• Skip to primary navigation
  • Skip to main content
  • Skip to primary sidebar
  • Skip to footer

Whipperberry

WhipperBerry • Your Home For Creative Inspiration

  • Home
  • Recipes
    • Starters
    • Easy Weeknight Dinners
    • Main Dish
    • Salads
    • Side Dish
    • Soups & Stews
    • Desserts
    • Breakfast
    • Miscellaneous
  • Tutorials
    • Creative Crafts
    • DIY Decor
    • Fabric Crafts
    • Food How-To
    • Jewlery
    • Paint Projects
    • Paper Art
    • Party Styling
    • Photography and Graphic Design
    • Silhouette
  • Holidays
    • Easter
    • Mother’s Day
    • Father’s Day
    • 4th of July
    • Halloween
    • Thanksgiving
    • Christmas
    • Valentine’s Day
  • Gift Ideas
    • Gifts For Everyone
    • Gifts for Dad
    • Mother’s day
    • For The Girls
    • For The Kids
    • Teacher Gift Ideas
    • Christmas
  • Printables
    • Holiday
    • Gift Idea
    • LDS Primary
  • Travel
  • About
    • Terms
  • Contact
  • Nav Social Menu

    • Facebook
    • Instagram
    • Pinterest
    • RSS
    • Twitter

Craft

Can You Paint Over Milk Paint – A Quick How-To Guide

8 · Jun 23, 2024 · Leave a Comment

Yes, you can paint over milk paint. I wanted to create a quick guide on how to paint over it though. I had some old furniture that I painted over, and there were some things I needed to figure out.

Now I want to share my experience with you so you don’t make the same mistakes that most people make.

Milk paint has been popular for several years now. However, milk paint may not always be the best choice for furniture, so you might want to paint over it.

You might decide to paint over an old piece of milk-painted furniture if you’re tired of how it looks, changing your home’s color scheme, or believe you can do a better job of painting now.

If you want to learn step-by-step instructions, make sure to stick to the end. If you have some other questions, make sure to read the whole post. For more information, check out the best milk paint and the comparison between milk paint vs. chalk paint

Can You Paint Over Milk Paint?

Yes, you can paint over milk paint. While it may seem challenging at first, with the right steps and preparation, you can achieve a smooth and beautiful finish.

Whether you’re updating an old piece of furniture or changing its color, painting over milk paint is possible. Just follow a few key steps to ensure the new paint adheres well and looks great.

(more details on that are below).

What kind of Paint Goes Over Milk Paint? Let’s Explore all the Options

When painting over milk paint, several types of paint work well. Latex paint is easy to find, affordable, and comes in many colors, though it may require a primer for better adhesion.

Acrylic paint is durable and flexible, ideal for both indoor and outdoor projects but can be more expensive. Chalk paint adheres well without primer and is easy to distress for a shabby chic look, though it typically needs wax or sealant. Oil-based paint provides a smooth, durable finish but has a longer drying time and requires mineral spirits for cleanup.

Enamel paint offers a hard, glossy finish that is easy to clean but can be more difficult to apply. Spray paint is quick and provides even coverage, making it good for small or intricate projects, though the color selection is limited.

Reapplying milk paint is also an option, as it is natural and non-toxic, but it requires a topcoat for durability. When painting over milk paint, ensure the surface is clean and lightly sanded, consider using a primer for better adhesion, and test the paint on a small area first. For added durability, especially with chalk or milk paint, seal the finish with a top coat.

Can You Paint Over Milk Paint With Regular Paint?

Yes, you can paint over milk paint with regular paint. However, it’s important to properly prepare the surface to ensure good adhesion. Start by cleaning the surface thoroughly to remove any dirt or grease.

Lightly sand the milk-painted surface to create a rough texture that will help the new paint stick better. Depending on the type of regular paint you choose (latex, acrylic, oil-based, etc.), you might also want to apply a primer for improved adhesion and coverage. Once the surface is prepped, you can proceed with applying your regular paint.

Can you Paint Over Milk Paint With Gloss Paint?

Yes, you can paint over milk paint with gloss paint. To ensure good adhesion and a smooth finish, follow these steps:

  1. Clean the Surface: Thoroughly clean the milk-painted surface to remove any dirt, grease, or dust.
  2. Sand the Surface: Lightly sand the milk paint to create a rough texture that helps the gloss paint adhere better.
  3. Prime the Surface: Apply a primer suitable for the surface and gloss paint. This step is especially important if the milk paint has a flat or porous finish.
  4. Apply the Gloss Paint: Once the primer is dry, you can apply the gloss paint. You may need multiple coats for full coverage, allowing each coat to dry completely before applying the next.

By properly preparing the surface, you can achieve a durable and attractive finish with gloss paint over milk paint.

Can You Spray Paint Over Milk Paint?

Yes, you can spray paint over milk paint. To ensure a smooth and durable finish, start by thoroughly cleaning the milk-painted surface to remove any dirt, grease, or dust.

Next, lightly sand the surface to create a rough texture that will help the spray paint adhere better. Applying a primer suitable for the surface and spray paint is also important, especially if the milk paint has a flat or porous finish.

Once the primer is dry, you can apply the spray paint in light, even coats, holding the can at the recommended distance from the surface. Allow each coat to dry completely before applying the next. By properly preparing the surface, you can achieve a smooth and durable finish with spray paint over milk paint.

Can You Paint Over Milk Paint With Satin Paint?

Yes, you can paint over milk paint with satin paint. To achieve the best results, start by thoroughly cleaning the milk-painted surface to remove any dirt, grease, or dust.

Lightly sand the surface to create a rough texture that will help the satin paint adhere better. Applying a primer suitable for the surface and satin paint is also important, especially if the milk paint has a flat or porous finish.

Once the primer is dry, apply the satin paint in even strokes, using light coats and allowing each coat to dry completely before applying the next. By properly preparing the surface, you can achieve a smooth and durable finish with satin paint over milk paint.

Can You Paint Over Milk Paint Without Sanding?

Technically, you can paint over milk paint without sanding, but the real question is, should you?

Unless you are painting over milk paint that has absolutely no sealant coat on it, you need to do some sanding before you paint. Paint just isn’t going to stick well to any type of protective coat.

If you try to paint over it without sanding, it might look like the paint went on okay, but it’s going to chip or even bubble up in a short amount of time.

If you’re trying to paint over a polyacrylic or polyurethane sealant, you don’t necessarily have to sand away every bit of it. Just sand it enough to get it scuffed up; this should be enough for your primer and/or paint to adhere well.

If you’re trying to paint over milk paint that has been sealed with wax, it’s going to take more prep work than a light sanding to get it ready for the new paint.

What If You Used Milk Paint Wax? Can You Still Paint Over It?

If you have used milk paint wax, painting over it is more challenging but possible with the right preparation. First, you need to remove as much of the wax as possible using a wax remover or mineral spirits applied with a clean cloth.

After removing the wax, clean the surface thoroughly with soap and water, then let it dry completely. Next, lightly sand the surface with fine-grit sandpaper to ensure smoothness and better paint adhesion, and remove any sanding dust with a tack cloth.

Apply a high-quality bonding primer designed to adhere to previously waxed surfaces, providing a good base for your new paint. Once the primer is dry, you can apply your chosen paint in light, even coats, allowing each coat to dry completely before applying the next.

For more information on the best products to use, check out this guide on the best chalk paint wax. By carefully removing the wax and preparing the surface, you can successfully paint over milk paint sealed with wax, ensuring proper adhesion and a durable finish.

Supplies You Need To Paint Over Milk Paint

Before getting into the details of how to do this painting project, you should gather all the necessary materials. Here is a basic list of what you will need:

  1. Mild Soap and Water: For cleaning the surface before you begin.
  2. Wax Remover or Mineral Spirits: If the milk paint has been sealed with wax, you will need this to remove the wax.
  3. Clean Cloths: For applying the wax remover and cleaning the surface.
  4. Fine-Grit Sandpaper: For lightly sanding the surface to ensure better paint adhesion.
  5. Tack Cloth: To remove sanding dust and debris.
  6. High-Quality Bonding Primer: To provide a good base for your new paint, especially if the surface was previously waxed.
  7. Paintbrushes or Rollers: For applying the primer and paint.
  8. Your Choice of Paint: The paint you plan to use for your project, such as latex, acrylic, satin, or gloss paint.
  9. Protective Gear: Gloves and a mask to protect yourself from dust and fumes.
  10. Drop Cloths or Protective Sheeting: To protect your workspace from spills and drips.

These supplies will help you prepare and successfully paint over milk paint, ensuring a smooth and durable finish.

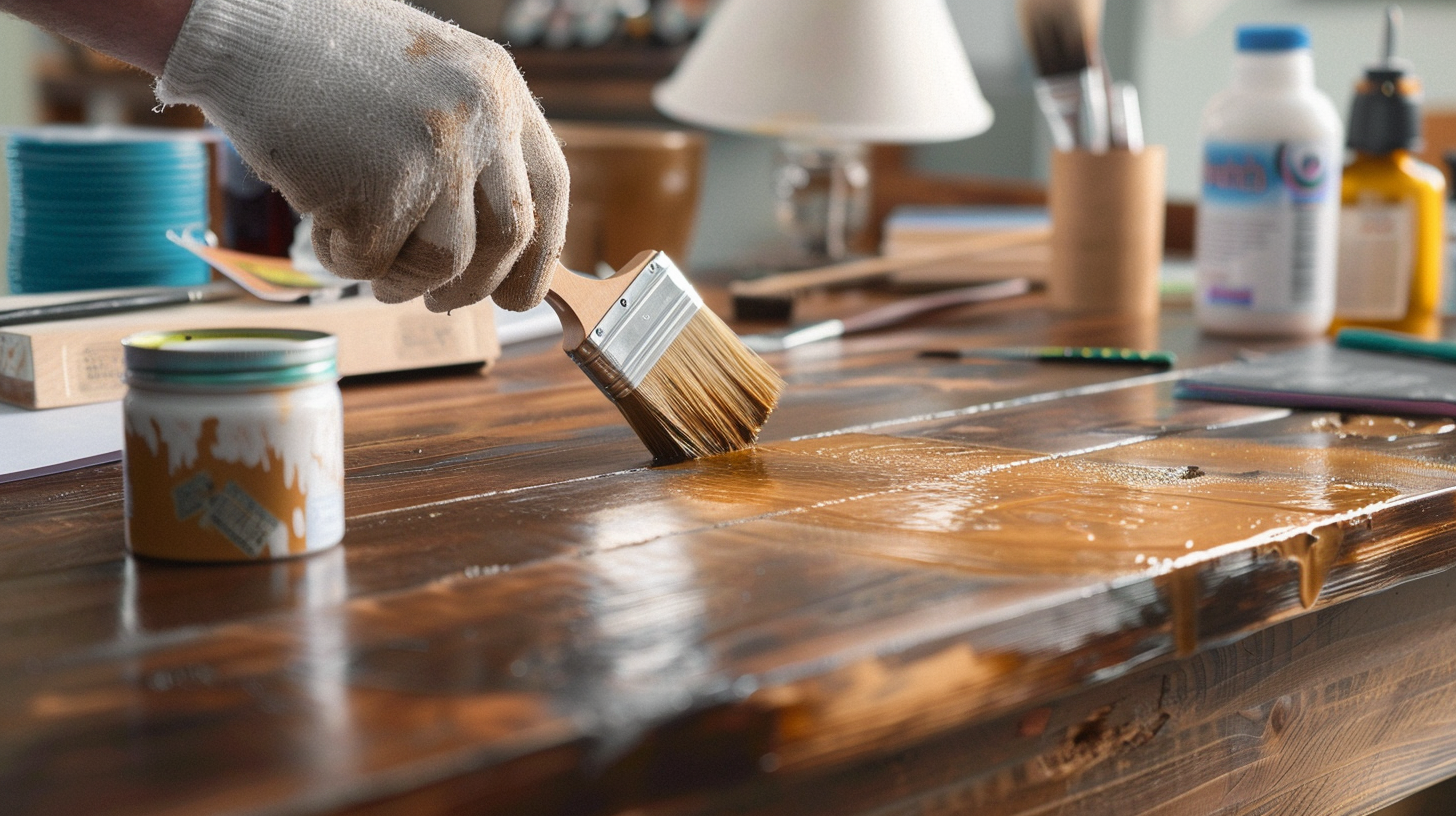
How to Paint Over Milk Paint

Other than some extra effort to remove old finishes, the process of painting over milk paint isn’t much different from any other furniture painting project. Spread out your drop cloth, gather your supplies, and get ready for some DIY fun!

Step-by-Step Guide

  1. Clean the Surface: Start by thoroughly cleaning the surface with mild soap and water to remove any dirt, grease, or dust. Let it dry completely.
  2. Remove Wax (if applicable): If the milk paint has been sealed with wax, use wax remover or mineral spirits on a clean cloth to remove the wax. Wipe the surface until the wax is no longer present.
  3. Sand the Surface: Lightly sand the entire surface with fine-grit sandpaper to create a rough texture that helps the new paint adhere better. If you remove wax, this step is crucial to ensure the new paint sticks well.
  4. Clean the Surface Again: Use a tack cloth to wipe away any sanding dust and debris, ensuring a clean, smooth surface.
  5. Apply Primer: Apply a high-quality bonding primer to the surface. This is especially important if the surface was previously waxed or if you’re using a paint that requires a primer for better adhesion. Let the primer dry completely according to the manufacturer’s instructions.
  6. Paint: Once the primer is dry, apply your chosen paint. Use even strokes and light coats, allowing each coat to dry completely before applying the next. Depending on the type of paint and the color you’re using, you may need multiple coats for full coverage.
  7. Finish and Seal (optional): If desired, apply a sealant to protect your new paint job, especially if the furniture or item will see a lot of use.

By following these steps, you can successfully paint over milk paint and achieve a smooth, durable finish on your project.

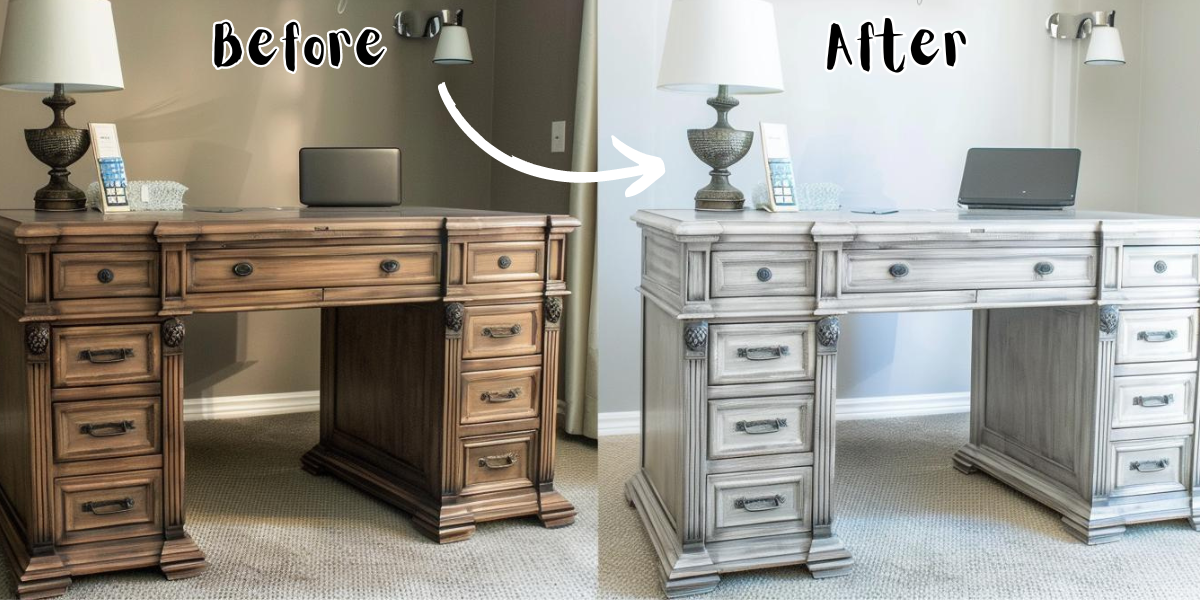
Finally, I want to remind you to take some before and after pics of your project! It’s fun to compare them and see what an amazing transformation can be achieved with a new paint job!

Snowball Bath Bomb Printable Gift Tag

45 · Nov 10, 2017 · 1 Comment

Hey guys! The Holidays are right around the corner and now’s the time to start preparing. I had a friend tell me today, “the Christmas season starts the minute Halloween is over and Thanksgiving is half-time.” I’m not one to run right past Thanksgiving but, I kind of get where he’s coming from. As busy as things get, it’s a great idea to start workin on those fun neighbor, office, teacher and friend gifts. Now, if you’re planning on baking, you’ll have to wait until the last minute to make your treats. With these Snowball Bath Bombs, you can still pull out the mixer and not have to scramble at the last minute to put your sweet treats together. These could be wrapped up in July if you’re really that prepared!

SNOWBALL BATH BOMBS Looking for a simple Christmas gift for friends and neighbors? This simple to make snowball bath bomb will quickly become your favorite gift to give this holiday season!

Check out this video to see how easy they are to make…

Snowball Bath Bombs via WhipperBerry from Heather Thoming on Vimeo.

For the full recipe you’ll need to visit I Heart Nap Time to get all of the details on how to make the snowball bath bombs BUT… You can download the free printable HERE.

snowball bath bomb whipperberry free printable gift tag-100

This tag is double sided. All you need to do is print the front then flip your paper over and print the polka dots on the back side.

SNOWBALL BATH BOMBS Looking for a simple Christmas gift for friends and neighbors? This simple to make snowball bath bomb will quickly become your favorite gift to give this holiday season!

Make sure to run over to I Heart Naptime to get all of the instructions on how to make this gem of a little gift.  You can also pin the image below to help you remember what you’re going to make for your friends and neighbors this year. Happy gifting!

SNOWBALL BATH BOMBS Looking for a simple Christmas gift for friends and neighbors? This simple to make snowball bath bomb will quickly become your favorite gift to give this holiday season!

Cute DIY Folding Chairs Makeover

140 · Jun 9, 2013 · 92 Comments

WhipperBerry Creative Team // Today I’m super excited to introduce you to another member of the WhipperBerry Creative Team… Jenn from My Fabulous Life. She is one talented lady with an amazing list of talents…
jenn from my fabuless life


  I’m Jenn and I blog about DIY, furniture refinishing, and other random creative endeavors over at My Fabuless Life. I’m beyond thrilled and flattered that Heather has asked me to be a part of her team.  Today I’m sharing a cute folding chair makeover story in DIY style!

It’s probably no surprise that I love to host parties and gatherings at my house and volunteer my abode for events whenever possible–my husband totally loves it.  So this past year, when the parents asked me what I wanted for Christmas, I told them, without skipping a beat, FOLDING CHAIRS! Buuuttt….I feel like nothing puts a damper on my party quite like adding some drab, ugly folding chairs to a perfectly planned table setting.  You can imagine the parents’ joy when they granted my Christmas wish and I immediately said, “Oh, I’m so excited! I can’t wait to paint these and recover them.” Queue collective, “Aww, no, don’t do that…they’re perfectly good and new…wait until they’re at least beat up a little….”

I had a little guilt about going against the wishes of the gift-givers, but seriously, these girls were not going to be invited to my parties in this outfit.

How to Makeover Folding Chairs – Do it Yourself Style

I originally set out to do some vintage florals, but plaids have stolen my heart in a big way lately–for some reason whenever I say this, I hear Tim Gunn in my head talking about menswear.  Anyway, I was at Walmart, of all places one day, and found the blue and pink plaid (on the right) in their remnant bin for like $2.00 and knew EXACTLY what I was going to do with the chairs.  The gold, polka dot burlap was not in the original plan, but when you find GOLD, POLKA DOT BURLAP (at Joann’s), you USE IT!  I may need meetings for this burlap addiction because it is quickly appearing all over my house and I can not get enough.

How to Add Cushions to Metal Folding Chairs

Metal folding chairs are a bit uncomfortable. So, if you don’t already have the one’s with cushions you’ll want to add cushions first. This might seem hard if you want to do it yourself but it’s actually easy! The things you’ll need for adding a cushion are below.

Things You’ll Need to DIY:

Spray paint (about one can for each chair)
Fabric (less than 1/2 yard for each chair)
Staple gun (can be purchased for about $10 just about anywhere that sells basic tools)
(4) 1″ screws for each chair

Start by removing the pads from the chair.  On my chairs, the ones on the back just came off by unscrewing three little screws.

The seat cushion was attached with some type of plastic screws so I just clipped the ends off with wire cutters (just something will cut through thick plastic).  DON’T TRY TO PULL THEM OUT.  They have a flat head that’s attached to the wood under the padding and you’ll just rip a hole through the seat–learned that one the hard way.

Then spray paint the chairs.  I used Valspar Brushed Rose and Mellow Spring from Lowe’s.  While the paint is drying, you can upholster your cushions.

Just lay the cushion on the fabric, cut a piece of fabric big enough to pull around it, and staple it down right over the top of the existing fabric.  Make sure to keep it pulled tight, and if you’re using a fabric with a pattern, keep flipping the cushion over as you go to make sure you’re keeping the pattern straight.

Trim the excess fabric and reattach the cushions.  To attach the seat cushions, just drill a new screw up through where the old plastic screw used to be.

And there you have it!  Pretty, party-ready chairs! And when they’re this easy, you can change the fabric for every party if you want!

You can find more Fabulessness at My Fabuless Life, here are a few more fun finds…
My Fabuless Life
dressed-up childs artwork // diy towel rack // printables
Sweet Relish

Sail Cloth Shower Curtains | Guest Post

3 · Jul 3, 2012 · 3 Comments

Soooo when I was at Haven I met the sweetest lady that I just fell in love with and her name is Kari and she has the most beautiful blog called Thistlewood Farm. She is one of those sweet southern belle ladies with a personality the size of Georgia and I ADORE her!!  When I had a chance to check out her amazing blog after we met I was blown away with her work and HAD to share her talents with you today as she teaches us how to make sail cloth shower curtains.  So, take it away Kari…


Hello Whipperberry readers. I'm Kari from Thistlewood Farm and I am so excited to be here with you today, sharing my numbered sailcloth shower curtain project.

Sailcloth Shower Curtain Tutorial

Supplies:

Red Cotton fabric from Wal-mart (the thicker the better)


Scissors

White Shower Curtain

Sharpie

Pins


Step 1:

Print out extremely large numbers on your computer in Ariel Bold.

These were printed at 700 x.

Cut out numbers and photograph them on grapevine.

Because printed numbers photographed on the table just aren't the same.

And because you have been pinning photo props on pinterest in your quest to be a highly sought after grapevine numbers photographer.


Number four image


Step 2:

Take your 700x Bold Ariel Font numbers and trace them with a sharpie.

Backwards.

Because when you traced them frontwards….the sharpie showed.

And even though you tried to fray the sharpie off the edges.

You still knew it was there.

And the little bits of sharpie that still showed even after you tried to fray the edges took on the proportions of the Empire State Building lit up red white and blue for the fourth of July.

Trust me.

Backwards is so much more sharpieless.


Number cutout


Step 3:

Cut out the numbers.

And then pin them onto the white shower curtain.

I pinned them diagonally.

To create the impression that I had just ripped the sail off a sailboat.

And hung it up as a shower curtain in the bathroom.

And so it would look like this without spending the $100.


Step 4:

Pin the numbers onto the shower curtain.

Stitch a one-inch border in contrasting thread.

Fray the edges.

And hang shower curtain and liner on nickel-plated hooks.


Total cost if you would have bought it online: $100.00.

Total cost for project: $16.93.

Simple.

Easy.

For less than the cost of a movie, popcorn and a box of junior mints.

PS For more project inspiration or just a glass of sweet tea….stop by for a visit at Thistlewood Farm!

PPS Thank you so much for having me over today, Heather. You are such a rock star and so full of creativity and inspiration!


Here is some more of Kari's work from Thistlewood Farm…


  1. Painted Kitchen Island
  2. Garage Sale Hutch
  3. Yard Stick Stool
  4. Butler's Pantry

I want to move into her house now!!! Thank Kari for sharing your amazing talent's with us today.

  • « Go to Previous Page
  • Page 1
  • Page 2
  • Page 3
  • Page 4
  • Go to Next Page »

Primary Sidebar

Heather from Whipperberry
Hello... my name is Heather and I'm the creator of WhipperBerry a creative lifestyle blog packed full of great recipes and creative ideas for your home and family. I find I am happiest when I'm living a creative life and I love to share what I've been up to along the way... Come explore, my hope is that you'll leave inspired!

Footer

  • Privacy Policy
  • Crafts
  • Food
  • Gifts
  • Holidays
  • Home
  • Mom Life
  • Recipes
  • Travel

Copyright © 2026 · Seasoned Pro