• Skip to primary navigation
  • Skip to main content
  • Skip to primary sidebar
  • Skip to footer

Whipperberry

WhipperBerry • Your Home For Creative Inspiration

  • Home
  • Recipes
    • Starters
    • Easy Weeknight Dinners
    • Main Dish
    • Salads
    • Side Dish
    • Soups & Stews
    • Desserts
    • Breakfast
    • Miscellaneous
  • Tutorials
    • Creative Crafts
    • DIY Decor
    • Fabric Crafts
    • Food How-To
    • Jewlery
    • Paint Projects
    • Paper Art
    • Party Styling
    • Photography and Graphic Design
    • Silhouette
  • Holidays
    • Easter
    • Mother’s Day
    • Father’s Day
    • 4th of July
    • Halloween
    • Thanksgiving
    • Christmas
    • Valentine’s Day
  • Gift Ideas
    • Gifts For Everyone
    • Gifts for Dad
    • Mother’s day
    • For The Girls
    • For The Kids
    • Teacher Gift Ideas
    • Christmas
  • Printables
    • Holiday
    • Gift Idea
    • LDS Primary
  • Travel
  • About
    • Terms
  • Contact
  • Nav Social Menu

    • Facebook
    • Instagram
    • Pinterest
    • RSS
    • Twitter

Christmas

Gingerbread Granola

3 · Dec 10, 2013 · 2 Comments

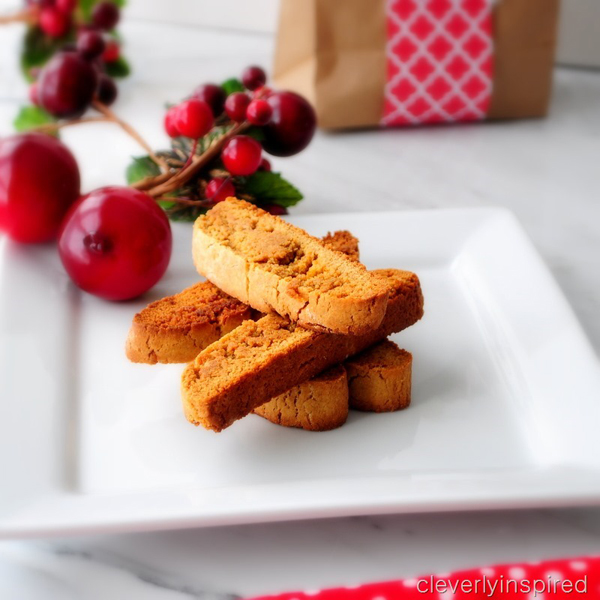
I’ve known for some time that I want to recreate this recipe. Gingerbread has been on my mind a lot recently with the holidays. My two flavor staples for this time of year are gingerbread and eggnog. So when I tried out a granola that incorporated one of those I became giddy with the thought of building a recipe around the product! This gingerbread granola is now a staple in our home. Mainly because it’s so quick to prepare and packages up beautifully for last minute neighbor treats!

gingerbread-granola

4 cups old-fashioned rolled oats
1 1/2 cups pecans, finely chopped
1 teaspoon salt
1/2 teaspoon cinnamon
1/2 teaspoon ground ginger
1/2 cup melted butter
1/3 cup real maple syrup
1/4 cup molasses
3/4 teaspoon vanilla


Preheat your oven to 350 degrees. Line a large baking sheet with parchment or a baking mat.

Mix all of your ingredients together in a large bowl. Spread into an even layer on your prepared pan.

Bake for 30 minutes, stirring halfway through the baking time. Allow to cool completely and enjoy!

gingerbread-granola-gift

While this bakes you get the wonderful smell of the Holiday’s floating through your home. It is so wonderful to wake up to and seems to last for days! We like to double the batch otherwise it never seems to make it to our friends and family!

gingerbread-granola-treat

Try it out on top of cereal, yogurt, fruit… or just on it’s own. It is unbelievably delicious and helps spread Christmas cheer whenever you decide to share! If you liked this recipe, check out these:

coconut-macaroon   Orange-rolls   cranberry-bars

Coconut Macaroons // Easy Orange Blossom // Cranberry Bliss Bars

DIY Jingle Bell Ornaments

29 · Dec 9, 2013 · 8 Comments

DIY Jingle Bell Ornaments // One of my favorites at this time of year are jingle bells! I love the songs, the stories and the bells themselves. One time last year I walked into a beautiful shop in Colorado called Old Glory Antiques and they had a giant rustic German bread bowl FULL of jingle bells…  I was in Heaven! Here is my Instagram collage of the place…

I knew I had to make something with jingle bells. It needed to be beautiful and easy to make, so I created my DIY Jingle Bell Ornament…

WhipperBerry Jingle Bells Christmas Ornament-2

DIY Jingle Bell Ornament Supplies

48 inches of red 1/4″ wide grosgrain ribbon

24 inches of 2″ wide decorative ribbon

41 medium size jingle bells

2 inches of masking tape

hot glue or floral wire

WhipperBerry Jingle Bells Christmas Ornament-4

DIY Jingle Bell Ornament Directions

Take your 48 inches of small red ribbon and cut in half (24 inches.) Then using the masking tape place little pieces of tape around all four ends. You are essentially making needles at each end of the ribbon. This will make it easier to feed the bells onto the ribbon.

WhipperBerry Jingle Bells Christmas Ornament-8

Take one of the bells and feed it onto both of strands of ribbon.

WhipperBerry Jingle Bells Christmas Ornament-9

This is going to be your center bell so, pull it to the middle of both of the ribbons.

WhipperBerry Jingle Bells Christmas Ornament-10

Next, spread out the four different ends and add one bell to each end and pull to the center.

WhipperBerry Jingle Bells Christmas Ornament-11

Now all you have to do is continue to add bells to each strand. Ten total on each strand.

WhipperBerry Jingle Bells Christmas Ornament-12

Now, scrunch them down so that they are over lapping and close to the center.

WhipperBerry Jingle Bells Christmas Ornament-13

Gather each of the ribbons together and arrange the bells to your liking and then gather the ribbon together and tie with a large loop at the top.

WhipperBerry Jingle Bells Christmas Ornament-14

Make sure the knot is really tight and then trim the ends pretty close to the knot.

Tie a bow with the large ribbon and either hot glue the ribbon to the knot or use floral wire to wire it to the knot. I don’t actually tie the bow on the ornament because of the bulk of the wide ribbon. Voilá, you are finished!

WhipperBerry Jingle Bells Christmas Ornament-15

It’s perfect for your Christmas tree, they are so easy, you can make a whole bunch for your tree. Or,  you can use it to decorate a wreath. Either way, it’s super fun.

WhipperBerry Jingle Bells Christmas Ornament-3

What’s your favorite holiday item? Are you a jingle bell lover too?


3e8798cc375a11e28ac522000a9f141e_7


Want more do-it-yourself Christmas ideas? Get them below.

Hanging with My Gnomes Wreath


DIY Paper Fan Photo Ornaments

57 · Dec 8, 2013 · 7 Comments

 
Hello everyone! December snuck up on me…but I'm grateful Heather is so sweet to still share my photo ornament project! Hopefully some of you are like me, and still doing holiday crafting and decorating. Anyone? Buhler?? haha! I love subtly incorporating photos into decor…as seen here. 🙂 I made quite a few photo ornaments this year…and hope to carry on the tradition in years to come, making just a few more ornaments each year to add to the collection, displaying sweet winter memories.
 
Supplies you'll need:
Cardstock (I used gold glitter cardstock from Joann Fabric & Craft)
White Cardstock (or whatever color you'd want to frame/outline your photo)
Hot glue gun (with extra glue!)
Scissors
String/twine/yarn
Photos!
 
You can print/create your circular photos a few different ways:
–> I used two apps on my phone–Afterlight to get the photos into frames, then Diptic to put the circular photos into a collage (I put one picture in one part of the two-picture collage, and printed them out as 4×6's)
–> Print a bunch of photos (I liked mine black and white) and then use a cup or something circular to trace circles onto the photos….just make sure they're as uniform as possible.
–> Or you can use an online photo editing site like PicMonkey to create the circular pictures.
 
Then cut!
 
You'll want to reinforce the sturdiness of the photo by hot glueing the photos to card stock, then cut them out again (I left a thin frame/outline around the edge).


To create the paper fans, I used a tutorial Heather actually shared a few years ago over on the lovely Stephanie Lynn's blog, Under The Table and Dreaming. 🙂 Go here to see the how-to. Just be sure that the width of the paper strips you cut out (you'll need two strips per ornament) are a little more than what the radius (half the width) is of your circular photo.
 
Heather's tutorial for the paper fan has you glue a piece of paper to back, which I did here–and I wrote the month/year of the photo that would be on the front. And with the thicker card stock paper, I needed more than just a drop of glue, so I put about 3 or 4 circle/swirls of hot glue (moving quickly, as it dries fast) on each cut-out circle and pressed them onto the paper fan and held for a few seconds to make sure it was secure. 
**A photo is hot glued on the back of the lower fan already…that way I didn't have to hold it for the picture I was taking. But you'll need to hold it tight and flat on your work surface until you hot glue your paper to it.
 
Then you'll hot glue the photos…it's coming together! Again, quickly swirling the hot glue around the back of the paper/photo to make sure there is good coverage, then press it onto the paper fan and give it a good rub down to make sure it stays put. 😉 


Next, put the "hangers" on. I just cut pieces of the string/twine and, with a dab of hot glue, glued the two ends to the back, in one of the folds). And I used a pen to push the string down and get it nice and stuck in the glue. Remember to make sure you're putting the loop at a spot in the back where, when it hangs, the picture will be straight. 🙂 
 
Voila!!


Then trim your tree and deck yours halls!! I used ours as ornaments…but I'm thinking I may make more and create a garland for over our mantle. Lots and lots of possibilities. 🙂
 

Thank you Heather! And thank you WhipperBerry readers! Happy Holidays everyone!

 
xo
Haley
 
PS – Here are a couple Christmas projects I shared last year:
 
Go here for our Christmas box advent calendar…love this magical season and the sweet traditions that come with it!! 
 
Go here for stencils to create these Christmas photo booth props. We used them for our Christmas card, as well as at an Ugly Sweater party and a company holiday party! SO FUN.

Peppermint Drop Cookies // Cookie Swap Recipe

21 · Dec 5, 2013 · 14 Comments

Peppermint Drop Cookie Recipe // The season is upon us… Holiday baking and general goodie making. I grew up with a Mom who created all kinds of goodies each year to share with friends and neighbors. This year I decided to experiment with a "cookie" or a meringue cookie really… to come up with a cute take on those traditional peppermint candies. 

WhipperBerry Peppermint Drop Meringue Cookies

Meringue cookies are all over the patisseries in Paris in varies shapes and flavors. They are sooooo easy to make and are a fun unique treat that you can WOW your friends with. They are made just like a meringue for a pie, but you pipe them onto a parchment lined baking sheet and bake them for quite a bit longer. They turn into these cute, crunchy, yet soft in the middle sweet treats. When you add a little red food coloring and some peppermint extract they get even better and are like peppermint candies, but WAY better!

Peppermint Drop Cookie Recipe

This recipe has been adapted from Martha Stewart's Peppermint Meringues with Chocolate Filling Recipe // It will yield about 30 two inch size meringue cookies.

3 egg whites

3/4 cup sugar

1/2 teaspoon peppermint extract

red gel food coloring

Instructions

In a heat safe mixing bowl, place the egg whites and sugar. Place over a medium sauce pan filled half way with water at a low simmer on the stove. Slowly whisk the egg whites and sugar until the sugar has melted. The best way to test that is using your CLEAN fingers. Just pinch a bit of the mixture and see if you still feel the grit of the sugar. As soon as the grit is gone, this usually take a few minutes, the whites are then ready to whip into a meringue.

Place mixing bowl in mixer and with the whisk attachment, whisk on high until the egg whites and sugar form stiff peaks.  Once you have stiff peaks, add the peppermint extract and whisk until fully combined.

Place a large star tip in a large pastry bag. Then using a clean brush or tip of a butter knife, draw some stripes onto the inside of the pastry bag with the red gel food coloring.

WhipperBerry Peppermint Drop Cookies-pipping bag trick

It doesn't need to be pretty, or exact… just four or five lines to add the red stripes to the peppermint drops.

WhipperBerry Peppermint Drop Cookies-2

Next, pipe the meringue onto a parchment lined baking sheet. Make the cookies about two inches in diameter.  A quick note… Due to the nature of these cookies you may want to use masking tape to tape down the parchment paper on the baking sheet. That way you won't have parchment paper floating around wreaking havoc on your peppermint drop cookies.  Make nice little drops with the pastry bag and then carefully pull up to create the nice peak at the top.

WhipperBerry Peppermint Drop Cookies-3

Place in a 175˚ oven for 3 hours. I also place a wooden spoon in between the oven door and the oven so that any steam that is created can escape. Once the cookies are hard, remove them from the oven and let cool.

WhipperBerry Peppermint Drop Cookies - Meringue Recipe

These little meringues turn into these bite size peppermint treats that just melt in your mouth. They are a perfect addition to a goodie plate, because they add DRAMA. The nice thing is they can be made ahead of time and stored in an air tight container for a couple of weeks. You can even create a fun little goodie bag just filled with these little treats. Either way, they would be a great addition to your holiday treat list!

WhipperBerry Peppermint Drop Cookies

Santa will even love them on his goodie plate. They are a nice change of pace to your regular cookie!

I am participating in a fun cookie swap this week with a group of fabulous bloggers!!

cookie swap button 680

You can head over and check out their fun recipes…

Tracie from Cleverly Inspired made some rustic Gingerbread Biscotti… 

easy-gingerbread-biscotti-recipe-cleverlyinspired-4_thumb

Chelsea from Two Twenty One made another peppermint treat… Peppermint Chocolate Cookies.

cookies

Tomorrow, Carmel from Our Fifth House will have another cookie to share with you guys! Make sure to head over and see what she's created.

Happy Holidays!

  • « Go to Previous Page
  • Page 1
  • Interim pages omitted …
  • Page 10
  • Page 11
  • Page 12
  • Page 13
  • Page 14
  • Interim pages omitted …
  • Page 21
  • Go to Next Page »

Primary Sidebar

Heather from Whipperberry
Hello... my name is Heather and I'm the creator of WhipperBerry a creative lifestyle blog packed full of great recipes and creative ideas for your home and family. I find I am happiest when I'm living a creative life and I love to share what I've been up to along the way... Come explore, my hope is that you'll leave inspired!

Footer

  • Privacy Policy
  • Crafts
  • Food
  • Gifts
  • Holidays
  • Home
  • Mom Life
  • Recipes
  • Travel

Copyright © 2026 · Seasoned Pro