• Skip to primary navigation
  • Skip to main content
  • Skip to primary sidebar
  • Skip to footer

Whipperberry

WhipperBerry • Your Home For Creative Inspiration

  • Home
  • Recipes
    • Starters
    • Easy Weeknight Dinners
    • Main Dish
    • Salads
    • Side Dish
    • Soups & Stews
    • Desserts
    • Breakfast
    • Miscellaneous
  • Tutorials
    • Creative Crafts
    • DIY Decor
    • Fabric Crafts
    • Food How-To
    • Jewlery
    • Paint Projects
    • Paper Art
    • Party Styling
    • Photography and Graphic Design
    • Silhouette
  • Holidays
    • Easter
    • Mother’s Day
    • Father’s Day
    • 4th of July
    • Halloween
    • Thanksgiving
    • Christmas
    • Valentine’s Day
  • Gift Ideas
    • Gifts For Everyone
    • Gifts for Dad
    • Mother’s day
    • For The Girls
    • For The Kids
    • Teacher Gift Ideas
    • Christmas
  • Printables
    • Holiday
    • Gift Idea
    • LDS Primary
  • Travel
  • About
    • Terms
  • Contact
  • Nav Social Menu

    • Facebook
    • Instagram
    • Pinterest
    • RSS
    • Twitter

Christmas

Last Minute Holiday Gifts with GiftGloss

210 · Dec 4, 2012 · 4 Comments

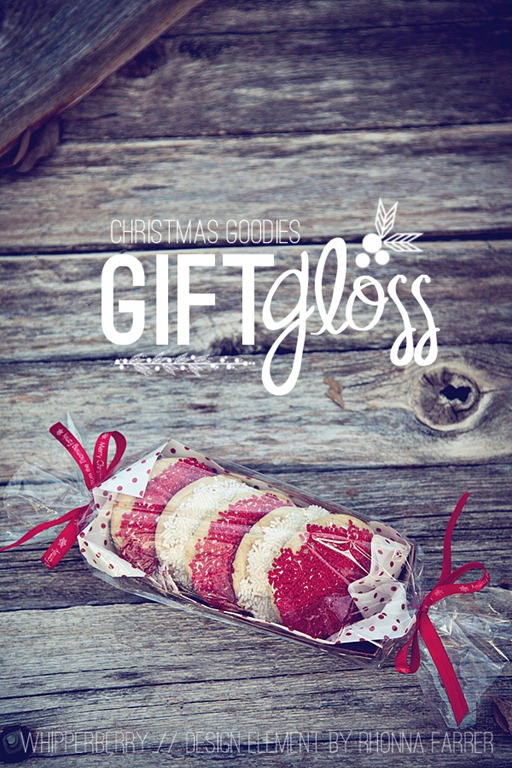
Do you ever find yourself in a pinch over the Holidays? You need a gift for a friend, neighbor, colleague and you just don’t have time to make some goodies to share!  You find yourself heading to the market to find some store bought goodies but feel like a total dope for bring bringing something that’s not homemade. Don’t you worry!  All you need to do is keep some GiftGloss on hand with a few other handy packaging supplies and you are GOLDEN!

Christmas Goodies with GiftGloss

design elements // rhonna designs

I ran to the store yesterday and checked out the bakery section to find some goodies that I could repackage and give as fun gifts for friends & neighbors when you are in a pinch.  Here are some suggestions that I have…

No. 1 Select a Theme

GiftGloss 024

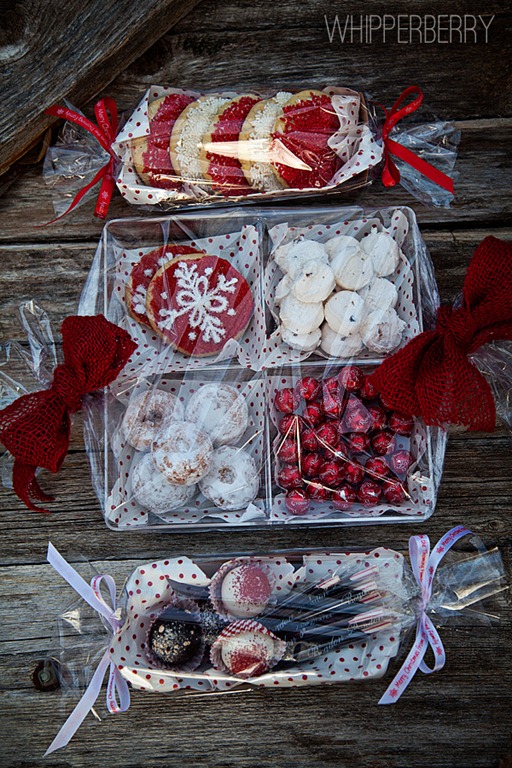
Even when you are in a hurry, take a few minutes to come up with a cohesive theme. This will kick your quick goodie up a notch and turn it into a stunning gift. It took just a few minutes to go through the bakery and candy section at the store to find a few items that would go with my red, white & chocolate theme.

No. 2 Packaging

Nothing screams LAME more than store bought goodies brought in their store containers. To save myself from that mistake I keep a few items on hand to save me when in a pinch…

  • GiftGloss – Not sure what GiftGloss is click here to see their video. I keep both the 6 & 12 inch rolls on hand
  • Decorative plates or containers – The skies the limit here, as long as they fit in the 6 or 12 inch GiftGloss tube.
  • Fancy parchment paper – I found my red dot parchment paper at Cost Plus World Market
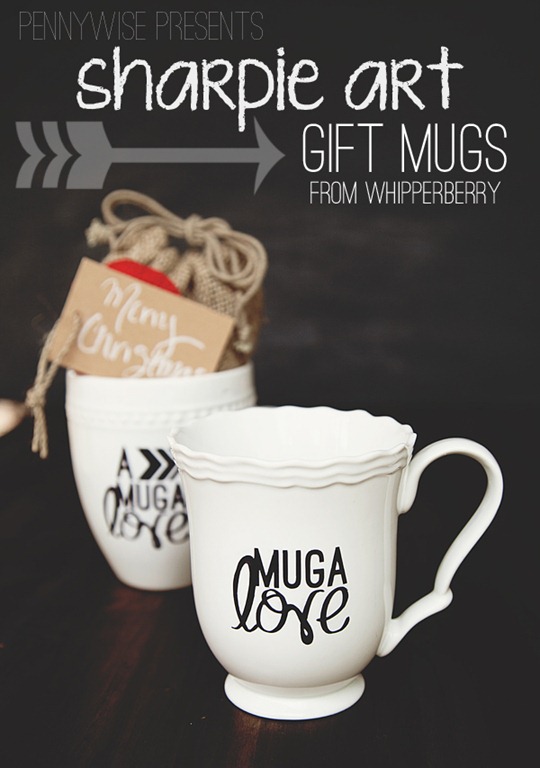
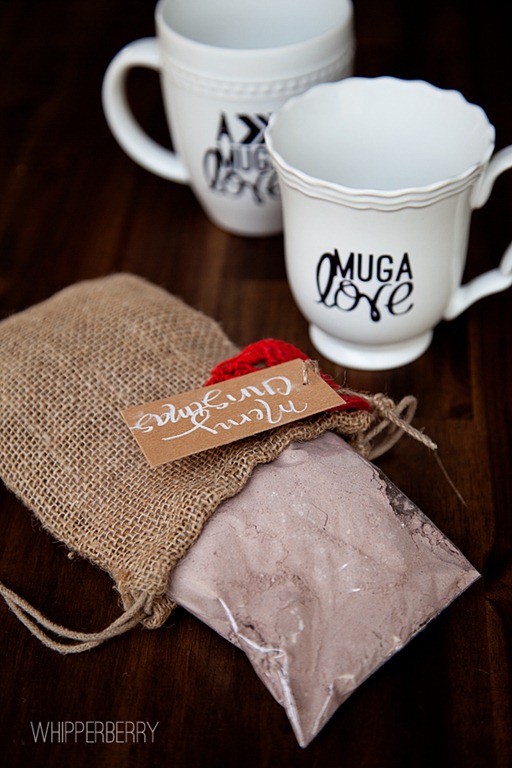
  • Ribbon, twine, yarn or some type of decorative tie – I found my fun personalized ribbon on Pick Your Plum not too long ago. It says “Merry Christmas from the Thoming Family” LOVE it!!

GiftGloss 028

No. 3 Placement

You’ve taken the time to get the goodies, stock the fun packaging… Now you need to make sure you create a beautiful goodie package or plate by making sure you place thing well.

  • Don’t over crowd the plate.
  • Use the color to your advantage with color groups.
  • Think of your patterns and textures and place accordingly.
  • For large plates have one item be the show stopper then add to it with a good supportive selection of items. For example, in my large plate I have the beautiful cookies as my show stopper and then the supportive cast accentuates the beautiful cookies.

Now, if you keep all of those things well stocked, you can have some amazingly SIMPLE yet STUNNING holiday gifts in a snap. 

GiftGloss 017

The FoofQueens are making that extra easy right now with a special deal for EVERYONE!!

Christmas GiftGloss Deal

Head on over and visit the FoofQueens to stock-up on GiftGloss so you won’t be caught empty handed.

Here are some more easy ideas from the FoofQueens…

  • Forget the envelope and use GiftGloss for your GIFT CARDS!!
  • Giving cold hard cash isn’t boring with GiftGloss
  • More ides for holiday goodies
  • Holiday garlands and advents with GiftGloss

What are some of your ideas? What would you foof-up with your new GiftGloss?

Heather copy

Discloser Statement

Christmas Cinnamon Garland

7 · Nov 27, 2012 · 20 Comments

A few years ago my husband and I had the opportunity to take our girls {the little guy wasn’t around then} to Germany and France for the month of December. We couldn’t have planned the timing any better.  Christmas in Europe is something everyone should experience. Wishing that everyone could have the experience without the hefty fees involved, I thought I would create something that will help bring some of the German Christmas spirit into your home.

In the German Christmas markets they sell the most amazing gingerbread cookie creations and I’ve always found the designs so inspiring. I thought it would be fun to create a gingerbread cookie inspired garland to dress the home up for Christmas…

Christmas Cinnamon Garland by Whipperberry

The fun thing about this garland is that it’s made out of the classic cinnamon and apple sauce mixture that just makes your home smell like heaven. Here is what you will need to make this garland for your home…

recipe for cinnamon apple sauce ornaments

Supplies for the Cinnamon Garland

  • 4 oz. cinnamon
  • 3/4 cup apple sauce
  • drinking straw
  • Wilton snowflake cookie pan
  • chalk pencil (found in the art supply section)
  • baker’s twine
  • yarn

Instructions

In a bowl, mix the cinnamon and apple sauce into a dough like consistency. If it’s too thin add more cinnamon or vice versa.

how to make cinnamon apple sauce ornaments

Knead the dough together into a ball then pinch off small gumball size pieces and press them into the snowflake cookie pan.

wilton snowflake cookie pan  use a press cookie pan to make cinnamon apple sauce ornaments

Using a drinking straw, place holes into the cinnamon ornaments.  One at the top if you want to use them to decorate the tree or gift box. Two holes if you would like to string them on a garland.

use a straw to place holes in your cinnamon apple sauce ornaments


Place in a 350 degree oven for 2 hours or until completely dry.  Keep and eye on them so they don’t burn.

cinnamon apple sauce christmas ornaments with a press cookie pan

Once they are completely dry, take the white chalk pencil and color in the raised snowflake designs.  This idea was a happy accident when I was trying to figure out the best way to have the cookies look like they have been dusted with powdered sugar. The chalk works PERFECT!!

Chalk on your cinnamon apple sauce ornaments to look like icing\

Next, all you need to do is string it onto the baker’s twine and yarn to make the garland.  I used a red and white baker’s twine along with a solid red yarn for my garland, but you can use whatever you like.

Whipperberry's Sented Cinnamon Garland


Now you can use it to dress up your home for the holidays and not only will it look fantastic, it will make your home smell amazing!

Sharpie Art Gift Set // Mug A Love Hot Chocolate

4 · Nov 13, 2012 · 26 Comments

I was a guest over at Infarrently Creative a little bit ago and I thought I would share what I created for Beckie and her friends over there.  A Sharpie Art Gift Set.  Check out how to make this fun and inexpensive gift for your family and friends this holiday season…


Hello all my IC friends! I’m Heather from WhipperBerry and I’m over the moon excited to be here with Beckie to share my Sharpie Art Gift Mugs today. I just adore Beckie and all her amazing talents.  She’s one lady I would LOVE to spend a day with, just to hopefully glean from some of her knowledge, talents & energy!! One talented lady I must say…

I love this pennywise presents series she’s running this month and I have a fun one to share…

sharpie art gift mugs copy

arrow design element from Rhonna Designs

Who doesn’t love a good hot chocolate mug during the chilly months and especially if it’s a mug full of LOVE?! That’s how I came up with my “A Mug A Love” gift idea to share. Here is what you will need…

Supplies

  • light colored ceramic mug
  • a Sharpie
  • plastic sandwich bag
  • hot chocolate mix, favorite coffee blend, tea or Choffy
  • Kraft paper gift tag
  • white chalk pencil

Optional Supplies

  • vinyl
  • vinyl cutting tool (I used the Silhouette Portrait)
  • burlap gift bag
  • bag embellishments (ribbon, bakers twine, whatever you would like to use to dress up your bag)

Directions

You can go big or minimalist with this project for sure. It all depends on your style and your budget.  Also, the sky is the limit as far as the design is concerned. I’ve seen some lovely hand written designs that people have created with their sharpies on ceramic mugs, plates and bowls.  I, however am not gifted in the hand writing area.  I have decent handwriting, but I’m too much of a perfectionist and I would blow through 150 mugs, (I’m sure,) trying to get it just right!! I decided to create a vinyl stencil so I didn’t have to go through that headache.  If you are artistically inclined, you can just skip this step and free-hand your design.

I created a design using my Silhouette Designer Edition software and cut the vinyl on my Silhouette Portrait.

Using the Silhouette Portrait

This way I had a custom stencil for my Sharpie art.  I placed the stencil on the mug and then carefully colored in the design…

Using a stencil to create a fun graphic on a mug with a Sharpie

I say carefully because, even with the vinyl the Sharpie ink can bleed through and mess up your crisp lines. What I learned is to press on the marker lightly and trace the edges first.  By doing that your design will come out perfect!

Once your design is complete, place it in a 350 degree oven for 30 minutes to set the ink.  This way your design will become permanent and whom ever you are gifting it to can wash it, run it through the dishwasher, you name it and the Sharpie ink will not smudge!! How fun is that?

I did two different versions… A Mug A Love and Mug A Love, basically because I couldn’t decide which one I liked better. Yep… commitment issues.

Like I said before, it’s up to you and your budget as to how you dress-up your bag that goes inside the mug. You can take the minimalist approach and put your mix in a basic bag with a gift tag which would look lovely, or you could dress it up however you like. I chose to put my hot chocolate mix into a small burlap bag and dress it up with a small crocheted red doily paired with a simply Kraft paper tag. I wrote Merry Christmas on the tag with a white chalk pencil that you can find in any art supply store. It’s has a finer tip than your basic stick of chalk so it looks a little better.

Now all you have to do is fill it with your desired hot beverage mix and voila, you have a personal, yet inexpensive, not very time consuming gift to give to your friends and family.

mug a love hot chocolate

Come on over an join me at WhipperBerry… I have all kinds of simple crafts and fun goodies to share for this holiday season and any time of year really. Plus, I love to make new friends!! Thanks Beckie for having me over today, I had a ball!!

Here are some more gift ideas from WhipperBerry…


homemade vanilla extract /// anthro inspired snow globes /// hot chocolate on a stick

You can also find me over at…

Pinterest /// Facebook /// Twitter /// Instagram

Heather copy

Snowflake Art | Tutorial

3 · Dec 14, 2011 · 2 Comments

Earlier this month I created a guest post for the lovely ladies from The Letter 4 while they were having a ball meeting Martha on the Martha Stewart show.  Just in case you missed it here is the Snowflake Art that I shared over there.

I am one of those displaced snow bunnies!  I grew up in Colorado skiing and loving everything that winter brought with it. For the past eight years I've been living in Las Vegas  and I can count the amount of times I've seen snow on one hand. So… When the girls invited me over I knew I wanted to create a project to add a little snow to my life!

I took my inspiration from a fabulous project that I found on Pinterest  from the Ballard Bunch. It was a simple snowflake made from craft sticks and it was stunning!!  I decided to take the humble craft stick and create a fun wall or door display using some chargers from the dollar store, some ribbon, paint and sprinkle of SNOW!

…

Read On →

  • « Go to Previous Page
  • Page 1
  • Interim pages omitted …
  • Page 14
  • Page 15
  • Page 16
  • Page 17
  • Page 18
  • Interim pages omitted …
  • Page 21
  • Go to Next Page »

Primary Sidebar

Heather from Whipperberry
Hello... my name is Heather and I'm the creator of WhipperBerry a creative lifestyle blog packed full of great recipes and creative ideas for your home and family. I find I am happiest when I'm living a creative life and I love to share what I've been up to along the way... Come explore, my hope is that you'll leave inspired!

Footer

  • Privacy Policy
  • Crafts
  • Food
  • Gifts
  • Holidays
  • Home
  • Mom Life
  • Recipes
  • Travel

Copyright © 2026 · Seasoned Pro