I love the long seated tradition of entering the kitchen at this time of year to create all kinds of goodies to share with family and friends. I also LOVE receiving these gifts every year. You can always feel the love that goes into each and every recipe that is shared. One thing I DON'T love is how frantic and hurried the season has become. Sometimes we just don't have time to bake for days and days in order to put together these treasured gift plates.
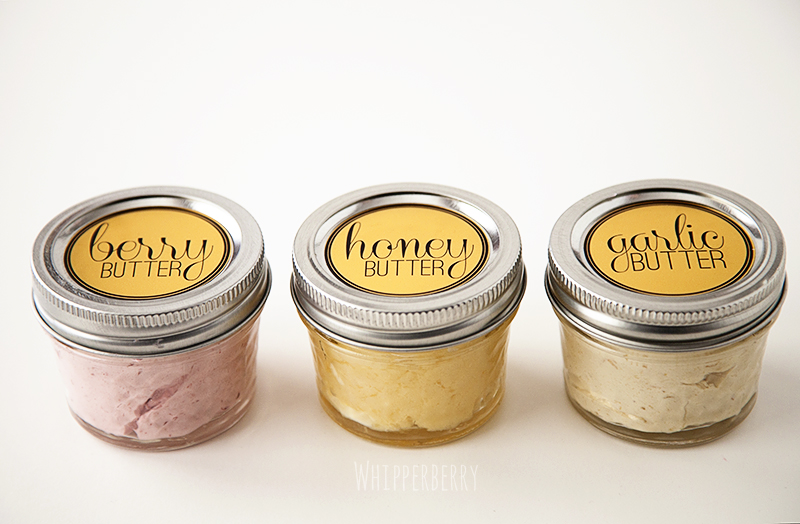
Another issue I have have… Sometimes, we get sugar overload with all of these scrumptious goodies. For the last several years, I have tried to find some savory goodies along with the sweet to give as holiday neighbor gifts. This year, my favorite sweet & savory gift for the season is compound butter. What is compound butter you ask? Well, it is butter combined with any of a number of tasty additions that can be used in various different ways in the kitchen. I am particularly fond of any type of berry butter, the ever popular honey butter and the luscious roasted garlic butter. All of these can be used on breads, French toast, crêpes, pancakes, used in sauces and even used to enhance many types of meats. I decided this year, that I am going to give little gift baskets with some homemade compound butter along with some bread…
Don't you worry, these butters are a snap to make AND you can even use store bought bread if you aren't the baking type. I am going to give you three quick butter recipes along with the fabulous printable that you can use to label your jars and your gift container if you like.
Berry Butter Ingredients
4 sticks of softened unsalted butter
1 jar of Smucker's Orchard's Finest preserves (you can use any kind you like, for this one I used cranberry raspberry preserves)
1 tablespoon honey
1/4 teaspoon citric acid
Berry Butter Directions

In the bowl of an electric mixer, add your softened, room temperature butter, the Orchard's Finest preserves, honey & citric acid. Why do I use citric acid? I like to add a bit of a tart kick to the butter without adding the liquid from the lemon. The liquid can cause issues with the consistency and I have found that citric acid is a perfect solution. You can get the hit of tart flavor without the consistency issues. I found citric acid at my local market in the canning section. If you can't find it, you can always order it online. I LOVE it and use it in all kinds of recipes.
Once you have all your ingredients in your mixer, turn your mixer on high and whip the butter for several minutes. Once it has whipped well and is nice and fluffy, take your mixture and add it to your sterilized 4 ounce Ball jars. Fill to the top and place the lid on tight. Store in the refrigerator until ready to serve. This recipe also can be stored in the freezer really well.
Honey Butter Ingredients
4 sticks of softened unsalted butter
1 cup honey
Honey Butter Directions
In the bowl of an electric mixer, place softened room temperature butter and honey. Whip on high for several minutes until light and fluffy. Once finished, carefully spoon into sterilized 4 ounce ball jars and replace the lid. Store in the refrigerator until ready to use. This butter also freezes well.
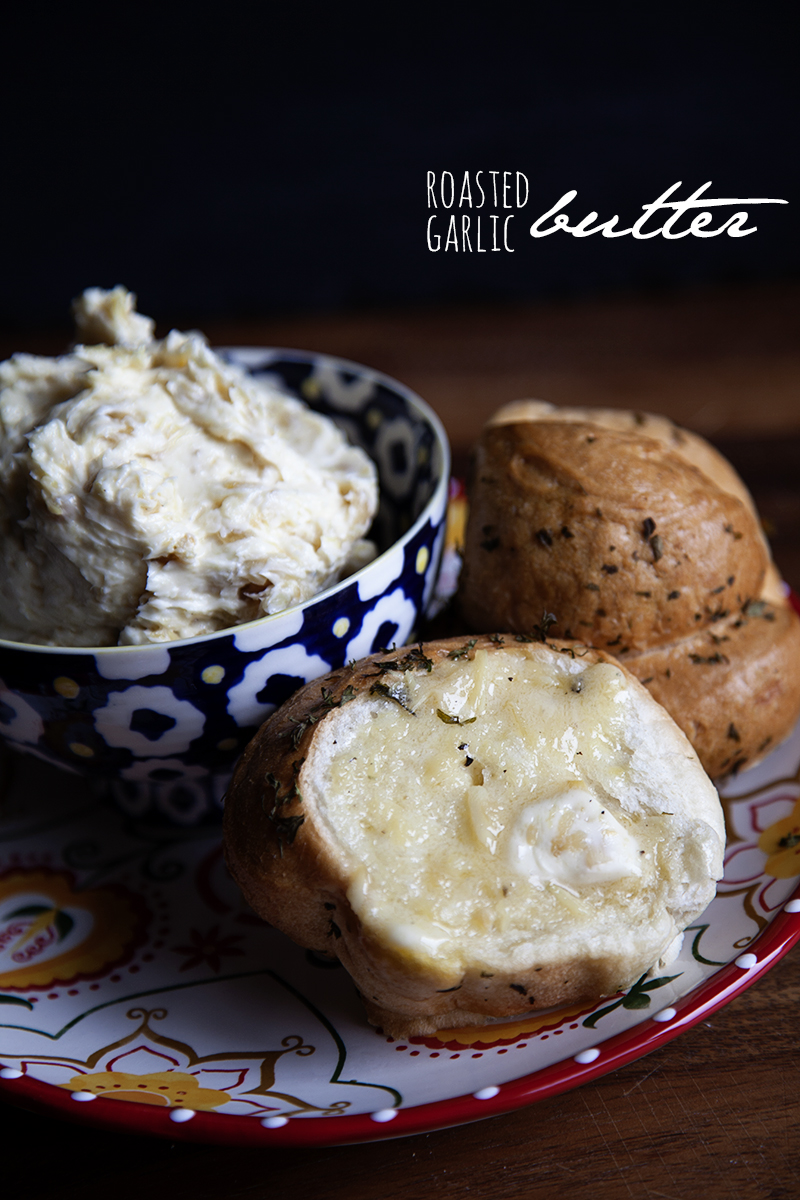
Roasted Garlic Butter
I have a fabulous recipe for Roasted Garlic Butter over at WhipperBerry that you should check out. I also, show you how to roast your own garlic and everything!
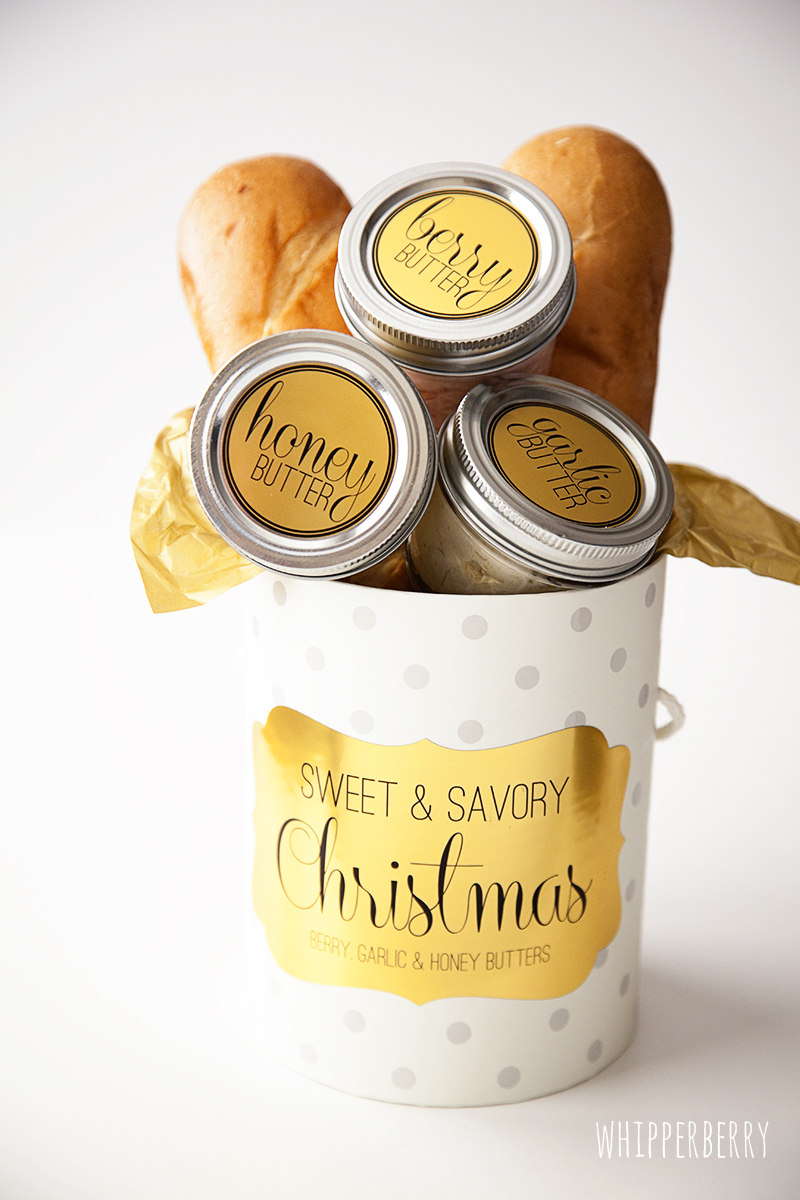
Savory & Sweet Christmas Gift
Now this is where it gets fun… I LOVE packaging! To me the way you dress-up a gift is just as important as the gift. Now, I used my favorite 4 ounce Ball jars for the butter on purpose. With these jars I can create a lovely FREE printable label for everyone to use.
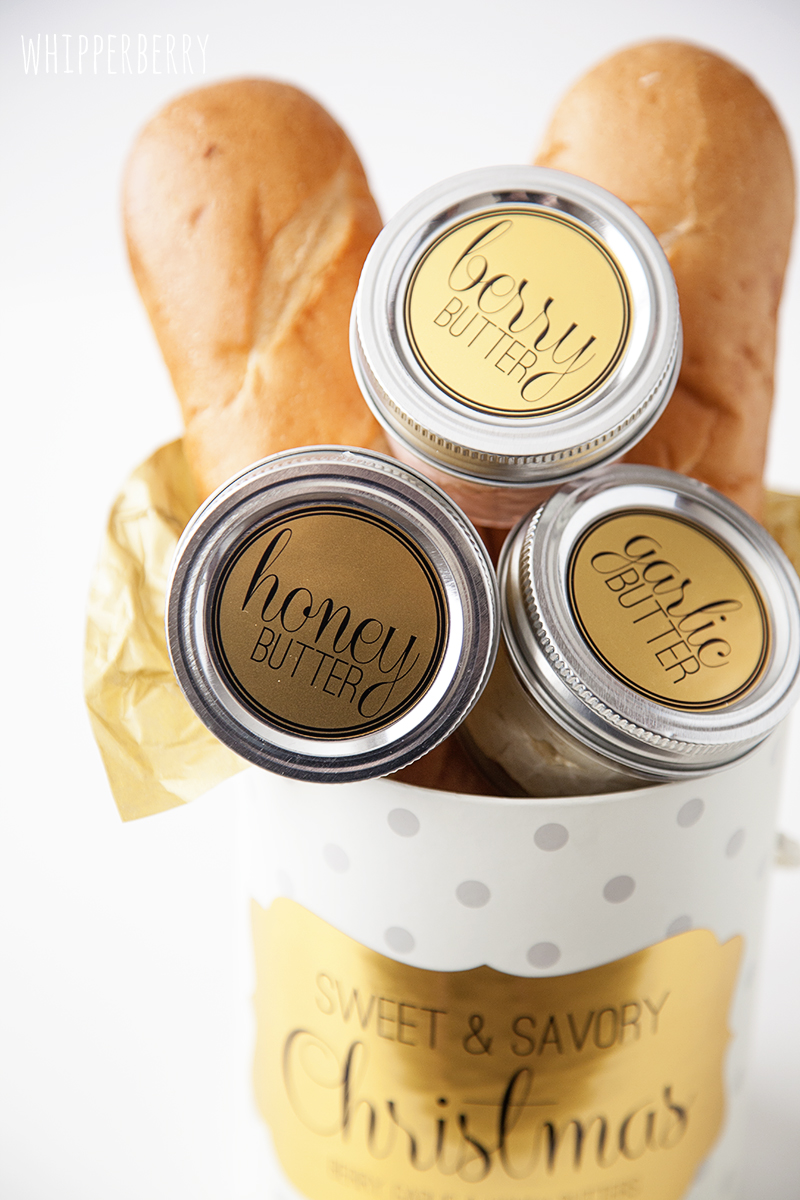
Aren't they fun?! Now… I have created a couple of different ways to use these free printable labels.
Silhouette Print & Cut Users
If you are a Silhouette User, you can download the Silhouette Studio file, print them with your printer and cut out with your CAMEO or Portrait. I used the Printable Gold Foil for mine, but you could use anything that you want. Card stock, printable sticker paper or even printable kraft paper. Use whatever you feel comfortable with. Click HERE to download the Silhouette Studio Label file.
Printable Users
Now, if you would like to print and cut your labels on your own… No worries, I have you covered too! Click HERE to download the free PDF for you to use for your special gift. Just print as many sheets as you would like on whatever paper you would like, cut out the labels and affix them to your jars and gift container.
Gift Container
I found my container at Target in their seasonal decor section. I would love to link to it, but I can't seem to find it on their web site. You'll just have to look at your local store. You can also use any type of container that will fit your butter selection and the bread your choose. You could use an inexpensive gift bag and it would look fabulous!!
All in all, I am in LOVE with this gift idea and I hope that it sparks some creativity for your holiday gift giving this year. You know… not all homemade holiday gifts have to be sweet! I know some of us would love some savory treats as well!