This post is brought to you by Elmer's Glue // I'm super excited to share this idea with you guys today! This time of year I am ALWAYS looking for fun handmade gift ideas. Gifts that are easy to make but huge on the WOW factor. These DIY Lace Flower Pots fit the bill just perfect!!
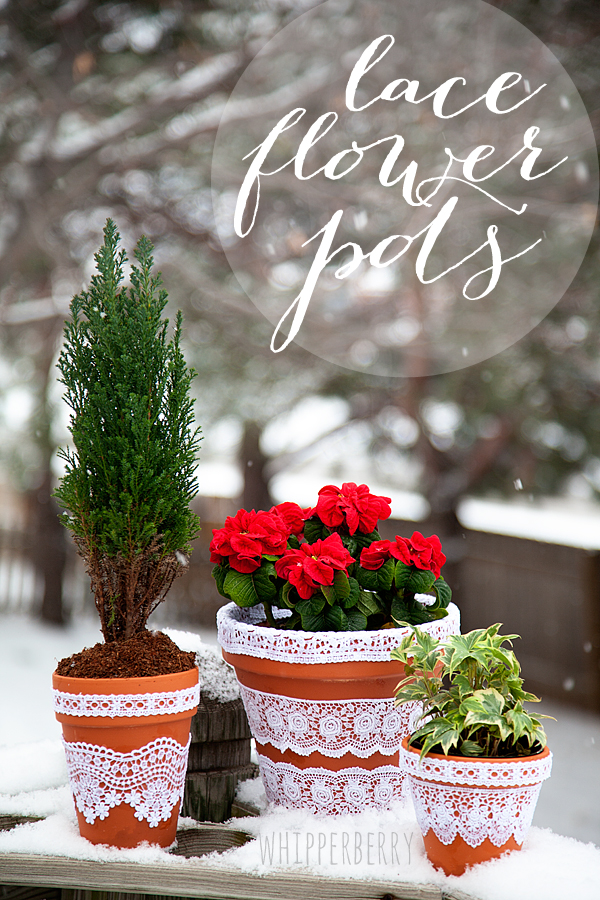
These are PERFECT neighbor gifts, teacher gifts… anyone really. Add a poinsettia or a festive evergreen and it's a stylish gift for anyone. Here's what you need to make them…
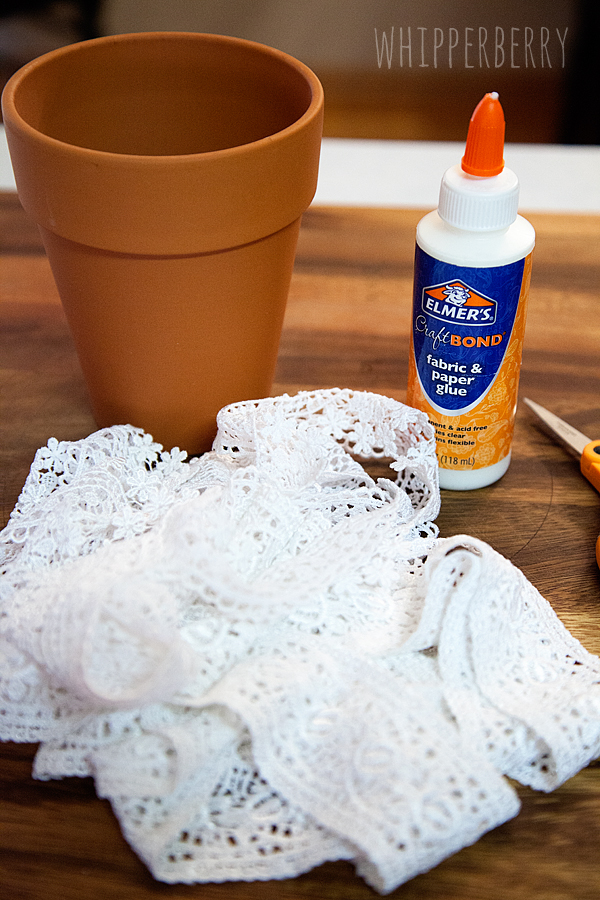
Lace Flower Pot Supplies
Terra cotta pots – any size.
Lace – for smaller pots, you can use scraps, larger pots will need possibly a yard or so. You will have to measure your pots for exact measurements.
Elmer's Craft Bond Fabric & Paper Glue
Scissors
Lace Flower Pots Instructions
First you need to measure the lace and make sure that it will fit your desired spot on the pot. Then generously add glue to the pot in small sections and lay the lace down.

Use your fingers to work glue around the lace. Don't worry about the white color. This type of Elmer's Fabric & Paper Glue dries clear. Make sure that all of the lace is covered in the glue and then move on to the next section.
NOTE: You may want to wear disposable gloves when working with the glue. I didn't and it took a bit to wash off my hands.
Trim the lace so that the seam doesn't show and then smooth everything down. Let dry over night. The next morning, you will have the most beautiful lace flower pots. It's just that easy! Now, all you have to do is figure out what you want to fill the pot with. You can fill it will any kind of indoor plant or you could fill it will a scrumptious batch of cookies. It's your call!!
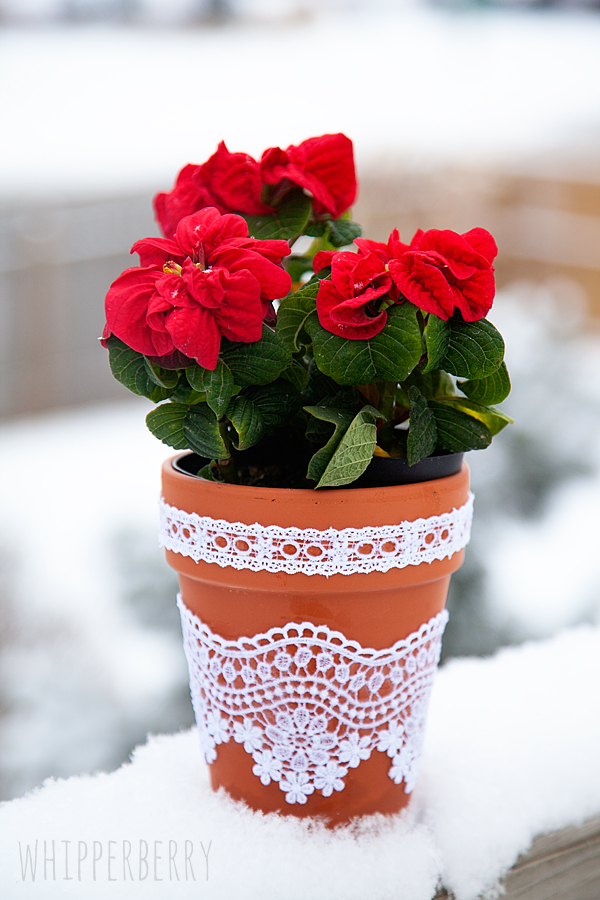
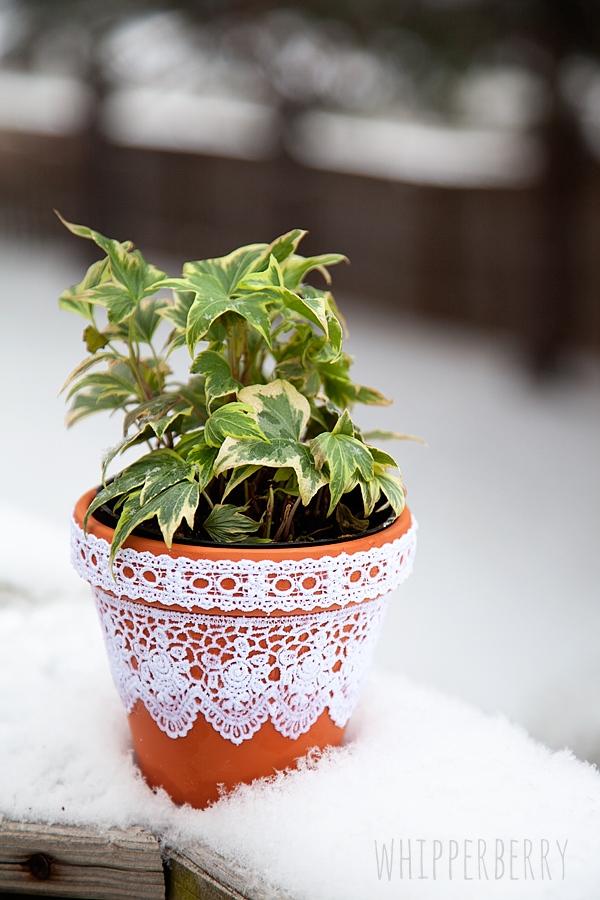
You will be amazed at how strong the glue is! I actually tried to pull the lace off once it was dried and couldn't. I ran water over it and it still looked like new when it dried. Gotta say… Pretty happy with this gift idea!
What would you fill your DIY Lace Flower Pots with?
Disclaimer // This post is sponsored by Elmer's Glue. I am a member of Elmer's Craft it Crew and received payment and product for this post. Rest assured, I will never work with a brand or product that I don't whole heartedly endorse and use in my every day life.