Peppermint Drop Cookie Recipe // The season is upon us… Holiday baking and general goodie making. I grew up with a Mom who created all kinds of goodies each year to share with friends and neighbors. This year I decided to experiment with a "cookie" or a meringue cookie really… to come up with a cute take on those traditional peppermint candies.
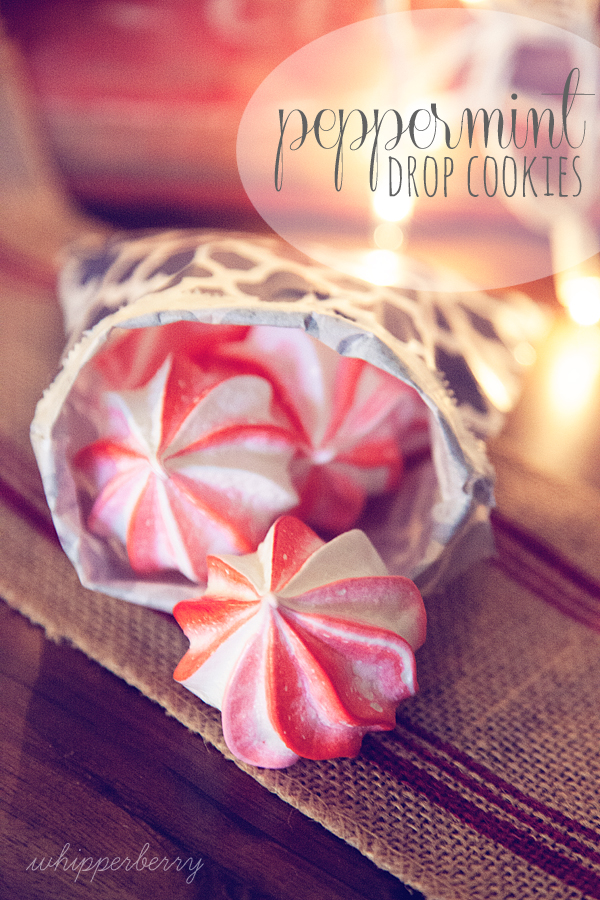
Meringue cookies are all over the patisseries in Paris in varies shapes and flavors. They are sooooo easy to make and are a fun unique treat that you can WOW your friends with. They are made just like a meringue for a pie, but you pipe them onto a parchment lined baking sheet and bake them for quite a bit longer. They turn into these cute, crunchy, yet soft in the middle sweet treats. When you add a little red food coloring and some peppermint extract they get even better and are like peppermint candies, but WAY better!
Peppermint Drop Cookie Recipe
This recipe has been adapted from Martha Stewart's Peppermint Meringues with Chocolate Filling Recipe // It will yield about 30 two inch size meringue cookies.
3 egg whites
3/4 cup sugar
1/2 teaspoon peppermint extract
red gel food coloring
Instructions
In a heat safe mixing bowl, place the egg whites and sugar. Place over a medium sauce pan filled half way with water at a low simmer on the stove. Slowly whisk the egg whites and sugar until the sugar has melted. The best way to test that is using your CLEAN fingers. Just pinch a bit of the mixture and see if you still feel the grit of the sugar. As soon as the grit is gone, this usually take a few minutes, the whites are then ready to whip into a meringue.
Place mixing bowl in mixer and with the whisk attachment, whisk on high until the egg whites and sugar form stiff peaks. Once you have stiff peaks, add the peppermint extract and whisk until fully combined.
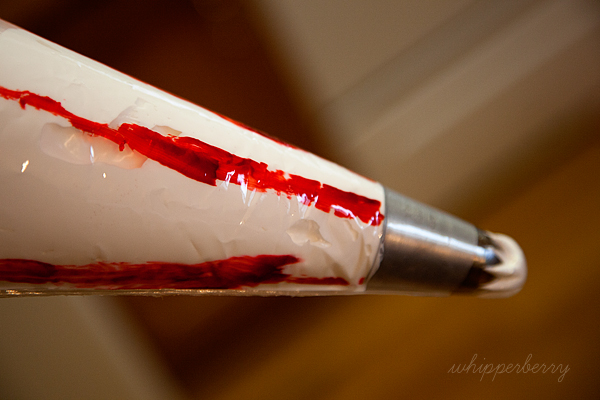
Place a large star tip in a large pastry bag. Then using a clean brush or tip of a butter knife, draw some stripes onto the inside of the pastry bag with the red gel food coloring.
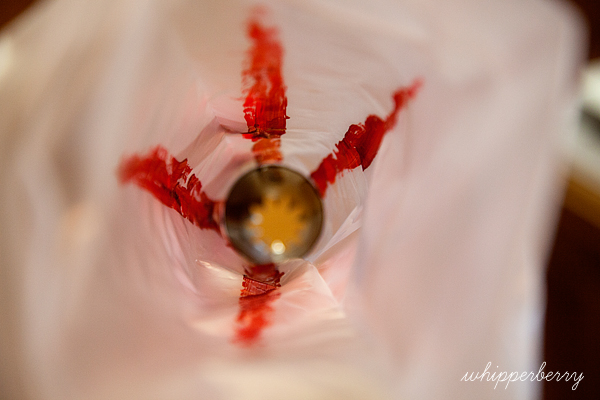
It doesn't need to be pretty, or exact… just four or five lines to add the red stripes to the peppermint drops.
Next, pipe the meringue onto a parchment lined baking sheet. Make the cookies about two inches in diameter. A quick note… Due to the nature of these cookies you may want to use masking tape to tape down the parchment paper on the baking sheet. That way you won't have parchment paper floating around wreaking havoc on your peppermint drop cookies. Make nice little drops with the pastry bag and then carefully pull up to create the nice peak at the top.
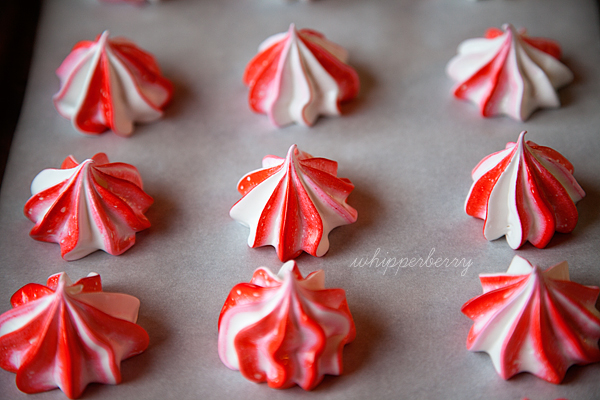
Place in a 175˚ oven for 3 hours. I also place a wooden spoon in between the oven door and the oven so that any steam that is created can escape. Once the cookies are hard, remove them from the oven and let cool.
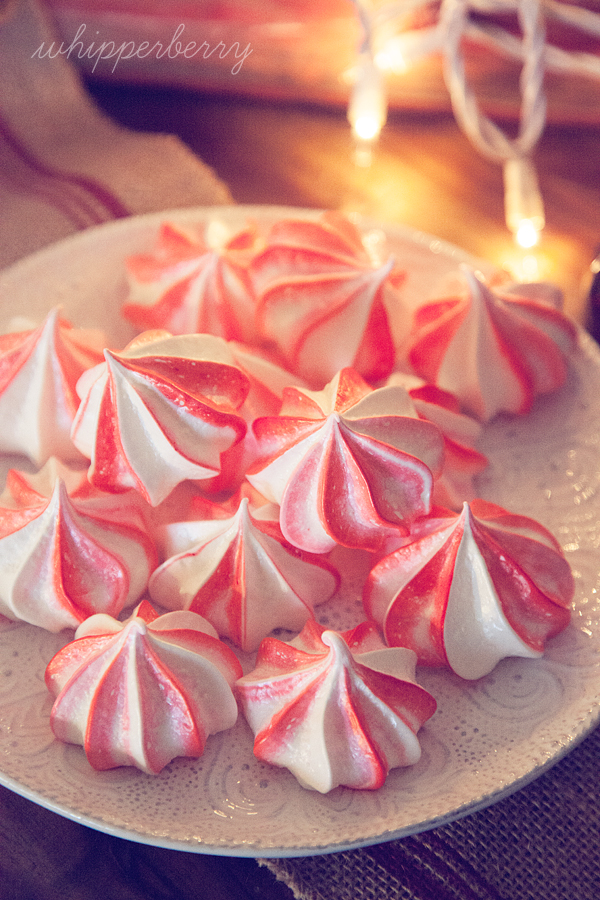
These little meringues turn into these bite size peppermint treats that just melt in your mouth. They are a perfect addition to a goodie plate, because they add DRAMA. The nice thing is they can be made ahead of time and stored in an air tight container for a couple of weeks. You can even create a fun little goodie bag just filled with these little treats. Either way, they would be a great addition to your holiday treat list!
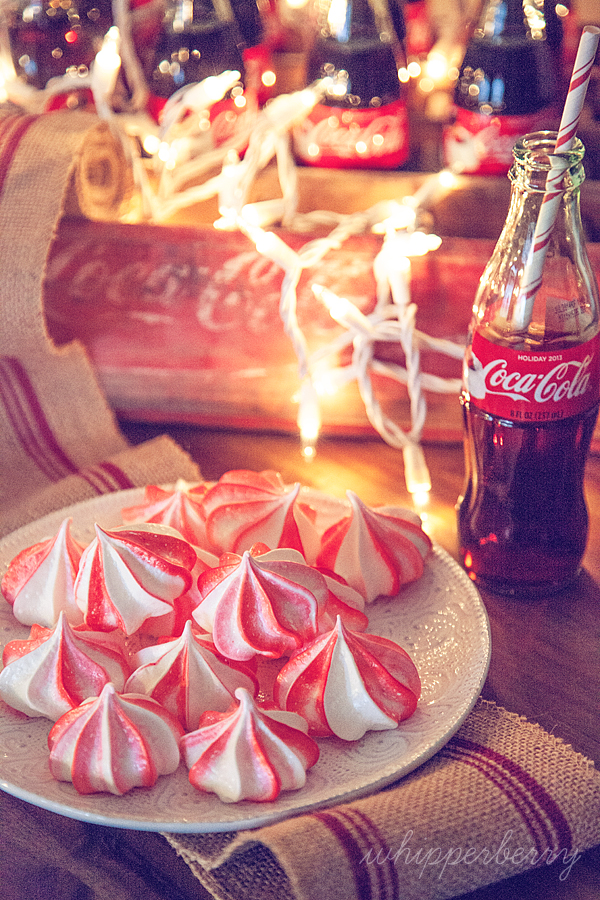
Santa will even love them on his goodie plate. They are a nice change of pace to your regular cookie!
I am participating in a fun cookie swap this week with a group of fabulous bloggers!!

You can head over and check out their fun recipes…
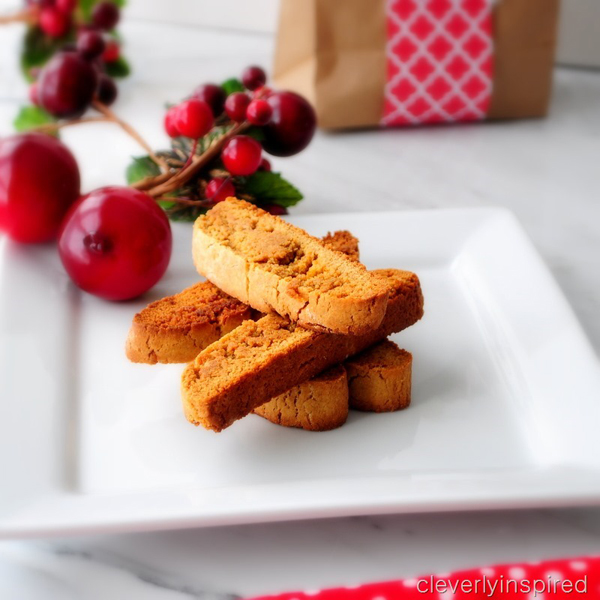
Tracie from Cleverly Inspired made some rustic Gingerbread Biscotti…
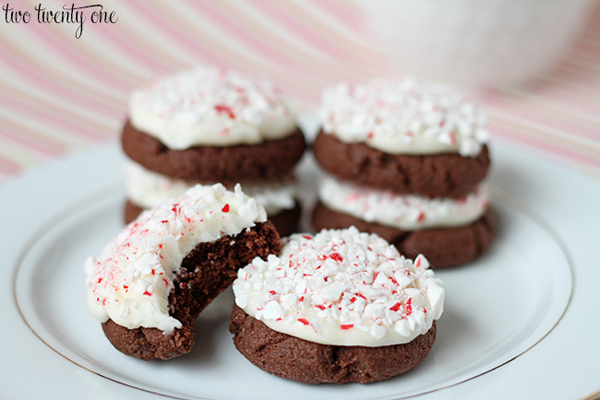
Chelsea from Two Twenty One made another peppermint treat… Peppermint Chocolate Cookies.
Tomorrow, Carmel from Our Fifth House will have another cookie to share with you guys! Make sure to head over and see what she's created.
Happy Holidays!