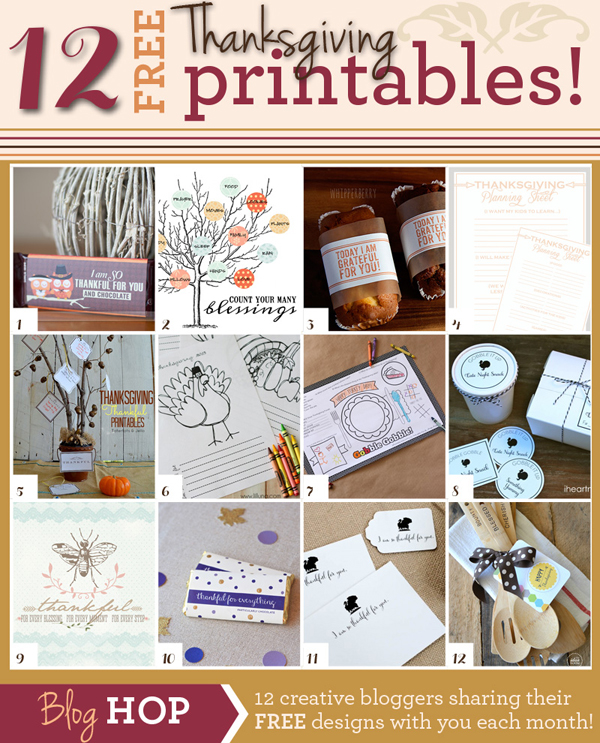
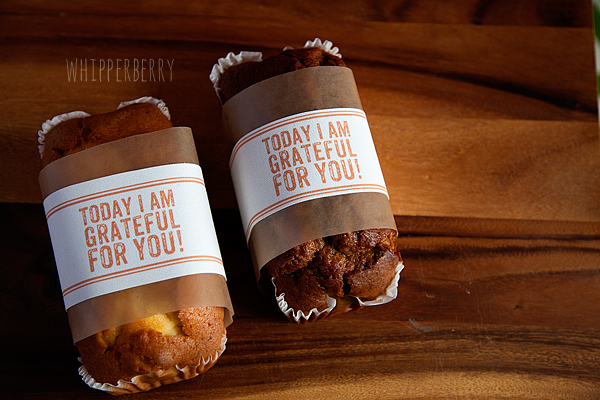
This post brought to you by Michaels Craft Stores // I have always been a fan of the Ornament Frame, they are just perfect for creating all kinds of goodies for the holidays. I've given them as personalized gifts for years. This year, Michaels challenged me to come up with FIVE different "out of the frame" ideas for crafting with ornament frames.
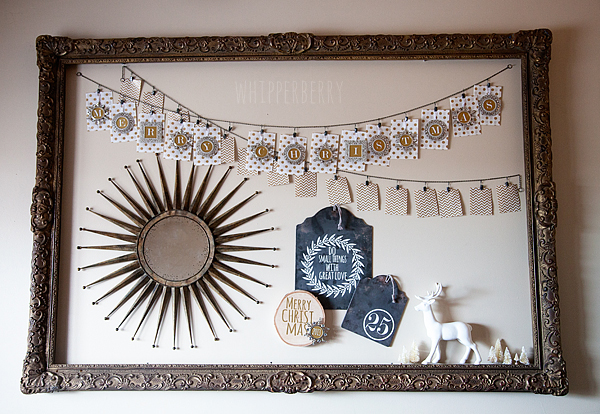
Merry Christmas Banner
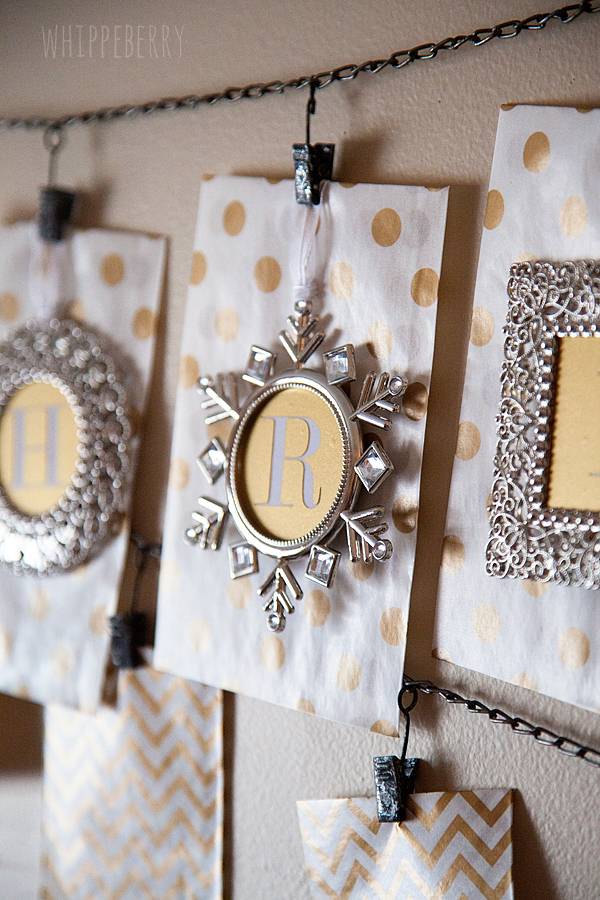
We will start with my Merry Christmas banner. This one was last minute inspiration, but turned out to be one of my favorite projects. I used my Silhouette Portrait to cut letters out of gold vinyl and then affixed it to the face of the frame. Then, this is the good part… I found these super cute gift bags at Michaels that I just fell in love with. I thought they would be a great background for the letter frames to make a fun banner. SUPER cool and SUPER easy to make. You don't have to cut any paper just use the bag as is as your banner background!
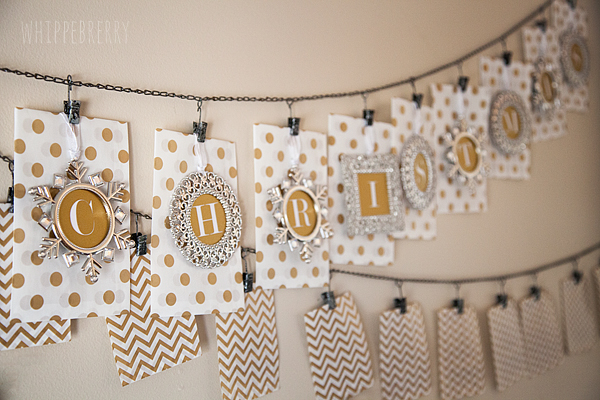
This year's hot trend is using both silver and gold together so, I thought the silver frames would look fantastic with the gold accents.
The banner looks perfect in my new GIANT shadow box…

Personalized Napkin Rings
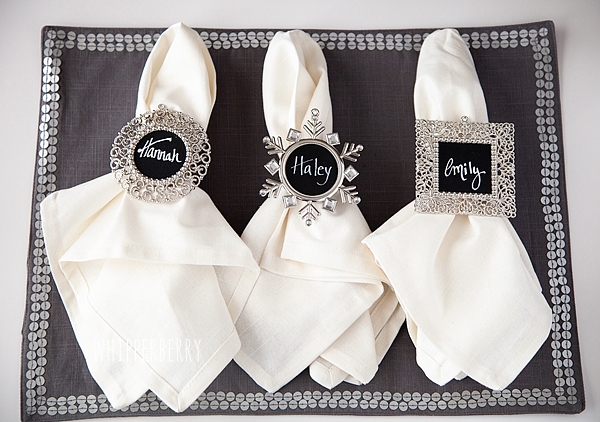
This idea was super simple and will add a little flair to your holiday table. Just use a little chalkboard paint on the face of the frame to make a chalkboard surface. Glue the frame onto a basic napkin ring and you're set.
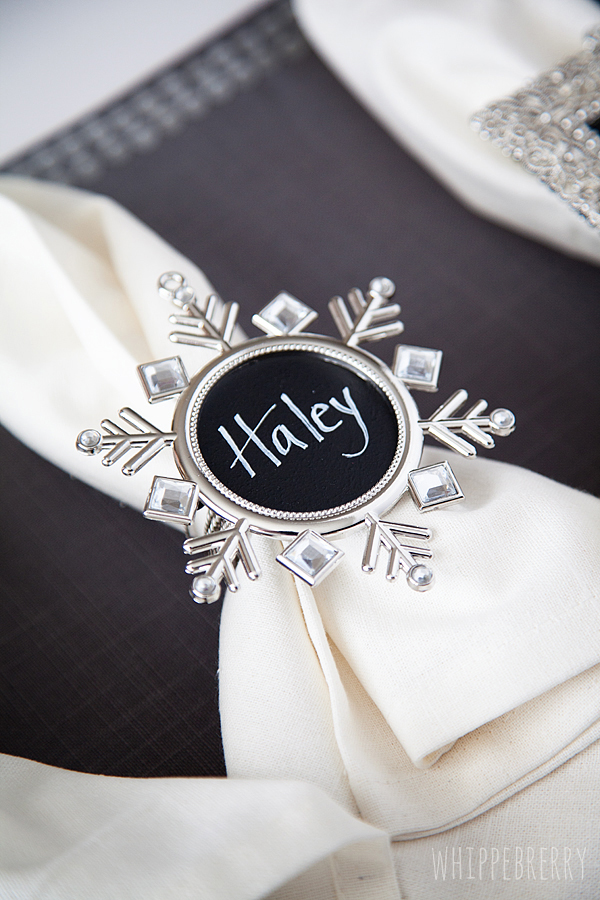
Use a chalkboard maker to personalize your stylish napkin rings. You can even use a 3D Glue Dot to temporarily affix your frame to the napkin ring. At the end of the night, add the ribbon back and send the ornament home with your guests as a party favor.
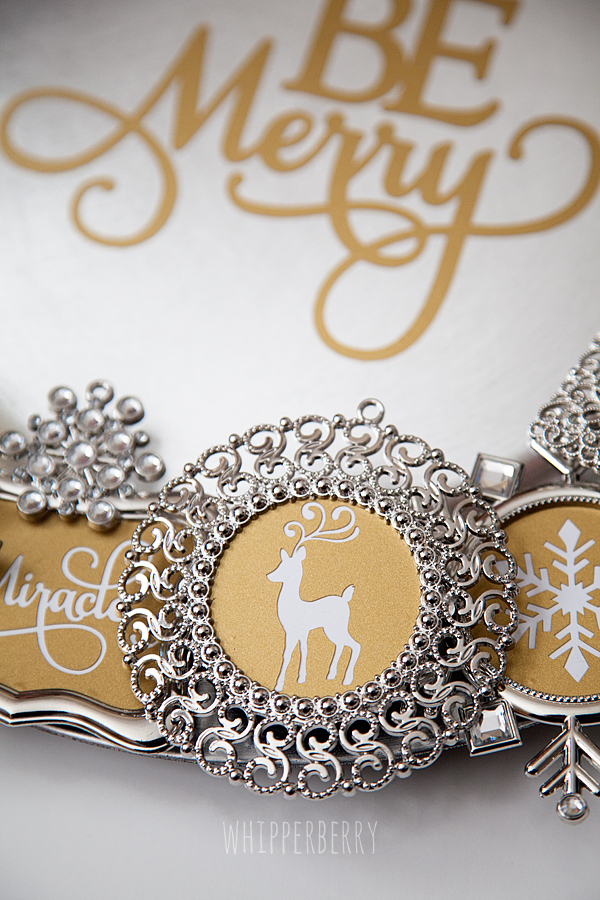
Decorative Wall Art
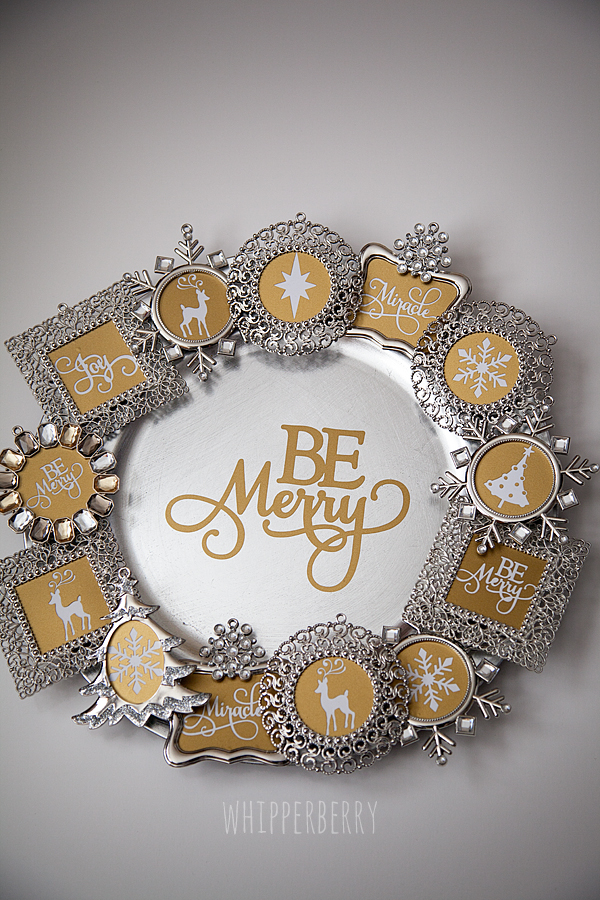
This piece was so fun to make. I again employed my Silhouette Portrait to help with this project. I cut several holiday images out of their gold vinyl and affixed it to the face of the frames. Then I glued the frames to an inexpensive silver charger that I found at Michaels. I LOVE how this turned out!!
Accent Element
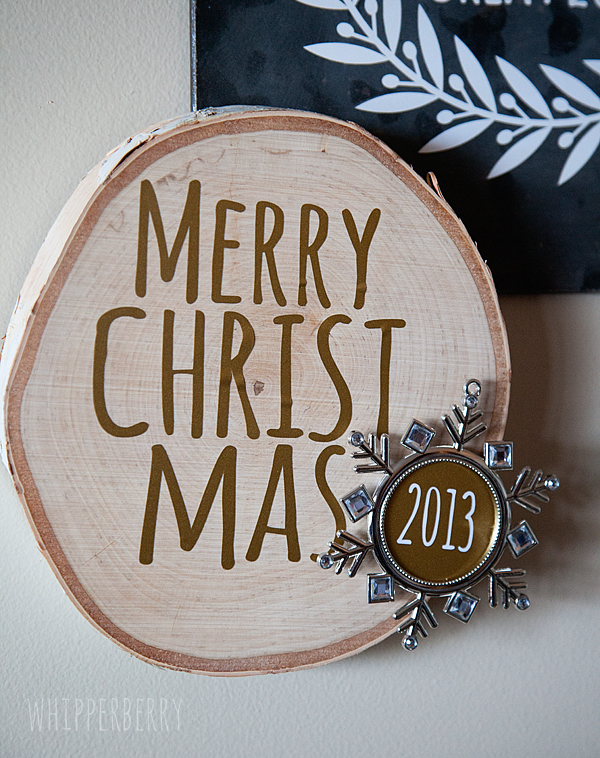
This one is SIMPLE… I used one of the ornament frames to add a little accent element to a sign that I had created. Again, I used my Silhouette to cut the 2013 out of gold vinyl and affixed it to the frame. It was a great addition to my shadow box display…
Personalized Gift Tag

Last, but not least… I created a decorative gift tag that can be used over and over and over. I used one of those cute tiny gift bags that I had left over from the banner, cut it to size and then placed that inside the frame. You can then use dry erase or chalkboard makers to write the name on the tag and voilá, you have a stunning gift tag that anyone will love!
Well… there you have it. 5 different ways to create with a simple ornament frame. Did that get your imagination running? What would you make? Take a little time to "think outside the frame" and create something fun with some ornament frames!
Disclaimer // This post was sponsored by Michaels Craft Stores. I receive product from Michaels in order to create the projects in the post.