• Skip to primary navigation
  • Skip to main content
  • Skip to primary sidebar
  • Skip to footer

Whipperberry

WhipperBerry • Your Home For Creative Inspiration

  • Home
  • Recipes
    • Starters
    • Easy Weeknight Dinners
    • Main Dish
    • Salads
    • Side Dish
    • Soups & Stews
    • Desserts
    • Breakfast
    • Miscellaneous
  • Tutorials
    • Creative Crafts
    • DIY Decor
    • Fabric Crafts
    • Food How-To
    • Jewlery
    • Paint Projects
    • Paper Art
    • Party Styling
    • Photography and Graphic Design
    • Silhouette
  • Holidays
    • Easter
    • Mother’s Day
    • Father’s Day
    • 4th of July
    • Halloween
    • Thanksgiving
    • Christmas
    • Valentine’s Day
  • Gift Ideas
    • Gifts For Everyone
    • Gifts for Dad
    • Mother’s day
    • For The Girls
    • For The Kids
    • Teacher Gift Ideas
    • Christmas
  • Printables
    • Holiday
    • Gift Idea
    • LDS Primary
  • Travel
  • About
    • Terms
  • Contact
  • Nav Social Menu

    • Facebook
    • Instagram
    • Pinterest
    • RSS
    • Twitter

decor

Painted Nautical Signal Flags for Boys Room Decor

7 · Jul 13, 2017 · Leave a Comment

Looking for a fun way to dress-up your boys room? Vintage Nautical is one of my favorite ways to decorate for my little guy. Come learn how I created these painted nautical signal flags for our little guy’s room…

Looking for a fun way to dress-up your boys room? Vintage Nautical is one of my favorite ways to decorate for my little guy. Come learn how I created these painted nautical signal flags for Gage's room... WhipperBerry

• This post brought to you by Michaels •

I’ve always been inspired by vintage nautical pieces. All of the fun gadgets and gizmos, the style of the ships, the anchors and I especially love vintage nautical signal flags.

Vintage nautical signal flags

One of my picker friends here in Nebraska does a fabulous job collecting vintage nautical items. Here are a few of Cody’s from The West Place, vintage nautical flags among other items.

Cody from the West Place

Aren’t they cool?! I purchased a flag from him about a year ago with the intention of using it for my little boy’s room in our new house. The one that I have is (if you look at the chart above) the letter “Z”. It’s colors are amazing! The perfect red, blue, mustard yellow and black. I’m using that as my inspiration for Gage’s room.

If you’re following along, Gage and I introduced you to Davy Jones, Gage’s new octopus wall art for his room…

Create this fun DIY Octopus Wall art for your favorite nautical themed room. This one is going into my son’s vintage nautical room and it’s going to look fabulous! Created by WhipperBerry via @decoArt

24137_SO_July_MarthaPaint_B

I thought it would be fun to create a few more nautical signal flags to go along with Davy Jones. I was thrilled to find out that the Michaels Maker challenge for July is craft paint! Of course this is a perfect opportunity to create these fun flags using a wood canvas that I found at Michaels and the NEW DecoArt Americana Premium Acrylic Paints.

DIY-Octopus-Wall-Art-3

If you don’t already know, Michaels has all kinds of new craft paints in-store now. You need to check it out! They have acrylics, milk paint, chalk paint… All kinds of specialty paints. Not to mention stencils, canvases, brushes and more. Painting with stencils makes things really easy so definitely pick those up. I actually just painted my front door with paint that I purchased at Michaels, the new DecoArt Curb Appeal paint. Who knew you could find that kind of paint at Michaels!

I’m also totally in love with these Art Wood Panels that you can find at Michaels. I wanted my flags to look vintage and a normal canvas wouldn’t be able to create the kind of look I was going for. Nor could I find wood that would look somewhat like a flag. Other wood options would add a lot more bulk and I didn’t want that. This wood canvas is perfect.

Gage and I talked it over and decided that we would create flags for the letters W-X-Y to go with our actual Z flag.

Looking for a fun way to dress-up your boys room? Vintage Nautical is one of my favorite ways to decorate for my little guy. Come learn how I created these painted nautical signal flags for Gage's room...

Supplies for the Painted Nautical Signal Flags

DecoArt Premium Acrylic Paint

  • Prussian Blue Hue
  • Yellow Oxide
  • Titanium White
  • Cadmium Red Hue

DecoArt Premium Medium • Matte

Artist Loft Art Wood Panel Value Pack

Painter tape

Sponge Brushes

Painted Nautical Signal Signs Instructions

Each flag is going to have a different process due to the designs of the signal flags. You will have to figure out how to best create the design for the letters you create. I’ll show you how I created the letter “Y” flag.

First, I painted the base layer in Yellow Oxide and let it dry. I only did one coat of paint because I was planning on distressing the sign so why make my job harder with an extra layer of paint.

Next, rather than busting out my mad math skills (of which I have none) I layed 2 inch painters tape diagonally across the entire board with the tape bumping right up to the base of the other tape.

Looking for a fun way to dress-up your boys room? Vintage Nautical is one of my favorite ways to decorate for my little guy. Come learn how I created these painted nautical signal flags for Gage's room...

Then, I removed every other strip of tape to then create perfect diagonal stripes. I then painted the red stripes on the board. For this stripe, I did paint two light layers of paint. I wanted a truly bold color even though I was still going to be distressing the board.

Looking for a fun way to dress-up your boys room? Vintage Nautical is one of my favorite ways to decorate for my little guy. Come learn how I created these painted nautical signal flags for Gage's room...

After the paint was dry, I pulled the tape to reveal the PERFECT stripes!

Looking for a fun way to dress-up your boys room? Vintage Nautical is one of my favorite ways to decorate for my little guy. Come learn how I created these painted nautical signal flags for Gage's room...

I love how you can still see the wood grain on these art boards. Not to mention, look at those beautiful bold colors. I love this paint! Next, I used my detail sander to distress the board a bit to give this faux flags the vintage look.

Looking for a fun way to dress-up your boys room? Vintage Nautical is one of my favorite ways to decorate for my little guy. Come learn how I created these painted nautical signal flags for Gage's room...

I LOVE how they turned out. I can’t wait to see how they look in Gage’s room when it’s finished.

Looking for more painting inspiration? Michaels has you covered. You can follow along on The Glue String (the Michaels blog) OR, checkout these other projects from the other Michaels Makers…

An InLinkz Link-up

Quick Red White and Blue Home Decor

10 · May 10, 2017 · Leave a Comment

With the Summer months rolling in, it’s time to give a little nod to our favorite ole’ Red White and Blue! Michaels has a whole new line of FUN Americana decor that you’re going to love! Here’s what I found to dress-up my living room for the Summer holidays. • Red White and Blue Decor • With the Summer months rolling in, it's time to give a little nod to our favorite ole' Red White and Blue! Michaels has a whole new line of FUN Americana decor that you're going to love! Here's what I found to dress-up my mantel for the Summer holidays via WhipperBerry

Quick Red White and Blue Home Decor • This post brought to you by Michaels

It’s been a couple of months or so, but… We finally bought a house and have moved in and are finally feeling a little settled. BOY, that’s a process that I don’t want to do again for quite some time. Three moves in roughly 5 years is enough for this family. It’s finally time to start making a house our home.

When I started packing-up our rental, the first thing I packed-up were the decor pieces that I wanted to use right away in the new house. I made sure to set those boxes aside and label them appropriately so that they wouldn’t get lost in the sea of boxes. That’s when, as soon as all of the basic needs were met in the new house, I could easily dress-up our space and make it feel like home. Now that we’ve been here for a couple of months, it’s time to start thinking a little more about seasonal decor. With Summer right around the corner the first thing that comes to mind is my favorite red white and blue home decor!

How to Quickly Incorporate Red White and Blue Home Decor

My father served in the Army during Vietnam, my Grandfather served on the beaches of Normandy in World War II, my Father-in-Law served in the Navy during the Korean War. To say that we are a proudly patriotic family would be putting it mildly. We love the stars and stripes and every summer, I love to dress up our home with some red white and blue decor. Thank goodness this month’s Michaels Makers summer challenge had a little bit of a patriotic spin to it.

Have you been to Michaels lately? Have you scene this great new Americana line that they just introduced. It’s so fun!

• Red White and Blue Decor • With the Summer months rolling in, it's time to give a little nod to our favorite ole' Red White and Blue! Michaels has a whole new line of FUN Americana decor that you're going to love! Here's what I found to dress-up my mantel for the Summer holidays via WhipperBerry

It’s perfect to quickly and easily dress your home up for the patriotic holidays this summer with minimal time and effort. What I love is that it seems to have something for everyone. If you are more into a vintage farmhouse style they have you covered. Are you more into classic cars and hanging out at the lake, you’re covered there too, It’s great.

I layered a few items on my mantel that really spoke to me. I love the large distressed wood flag and I thought it would layer well with this aaaamazing clock that they have at Michaels right now too. It seriously looks just like a clock that I almost paid quadruple for at Magnolia Market a few weeks ago!

• Red White and Blue Decor • With the Summer months rolling in, it's time to give a little nod to our favorite ole' Red White and Blue! Michaels has a whole new line of FUN Americana decor that you're going to love! Here's what I found to dress-up my mantel for the Summer holidays via WhipperBerry

The wooden red white and blue stars were also a must have. They add a nice little touch patriotic touch. I actually may go back to Michaels and grab some more.

Do you have a more classic style like I do? This beautiful 1776 pillow fit right into my room and added to the classic vibe.

• Red White and Blue Decor • With the Summer months rolling in, it's time to give a little nod to our favorite ole' Red White and Blue! Michaels has a whole new line of FUN Americana decor that you're going to love! Here's what I found to dress-up my mantel for the Summer holidays via WhipperBerry

I layered it with a red and white pillow that I already owned and it looks perfect.

The last, not so little bits, are the cute wooden fireworks that stoically preside over the hearth of our fireplace. Aren’t they cute with the rope coming out the top to make them look like fireworks.

• Red White and Blue Decor • With the Summer months rolling in, it's time to give a little nod to our favorite ole' Red White and Blue! Michaels has a whole new line of FUN Americana decor that you're going to love! Here's what I found to dress-up my mantel for the Summer holidays via WhipperBerry

What I love most about all of these pieces is that they incorporate so easily into the decor that I already had in the space. It doesn’t look awkward or out of place. It’s seamlessly blended right into the room.

• Red White and Blue Decor • With the Summer months rolling in, it's time to give a little nod to our favorite ole' Red White and Blue! Michaels has a whole new line of FUN Americana decor that you're going to love! Here's what I found to dress-up my mantel for the Summer holidays via WhipperBerry

Looking for more patriotic DIY inspiration? Visit Michaels.com for more creative ideas that will help you transform your home this summer. You should also visit Michaels’ blog, The Glue String, to see the rest of the Michaels Makers’ red, white and blue project ideas.

An InLinkz Link-up

How to Apply Vinyl Tutorial + New Kitchen Sign Design

5 · May 9, 2017 · 2 Comments

Have you always wanted to create beautiful vinyl signs but, can’t quite get the hang of applying vinyl? Look no further, I’m sharing my pro tips for how to apply vinyl to create beautiful vinyl signs.

How to Apply Vinyl Have you always wanted to create beautiful vinyl signs but, can’t quite get the hang of applying vinyl? Look no further, I’m sharing my pro tips for how to apply vinyl to create beautiful vinyl signs.

how to transfer vinyl tutorial • brought to you by Cricut

Recently, we moved to our new forever home and I have been madly creating all kinds of fun things to make the space my own. I LOVE creating word art whether it be for vinyl signs, painted signs, or for printables, for some reason that kind of decor always speaks to me. (No pun intended!) I love typography and everything that comes with creating with words and letters. I love watching trends come and go and adding my version to the fray.

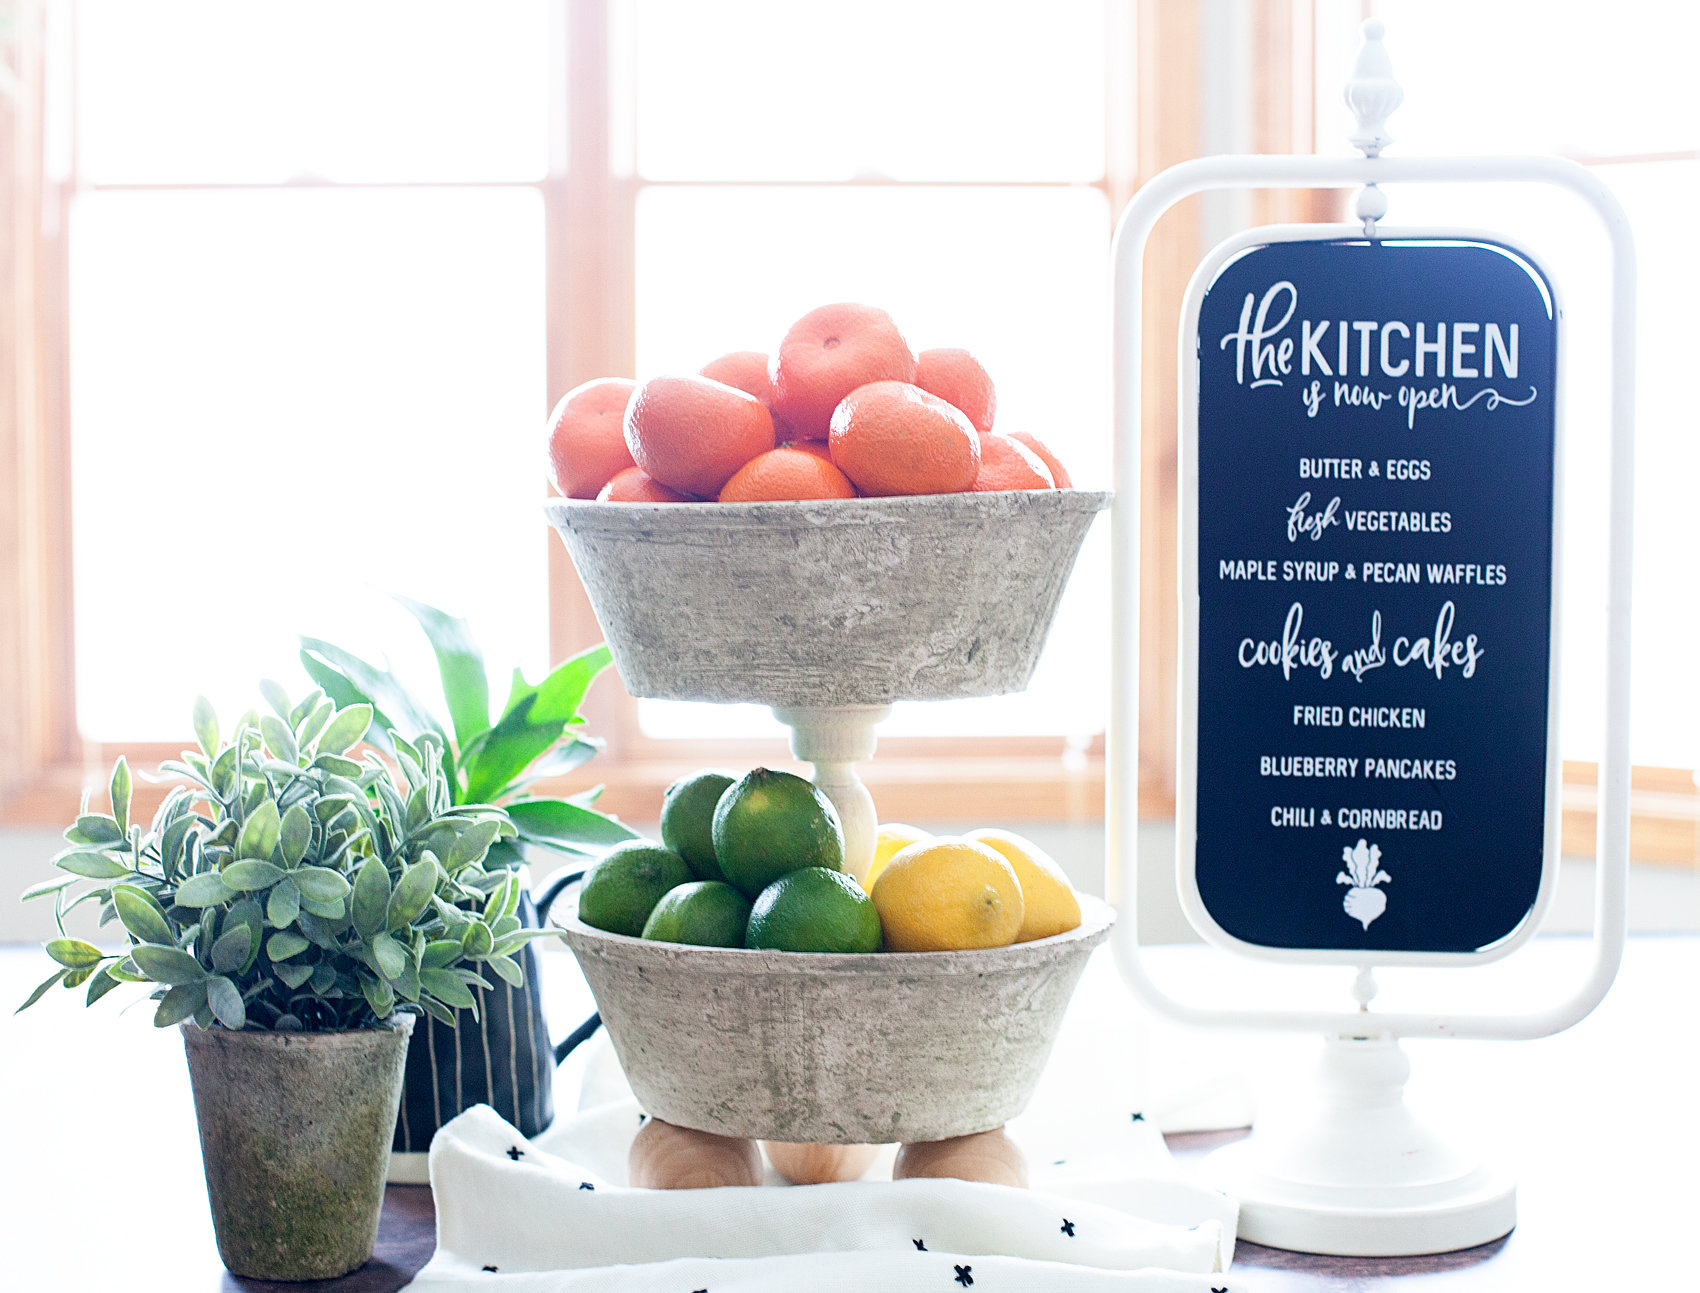
Right now, with the popularity of the show Fixer-Upper, word art is hot. I have all kinds of farmhouse/industrial signs all over my house. I found a fun, blank chalkboard stand at Michaels in their decor section and thought it would be fun to create a new “The Kitchen is Now Open” Sign for my counters. After a little bit of playing around, this is the design that I settled on…

How to Apply Vinyl Have you always wanted to create beautiful vinyl signs but, can’t quite get the hang of applying vinyl? Look no further, I’m sharing my pro tips for how to apply vinyl to create beautiful vinyl signs like this, "The Kitchen is Now Open Sign" with menu from WhipperBerry.

Download Kitchen Sign for Free

It has a little bit of farmhouse flair that so many of us are in love with right now. Now, this sign could be a little intimidating with all of the little letters but, don’t let it be intimidating. YOU CAN DO THIS! All you need is a little patience. So many people try and rush through a project and they get easily frustrated and then their project fails. That is so SAD! Step back, grab a Diet Coke (or, whatever it is that makes you happy), and ENJOY the process of creating.

For today, I’m focusing on just the vinyl transfer part of sign making. I’m working on a few more tutorials on how to create your sign in the NEW Cricut Design Space that was launched in BETA mode a week ago. It’s fabulous! I’ve been having a ball getting to know the new, faster & more user-friendly Design Space. I’m sure you’re going to love it too! It’s so easy to create your own designs within the Design Space or you can create in other programs like Photoshop or Illustrator and import your PNG files directly into Design Space and create that way as well. I’ll be working on more tutorials for both of those options soon.

I’m also working on a video tutorial on how to weed your vinyl. That’s the process of removing the negative part of your design in the vinyl. It’s really not hard, but I have a few tricks up my sleeve that will make it a little easier. Today, I’m just going to focus on how to apply vinyl. Here’s a quick video to show you how to apply vinyl to any type of smooth surface.

Video Tutorial for How to Apply Vinyl

How to Apply Vinyl by WhipperBerry from Heather Thoming on Vimeo.

See, isn’t that simple! Honestly, the trickiest part is making sure that the design is centered onto your surface. As long as you stick with these simple tips, you can become a vinyl sign PRO!

Pro Tips for Applying Vinyl

How to Apply Vinyl Have you always wanted to create beautiful vinyl signs but, can’t quite get the hang of applying vinyl? Look no further, I’m sharing my pro tips for how to apply vinyl to create beautiful vinyl signs like this, "The Kitchen is Now Open Sign" with menu from WhipperBerry.

  • Take your time – like I said before, don’t rush. If some of the vinyl lifts while you are transferring it to either the transfer tape or your sign… Don’t stress out. Lay that section back down and press on the vinyl with your finger and then try again. You’ll get it, just don’t rush.
  • Make sure your surface is clean – Now think about this, if you try and place a sticker on a surface covered in dust, dirt, sand, or general grime, what will happen? The sticker won’t stick. Same thing with adhesive vinyl. Whatever you are adhering it to needs to be clean. Nothing is more frustrating than laying down some vinyl and then finding a little piece of dirt stuck under the vinyl image making an unsightly bump. Take the time to make sure everything is clean.
  • Trim excess vinyl backing – Again, vinyl is just one big sticker. Stickers are placed on backing to keep the adhesive side sticky. The same applies to vinyl. Once you have cut your design on your Cricut machine, you’ll weed your vinyl and then you’ll want to cut away the excess vinyl backing. This will help when laying down your design and making sure it is placed the way you would like it.
  • Create a hinge – Several years ago, when the Cricut cutting machines made cutting your own vinyl possible, a good friend of mine, who owned a large-scale sign-making company, taught me her tricks for applying vinyl. Each of these tricks, I still use them every time. One of them is to use the transfer tape to create a “hinge” at the top of your design. Check out the video and you’ll see what I mean.
  • Pull transfer tape low, slow, and diagonally – My sign-making friend also taught me this years ago. When removing the transfer tape, pull low, slow and diagonally. What I mean by low is, that you are essentially folding the non-sticky side over on itself as you are pulling as close to your surface as possible. When do that along with pulling diagonally, you’ll be less likely to pull the vinyl back up as you remove the transfer tape.

A Quick Note on Materials

Here we have it… Not all vinyl and transfer tapes are created equal!! I have tried many brands of both vinyl and transfer tape. I’ve used what the professionals use and basic crafters vinyl. I LOVE the Cricut Transfer Tape!! It’s clear and so easy to use. I’ve also been very happy with the Cricut Vinyl. I have exclusively used the Premium Outdoor Vinyl for most of my projects and have been thrilled with the results. I made some travel mugs with the Premium Vinyl and have run them through the dishwasher many, many times and have yet to have any issues with the vinyl coming off. I LOVE that!

Stay tuned for more Cricut tutorials and projects coming to WhipperBerry! By the way… If you have any questions, feel free to leave a comment here. I would be happy to help!

How to Apply Vinyl Have you always wanted to create beautiful vinyl signs but, can’t quite get the hang of applying vinyl? Look no further, I’m sharing my pro tips for how to apply vinyl to create beautiful vinyl signs like this, "The Kitchen is Now Open Sign" with menu from WhipperBerry.

Disclaimer // I am a Cricut Ambassador and receive  product and payment to help with my projects. As always, I will NEVER promote a product that I don’t truly believe in!

Colorful Nautical Gallery Wall Tips and Tricks

2 · Mar 20, 2017 · 1 Comment

The Gallery Wall… Everyone loves them. Yet, some find them really challenging. It can be hard to come up with the perfect combination of items that complement each other. Finding the right arrangement on the wall can be mind boggling BUT… It doesn’t have to be. You don’t have to be a certified gallery wall specialist, you just need to find a good partner like Michaels and then follow a few tips and tricks to create the PERFECT gallery wall for your home.Tips and tricks for the perfect gallery wall

Gallery Wall 101

  • Gather items that compliment the room – You need to stay true to the space and find items and frames that enhance the space and stay true to the style of the room. If you have a rustic white farmhouse space, it would make no sense to put together a mid-century inspired wall gallery. The examples below are from Michaels new Gallery Wall collections. They are each designed to complement YOUR STYLE and make it easy to pull that style together without a degree in the fine arts… They’ve done all of the hard work for you. Tips and tricks for the perfect gallery wall
  • Don’t be afraid to gather more than you need – It’s so much easier to gather items such as frames, photos, hooks, clocks, shelves, planters, wall art, mirrors, meaningful items… The list could go on and on. It’s better to have too much to start with than not enough. It’s easier to start working on your layout and then edit out items that don’t work. (Michaels PRO TIP, If you join their rewards program YOU NO LONGER NEED A RECIPT TO RETURN ITEMS! Yep, they keep all of your purchases stored under your account and you no longer have to keep those pesky recipes.)
  • Define your space – Gallery walls come in all shapes and sizes. Don’t be afraid to break the rules! Trust your eye and see what works best for your space. For my gallery wall, I wanted something nice and tight that didn’t go too much past the edges of the dresser in my daughter’s room. Yet, I didn’t really want it to be in a uniform shape. Don’t be afraid to think outside of the box. Gallery walls can also spread out over multiple walls, around corners and take up larger spaces. So, don’t be afraid to spread out as well. Tips and tricks for easy Gallery Walls
  • Layout your design on the floor – Jennifer Rizzo created a fun gallery wall using this idea. Before you get out the hammer & nails… Layout your design on the floor to get an idea of what it will look like. It’s so much easier to move stuff around that way and play with different designs. It’s much easier on your walls as well. Click on the photo to see how beautiful her gallery wall turned out!Tips and tricks for the perfect gallery wall
  • Layer items to give more dimension – Flat is OUT! Gallery walls don’t need to to be one dimension. For my gallery wall I layered some items to give the space a little POP. I used strong adhesive glue like E-6000 to layer my different items.Tips and tricks for the perfect gallery wall
  • Add color and texture with decorative  paper – Not all frames need to be filled with photos. Using decorative papers is an inexpensive way to add color and texture. Tips and tricks for the perfect gallery wall
  • Trace your items on paper – STOP! Before you hang one single thing… Trace all of your items onto butcher paper or old paper grocery sacks. Cut them out and hang it on the wall just like your perfect layout that you created on the floor. Ashley Hacksaw from Lil’Blue Boo shows how to use inexpensive paper and some painters tape to layout your gallery wall BEFORE you start putting holes in the wall. Once you get your layout perfect then the hanging can commence. You can even hammer or drill right on top of the paper to make sure your nails or screws are in the perfect place. Click on the photo below to see how Ashley’s cool gallery wall turned out!Tips and tricks for the perfect gallery wall
  • Don’t be in a rush – Take your time. If you have a hard time feeling comfortable with creating your gallery walls and feel like you need a few second opinions, do it! Lay your gallery wall out on the floor and hand your paper gallery wall up and invite a couple of trusted friends over. Let it sit at this point for a few days until you are good and ready to move on to the next step. There is no need to rush… Unless your Mother-in-Law is coming soon, then you should probably get a move on.
  • Don’t be afraid to try other methods to hang your items – We live in an amazing time when we don’t always have to put nails in our walls to create an amazing gallery wall! Have you tried using Command Strips to hang your gallery wall items? I LOVE THEM!!! I especially LOVE the Command Strip picture hanging strips that are like Velcro. They are my current obsession. Will it surprise you to know that I didn’t use a single nail or screw for my gallery wall? Not a single hole was made in the wall. (My Dad would be so proud!) Now with that said, some heavier items will need a more secure way of hanging, so follow the directions on the Command Strips and make sure to use the right tool for the job. Tips and tricks for the perfect gallery wall

The bottom line is, DONT BE AFRAID! Break the rules, do what works for you and your space. You aren’t creating Mount Rushmore, if after some time you feel the need for change, than change it. Luckily Michaels makes it so easy by creating a great starting point with fun products for their four new gallery wall collections the Farmington, Catalina (that’s the one I used), Alexandria & Savannah.  Come on over to their blog the Glue String to get even more inspiration on how to create the perfect gallery wall for your home.

Disclaimer // I am thrilled to be a Michaels Maker and to have a chance to share with you some of my favorite Michaels projects. As a Michaels Maker they do provide the product for me to create with each month. However, I will only share what I truly love and use in my typical day-to-day life.

  • « Go to Previous Page
  • Page 1
  • Interim pages omitted …
  • Page 3
  • Page 4
  • Page 5
  • Page 6
  • Page 7
  • Interim pages omitted …
  • Page 9
  • Go to Next Page »

Primary Sidebar

Heather from Whipperberry
Hello... my name is Heather and I'm the creator of WhipperBerry a creative lifestyle blog packed full of great recipes and creative ideas for your home and family. I find I am happiest when I'm living a creative life and I love to share what I've been up to along the way... Come explore, my hope is that you'll leave inspired!

Footer

  • Privacy Policy
  • Crafts
  • Food
  • Gifts
  • Holidays
  • Home
  • Mom Life
  • Recipes
  • Travel

Copyright © 2026 · Seasoned Pro