• Skip to primary navigation
  • Skip to main content
  • Skip to primary sidebar
  • Skip to footer

Whipperberry

WhipperBerry • Your Home For Creative Inspiration

  • Home
  • Recipes
    • Starters
    • Easy Weeknight Dinners
    • Main Dish
    • Salads
    • Side Dish
    • Soups & Stews
    • Desserts
    • Breakfast
    • Miscellaneous
  • Tutorials
    • Creative Crafts
    • DIY Decor
    • Fabric Crafts
    • Food How-To
    • Jewlery
    • Paint Projects
    • Paper Art
    • Party Styling
    • Photography and Graphic Design
    • Silhouette
  • Holidays
    • Easter
    • Mother’s Day
    • Father’s Day
    • 4th of July
    • Halloween
    • Thanksgiving
    • Christmas
    • Valentine’s Day
  • Gift Ideas
    • Gifts For Everyone
    • Gifts for Dad
    • Mother’s day
    • For The Girls
    • For The Kids
    • Teacher Gift Ideas
    • Christmas
  • Printables
    • Holiday
    • Gift Idea
    • LDS Primary
  • Travel
  • About
    • Terms
  • Contact
  • Nav Social Menu

    • Facebook
    • Instagram
    • Pinterest
    • RSS
    • Twitter

decor

How to Decorate Your Home Office with Pictures

0 · Apr 12, 2025 · Leave a Comment

Let’s be honest—when your workspace feels blah, your motivation tends to follow suit. That’s why decorating your home office isn’t just about making it “look nice”—it’s about designing a space that sparks joy, inspires focus, and makes those long work-from-home days feel a little more delightful. With so many of us now working remotely, creating a beautiful, functional remote office space has never been more important.

One of my favorite ways to bring personality and charm to a home office? Pictures! Yep, thoughtfully chosen home office pictures can completely transform your space. Whether it’s a peaceful landscape, bold abstract art, or a favorite quote that lifts your spirits, the right images make a big impact. Choosing and arranging home office images, like those available on licensed content platforms like Depositphotos and creative marketplaces like Etsy.

Let’s explore some creative ways to style your space with pictures and make your home office feel like you.

Are pictures good decor for a home office?

Pictures are an excellent way to personalize your home office and reflect your style and values. The right home office images can create a calming or motivating atmosphere that boosts productivity. Visuals are particularly impactful in a remote office space, where you may spend long hours. Carefully chosen pictures can brighten the room and be a daily source of inspiration and creativity.

Overall, images should align with the overall aesthetic of your at-home office. Whether you prefer abstract art, nature scenes, or inspirational quotes, visuals can contribute to an environment conducive to focus and well-being.

Decorate Your Home Office

What images can you use to decorate your home office?

When selecting home office images, it’s essential to consider both the aesthetic and functional aspects. Here are some categories of images to consider:

Nature and landscape

Nature images—whether it’s a beach, forest, mountain, or desert—can be calming and are known for reducing stress and promoting a peaceful, focused mindset. If you’re looking to create a serene and motivating remote office space, consider choosing home office images of natural landscapes. These visuals are ideal if you need a tranquil workspace to concentrate and avoid feeling overwhelmed by the demands of work. You can check out aesthetically pleasing prints on Not On The High Street.

Abstract art

Abstract artwork is an excellent choice if you want to add a bit of energy and creativity to your home office. This type of art often features bold colors and unique patterns that can spark inspiration and new ideas. For a job where creativity is key—such as design, writing, or marketing—abstract art in the office space can be excellent for adding a personal touch while fostering innovative thinking.

Motivational quotes

For many, a source of encouragement in their home office is essential, and motivational quotes or affirmations are constant reminders to stay focused and positive. If you’re working in a remote office space, these reminders can help you feel energized and aligned with your goals, especially when motivation is hard to find. Whether you prefer a minimalist, modern design or a vintage-style frame, incorporating quotes into your office decor is an easy way to personalize your workspace.

Personal photos

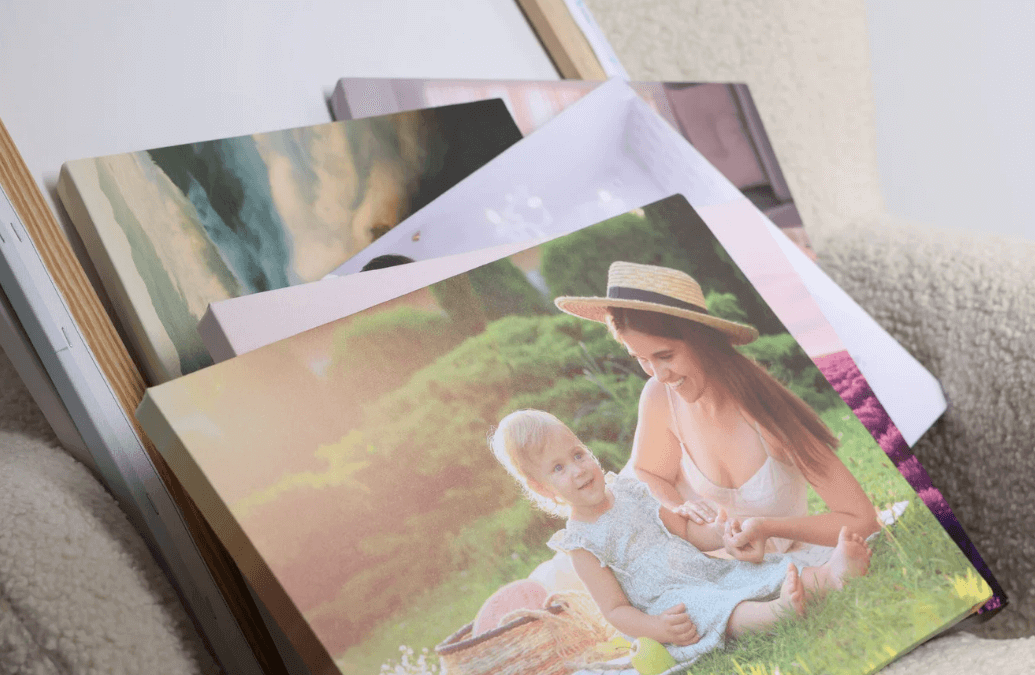
Adding personal photos of family, friends, or special memories to your home & office is a go-to way to create a more comfortable and relatable atmosphere. These pictures can evoke positive emotions and make you feel more connected to your space.

Personal images are especially beneficial if you experience occasional isolation, as they remind you of your support system and can create a more relaxed environment that encourages productivity.

Professional artwork

If you work in an industry where professionalism is key—such as law, finance, or corporate settings—professional artwork can convey sophistication and credibility in your remote office space. Choose artwork that reflects your field of work, e.g., detailed illustrations of historic courthouses, abstract designs inspired by financial graphs, or sleek, modern imagery symbolizing innovation.

Incorporating home office pictures that resonate with your career aspirations can also reinforce your professional image and commitment to excellence.

Decorate Your Home Office with Pictures

How to Decorate Your Home & Office with Chosen Visuals

Once you’ve selected your go-to home office pictures, it’s time to place them strategically within your interior. Here are some tips to help you decorate effectively:

1. Create a focal point

A focal point anchors your home office design, creating visual intrigue and functionality. This can be a large, bold piece of art placed above your desk or on the wall directly behind you. This focal point will naturally draw the eye and set the tone for the rest of the room.

Consider these tips:

  • Select a prominent wall visible from your workspace;
  • Choose art that complements your office theme;
  • Experiment with size and scale for impact;
  • Incorporate lighting to enhance appeal.

2. Mix sizes and frames

To avoid a monotonous look, mix different sizes and types of frames for your home office pictures. This will create depth and visual interest, making your workspace feel dynamic.

Consider the following ideas:

  • Combine large statement pieces with smaller accents;
  • Vary frame materials and colors;
  • Arrange asymmetrical groupings;
  • Incorporate unique shapes.

3. Balance your decor

Balancing decor in your home office creates a harmonious, productive environment. To maintain a cohesive look, consider arranging your home office images in a symmetrical or grid-like fashion:

  • Group similar themes or colors;
  • Use odd-numbered arrangements;
  • Create symmetry with paired items;
  • Distribute visual weight evenly across walls.

Decorating Your Home Office with Pictures

4. Consider lighting

Lighting dramatically transforms your home office picture displays, enhancing visual appeal and ambiance. Natural light is ideal for showcasing your pictures, but you can also use spotlights or track lighting to focus attention on specific visuals.

Consider these strategies:

  • Use smart bulbs to customize color temperature;
  • Add wall sconces for subtle, directed illumination;
  • Experiment with backlit frames for dramatic effects;
  • Incorporate dimmers for mood control.

5. Stay organized

While it may be tempting to cover every home office wall with pictures, it’s essential to keep your space organized and uncluttered. Select a few key visuals that resonate with you and focus on creating a design that feels cohesive rather than overwhelming:

  • Use consistent hanging systems for a professional look;
  • Regularly assess and rotate images;
  • Utilize picture ledges for flexible displays;
  • Keep hanging tools accessible.

Home Office Wall with Pictures

Conclusion

A thoughtfully decorated workspace can do wonders for your creativity, mood, and focus. Home office pictures are such an easy, impactful way to get there. Whether it’s calming nature scenes, bold abstract art, or meaningful quotes that keep you going, the right visuals help tell your story and shape a space you actually want to spend time in.

But remember, to make your home office the most effective it can be, it isn’t all down to stylish décor or photogenic setups. A truly functional workspace combines comfort, productivity, and practicality.

Start by investing in ergonomic furniture — a supportive chair and a desk at the right height can make all the difference to your posture and focus. Ensure you have adequate lighting, ideally with a mix of natural light and a good desk lamp to reduce eye strain.

Next, consider your equipment setup: a reliable computer, noise-cancelling headphones, and even a secondary monitor can greatly boost productivity. Choose tech that not only performs well but also complements your space aesthetically.

Equally important is your internet connection as there’s nothing worse than lag during a meeting or a file upload that takes forever. You may need to take time comparing local internet service providers to find a dependable provider, but a fast, stable service prevents frustration and lost time. 

To stay organized, incorporate smart storage solutions and cable management. Clutter is the enemy of focus, so use drawers, shelves, and cable clips to keep your workspace clean and distraction-free.

Finally, create an environment that supports your workflow: set clear boundaries between work and relaxation zones, introduce a few personal touches like plants or artwork for inspiration, and keep your digital workspace just as tidy as your physical one.

Just remember, less can be more. Choose pieces that resonate with you, arrange them with intention, and don’t be afraid to switch things up now and then. Your home office should be a place that supports your work and reflects your personality—and with a little creativity, you’ll have a remote office space that feels cozy, polished, and totally inspiring.


How to Create A Stunning Gallery Wall With Poster Prints

0 · Apr 10, 2025 · Leave a Comment

A gallery wall is a simple way to bring life to any room. It can turn a blank space into a personal and eye-catching display. Whether placed in a hallway, living room, or above a bed, a well-arranged gallery wall adds charm and character.

Poster prints are a popular choice because they are affordable, easy to hang, and come in many styles. Opting for professional poster printing can ensure sharp images and high-quality finishes that make each piece stand out. With the right planning, anyone can create a stylish wall that feels both personal and put together.

Choose the Right Space

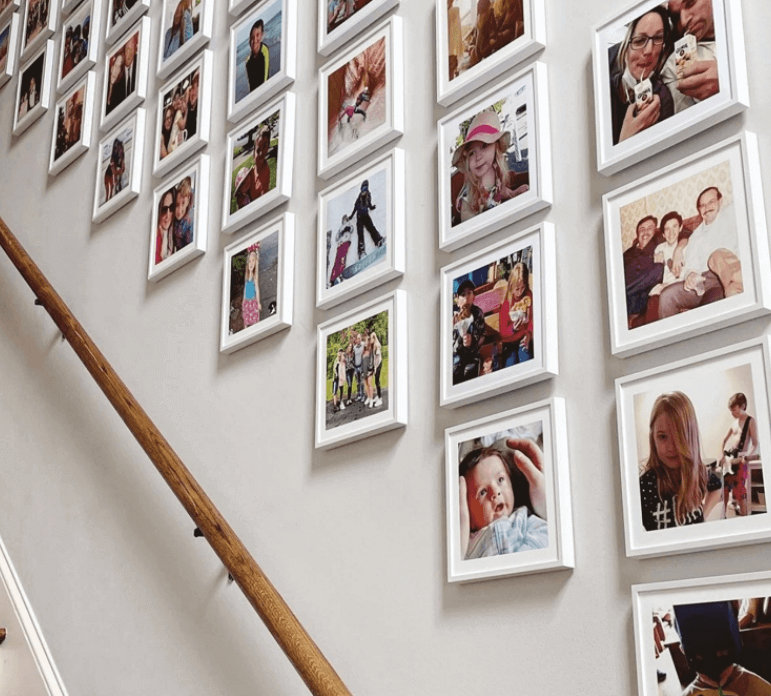
Before selecting the prints, pick the wall where the gallery will go. It could be a large empty wall with wallpaper or a small corner that needs some attention. The space should allow enough room for the prints to be arranged without feeling too crowded. Walls near staircases, behind sofas, or in entryways often work well. Consider how much natural light the area gets and whether the colors of the prints will stand out or blend in too much.

If the wall is too narrow, fewer prints or smaller sizes might be better. On a larger wall, a bigger collection with a different range of size can look more balanced. The key is to match the gallery size to the space available.

Gallery Wall

Use Poster Prints That Reflect Personality

A gallery wall should feel personal. Choose custom posters that mean something or speak to your style. This could be quotes, favorite movies, music, or illustrations that match your taste. Art doesn’t need to be expensive to be meaningful. Even simple line drawings or vintage travel posters can have a big impact when displayed thoughtfully.

There are many places to find high-quality poster prints at reasonable prices. Sites like CANVASDISCOUNT.com offer a wide variety of styles, sizes, and custom options, making it easy to find something that suits your space.

Using a mix of playful and serious pieces can show different sides of one’s personality. For example, a mix of abstract shapes and typography can create contrast that draws attention while still looking cohesive.

Decide on a Theme or Style

A gallery wall works best when it has a sense of unity. Choosing a theme or style helps tie everything together. This could be based on color, subject, or mood. For example, some people prefer black-and-white posters for a clean and modern look. Others may enjoy nature-themed prints, abstract art, or travel posters to reflect their interests.

To achieve high-quality results, especially for printed pieces, selecting the right paper is just as important as the artwork itself. Red River Paper offers premium paper options that enhance color vibrancy, detail, and texture—perfect for bringing your gallery wall to life. Whether you’re printing photography, illustrations, or digital art, the right paper can make your theme stand out with professional-level quality.

The frames can also help set the tone. Matching frames create a tidy and uniform look, while different frames add variety and a relaxed feel. A common approach is to use the same frame color but mix up the styles slightly for a balanced appearance.

Plan the Layout Before Hanging

Arranging the layout ahead of time saves effort and prevents mistakes. Start by laying the prints on the floor and testing out different arrangements. Try placing the largest poster in the center and building around it. Another method is to start from one side and move outward.

Leave equal spacing between each frame—usually two to three inches looks neat. Too much space can make the arrangement feel disconnected, while too little may seem crowded. A measuring tape or ruler can help keep everything even.

To take it a step further, cut out paper templates in the same size as your custom posters and tape them to the wall. This helps visualize the final look without making extra holes. Adjust the placement until it feels right.

Mix Sizes and Orientations

Using different sizes adds interest to a gallery wall. A mix of small, medium, and large posters draws the eye and creates movement. Adding both vertical and horizontal art prints also helps avoid a stiff or boxy look.

That said, balance matters. A large custom poster print can act as the anchor, while smaller ones fill in the gaps. Try to avoid placing all the big pieces on one side or all the small ones in a row. Keep stepping back to check the overall feel as the layout comes together.

Create A Gallery Wall With Poster Prints

Choose the Right Hanging Tools

Proper hanging tools make a difference in how secure and neat the wall looks. Lightweight poster prints can often be hung with adhesive strips, which leave no damage and are easy to adjust. Heavier frames may need nails or wall hooks.

Leveling tools help keep everything straight. Crooked frames, even slightly, can distract from the overall design. Take time during this step to get everything just right—it’s worth it in the end.

Don’t Be Afraid to Adjust

Creating a gallery wall is not a one-time task. Tastes may change, and new prints might be added over time. The wall can grow or shift as needed. Being open to small changes can help keep the space feeling fresh.

Some people like to swap out art posters each season or year. This keeps the wall from feeling static. Others may rotate prints to match events, like birthdays or holidays. Either way, flexibility keeps the space exciting.

Final Touches of Your Gallery Wall

Once the prints are up and everything looks right, take a moment to step back and enjoy the result. A good gallery wall can completely change how a space feels. It adds warmth, shows personality, and becomes a talking point for guests.

Lighting can also enhance the display. If the wall is in a darker area, consider adding a picture light or nearby lamp. This can bring out the details in each print and give the wall more depth.


Simple Ways to Make Your Study Area Feel Inspiring

0 · Feb 24, 2025 · Leave a Comment

A cluttered, dull study space can make focusing on work feel like a chore. But imagine sitting down in a space that feels fresh, motivating, and designed just for you. It doesn’t have to cost a lot of money to make your study area feel inspiring. Just a few small, well-thought-out changes can help you be more creative and focus better. Consider these tips:

A Space That Sparks Productivity

Your study space should help you concentrate and keep other things from getting in the way. A clean, well-organized area is essential for getting work done. Start by clearing off your desk. Get rid of papers, old notes, and other things that aren’t useful for your work.

Having your space in order helps clear your mind, which makes it easier to focus. It’s also very important to have good lights to keep your energy up. Natural light is best, but if you can’t get it, a warm work lamp that lets you change the brightness can really help.

Comfort is another important thing. A soft couch might look like a good place to study, but a supportive chair and a desk in the right place will help your balance and keep you from getting tired. Adding a footrest or using a laptop stand are small changes that can make long study sessions more comfy.

Adding personal touches to your study space can also make it a great place to get ideas. Motivating words, plants, or even a vision board can help you remember your goals and stay on track. If you study in a place that shows who you are, it will feel less like a chore and more like a fun routine that you enjoy.

Make Your Study Area Feel Inspiring

Personalization for Inspiration

Your study room should feel like it’s just for you. You can really change how you feel while you’re learning by adding designs, colors, and that are unique to you. Soft pastels can make a space feel calm, while bright colors can give it life and help you concentrate. You could use pretty work organizers, colored paper, or a soft throw blanket to make small changes.

Incorporating scents can also enhance your environment. Lavender and chamomile promote relaxation, while citrus or peppermint scents can boost alertness. A scented candle or an essential oil diffuser can subtly improve your study atmosphere.

Music and background sounds are also powerful tools for setting the mood. Lo-fi beats, instrumental music, or even nature sounds can help you focus. The key is to find what works for you—some students thrive in complete silence, while others benefit from ambient noise.

Even the way you arrange your study space affects your mindset. Facing your desk toward a window can give you a refreshing view, while a well-placed mirror can make a small space feel larger. The goal is to create a setup that feels welcoming and encourages you to stay on task.

The Role of a Tidy and Functional Setup

A cluttered workspace can lead to a cluttered mind. Keeping your study area clean doesn’t mean getting rid of everything; it just means setting it up in a way that makes studying easy and fun. A simple method for keeping track of books, papers, and supplies can keep you from getting sidetracked and wasting time looking for things..

Storage solutions like shelves, file organizers, and drawer dividers can keep everything in its place. If space is limited, vertical storage — such as wall-mounted shelves or pegboards — can be a lifesaver. A small bulletin board or a whiteboard can also help keep track of deadlines, reminders, and motivational quotes.

For students with demanding workloads, staying on top of assignments is crucial. If you ever need extra support with academic writing, the Papersowl website offers help for anyone who needs it. Whether you’re working on research papers or other tasks, it will assist you while maintaining a productive and inspiring learning space. Whether you’re preparing for exams or working toward a Master of Business Administration, creating a focused and inspiring study environment can make a meaningful difference in your performance.

Beyond physical organization, digital decluttering is just as important. Organizing your computer files, keeping your desktop clean, and using apps to manage assignments can make your workflow smoother. When everything is in order, your mind feels clearer, making it easier to dive into work.

Affordable and Easy Ways to Upgrade Your Study Area

​​Creating an inspiring study space doesn’t have to be expensive. Many upgrades can be done with items you already have or small budget-friendly additions. Rearranging your furniture can change the entire feel of a room without spending a dime. Placing your desk near a window for natural light or adding a small plant can instantly improve the atmosphere.

DIY projects can also add personality to your space. A homemade bulletin board, hand-painted desk accessories, or repurposed jars for storage can make your workspace both functional and stylish. Even a simple fabric or wallpaper backdrop behind your desk can give the area a fresh, new look.

Thrift stores and discount shops often have hidden gems like desk lamps, shelves, or unique decorations that can bring life to your space without breaking the bank. The key is to be creative and focus on small changes that make a big impact.

Make Your Study Area Inspiring

Make Your Study Area Feel Inspiring

Your study space plays a major role in how motivated and productive you feel. Keeping it clean, adding personal touches, and making small, careful changes can turn it into an inspiring space that helps you do well in study. 

So, why not start today? Try out a few of these simple ideas and watch your study area turn into a space where focus, creativity, and motivation thrive!

FAQ

How can I make my study space more inspiring without spending a lot of money?

You can rearrange your furniture, add natural light, or use DIY decorations like a vision board or handmade desk accessories. Even small touches like organizing your workspace or adding a plant can make a big difference.

What colors are best for a productive study area?

Soft pastels create a calming effect, while bold colors like blue and green can enhance focus and creativity. The best choice depends on your personal preferences and how different colors affect your mood.

How do I stay organized in a small study space?

Use vertical storage like shelves, pegboards, or wall-mounted organizers to maximize space. Desk organizers and drawer dividers help keep things in order, and digital tools can help you keep track of your work without all the paper.

Can background music help with studying?

Yes! Instrumental music, lo-fi beats, or nature sounds can improve focus and block out distractions. Some students prefer silence, so it’s important to find what works best for you.


How to Make Stylish Fabric Banners with the Cricut Maker

7 · Feb 26, 2018 · Leave a Comment

Forget the scissors & craft knife! I have a sure-fire way to create the most amazing graphic-driven fabric banners for your kiddos room or next event. NO sewing skills required! How cool are those fabric banners that are made out of felt? You know where I’m going with this! Come learn how to make graphic banners with the fabric without mind-numbing hand-cutting. If you want to see which is best, the Cricut or the Silhouette then read about that comparison here.

+ This post brought to you by the lovely folks at Cricut +How to Create Fabric Banners • They are easy to make with the Cricut Maker and have such impact in your room or for a party. Come learn how easy they are to make at whipperBerry.

Tools of the Trade

Having always been in LOVE with creating graphics, the idea of being able to design graphic driven projects out of fabric has always been a desire of mine. However, I don’t have the patience to sit with scissors or craft knifes to cut out my graphic elements. I was thrilled at the advent of the original Cricut back in the day. It revolutionized crafting, as we knew it, at the time. However, it just didn’t have the cutting chops for fabric. The new Cricut Maker is just as revolutionary as the first cartridge based Cricut in the Fabric world. It’s TOPS for sure!

Vintage Adventure Room

I’ve been working on a room makeover for my little guy, Gage. We created a vintage adventure room that covers everything land and sea. It’s all about adventure in this great big world of ours. I wanted to have some animals of the sea & land represented in the room. I used my Cricut Maker to make a vinyl stencil for this cute fox storage chest for his little gadgets and gizmos.

Transform a simple mini storage chest from IKEA into this cute little fox storage chest for your little ones little toys and trinkets. I used some of the @decoart chalky finish paint along with my @cricut Maker to create this fun design for my little boys room • WhipperBerry

Next, I wanted to make some sea loving creatures for some fabric banners on his wall. We LOVE Narwhals and jellyfish at our house quite a bit so, I knew I had to create something with these two ocean gems. After a little design work, I came up with these cute designs. Let's Explore the Deep Blue Banner created by WhipperBerry • A great banner idea for your little ones room.

Supplies for Fabric Banners

The next trick, making these designs into fabric banners for Gage’s room. I rummaged through my fabric stash and found some colors that would go well with the room design.

Fabric Banners • Great colors for a little boys room

Here’s the rest of the supplies you will need.

  • fabric
  • Heat n’ Bond
  • Cricut Maker
  • Cricut Rotary Cutter
  • Cricut Bonded Fabric Blade
  • Cricut Fabric Cutting Mat
  • fabric glue
  • wood dowel
  • cotton rope
  • sewing machine (optional)
  • thread (optional)

How to Create Graphic Banners with Fabric • They are easy to make with the Cricut Maker and have such impact in your room or for a party. Come learn how easy they are to make at whipperBerry.

Instructions

First, you need to create your design within Cricut Design Space. You can use either the large library of fonts that they have compiled at Cricut or, use your favorite fonts on your computer. You also have access to thousands of graphics that you can use to personalize your space or dress-up your party.

How to Prepare Graphic to Cut in Cricut Design Space

When you are working with multiply colors of fabric or paper, Cricut Design Space has some brilliant features that I really like. Instead of typing them all out I thought I would create a video for you watch that teaches you exactly how to prepare your designs to cut that really makes the cutting process so much easier. Click on the image below to watch the video.When you are working with multiply colors of fabric or paper, Cricut Design Space has some brilliant features that I really like. Instead of typing them all out I thought I would create a video for you watch that teaches you exactly how to prepare your designs to cut that really makes the cutting process so much easier.- WhipperBerry

Cutting Fabric

Now that your designs are ready to cut, it’s time to prepare your cutting mats. If you are cutting fabric, you need to make sure you are using the fabric cutting mat and the fabric rotary cutter. If you happen to have a rotary cutter that needs to be changed, here is a tutorial on how to do that. Cut your fabric to fit the cutting mat and place it on the mat.

PRO TIP • Don’t worry about cleaning the fabric cutting mat of all the fuzz & threads after you use it. It will work just fine with fuzz & threads. Attempting to clean the mat actually does more harm than good.

If you are planning on ironing your graphics onto the banners, you’ll want to iron-on the Heat n’Bond BEFORE you cut your fabric. (I use my Easy Press, which I LOVE!) In that case, you may want to use the Bonded Fabric Blade when cutting your fabric. I say that with a caveat, I found that the bonded felt that I used cut better with the rotary cutting blade.

Graphic Placement on Banners

Once you have all of your graphic element cut, you’re ready to place them on the banners. I like to layout my design onto the fabric banner first, to make sure I like the placement. That’s where the Cricut Weeding Tools come in real handy. I LOVE those tweezers!

Next, I use the Easy Press to warm the surface of the fabric banner and then lay down my graphics again quickly. Then, I cover them with the Iron-On Protective Sheet or a cotton dish towel if using a standard iron and press my graphics onto the banner according to the Heat n’ Bond directions.

3D Graphics on Banner

One really fun thing you can do when cutting graphics in this manner, you can add some little 3D elements to your design. I thought it would be fun to have my narwhal’s fin to pop out a bit to give him a little more character. When I was pressing the narwhal onto the banner, I placed the used backing of the Heat n’ Bond under the fin with the shiny side of the paper facing the fin. That would mean the it wouldn’t stick to the fabric or the paper.

Now, his cute little fin will pop right out!

Creating Banner Hanger

Now, to hand the cute banners that you just made. You need to either sew a pocket for the dowel or use fabric glue to create create the pocket. I prefer the sewing method however, if you don’t have a sewing machine, you don’t need to run out and purchase one just for this project.

You need to fold your fabric over to create a pocket large enough to feed your dowel through.

When you have the banner with the dowel ready to hang, attach the rope and hang on the wall!

How to Create Graphic Banners with Fabric • They are easy to make with the Cricut Maker and have such impact in your room or for a party. Come learn how easy they are to make at whipperBerry.

Now, I know you are going to want to save this tutorial and share it with all of your friends (wink, wink!) Here is a handy graphic to Pin…

How to Create Graphic Banners with Fabric • They are easy to make with the Cricut Maker and have such impact in your room or for a party. Come learn how easy they are to make at whipperBerry.

SaveSave

SaveSave

SaveSave

SaveSaveSaveSave

This is a sponsored conversation written by me on behalf of Cricut. The opinions and text are all mine.

SaveSave

SaveSave

SaveSave

SaveSave

SaveSave

SaveSave

  • « Go to Previous Page
  • Page 1
  • Page 2
  • Page 3
  • Page 4
  • Page 5
  • Interim pages omitted …
  • Page 9
  • Go to Next Page »

Primary Sidebar

Heather from Whipperberry
Hello... my name is Heather and I'm the creator of WhipperBerry a creative lifestyle blog packed full of great recipes and creative ideas for your home and family. I find I am happiest when I'm living a creative life and I love to share what I've been up to along the way... Come explore, my hope is that you'll leave inspired!

Footer

  • Privacy Policy
  • Crafts
  • Food
  • Gifts
  • Holidays
  • Home
  • Mom Life
  • Recipes
  • Travel

Copyright © 2026 · Seasoned Pro