• Skip to primary navigation
  • Skip to main content
  • Skip to primary sidebar
  • Skip to footer

Whipperberry

WhipperBerry • Your Home For Creative Inspiration

  • Home
  • Recipes
    • Starters
    • Easy Weeknight Dinners
    • Main Dish
    • Salads
    • Side Dish
    • Soups & Stews
    • Desserts
    • Breakfast
    • Miscellaneous
  • Tutorials
    • Creative Crafts
    • DIY Decor
    • Fabric Crafts
    • Food How-To
    • Jewlery
    • Paint Projects
    • Paper Art
    • Party Styling
    • Photography and Graphic Design
    • Silhouette
  • Holidays
    • Easter
    • Mother’s Day
    • Father’s Day
    • 4th of July
    • Halloween
    • Thanksgiving
    • Christmas
    • Valentine’s Day
  • Gift Ideas
    • Gifts For Everyone
    • Gifts for Dad
    • Mother’s day
    • For The Girls
    • For The Kids
    • Teacher Gift Ideas
    • Christmas
  • Printables
    • Holiday
    • Gift Idea
    • LDS Primary
  • Travel
  • About
    • Terms
  • Contact
  • Nav Social Menu

    • Facebook
    • Instagram
    • Pinterest
    • RSS
    • Twitter

decor

Travel-inspired Home Decor: How Flowers, Colors, and Local Traditions Can Bring Your Favorite Trip Back Home

0 · Jun 29, 2026 · Leave a Comment

Whether it was a family vacation, a girls’ getaway, or a once-in-a-lifetime adventure, travel has a way of leaving a lasting impression. The challenge comes after you’re back home, when everyday routines of school drop-offs, meal planning, laundry, and work slowly replace those unforgettable moments.

Instead of letting those memories fade, why not weave them into the place your family spends the most time: your home? Small touches like fresh flowers, meaningful colors, and traditions inspired by places you’ve visited can turn everyday spaces into reminders of the experiences that shaped you.

If Colombia is one of those special places, flower delivery to Colombia can keep the color of a Medellín market connected to the people, rituals, and rooms that made the journey matter. The colors of a Medellín flower market, the particular blue of an Aegean doorway, the smell of jasmine in a Marrakech riad – it all begins fading behind the routine of groceries, laundry, and Monday morning alarms.

But here’s what I’ve noticed: the travelers who hold onto that feeling the longest aren’t the ones with the most photos. They’re the ones who’ve woven pieces of their journeys into the spaces they actually live in. Not through generic souvenirs collecting dust on a shelf – through deliberate choices about flowers, color, texture, and ritual that transform a room into a quiet reminder of somewhere extraordinary.

This goes deeper than pinning a map on the wall. It’s about understanding why certain places made you feel alive and recreating those sensory triggers at home. Let’s break down how to do that without turning your apartment into a theme park.

Flowers as Travel Souvenir

Why Flowers Are The Most Underrated Travel Souvenir

Most travel-decor articles jump straight to textiles and vintage suitcases. They completely skip over something that cultures around the world have used for centuries to define their spaces: flowers.

Think about it. Marigolds in a Oaxacan home aren’t decoration – they’re a bridge between worlds during Día de los Muertos. Orchids on a Thai spirit house carry meaning no throw pillow can replicate. Lotus arrangements in a Vietnamese home signal something about purity and renewal that the family lives with daily.

When you bring region-specific blooms into your own home, you’re doing more than adding color. You’re importing a tiny ecosystem of meaning. And unlike a ceramic plate, flowers change – they open, they scent a room, they remind you that beauty is temporary, which is sort of the whole lesson of travel anyway.

Picking Blooms That Tell a Specific Story

Here’s a practical approach I’ve found useful:

  • Colombia: Roses, carnations, and exotic orchids. Colombia is the second-largest flower exporter in the world, and its blooms are tied to everything from Medellín’s Feria de las Flores to everyday market culture. If you fell in love with the floral traditions of Colombia, keeping fresh Colombian-grown stems in your home is one of the most direct ways to hold onto that experience.
  • Japan: Cherry blossom branches (or realistic faux versions) in a simple ceramic vessel evoke ikebana’s principle of “less is the whole point.”
  • Morocco: Orange blossom and jasmine – even in essential-oil form diffused near a tray of mint tea glasses – can reconstruct the sensory atmosphere of a riad courtyard.
  • Provence: Dried lavender bundles. Straightforward, long-lasting, and they still smell like July in Gordes three months later.
  • India: Tuberose and marigold garlands. String them along a doorway for a festival-day feeling.

The key is specificity. Don’t just grab “flowers.” Choose the exact species connected to the place you’re remembering. That specificity is what triggers the memory.

Borrowing Color Palettes From Places, Not Pinterest

Every destination has a chromatic fingerprint – a combination of colors that exists nowhere else on earth in quite the same proportion. The problem is, most people come home and try to recall those colors from memory. Memory lies. It exaggerates sunsets and desaturates everything else.

Here’s a better method: pull up your travel photos and use a free color-palette generator (Coolors and Adobe Color both work) to extract the actual hex values from your images. You’ll be surprised. That “vibrant turquoise” door in Havana? It’s probably closer to a muted teal. The “bright white” of Santorini has gray-blue undertones you didn’t consciously notice.

A Color Framework By Region

Some starting points, based on recurring palettes I’ve observed across dozens of interiors:

  • Latin America (Colombia, Mexico, Guatemala): Saturated yellows, deep terracotta, cobalt blue, papaya orange. These cultures aren’t afraid of color clashing – the clash is the harmony. Try painting one accent wall in a bold Colombian gold and pairing it with hand-painted ceramics.
  • Scandinavia: Warm whites, pale wood tones, muted sage, charcoal. The trick here is texture over color – think boucle, unfinished pine, and candlelight.
  • Southeast Asia: Emerald green, saffron, dark teak, gold leaf accents. Dense and layered, like walking through a temple.
  • Mediterranean: Whitewash, faded blue, olive green, dried-herb brown. Restraint with warmth.

Pro tip: you don’t need to repaint your whole house. A set of throw pillow covers, a ceramic vase, or even a single piece of wall art in the right palette can shift the entire emotional temperature of a room.

Local Traditions That Actually Translate To Home Rituals

This is the piece competitors almost always miss. Travel-inspired decor isn’t just visual. The most powerful way to bring a trip home is to adopt a small daily practice rooted in the culture you experienced.

Some examples that work in a typical American household:

  • The Danish concept of hygge: A dedicated “cozy corner” with a thick blanket, a warm-light lamp, and a candle. No screens allowed. This isn’t decorating – it’s redesigning how you use a space.
  • The Japanese genkan: A transitional zone at your front door where shoes come off and the outside world stays outside. Even a small bench, a shoe tray, and a single ikebana arrangement can create this threshold.
  • The Colombian flower tradition: In many Colombian homes, fresh flowers on the table aren’t reserved for special occasions – they’re a weekly constant. Adopting this practice keeps your home feeling alive and connected to a culture that treats flowers as an essential, not a luxury. Start with roses, carnations, or orchids in colors that echo the market stalls you remember.
  • The Moroccan tea ritual: A brass tray, small glasses, fresh mint, and green tea. Set it on a low table. Use it on Sundays. The objects become the decor, and the practice becomes the memory anchor.

These rituals accomplish something a gallery wall simply can’t: they engage your body and your senses, not just your eyes. When you pour tea from a Moroccan pot every weekend, your muscles remember the riad. That’s deeper than decoration.

How To Avoid the “Souvenir Shop” Effect

There’s a fine line between a home that tells travel stories and one that looks like it swallowed an airport gift shop. The difference usually comes down to three principles:

  1. Edit ruthlessly. One handwoven textile draped over a chair back says more than twelve items crammed on a bookshelf. Give each piece room to breathe.
  2. Mix eras and origins with intention. A Balinese wood carving next to a mid-century modern lamp works if they share a visual quality – warmth, simplicity, organic lines. It fails when neither connects to anything else in the room.
  3. Anchor with living elements. Fresh flowers, potted plants from climate-similar regions, and natural materials (rattan, clay, raw linen) prevent a space from feeling like a museum. They signal that someone actually lives here, among these memories.

One interior designer I spoke with put it perfectly: “The goal isn’t to recreate Bali in Brooklyn. It’s to capture the feeling of a slower morning in Ubud and engineer it into your Tuesday.”

Putting It All Together – Room by Room

Entryway

Set the tone immediately. A small bench (Japanese genkan-style), a potted fern, and a woven basket for keys sourced from your last trip. This says: a traveler lives here.

Living Room

This is where your color palette and textiles do their heaviest lifting. Choose one region’s palette as your foundation, then layer in pieces from other trips as accents. A Colombian-inspired arrangement of roses and exotic greenery on the coffee table can serve as the room’s living centerpiece – more impactful than any print on the wall.

Kitchen or Dining Area

Ceramics, spice jars, and the ritual objects – your Moroccan tea set, your Portuguese tile trivet, your hand-thrown bowls from a pottery village in Oaxaca. These items earn their place by being used, not displayed.

Travel-inspired Home Decor

Bedroom

Keep it calm. A single scent (lavender, sandalwood, whatever unlocks a specific memory), one textile, muted tones. The bedroom isn’t for stimulation – it’s for the quiet, contented feeling you had on the best night of your trip.

Your Home As A Living Travel Journal

The best travel-inspired homes I’ve seen don’t look “themed.” They look layered – accumulated over years, evolving with each trip, mixing handmade ceramics from Portugal with farmer’s-market flowers from down the street. What ties it all together is intentionality.

Start small. Choose one trip that changed how you see the world. Identify the colors, scents, flowers, and daily rhythms that defined it. Then bring one or two of those elements home – not as trophies, but as living pieces of a life shaped by curiosity.

If a particular region’s floral culture caught your attention – say, Colombia’s extraordinary tradition of growing and gifting flowers as part of everyday life – keep that memory present through a weekly vase, a market-inspired palette, or a small ritual you repeat at home.

Because the point of travel was never to leave and come back unchanged. It was to bring something back that makes even an ordinary Tuesday feel a little more like that perfect afternoon abroad.

After all, the best vacations don’t just leave us with photos. They inspire the way we live, gather, and create a home where every room tells a story.

Change Your Photos, Not Your Walls: 5 Flexible Decor Ideas for Families

0 · Mar 20, 2026 · Leave a Comment

We’ve all been there. It’s your living room, and you see the big, empty wall screaming for some family photos. You’ve got a bunch of amazing photos and a hammer in your hand to make the first hole.

For some reason, however, you can’t seem to do it. You are nervous about getting the nails in the wrong spots. You are paralyzed by the thought of the gallery wall being crooked. You fear you will want to change it again next year after you do a new family portrait session.

You have just found yourself in the world of decor paralysis. Most busy moms and renters want to keep their security deposits, and the idea of so many permanent holes in their pristine drywall is a real fear.

The anxiety of committing to a wall arrangement can leave photos of children, pets, and vacations stuck in the phone, forever.With flexible decor, there is no need to choose between empty walls and drywall riddled with holes.

Seasonal rotational display methods keep homes feeling new and facilitate showcasing recent memories, all without the need to make permanent nail and hammer decisions. These are five decor ideas that allow families to easily change decor.

decor ideas

1. Embrace Removable Photo Tiles

When instant home decor gratification is needed, removable photo tiles are a game changer. These photo blocks with a lightweight adhesive back can stick to your drywall without damaging it, and can be pressed on and pulled off an unlimited number of times.

With the ability to easily update decor seasonally, and for families living in rentals where no nails can be used, this is the ideal solution. It takes less than ten minutes to make an evenly spaced grid in your hallway. If one is unexpectedly too high, it can be peeled and stuck back on.

They provide a fantastic modern look. The sleek edges allow your walls to look clean without the bulk of traditional wooden frames. If you want to learn about the brand visual for your art and photography online and want to keep your design cohesive with your space, integrating your wallpics with your brand or family aesthetic will work seamlessly. It will take the stress out of interior design.

2. Design a Clip-and-Cable Display

For a more rustic, laid-back look clip-and-cable displays work great. This technique uses a length of twine, a slim metal wire, or a cord and crosses a section of wall. Then mini clothespins or metal clips can be used to secure a few of your favorite prints.

This is a great option for imperfect, everyday photographs. If you got a funny, candid picture of your child with spaghetti, clip it up! If your oldest child painted a great watercolor and it came home from school, clip it right up! It will make your wall a living scrapbook of the daily family life and will make it look alive.

You only require two tiny anchor points for hanging the wire, and you do not even need to level separate frames to get the look you are going for. If you are interested in how flexible displays can help narrate your family’s story at home and help with your personal brand, visit the guides for artists and photographers to shine online. Adopting these ideas for displays is not only about enhancing the aesthetic appeal of your space, but it also makes your most cherished memories shareable, and accessible, from anywhere. It’s also quick to update. With the display, you are free to change the prints frequently. Simply unclip the photos for the memories you would like to replace, and clip in the new ones whenever you get new 4×6 photos printed.

Read More: https://www.wallpics.com/blogs/news/boosting-your-brands-visibility-with-youtube-a-guide-for-artists-and-photographers

3. Create a Magnetic Photo Board

For more dynamic areas, such as a child’s play space or a home office, an excellent option is to use magnetic photo boards. Instead of hanging pictures separately, you can create a large, decorative magnetic board as a whole. After this, the space will act as your canvas.Consider using decorative magnets to overlap pictures and create a display that resembles a mood board. This display style creates unique texture and visual excitement to a room and increases interactivity and engagement from children. Each month you can consider a small family project of selecting pictures to add to the display board of family vacations or family pets.

Magnetic boards can range from shiny stainless steel to rustic galvanized metals. There are options that are covered in fabric making the back of the board invisible. These boards are great because you can match them to your furniture while keeping your photos from any thumbtack holes or sticky tape stains.

4. Install Picture Ledge Shelving

If you are fond of the style of ornate and heavy picture frames and complex gallery walls picture ledges are perfect for you. Picture ledges are designed to hold frames and have a small front lip that keeps the frames from sliding off the front.

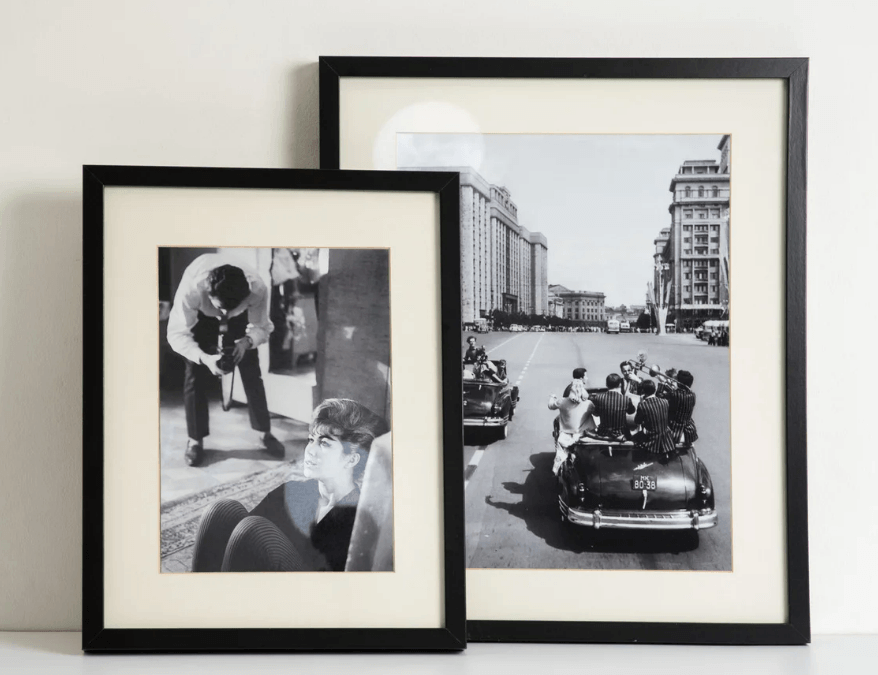
If you add one or two long ledges in your living room, you will create a permanent stage for a revolving cast of characters. You can arrange some of your framed photos of different sizes against the wall, overlapping them for a casual but professional style. When autumn comes, you can change your bright summer beach photos for warm, autumn family portraits.

You can get picture ledges to add some narrative to your display. This works for those who want a home that reflects their changing family and their creative spirit. In addition to your framed images, you could place a small trailing plant, a favorite hardback book, or a little wooden sign for some extra character. This style reflects how artists and art buyers track interest over time, gauging popularity based on what is loved. Each time you change or add something to your photo ledge, you get a living, quantifiable expression of your family’s style.

Read Also: https://www.wallpics.com/blogs/news/measuring-success-key-email-marketing-metrics-for-artists-and-art-sellers

5. Blend in Digital Gallery Frames

Flexible decor is probably best exemplified by the major breakthroughs in the world of digital frames. Gone are the days of bulky digital frames with low-res displays. Today’s digital gallery frames are smart, high-grade products that look like matted photographs and feature anti-glare technology and high-end wood or metal bezels.

Imagine mixing a large digital frame into your gallery wall. It can offer limitless creative rotation, as you can upload thousands of images to it directly from your phone via Wi-Fi. You can schedule it to change images every few hours, or you can set it to show one stunning family portrait all week.

This is an optimum solution for the thousands of photos we take that may never be printed. By placing a high-end digital frame in a picture ledge or as the focal point of your changeable decor, you finally use all of the photos that live on your device, rather than the thousands of images you never printed. It alleviates all of the guilt of leaving those marvelous photos in the cloud where they’re virtually inaccessible.

framed photos

3 Quick Photography Tips for a Cohesive Look

Changing the photos on your display is great, but frequent changes can make your display look messy. Here are a few tips to make your gallery look cohesive:

1. Go Completely Black and White

If your photos are colorful and have different lighting and background, you can put on a black and white filter to make your photos look cohesive. Black and white photos are classic and elegant. Most galleries have black and white to add a level of sophistication.

2. Chase the Natural Light

Whenever you are taking photos indoors, try to make sure your family is positioned so that they are in front of a window, especially if they are taking photos in the day. Photos taken in daylight look so much better than photos taken with indoors. Daylight photos look better and of higher quality.

3. Use Consistent White Space

If you are using digital mosaic tiles or thing of a grid display picture, try to have photos with a lot of white space in them, (like a shot of your children at the beach). A wide shot is a good balance to a tight shot and to prevent the wall from looking heavy.

Bring Your Walls to Life

Decorating a home can be a stressful undertaking, but it doesn’t have to be! You can create a beautiful and personal space without needing a level set of power tools, or a degree in interior design. Stress-relieving strategies give you the flexibility to change your space however and whenever you want. Some examples include clip-and-cable systems, pretty removable tiles, and stylish picture ledges.

As your family changes and grows, and as you make new memories, your home decor should be able to do the same. So put the hammer and the power tool down. The time has come to open your phone and stick stunning photos on your walls!

Best Custom Canvas Prints Online: Create Your Own Masterpiece in Minutes

0 · Feb 25, 2026 · Leave a Comment

There is something special about seeing a favorite photo displayed as beautiful wall art. A family vacation, a wedding moment, or even a simple snapshot from your phone can become the centerpiece of a room with the right print. Thanks to modern digital printing, you no longer need an art studio or design experience to create something that looks professionally made.

Today, custom canvas prints make it easy to turn everyday memories into meaningful home décor in just minutes. Whether you love clean gallery walls or cozy, layered spaces, canvas art adds warmth, texture, and personality to your home. By understanding how canvas printing works and what to look for when ordering, you can confidently create a piece that feels both timeless and uniquely yours.

prints on canvas

The Evolution of Canvas as an Art Medium

From Renaissance Origins to Modern Printing

Canvas became a foundational artistic surface during the 14th-century Renaissance, gradually replacing rigid wooden panels thanks to its portability and flexibility. Masters like Leonardo da Vinci and Michelangelo embraced it for larger, more transportable compositions. Early canvases were woven from hemp, though cotton and linen eventually took over as preferred materials for their superior stretchability. Craftsmen learned to prime surfaces with gesso—a chalky compound—that prevented oils from degrading the fabric beneath.

By the 1840s, early photographic processes like cyanotype made image transfer onto canvas possible for the first time, and offset lithography by the late 19th century opened the door to mass reproduction.

Key Innovations in Canvas Reproduction

The most transformative development came in the late 1980s with giclée printing—a high-resolution inkjet technique that uses pigment-based inks to reproduce imagery with remarkable color fidelity. The term derives from the French word for “spray,” a nod to its precise application method. Galleries adopted giclée widely because the reproductions could be nearly indistinguishable from originals. Since then, techniques including dye sublimation and UV printing have expanded what’s possible, producing vibrant, fade-resistant results across a wide range of finishes and materials.

Why Choose Canvas Prints for Home and Office Decor

Canvas offers a compelling combination of durability, aesthetics, and value. Archival-quality inks resist fading for 75 years or more under normal conditions, while the textured surface adds a painterly depth that framed prints behind glass simply can’t match. Canvas works equally well for photographs, panoramic landscapes, and digital artwork, and it scales from compact 8×10-inch pieces all the way to dramatic oversized wraps.

A family vacation photo printed on a 24×36-inch canvas, for instance, can anchor an entire living room—serving as a frameless, ready-to-hang focal point that carries real emotional weight without taking up a single inch of shelf space.

Step-by-Step Guide to Creating Your Canvas Print Online

Selecting and Preparing Your Image

Start with a high-resolution file—300 DPI at minimum—to ensure sharpness at larger sizes. Free editing tools make it easy to crop, adjust brightness, and refine composition before uploading. Applying the rule of thirds helps create visual balance, while converting to black and white can lend a timeless elegance to portraits and landscapes alike.

The Online Creation Process

Most platforms guide users through a straightforward workflow: upload your file, select dimensions and wrap style (gallery wraps fold the image around the edges for a seamless finish), then choose your material and finish. Cotton-polyester blends are a solid choice for budget-conscious buyers, while linen delivers a premium texture. Matte and satin finishes help minimize glare in brightly lit rooms. A 3D preview lets you confirm your choices before submitting—many users complete the entire process in under five minutes, including turning a pet portrait into a ready-to-ship 16×20-inch piece.

Production and Quality Assurance

Behind the scenes, canvas is stretched over kiln-dried wood frames for warp resistance, then sealed with UV-protective coatings that guard against dust and moisture. Pigment-based inks ensure color accuracy aligned with professional Pantone standards, maintaining consistency between what you see on screen and what arrives at your door.

custom canvas prints

Tips for Selecting the Best Online Canvas Print Services

When evaluating services, keep these factors in mind:

  • Print quality: Look for giclée certification or an equivalent standard for reliable color accuracy.
  • Turnaround and shipping: Reputable providers typically deliver within two to seven days; tubed shipping is preferable for large prints.
  • Material options: Linen for authenticity, cotton for affordability, PVC for outdoor use.
  • Eco-conscious practices: Sustainable inks and responsibly sourced materials are a good indicator of overall quality commitment.

Platforms that offer resolution-checker tools and customer photo galleries give you a realistic sense of what to expect before you buy. Prioritizing services with color calibration profiles also helps ensure that the colors on your display translate accurately onto the finished canvas.

Maintaining and Caring for Your Canvas Masterpiece

A little care goes a long way in extending a canvas print’s lifespan. Dust gently with a microfiber cloth and avoid placing the piece in direct sunlight or in rooms where humidity regularly exceeds 60%. Hanging the canvas one to two inches from the wall encourages air circulation, which reduces moisture buildup at the back. Professional cleaning every five to ten years keeps colors looking vibrant—making canvas a genuinely heirloom-worthy investment compared to standard paper prints, and a meaningful way to preserve memories for generations to come.

Bringing Your Memories to Life on Canvas

Custom canvas prints offer more than decoration. They turn personal moments into lasting pieces of art that grow with your home and your family. With today’s easy online tools, creating meaningful wall art takes only a few steps, yet the impact can transform an entire room.

By choosing quality materials, thoughtful sizing, and a trusted service, you can design a canvas that feels polished and personal at the same time. Whether you are refreshing a gallery wall, styling a new space, or preserving a favorite memory, a well-made canvas print adds warmth, texture, and heart to your home for years to come.

The Ultimate Checklist for Perfect Christmas Light Displays

0 · Sep 10, 2025 · Leave a Comment

Want an unforgettable Christmas light display that has neighbors stopping to gawk?

Millions of homeowners have it on their Christmas wish list each year. They dream of big sparkling displays that will amaze and delight families and friends.

Here’s the thing…

Most holiday decorators jump into the decorating season with little or no planning. The result? Explosions of tangled lights, blown fuses, and everything from no displays at all to downright disaster areas.

Yet here’s the real kicker…

According to the Consumer Product Safety Commission, over 18,000 Americans will end up in the emergency room this holiday season due to Christmas decoration related injuries. That’s 18,000 ER visits just in the US due to injuries and accidents from Christmas lights and other decorations.

The good news? We have the perfect Christmas light installation checklist to help you turn out jaw-dropping displays that keep your family safe.

What you will learn:

  • The safety plan before you even install your lights
  • Christmas light installation equipment and tools you need
  • How the pros professionally install outdoor displays
  • Safety protocols that work
  • Expert maintenance and storage tips

Safety First: What Equipment You Need

You can’t set up a safe, successful display without having the right equipment. Just as important, it’s essential that you understand how to properly use every item. Professional christmas light installation in Louisville knows this better than most.

Here’s the thing…

To create safe, stunning displays, you need:

  • Quality ladder with stabilizers. Those wobbly stepladders aren’t stable enough for this job.
  • Non-slip shoes. Those regular sneakers are no good for climbing on icy rooftops, either.
  • GFCI outlets. Essential for all exterior lighting safety.
  • Heavy-duty extension cords. Indoor extension cords are not designed for exterior use.
  • Light clips and mounting hardware. Never use nails or staples for securing lights.

Professional Christmas light installation companies spend a lot of money on training and buying top-notch equipment because they know that safety and quality go hand in hand.

Christmas Light Displays

The Pro Install Process: DIY or Hire a Professional

Ready to learn how the pros design and set up those picture-perfect displays?

It’s a tried-and-true process that eliminates a lot of the guesswork. You can use the same method.

Here’s how it works:

  1. Start from the top and work down. Begin with rooflines, then work your way down.
  2. Follow the 3-to-1 ladder rule. For every 3 feet of height, move ladder base one foot from the wall.
  3. Test everything before installation. You never want to be up on a ladder with a dead bulb and no way to test it.
  4. Install GFCI protection on all electrical connections. These special outlets shut off power if moisture is detected.
  5. Work slowly and carefully. Rushing leads to accidents.

Here’s some perspective…

Professional Christmas light installation services have seen demand increase by 20% in the last five years. Professional companies like Elite Christmas Light Installation have an easy answer as to why. Demand has increased because more and more people are learning that proper installation requires training and the right equipment.

Perfect Christmas Light Displays

Key Safety Protocols to Follow

Safety is more than having the right tools. Safety is following proven procedures.

Here are some you can never overlook:

  • Never work alone when on ladders. Always have someone spot you from the ground.
  • Check the weather forecast. Wet and icy conditions are incredibly dangerous.
  • Inspect all electrical connections before you install. Make sure every connection is secure and moisture-proof.
  • Don’t overload your electrical circuits. Most circuits safely handle 15-20 amps of power.

Fun fact…

65% of severe injuries involving Christmas light installation involves a ladder or roof fall. The vast majority of these accidents can be easily prevented with proper safety protocols.

Common Installation Mistakes (And How to Avoid Them)

There are lots of rookie and even experienced DIY homeowner mistakes when it comes to Christmas light installation. Here are the big ones:

  • Mixing indoor and outdoor lights. Outdoor lights should never be used indoors or vice versa.
  • Using damaged lighting equipment. If you see any frayed cords, throw that entire strand away.
  • Improperly securing lights. Use only light clips and avoid nails and staples.
  • Ignoring manufacturer guidelines. Those little safety pamphlets that come with lights are there for a reason.

The reality is that most installation problems come from rushing or cutting corners on safety.

Power Management: Electrical Safety and Other Tips

Getting the power requirements right is key for both safety and stunning displays.

LED lights draw 80% less power than traditional incandescent bulbs. This means you can go bigger and brighter without stressing your electrical system.

Calculate your electrical load carefully and add up wattage, dividing by circuit voltage (120V) to determine amperage requirements.

Use dedicated circuits when possible. Christmas lights shouldn’t be fighting kitchen appliances for power.

Install timers and other controls to reduce overheating risks.

Remember, Christmas lights are responsible for 40% of Christmas tree fires. Proper electrical management is essential for keeping your home safe.

Checklist for Christmas Light Displays

Professional Christmas Light Installation vs. DIY

Here’s a quick reality check…

90% of Americans put up outdoor Christmas lights. The problem is, a lot of people struggle with complex installations or have safety concerns.

When to DIY

  • Single-story application
  • Simple roofline displays
  • Limited electrical requirements
  • You have the proper equipment and experience.

When to call the Pros

  • Multi-story installations
  • Complex rooflines
  • Large-scale commercial installations
  • You lack the proper equipment and training.

Professional installers have specialized equipment, insurance, and experience to help create stunning displays that avoid unnecessary risks.

Wrapping Up: Light Up the Holidays Safely

To build jaw-dropping Christmas light displays you must focus beyond just bright lights and flashy designs.

Safety planning and execution of the perfect Christmas display bring family happiness without exposing anyone to danger.

We can’t lie to you. Holiday decorating accidents cause thousands of injuries each year. Careful planning and proper equipment along with safety protocols enable you to create incredible displays which transform into lasting family traditions for years to come.

Ensure your Christmas light displays bring joy not injuries whether you handle it yourself or hire professionals.

  • « Go to Previous Page
  • Page 1
  • Page 2
  • Page 3
  • Page 4
  • Interim pages omitted …
  • Page 9
  • Go to Next Page »

Primary Sidebar

Heather from Whipperberry
Hello... my name is Heather and I'm the creator of WhipperBerry a creative lifestyle blog packed full of great recipes and creative ideas for your home and family. I find I am happiest when I'm living a creative life and I love to share what I've been up to along the way... Come explore, my hope is that you'll leave inspired!

Footer

  • Privacy Policy
  • Crafts
  • Food
  • Gifts
  • Holidays
  • Home
  • Mom Life
  • Recipes
  • Travel

Copyright © 2026 · Seasoned Pro