This post brought to you by Crisco // When I was about 14 years old, I had a wise woman in my life, her name was Mrs. Robinson, who gave me some great advice… When in the kitchen, learn how to make one thing REALLY well. If you love chocolate cake, learn how to make the best chocolate cake. If you love pies, learn how to make the best pie out there. She said that if you have one really good dessert recipe, you could catch any guy you want. LOL!! Well, I decided that I wanted to make the perfect pie. To be more specific, I wanted to learn how to make the perfect pie crust. That way I could have several more options when it came to my man catching baking skills!
I have to say, I got pretty good at it. I was always called on to make the pies in my house during the holidays and after many attempts after awhile, they turned out nice and flaky every time. Then I met my so-to-be husband and boy was she right… He loved pies. All kinds of pies… Blueberry, Peach, Cherry & Apple. I was golden… Thank you Mrs. Robinson!!
Recently, I was asked by the lovely folks at Crisco to become a Crisco Pie Partner and I was thrilled. I'm excited for two reasons… I'm excited to share some of my hard earned pie tips and tricks with you, and that I could also honor my friend Mrs. Robinson, who has since passed on by sharing her sweet advice with all of you. So here you have it… Some tricks to making Picture Perfect Pie Crust EVERY TIME thanks to Mrs. Robinson.
With the holidays here, we are all gearing up to do all kinds of holiday baking and pies are always on the list. However, many of us have taken to using store bought frozen pie crust and my friends… it's just not the same. We have been tricked into thinking that pie crust is hard to make and it's not. It's really rather easy if you follow a few basic principles. Here are my tried and true pie crust secrets…
Tip #1 // Selecting the Right Ingredients
For years the debate with pie crust has been, which fat is better… Butter, Crisco or Lard? After MANY years of making pies and trying each option myself, I hands down select Crisco shortening every time. It just seems to make the lightest, flakiest crust each time. Sometimes I will do half butter, half Crisco if I'm wanting that buttery flavor but I always use Crisco or even the butter flavored Baking Sticks. The recipe I'm using today is your simple basic pie crust using just flour, salt, Crisco and water…
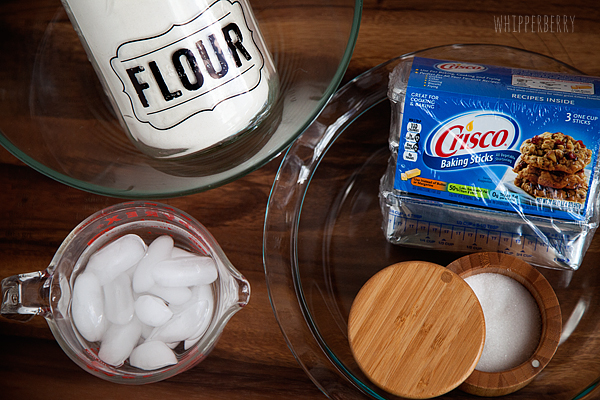
It's super simple click HERE to visit the recipe page. Can I just take a minute and thank Crisco for coming up with the Baking Sticks… I LOVE them!! No mess, no fuss and the measuring is done for you. PERFECT!!
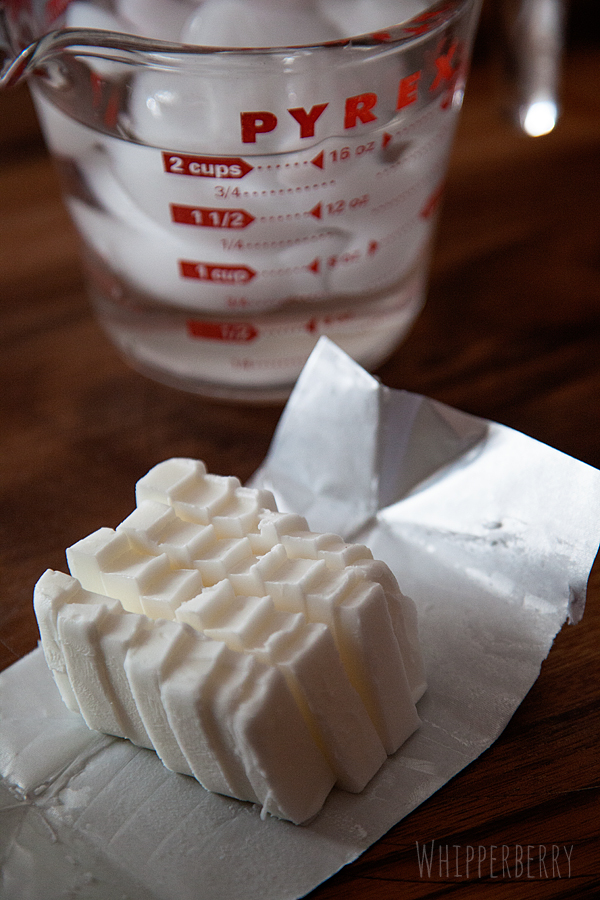
Tip #2 // Cold Ingredients are your Friend
The absolute key to making good crust is to use COLD ingredients. I place my Crisco Baking Sticks in the freezer for a few hours before hand and I use ice cold water when mixing the crust. I also try not to touch the dough too much with my warm hands. That will also cause the dough to warm up and you don't want that.
The reason why you want things to stay cold is… You want your Crisco to stay solid and in small little pieces within the crust. When those little nuggets are hit by the heat in the oven that is what makes those flaky little pockets in the crust that we love so much. Without those little gems, your crust will turn out solid and tough and not a whole lot of fun to eat.
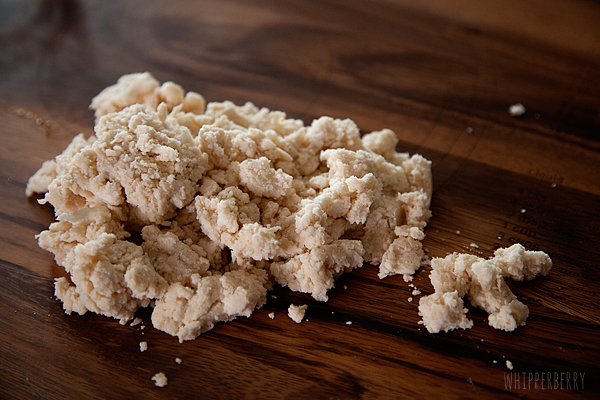
To start, I place my flour and salt in a large bowl. Then I remove the Crisco from the freezer and cut it into small pieces…
Sometimes, I even stick the Crisco back in the freezer for a few minutes after I have cut it, in order for it to chill again. Then I place my shortening into the bowl with my flour and salt. Using a pastry cutter I cut the Crisco into the flour…
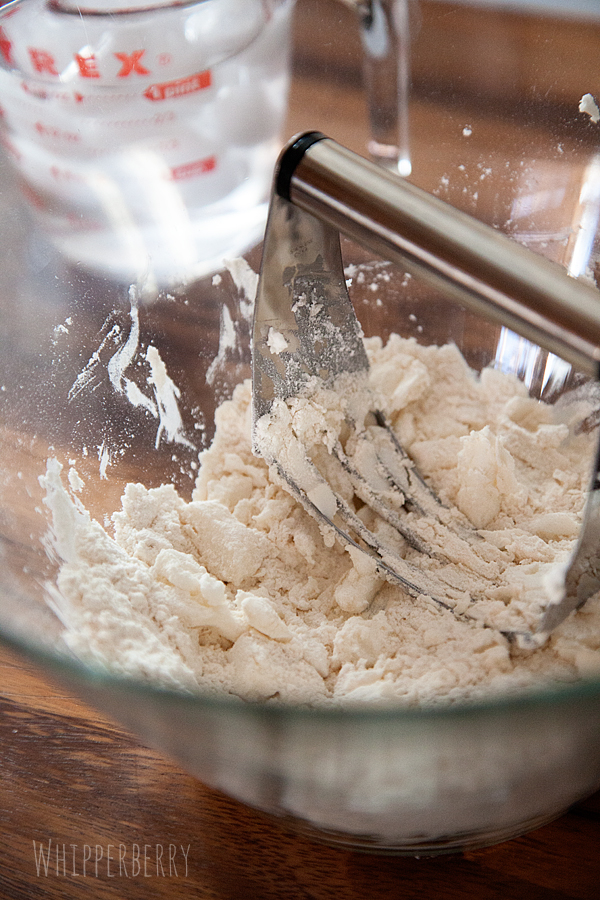
Again, you want to make sure to leave your shortening in small little pea size pieces so don't over work.
Tip #3 // The Key is a Light Hand
When it comes to working with this kind of dough. a light hand is key. Don't over mix the Crisco into the flour. Next, you will lightly fold in the cold ice water into the dough. I use a rubber spatula at this stage and gently fold in the water starting with one tablespoon and slowly mixing it just until the dough starts to come together. Again… light hand here. The more you mix the tougher the dough will be.

For this crust, the recipe calls for 3-6 tablespoons of water. I ended up using 4 but, that will depend on your environment where you are baking. You may need more, you may need less. Then I pour the loose dough out onto a clean board and this is what it should look like…
Now, this is the one step where I will quickly use my hands. I carefully pull the dough together and form it into a disk like so…

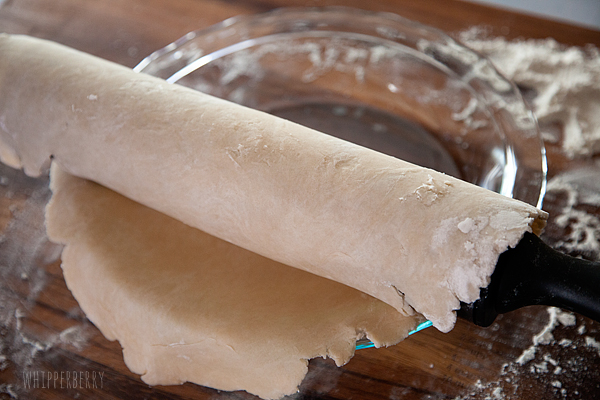
Then I wrap it in plastic wrap and place in the refrigerator for 20-30 minutes. Once it has chilled again, than I am ready to roll it out. On a clean floured surface I roll out my dough. I carefully turn the dough after a few passes with the rolling pin, to ensure that the dough doesn't stick to the board. You may even need to turn it and flour your surface a few times. But, be careful not to over flour.
Then using your rolling pin as a handy tool… roll the dough onto your pie plate…
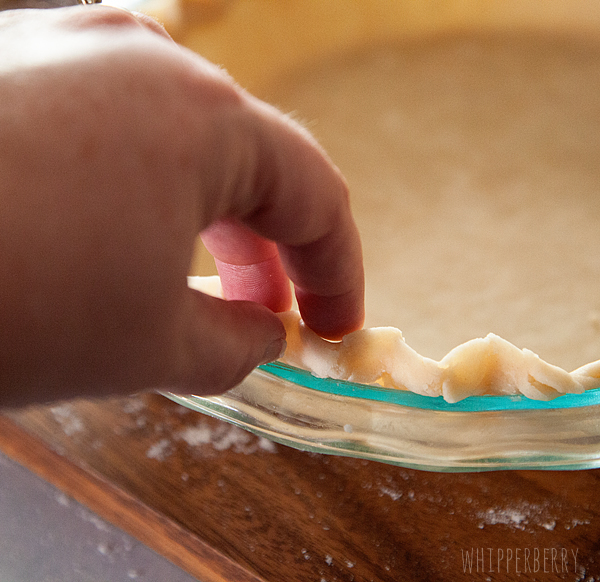
I trim my edges a bit and then crimp my edges using my two finger pinching method…
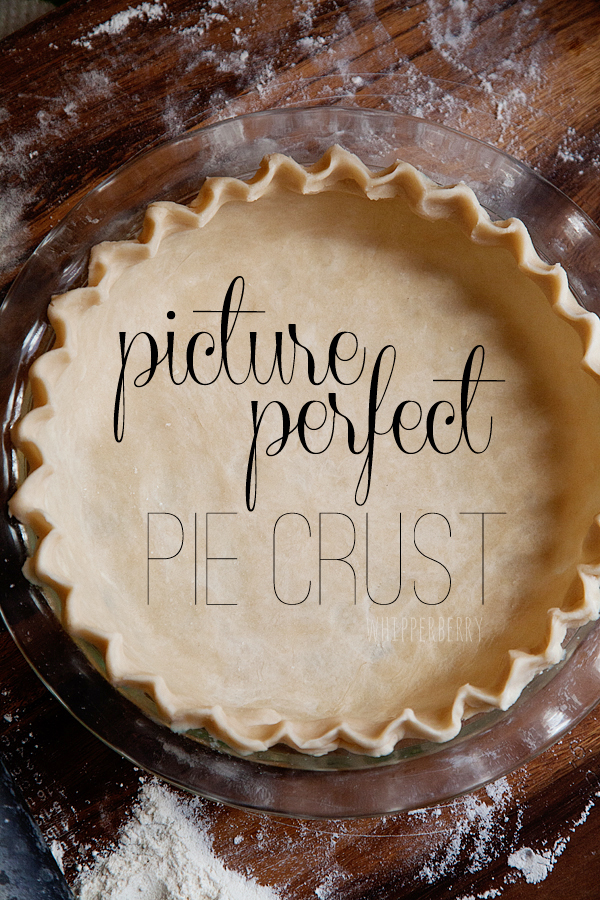
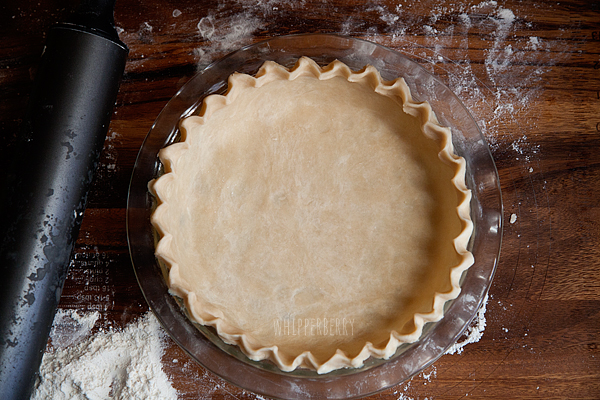
Now, you have the perfect canvas for any pie that you can dream up…
Not sure what to make? Crisco has you covered! Here are some fabulous resources for creating the perfect pie…
- You can call the Crisco Pie Hotline 1-877-FOR PIE TIPS (877-367-7438) for all kinds of around the clock PIE help this holiday season!
- Crisco has a Picture Perfect Pie Pinterest board that has all kinds of fabulous recipes.
- The Crisco Kitchen has teamed up with Michele Stuart owner of Michele's pies in Connecticut, she is over at Crisco's site sharing all kinds of fun pie tips and ideas.
- Crisco is hosting a fun Rate & Review contest for a chance to win a Michele Stuart pie prize pack. Visit the Rate & Review site to rate your favorite pie for a chance to win!
I hope Crisco and I have inspired you to pass on the freezer pie crust and try your hand in a truly homemade pie. I promise, if you follow these tips you will blow your family away with your scrumptious pies this year! In order to do just that… Crisco is giving away a fabulous Perfect Pie Prize Pack to one of you!! Here is what you will win…
- Breville Personal Pie Maker
- Babycakes Pie Pop Maker
- Sur La Table® Ruffled Pie Plates
- Lattice pie top cutter
- Pie Pop sticks
A Prize Pack valued at $200!! Follow the directions in the Rafflecopter box below to enter. This giveaway is open to those with a shipping address within the United States and will be open from November 27-January 2 with the winner announced on January 3rd.
Disclaimer // This post is sponsored by Crisco. I did receive payment for development of this post.