Vanilla salted chocolate chip cookie recipe // I don't know anyone who doesn't go weak in the knees when served a nice warm chocolate chip cookie… They are truly mom's love right on a plate. Now, there are many different recipes for this beloved cookie but I have stumbled across THE PERFECT chocolate chip cookies recipe…
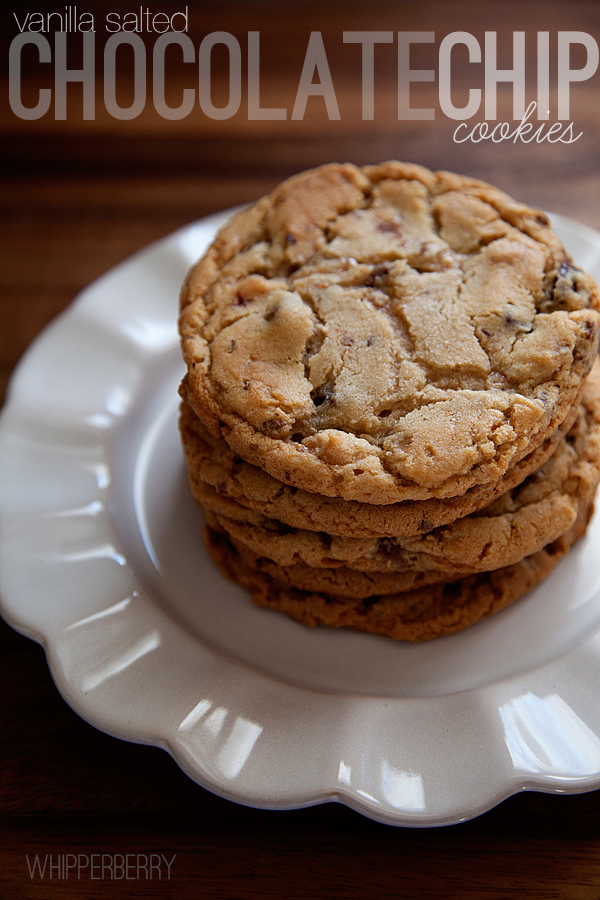
I grew up with the classic Toll House cookie recipe that my Mom has made for decades and I'm a fan, but I also felt like there was something missing with this recipe. I stumbled across a chocolate chip recipe on Tidy Mom that challenged my idea of a good chocolate chip cookie. Cheryl's recipe is the New York Times chocolate chip cookie recipe adapted from the original recipe from Jacques Torres. This recipe calls for slightly different ingredients than your traditional cookie, like the addition of baking powder and for the dough to be chilled no-less than 24 hours before baking. The big new ingredient for this recipe is the addition of a sprinkle of course sea salt on top of the cookie before baking. It's kind of like the popular salted caramel concept. I decided to take the addition of sea salt to the next level… Have you ever heard of Vanilla Sea Salt?
I discovered Vanilla Sea Salt or Vanilla Fleur de Sel, last year when I was doing research for my homemade Vanilla Extract. I ordered a bottle because I thought it would be perfect for caramels, little did I know that it would also be wonderful with these cookies. I do believe we can make our own vanilla sea salt, I'm going to work on that and see what I come up with.
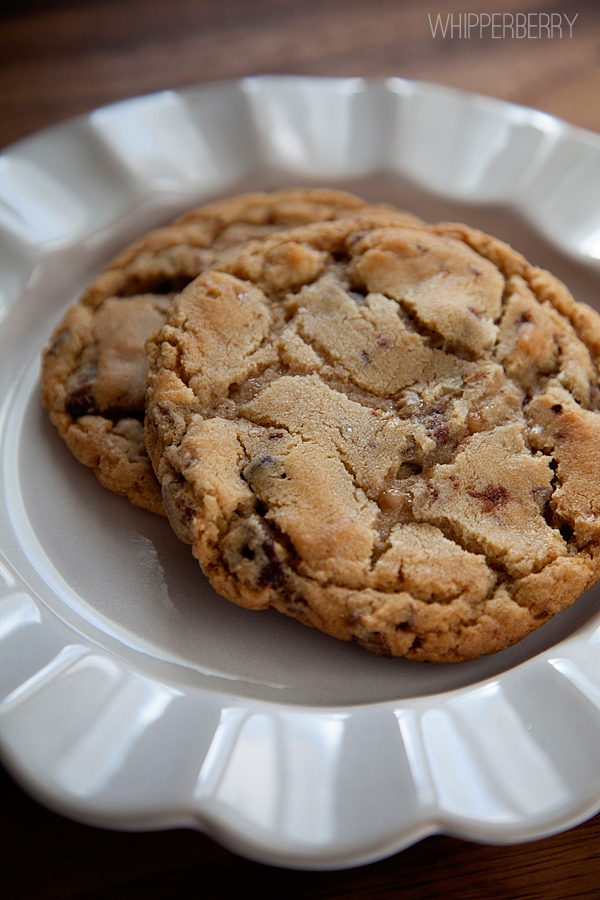
Vanilla Sea Salt Chocolate Chip Cookies
Here is my adaptation of this famous New York Times recipe…
2 (minus 2 tablespoons) cups cake flour
1 2/3 cups of All-Purpose Flour
1 1/4 teaspoon baking soda
1 1/2 teaspoon baking powder
1 1/2 teaspoon salt salt
2 1/2 sticks unsalted butter (room temp)
1 1/4 cups of brown sugar
1 cup of sugar
2 large eggs
2 teaspoons of vanilla extract
1 1/4 pounds of bittersweet chocolate
vanilla sea salt
Directions
In a large bowl mix sift the the dry ingredients together starting with the flours then adding baking soda, baking powder and salt. Set aside. In the bowl of an electric mixer cream the butter and sugars together. Mix on high for 5 minutes until the mixer is really light and fluffy. Add the eggs and vanilla and mix on high for 1 more minute. Slowly combine the butter and sugar mixer with the dry ingredients and mix just until combined. Add the chocolate and place in a large storage container. Cover the dough with plastic wrap and then place the lid on the storage container. Place in the refrigerator for at least 24 hours, 72 would be best.
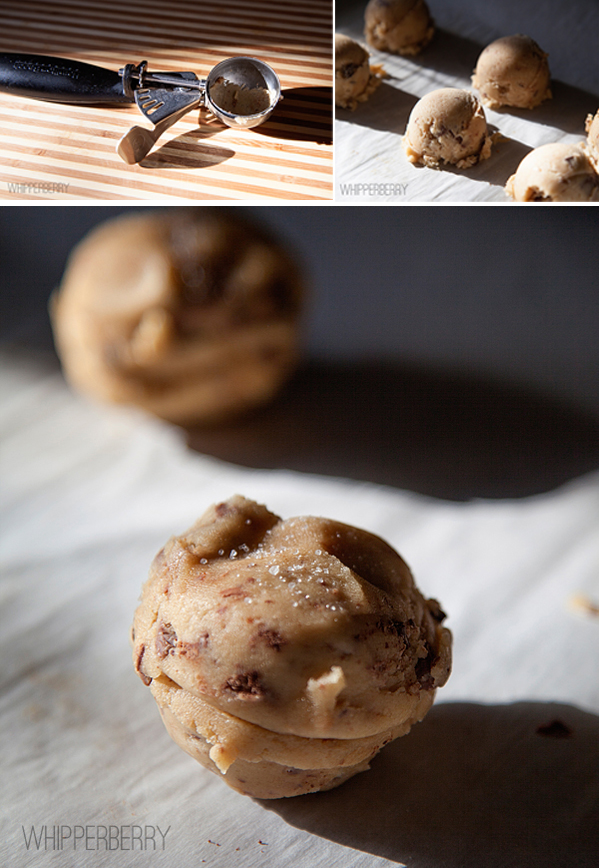
When you are ready to bake the cookies, pre-heat the oven to 350 degree. Prepare your baking sheet with parchment paper or a non-stick cooking mat. Scoop six 2 1/2 ounce dough balls. I used this one ounce scoop and placed two generous scoops together to create one large ball and then sprinkle a pinch of the vanilla sea salt on top of the dough.
Place in the oven and bake for 18-20 minutes, just until it starts to brown. When you take the cookie out of the oven it will look slightly underdone. You want them that way. That's what makes these cookies magical…
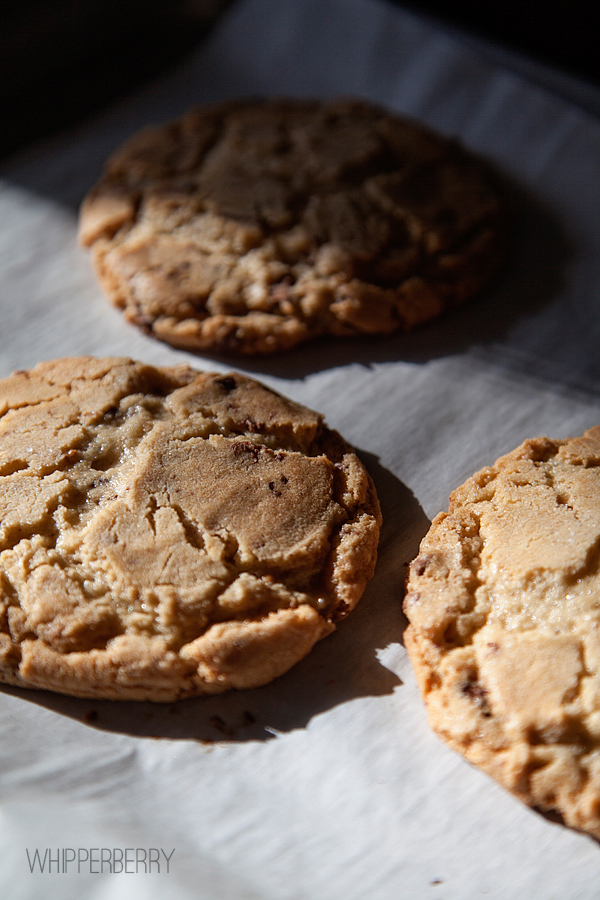
Let the cookies cool. You will find that after they have cooled a bit, these cookies have a crisp texture on the outside and are still soft and chewy on the inside.When you bite into one you will have that sweet taste of the cookie and every once in a while you will have a lovely burst of salt from that vanilla sea salt and you will be in heaven. Quite honestly this is the perfect chocolate chip cookie in my book!
What's your favorite cookie recipe? Have you found "the perfect" cookie recipe for your taste? Let us know, we would love to try some more idea!
I'm linking up with…