• Skip to primary navigation
  • Skip to main content
  • Skip to primary sidebar
  • Skip to footer

Whipperberry

WhipperBerry • Your Home For Creative Inspiration

  • Home
  • Recipes
    • Starters
    • Easy Weeknight Dinners
    • Main Dish
    • Salads
    • Side Dish
    • Soups & Stews
    • Desserts
    • Breakfast
    • Miscellaneous
  • Tutorials
    • Creative Crafts
    • DIY Decor
    • Fabric Crafts
    • Food How-To
    • Jewlery
    • Paint Projects
    • Paper Art
    • Party Styling
    • Photography and Graphic Design
    • Silhouette
  • Holidays
    • Easter
    • Mother’s Day
    • Father’s Day
    • 4th of July
    • Halloween
    • Thanksgiving
    • Christmas
    • Valentine’s Day
  • Gift Ideas
    • Gifts For Everyone
    • Gifts for Dad
    • Mother’s day
    • For The Girls
    • For The Kids
    • Teacher Gift Ideas
    • Christmas
  • Printables
    • Holiday
    • Gift Idea
    • LDS Primary
  • Travel
  • About
    • Terms
  • Contact
  • Nav Social Menu

    • Facebook
    • Instagram
    • Pinterest
    • RSS
    • Twitter

Main Dish

Cold and Flu Rescue Kit

49 · Oct 29, 2018 · 1 Comment

This post is brought to you by Ball® Fresh Preserving Products by Newell Brands

As much as we hate to admit it, cold and flu season is on its way. There is nothing more miserable than one of those lousy winter colds. What’s almost just as bad is watching someone you care for dealing with a cold or, Heaven forbid, the flu! I’m always looking for ways to help cheer them up and let them know that we love them and hope for their better health. That’s when I came up with this idea for a Cold and Flu Rescue Kit to share with those loved ones that are suffering. 

As much as we hate to admit it, cold and flu season is on its way. There is nothing more miserable than one of those lousy winter colds. What’s almost just as bad is watching someone you care for dealing with a cold or, Heaven forbid, the flu! I’m always looking for ways to help cheer them up and let them know that we love them and hope for their better health. That’s when I came up with this idea for a Cold and Flu Rescue Kit to share with those loved ones that are suffering. • WhipperBerry

There is just something special when someone takes the time to put together a simple little gift to let you know that they care when you are feeling down in the dumps. I have been on both ends of this, and it is never taken for granted in my books. So, if you have someone in your life needing a little TLC, I have the ticket for you. 

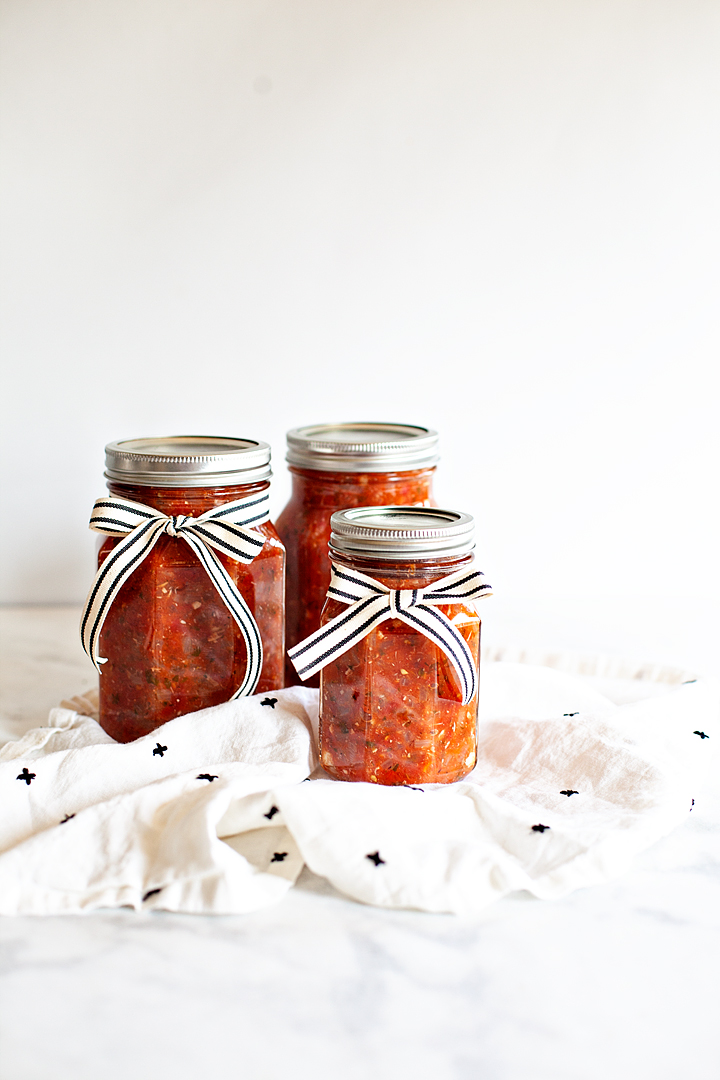
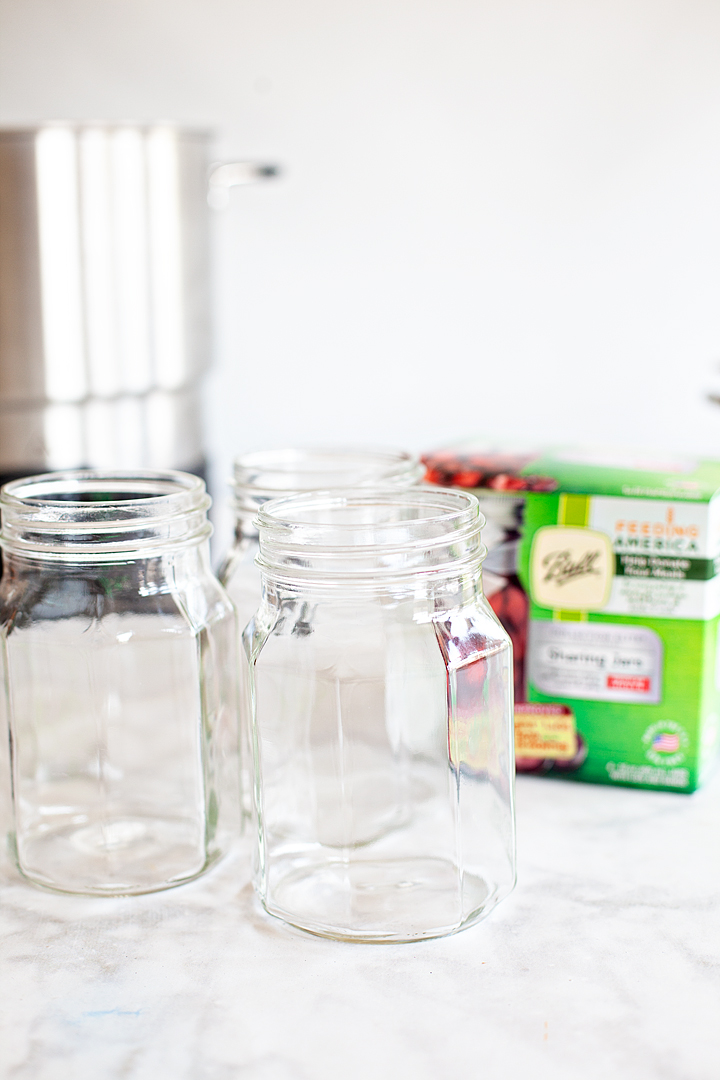
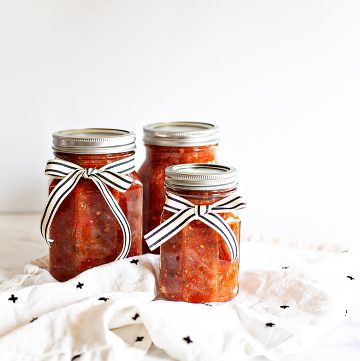
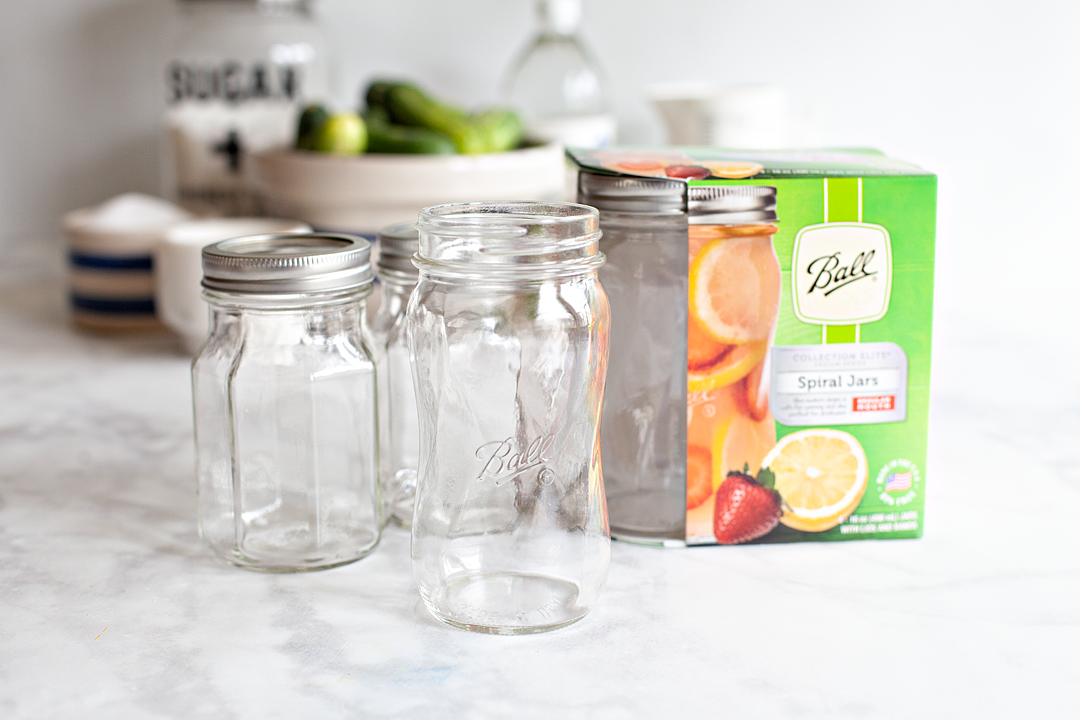
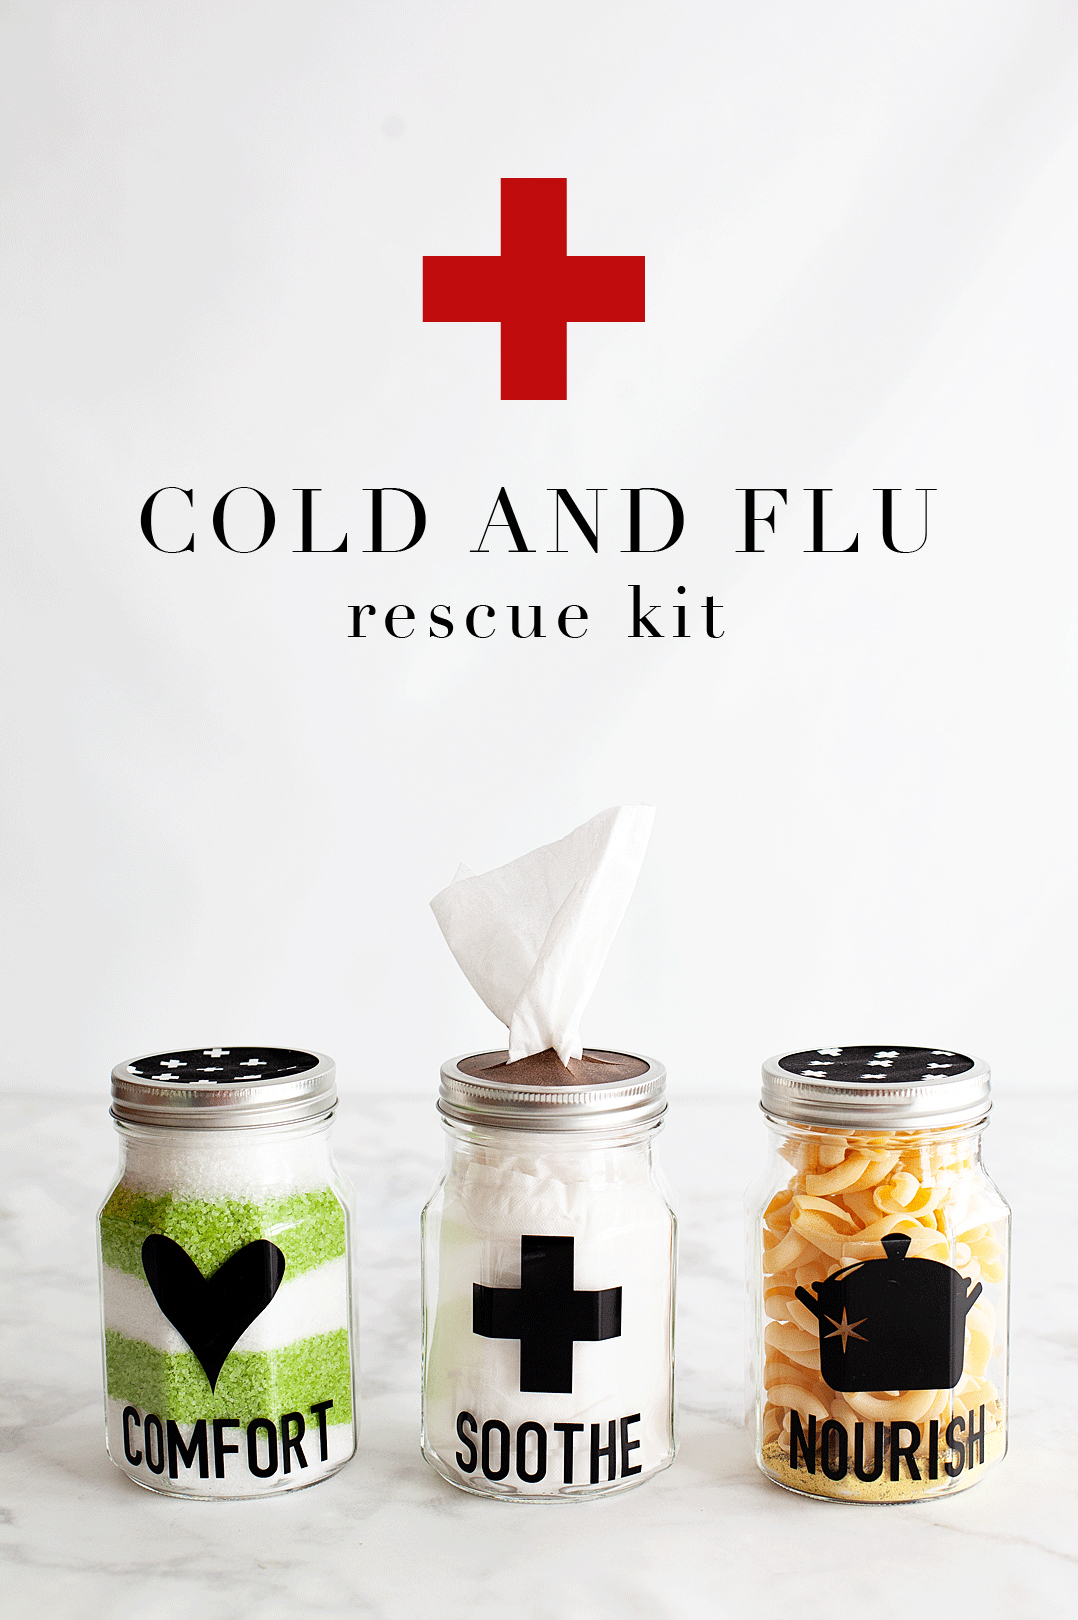
You all know of my love of all things jars, so of course, I put this little gift set together in my new favorite Ball® Quart Size Wide Mouth Sharing Jars. They are beautiful in their own right and they look even better dressed-up a bit. Here is what you will need for the whole kit.

Cold and Flu Rescue Kit Supplies

  • Ball® Quart Size Wide Mouth Sharing Jars
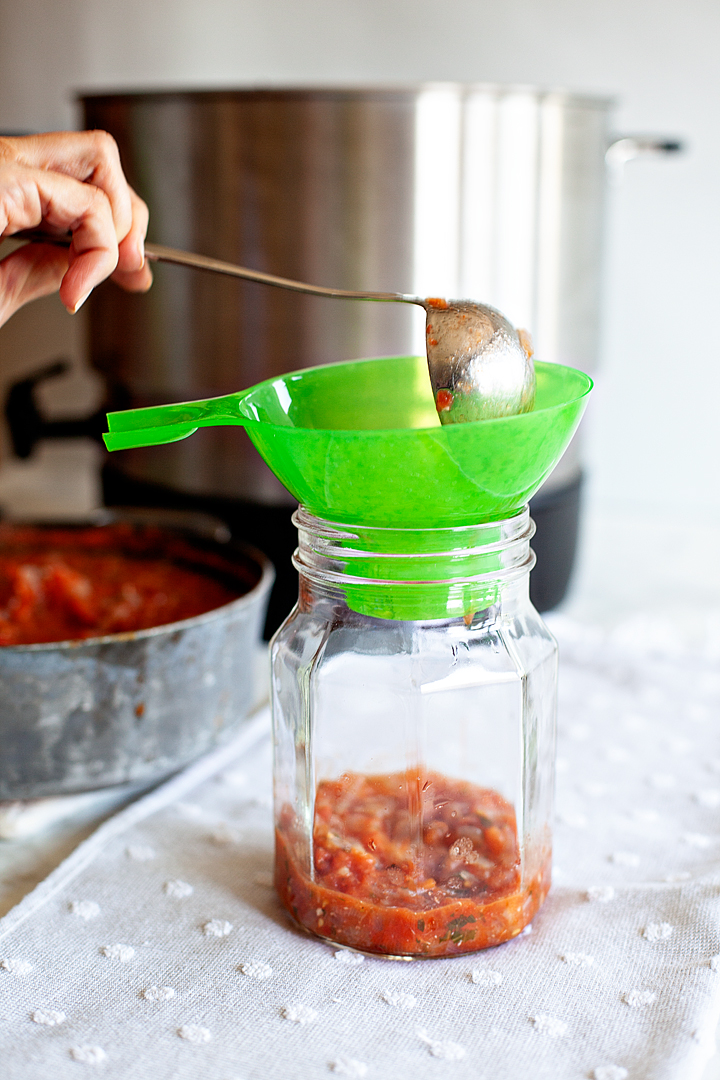
  • Ball® Home Canning Funnel for Mason Jars
  • Black vinyl (optional)
  • Cricut cutting machine (optional)
  • Cricut transfer tape (optional)
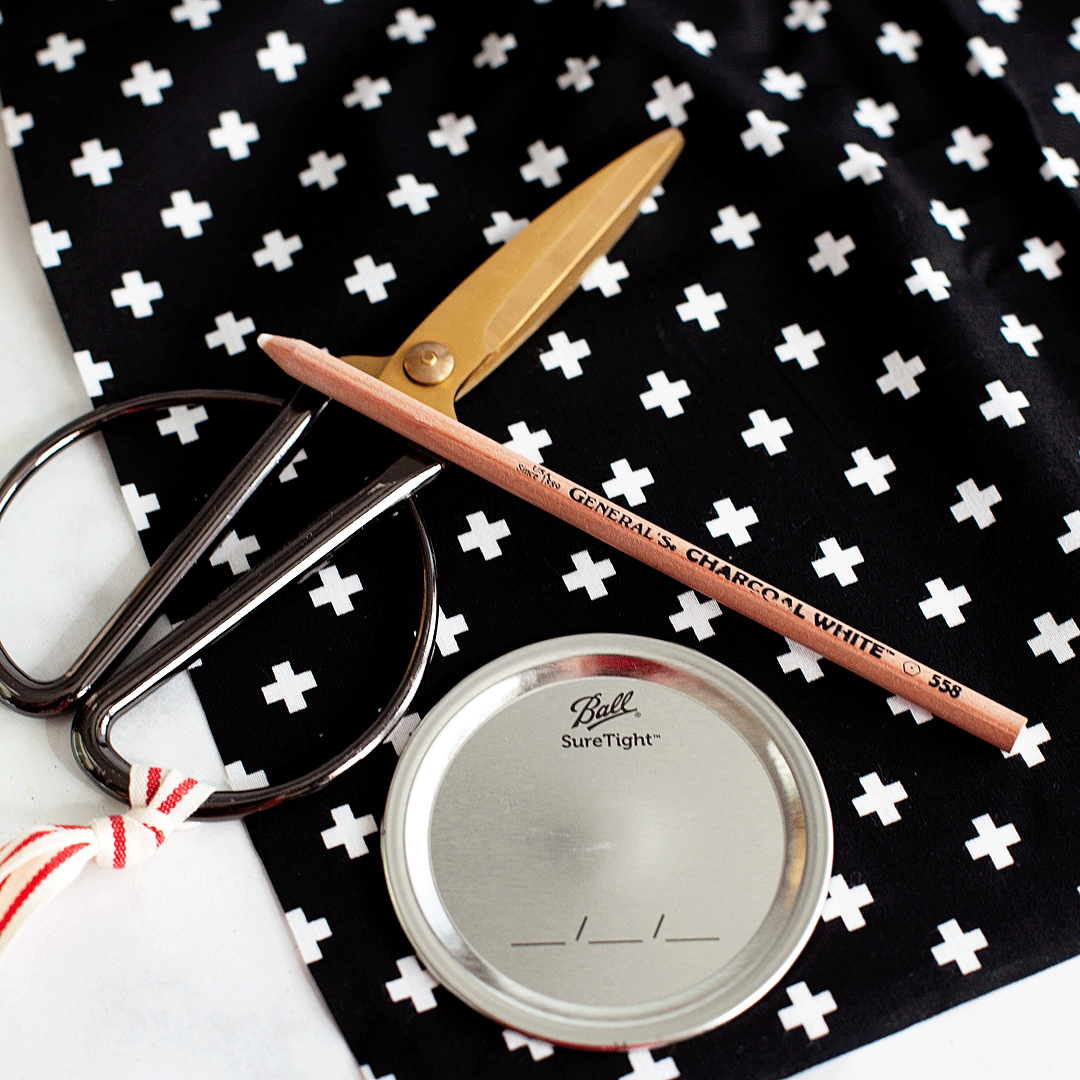
  • Scissors and craft knife
  • WhipperBerry Jar Designs
  • Epsom Salt soothing Eucalyptus and Menthol Mineral Bath
  • Small box of tissues
  • 4×4 piece of leather
  • 2 4×4 pieces of coordinating fabric
  • 3 heaping tbsp. of chicken bouillon – powdered
  • 1 tsp. garlic powder
  • 1 tsp. onion powder
  • 2 bay leaves
  • 1 tsp. dried thyme
  • 1 tsp. dried parsley
  • 2 cups of noodles

Instructions

As much as we hate to admit it, cold and flu season is on its way. There is nothing more miserable than one of those lousy winter colds. What’s almost just as bad is watching someone you care for dealing with a cold or, Heaven forbid, the flu! I’m always looking for ways to help cheer them up and let them know that we love them and hope for their better health. That’s when I came up with this idea for a Cold and Flu Rescue Kit to share with those loved ones that are suffering. 

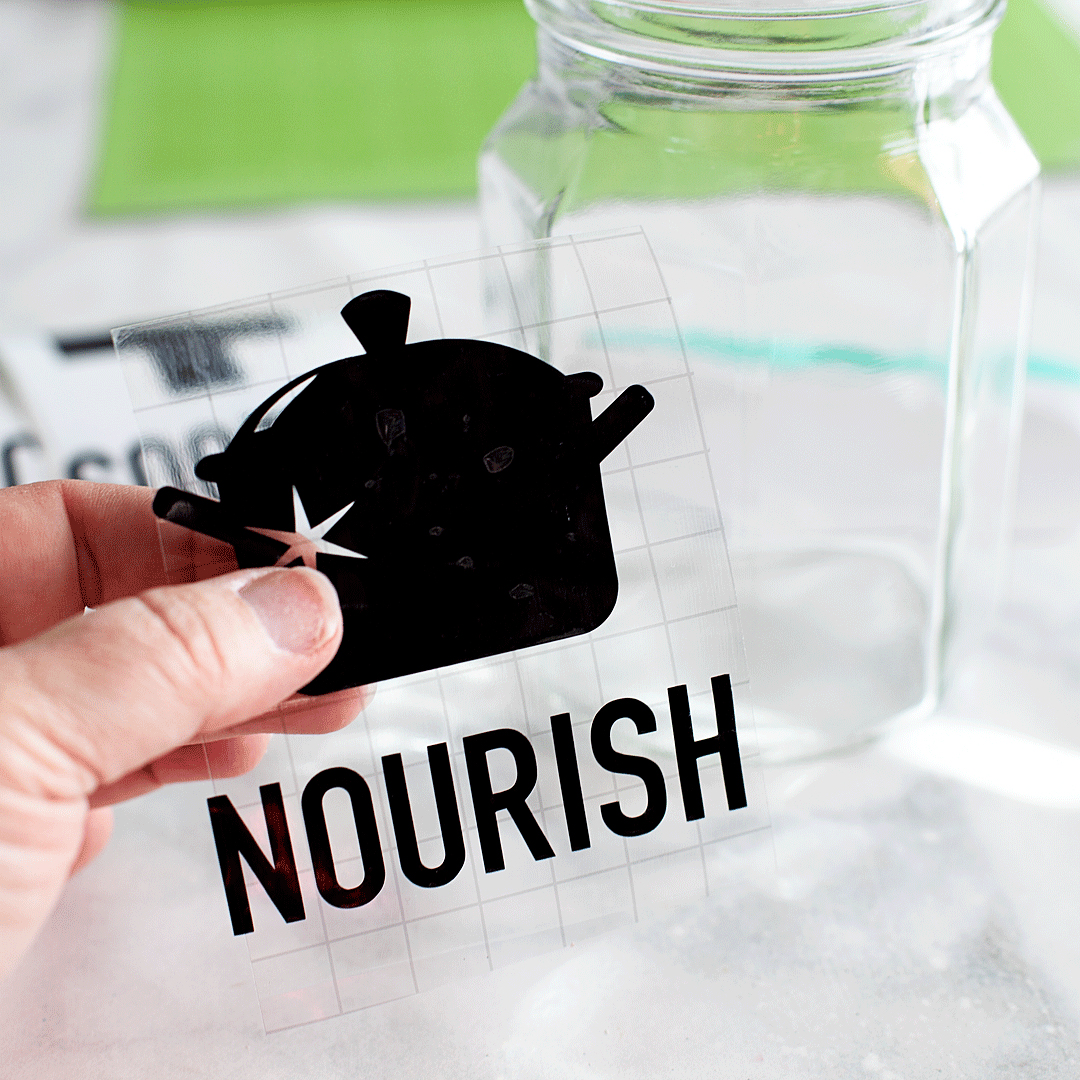
Now, the vinyl decals on the side of the jars are super cute, but if you don’t have a Cricut cutting machine don’t worry, they don’t make or break this project. However, if you do have one and would like to make the decals, you can have access to my project in Cricut Design Space. It’s already all set for you, sized for these jars and everything. Cut out the decals and adhere them to the side of the jar using the transfer tape. If you need a little help applying the vinyl, I have a good tutorial for applying vinyl that you may want to check out first. 

As much as we hate to admit it, cold and flu season is on its way. There is nothing more miserable than one of those lousy winter colds. What’s almost just as bad is watching someone you care for dealing with a cold or, Heaven forbid, the flu! I’m always looking for ways to help cheer them up and let them know that we love them and hope for their better health. That’s when I came up with this idea for a Cold and Flu Rescue Kit to share with those loved ones that are suffering. 

Once your vinyl is applied (if you are doing this step), the next step is to fill the jars and dress-up the lids. 
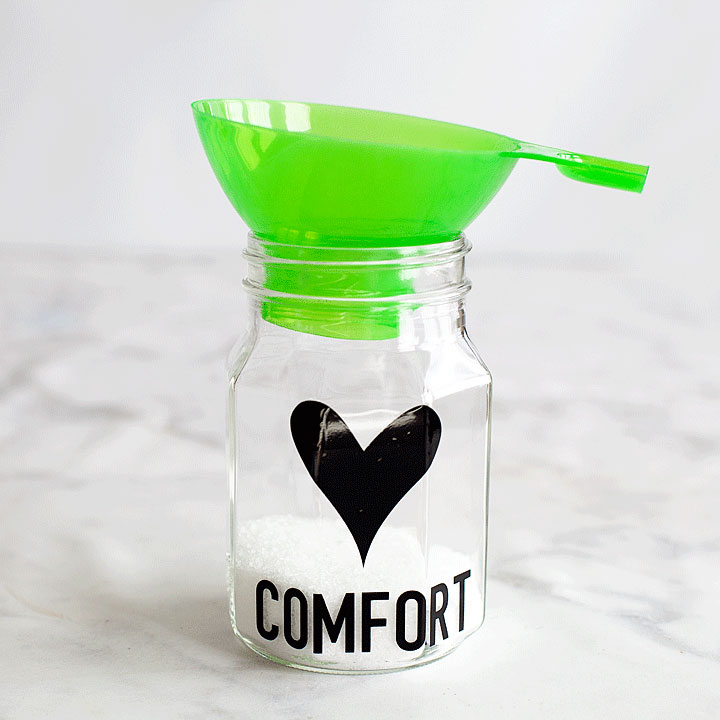
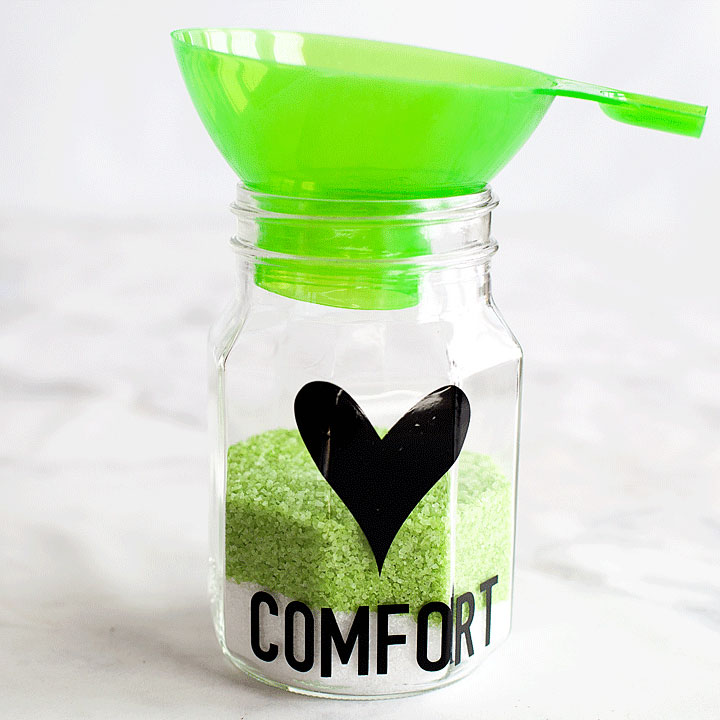
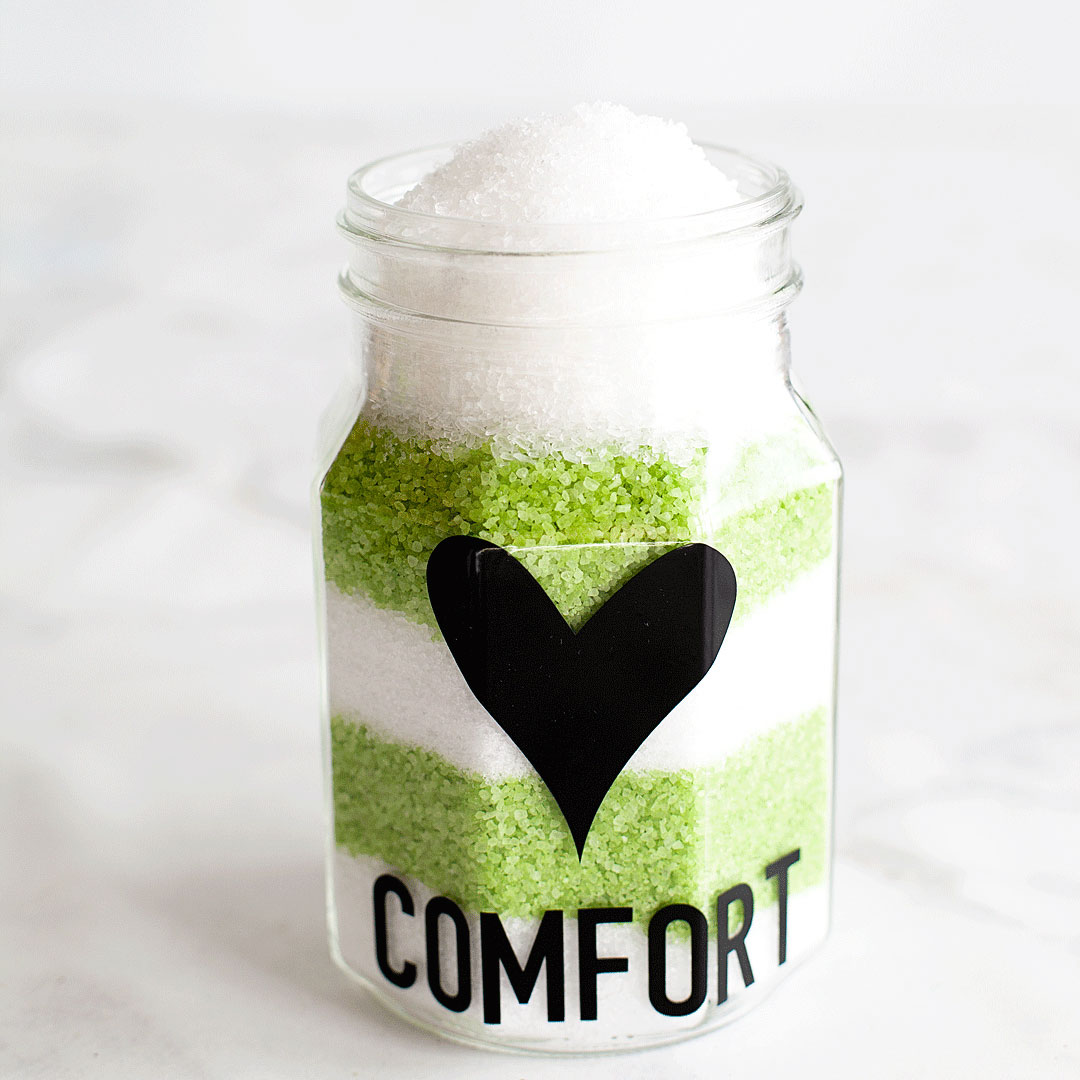
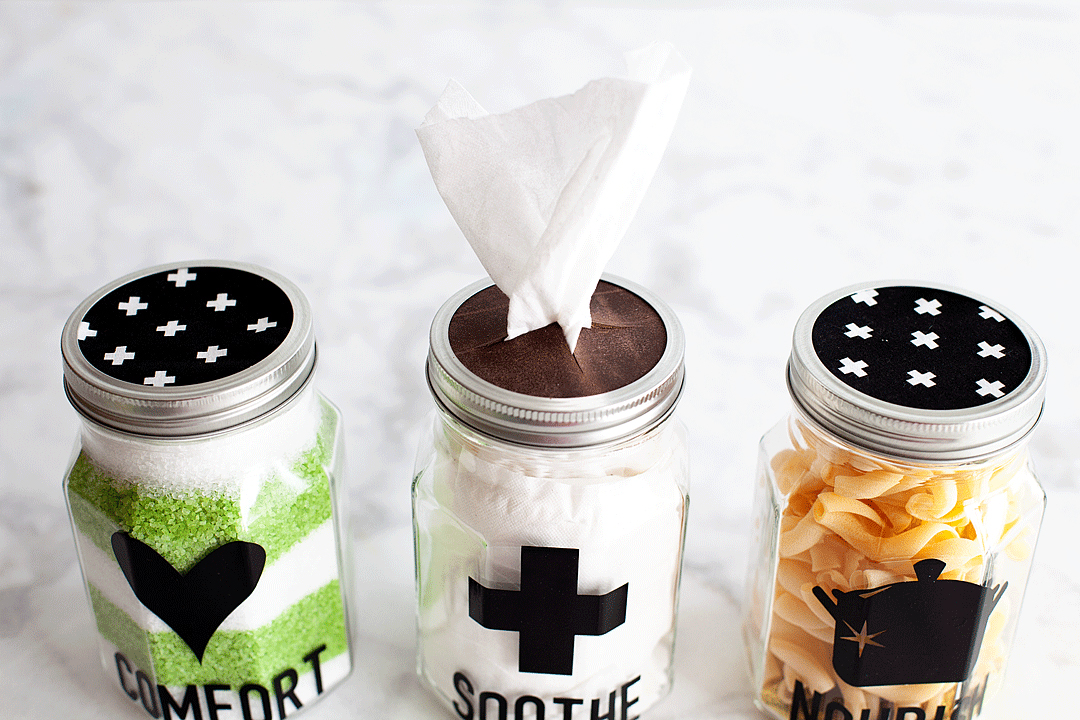
The Comfort Jar

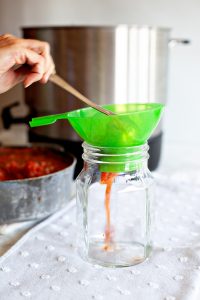
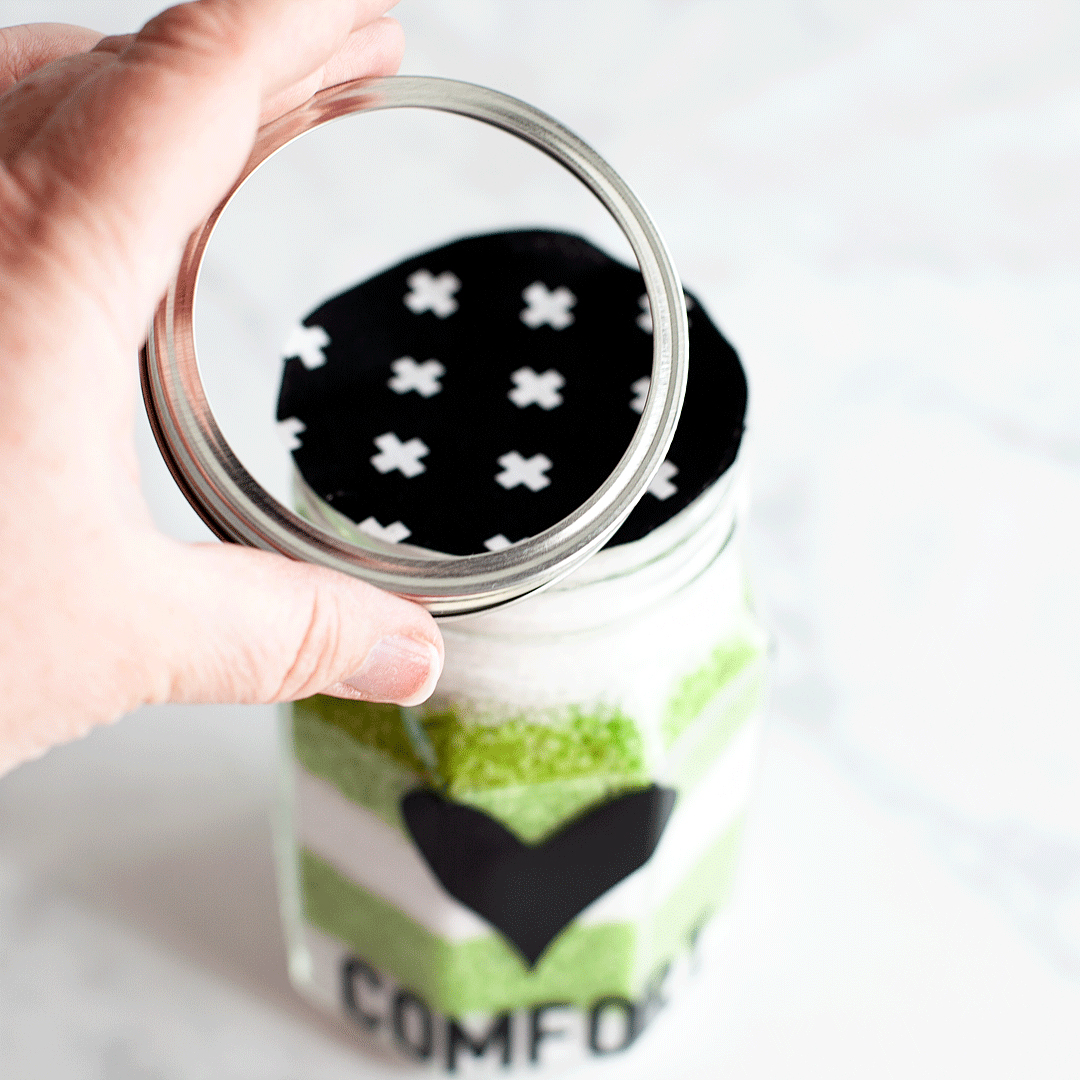
The comfort jar is filled with comforting mineral bath salts. I found two different colored Epsom salt baths that were infused with Eucalyptus, menthol & spearmint and layered it in the jar using the Ball® Home Canning Funnel creating stripes.

As much as we hate to admit it, cold and flu season is on its way. There is nothing more miserable than one of those lousy winter colds. What’s almost just as bad is watching someone you care for dealing with a cold or, Heaven forbid, the flu! I’m always looking for ways to help cheer them up and let them know that we love them and hope for their better health. That’s when I came up with this idea for a Cold and Flu Rescue Kit to share with those loved ones that are suffering. 

As much as we hate to admit it, cold and flu season is on its way. There is nothing more miserable than one of those lousy winter colds. What’s almost just as bad is watching someone you care for dealing with a cold or, Heaven forbid, the flu! I’m always looking for ways to help cheer them up and let them know that we love them and hope for their better health. That’s when I came up with this idea for a Cold and Flu Rescue Kit to share with those loved ones that are suffering. 

As much as we hate to admit it, cold and flu season is on its way. There is nothing more miserable than one of those lousy winter colds. What’s almost just as bad is watching someone you care for dealing with a cold or, Heaven forbid, the flu! I’m always looking for ways to help cheer them up and let them know that we love them and hope for their better health. That’s when I came up with this idea for a Cold and Flu Rescue Kit to share with those loved ones that are suffering. 

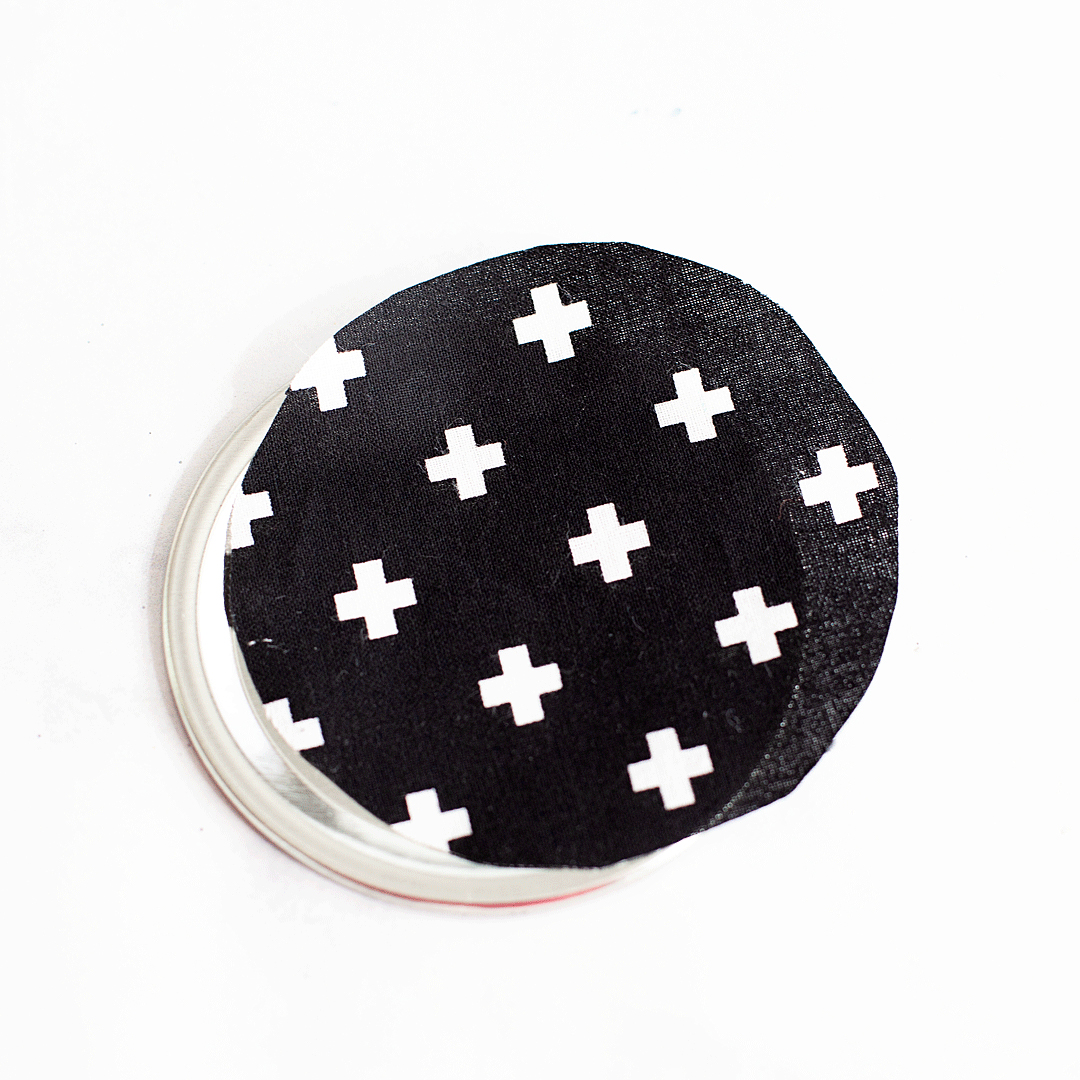
Next, I take a piece of cloth and trace a circle using the lid of the jar with a pencil or chalk pencil. Cut out the fabric and then place it on top of the jar lid and secure it with the band.
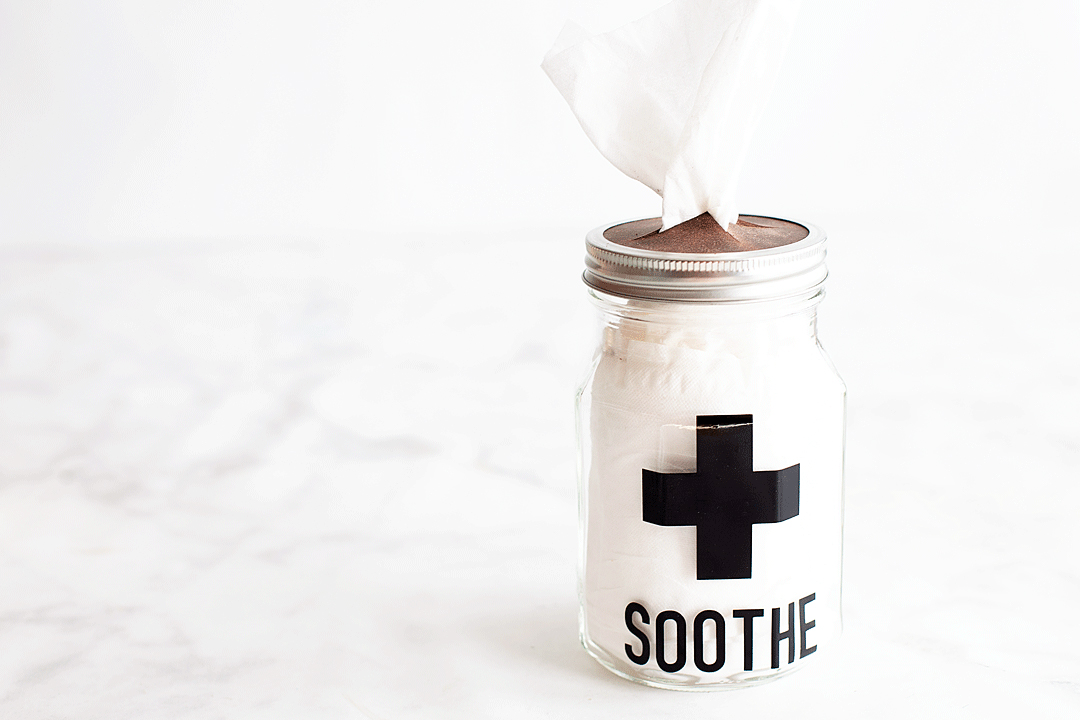
As much as we hate to admit it, cold and flu season is on its way. There is nothing more miserable than one of those lousy winter colds. What’s almost just as bad is watching someone you care for dealing with a cold or, Heaven forbid, the flu! I’m always looking for ways to help cheer them up and let them know that we love them and hope for their better health. That’s when I came up with this idea for a Cold and Flu Rescue Kit to share with those loved ones that are suffering. 

As much as we hate to admit it, cold and flu season is on its way. There is nothing more miserable than one of those lousy winter colds. What’s almost just as bad is watching someone you care for dealing with a cold or, Heaven forbid, the flu! I’m always looking for ways to help cheer them up and let them know that we love them and hope for their better health. That’s when I came up with this idea for a Cold and Flu Rescue Kit to share with those loved ones that are suffering. 

As much as we hate to admit it, cold and flu season is on its way. There is nothing more miserable than one of those lousy winter colds. What’s almost just as bad is watching someone you care for dealing with a cold or, Heaven forbid, the flu! I’m always looking for ways to help cheer them up and let them know that we love them and hope for their better health. That’s when I came up with this idea for a Cold and Flu Rescue Kit to share with those loved ones that are suffering. 

The Sooth Jar

This one is my favorite! It’s a tissue jar with a leather lid!!! How cool is that?  

As much as we hate to admit it, cold and flu season is on its way. There is nothing more miserable than one of those lousy winter colds. What’s almost just as bad is watching someone you care for dealing with a cold or, Heaven forbid, the flu! I’m always looking for ways to help cheer them up and let them know that we love them and hope for their better health. That’s when I came up with this idea for a Cold and Flu Rescue Kit to share with those loved ones that are suffering. 

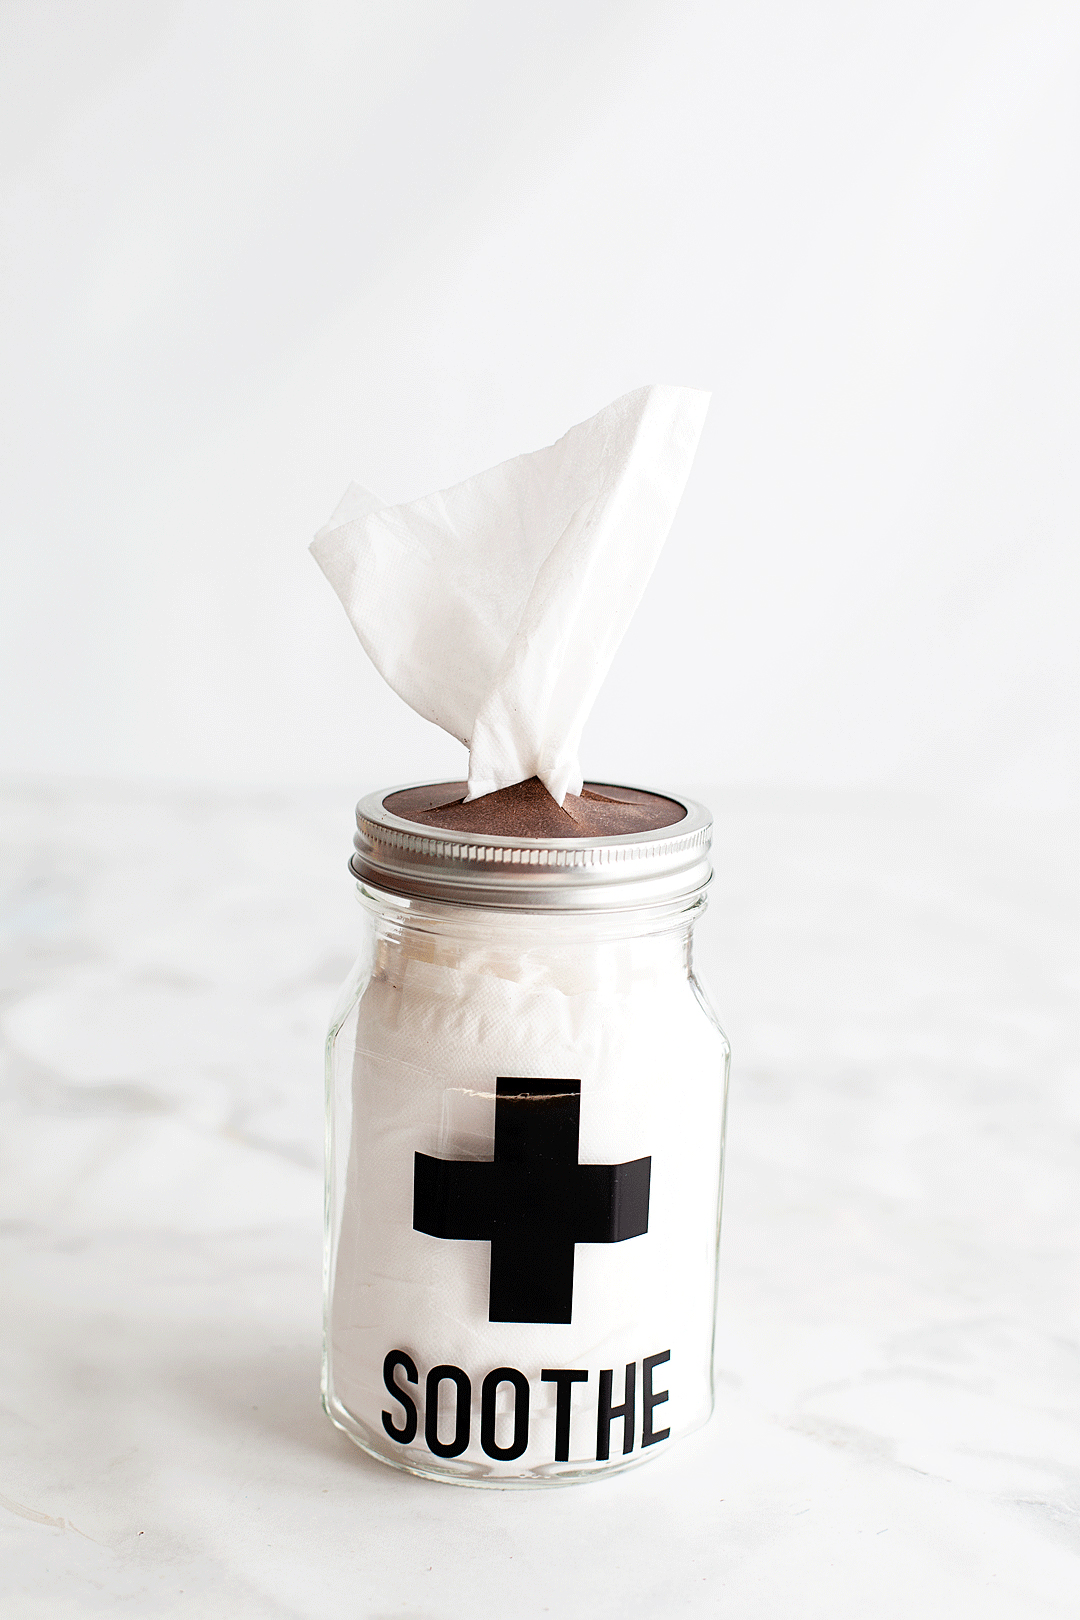
For this one, you will need a cube size box of tissues. Open the box from the side and pull the tissues out of the box. Take a third of the tissues and unfold the first tissue flap. Roll into a loose cylinder shape and place into the jar making sure to keep that tissue flap at the top. This will be the starting tissue once you put the lid on.

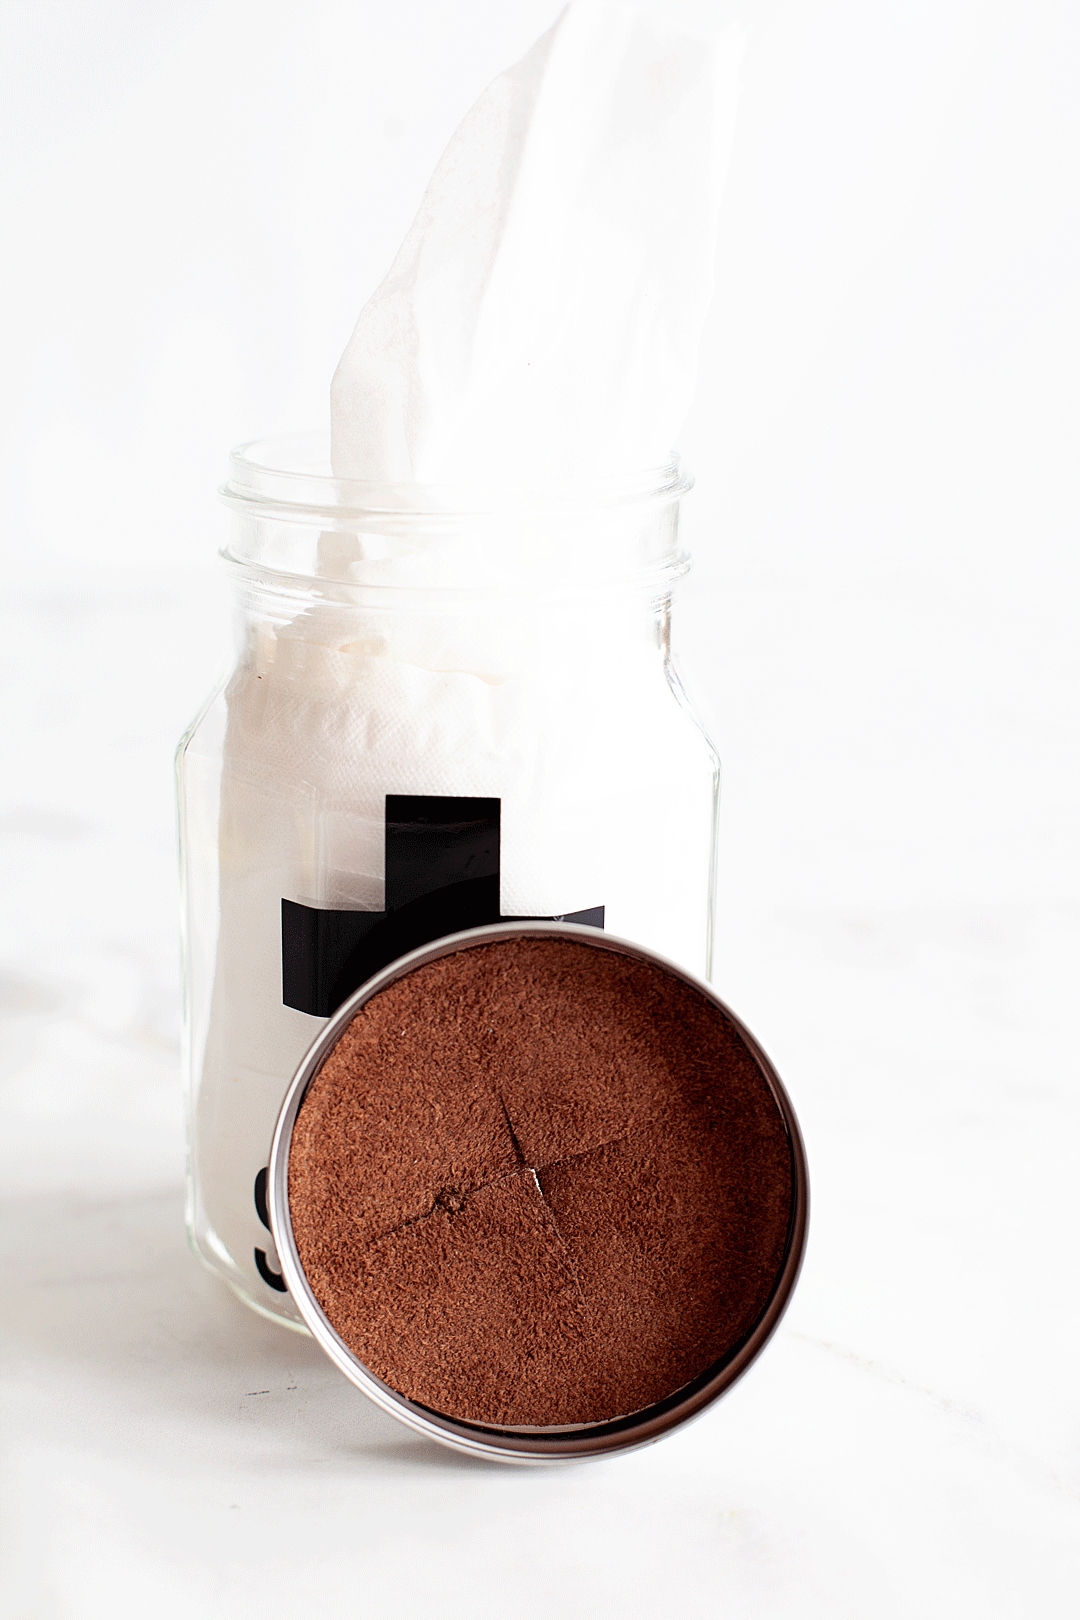
Again, take your leather and trace the lid of the mason jar and cut out the circle with your scissors. Next, cut an “X” with a craft knife into the center of the circle. 

As much as we hate to admit it, cold and flu season is on its way. There is nothing more miserable than one of those lousy winter colds. What’s almost just as bad is watching someone you care for dealing with a cold or, Heaven forbid, the flu! I’m always looking for ways to help cheer them up and let them know that we love them and hope for their better health. That’s when I came up with this idea for a Cold and Flu Rescue Kit to share with those loved ones that are suffering. 

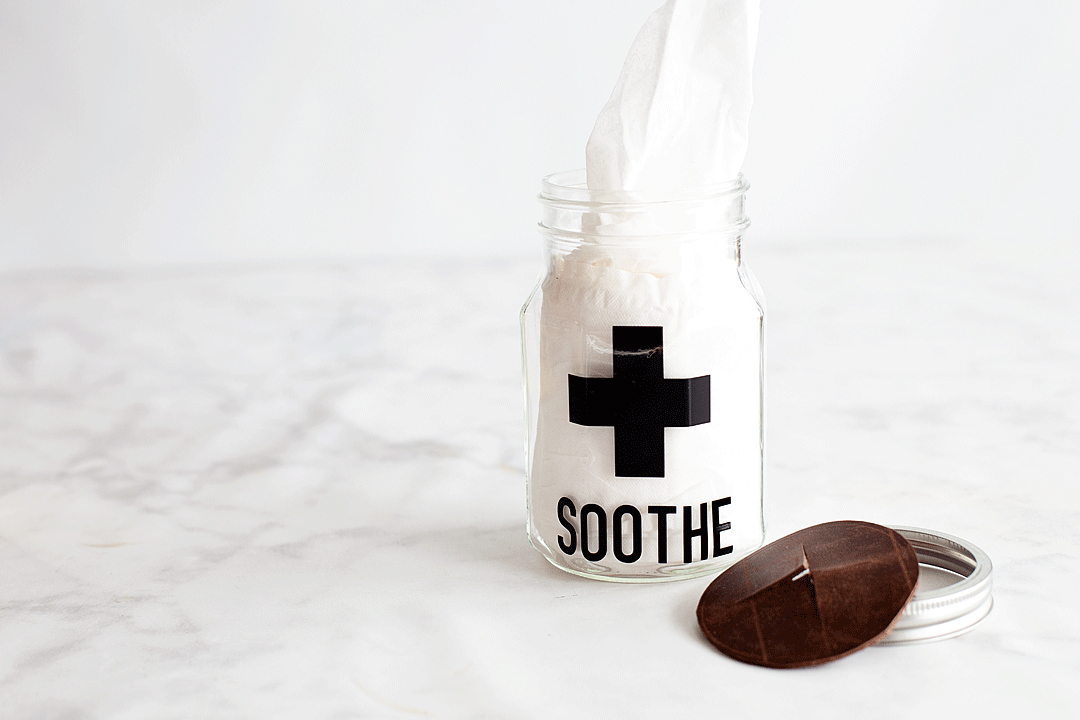
Place the leather inside of the mason jar band and place lid on the tissue jar making sure to pull the lead tissue through the opening in the leather lid. 

As much as we hate to admit it, cold and flu season is on its way. There is nothing more miserable than one of those lousy winter colds. What’s almost just as bad is watching someone you care for dealing with a cold or, Heaven forbid, the flu! I’m always looking for ways to help cheer them up and let them know that we love them and hope for their better health. That’s when I came up with this idea for a Cold and Flu Rescue Kit to share with those loved ones that are suffering. 

I think I will be making one of these for every room in my house!
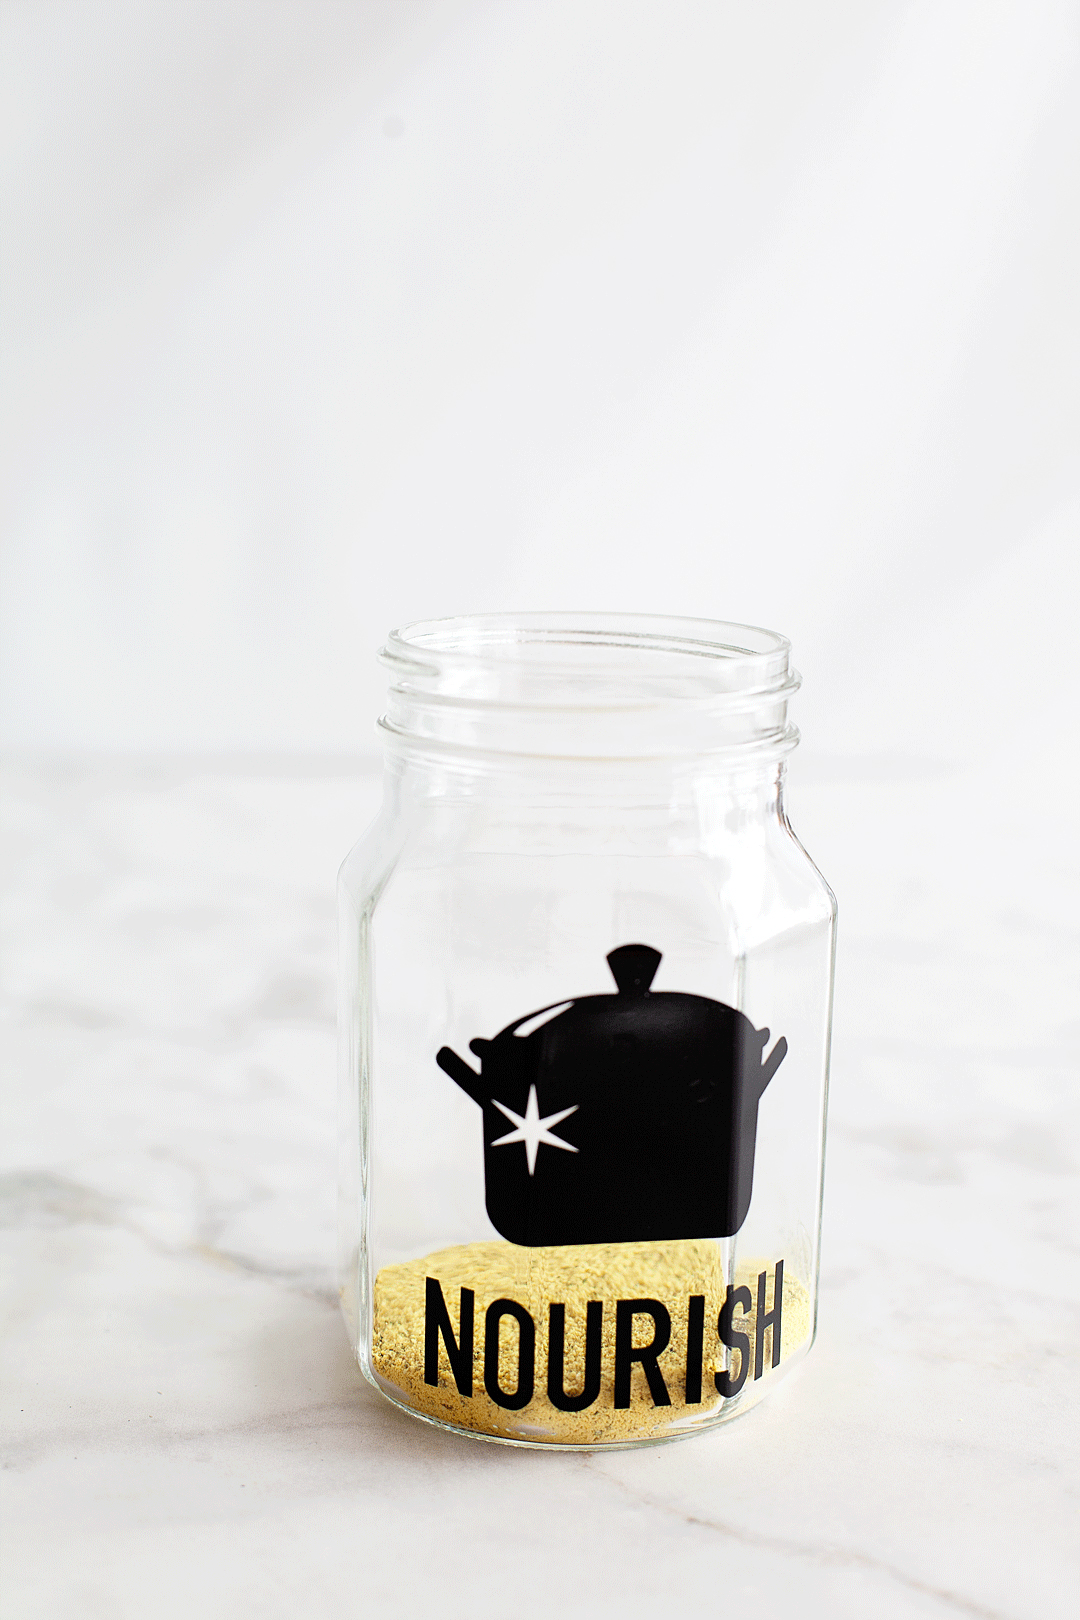
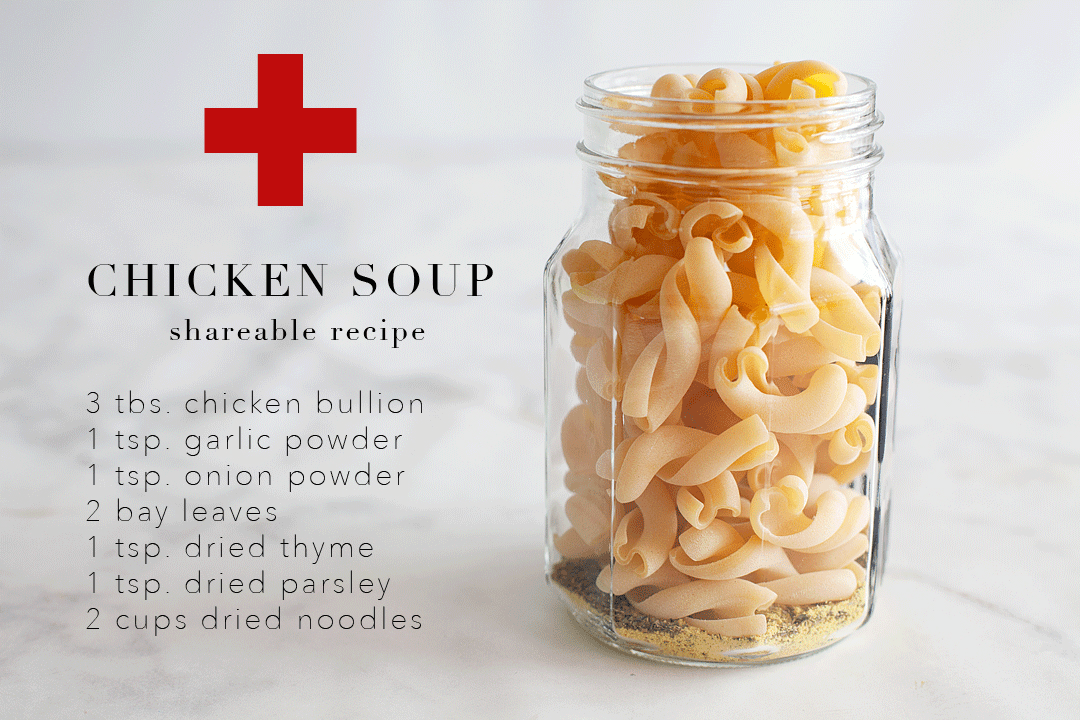
The Nourish Jar

This one is pretty straightforward. It may not be your Mom’s chicken noodle soup but, it’s pretty tasty in its own right. Plus, it’s easy to make and share. 

As much as we hate to admit it, cold and flu season is on its way. There is nothing more miserable than one of those lousy winter colds. What’s almost just as bad is watching someone you care for dealing with a cold or, Heaven forbid, the flu! I’m always looking for ways to help cheer them up and let them know that we love them and hope for their better health. That’s when I came up with this idea for a Cold and Flu Rescue Kit to share with those loved ones that are suffering. 

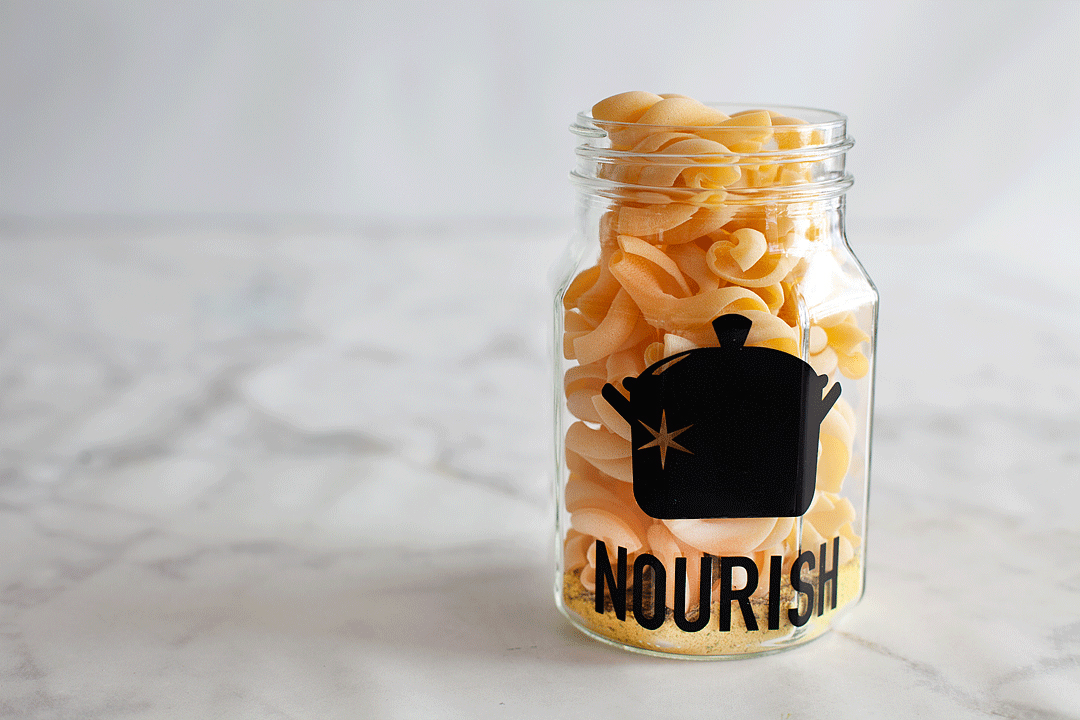
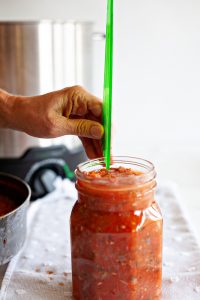
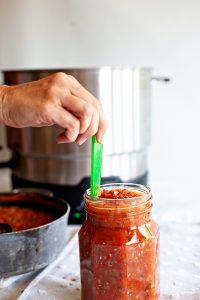
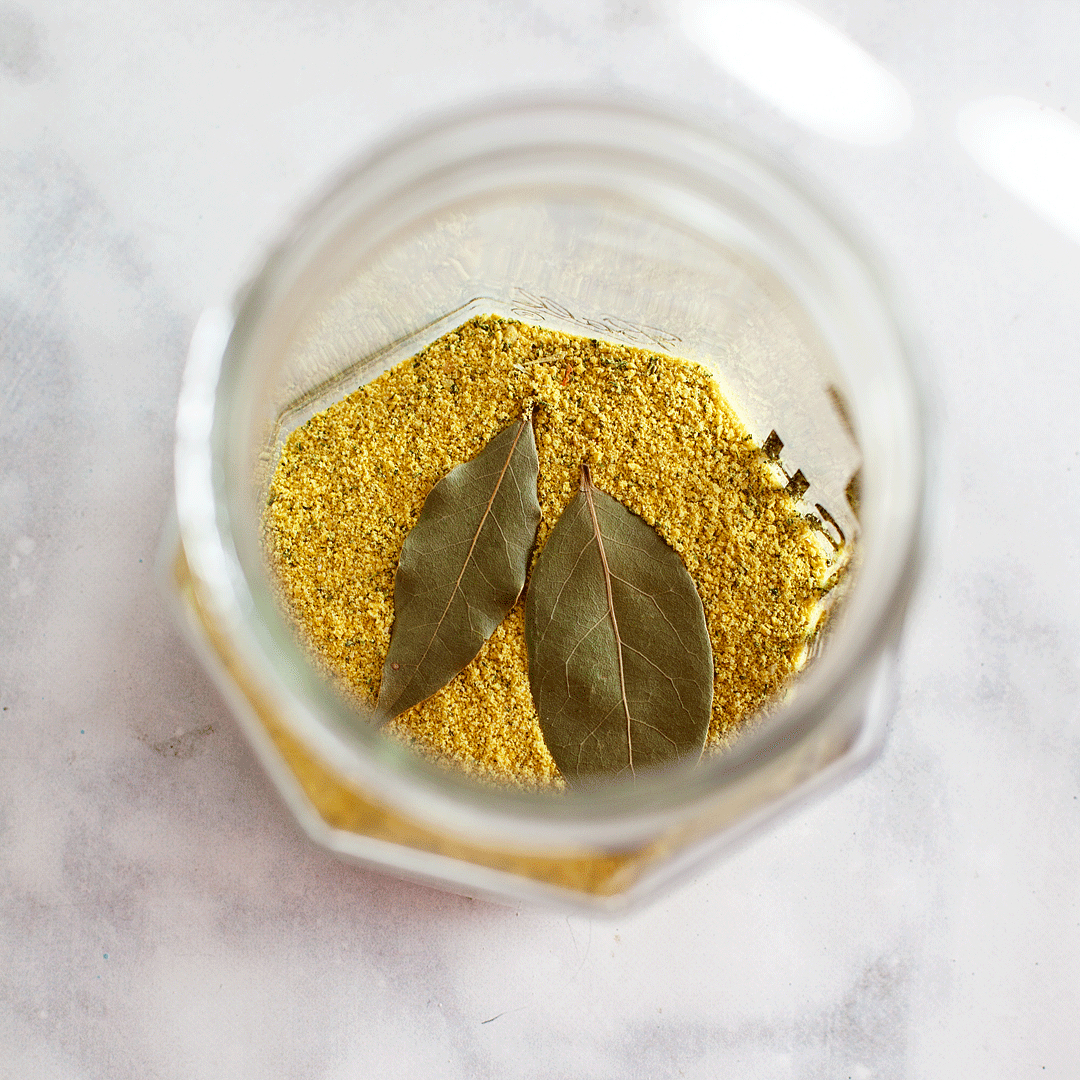
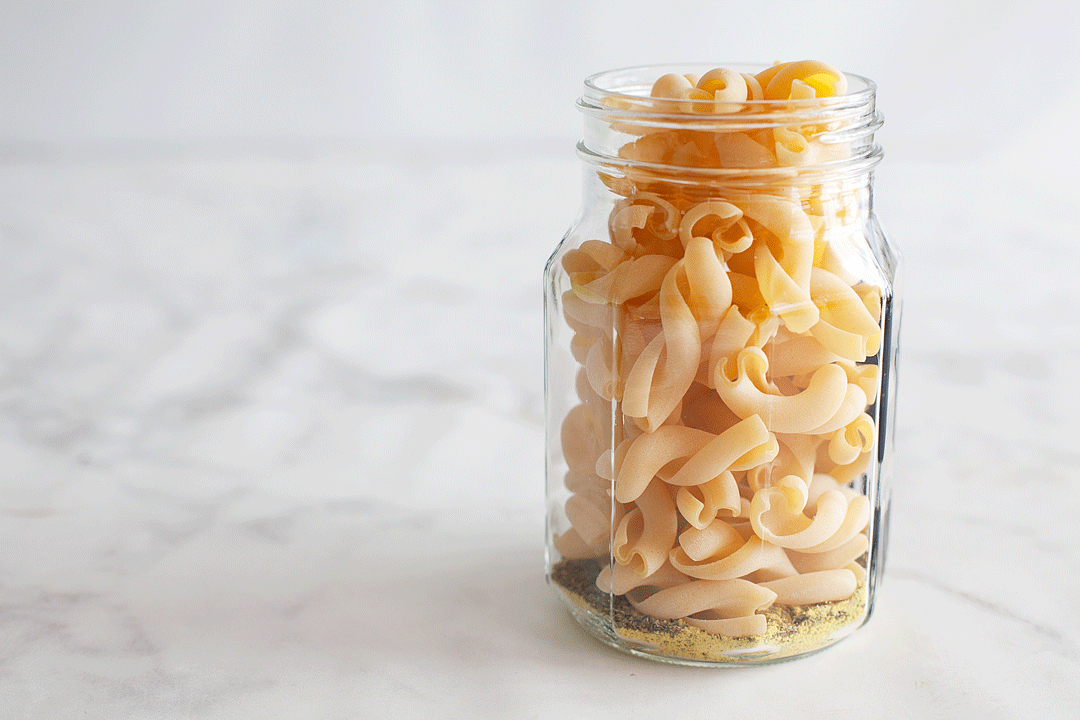
Again, you will be using your funnel to help keep this nice and tidy. Layer your chicken bouillon, garlic powder, onion powder, bay leaves, thyme, parsley, and noodles.

As much as we hate to admit it, cold and flu season is on its way. There is nothing more miserable than one of those lousy winter colds. What’s almost just as bad is watching someone you care for dealing with a cold or, Heaven forbid, the flu! I’m always looking for ways to help cheer them up and let them know that we love them and hope for their better health. That’s when I came up with this idea for a Cold and Flu Rescue Kit to share with those loved ones that are suffering. 

As much as we hate to admit it, cold and flu season is on its way. There is nothing more miserable than one of those lousy winter colds. What’s almost just as bad is watching someone you care for dealing with a cold or, Heaven forbid, the flu! I’m always looking for ways to help cheer them up and let them know that we love them and hope for their better health. That’s when I came up with this idea for a Cold and Flu Rescue Kit to share with those loved ones that are suffering. 

As much as we hate to admit it, cold and flu season is on its way. There is nothing more miserable than one of those lousy winter colds. What’s almost just as bad is watching someone you care for dealing with a cold or, Heaven forbid, the flu! I’m always looking for ways to help cheer them up and let them know that we love them and hope for their better health. That’s when I came up with this idea for a Cold and Flu Rescue Kit to share with those loved ones that are suffering. 

As much as we hate to admit it, cold and flu season is on its way. There is nothing more miserable than one of those lousy winter colds. What’s almost just as bad is watching someone you care for dealing with a cold or, Heaven forbid, the flu! I’m always looking for ways to help cheer them up and let them know that we love them and hope for their better health. That’s when I came up with this idea for a Cold and Flu Rescue Kit to share with those loved ones that are suffering. 

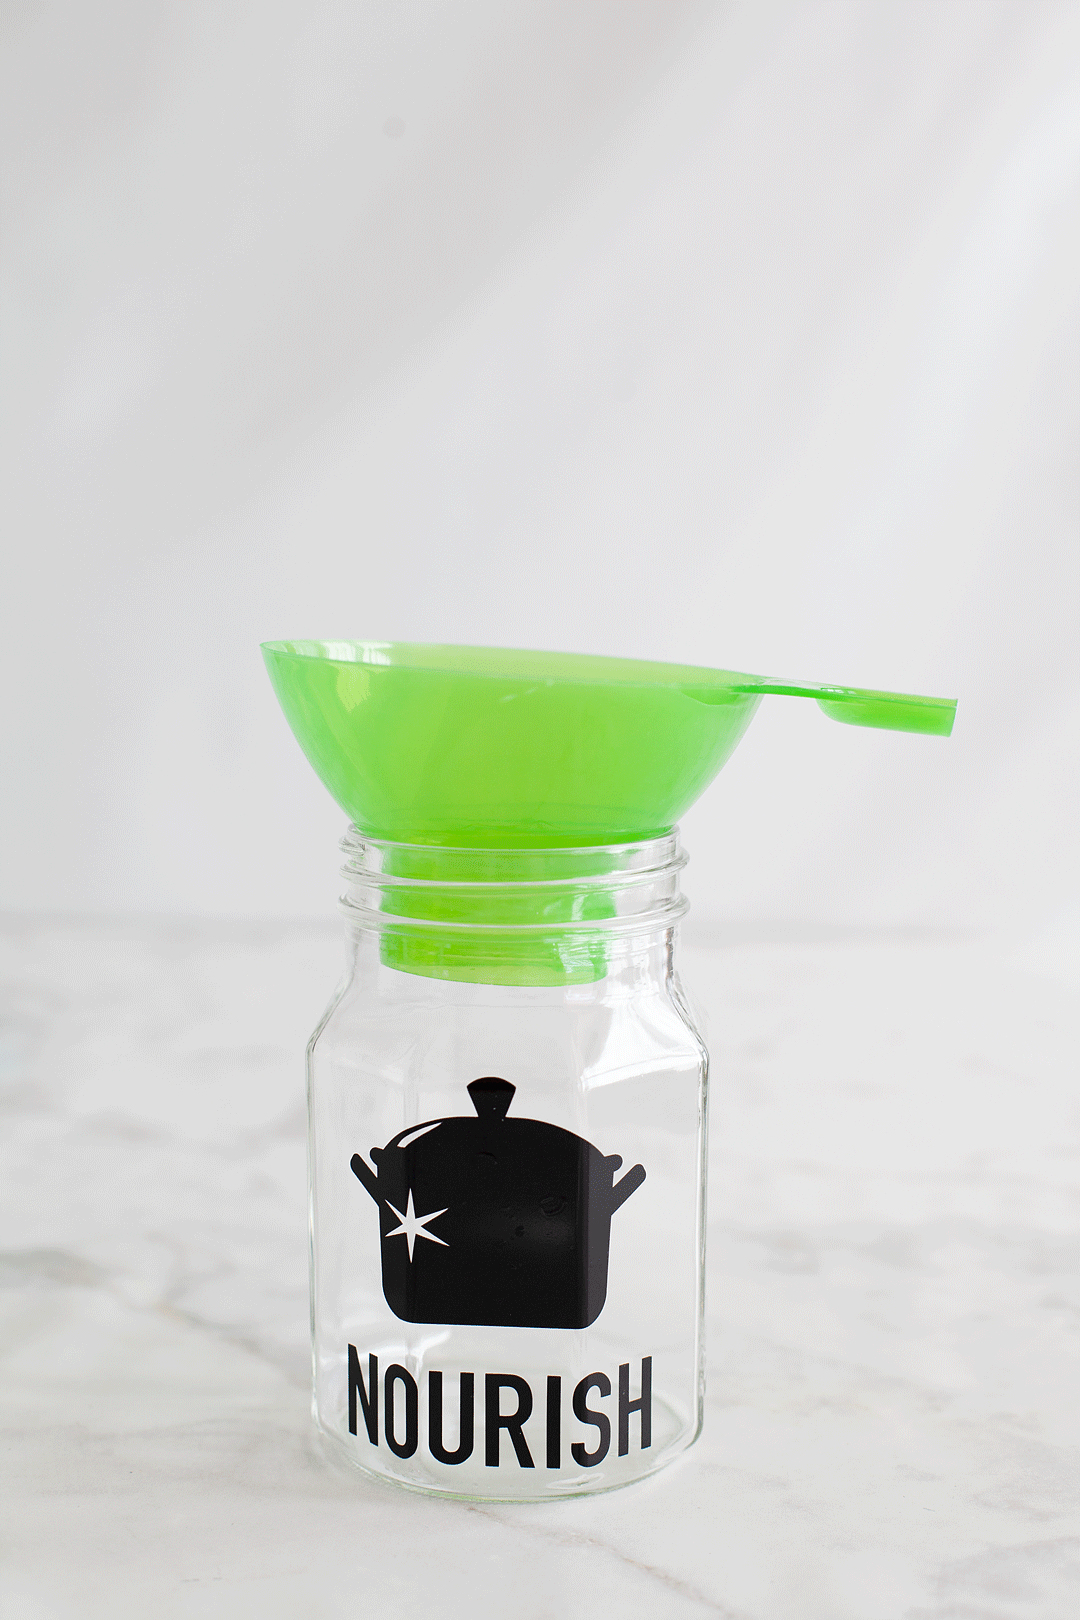
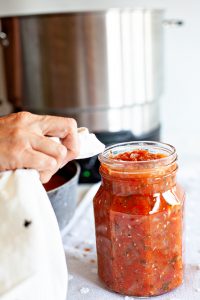
You’ll top this with another fabric circle. 

As much as we hate to admit it, cold and flu season is on its way. There is nothing more miserable than one of those lousy winter colds. What’s almost just as bad is watching someone you care for dealing with a cold or, Heaven forbid, the flu! I’m always looking for ways to help cheer them up and let them know that we love them and hope for their better health. That’s when I came up with this idea for a Cold and Flu Rescue Kit to share with those loved ones that are suffering. 


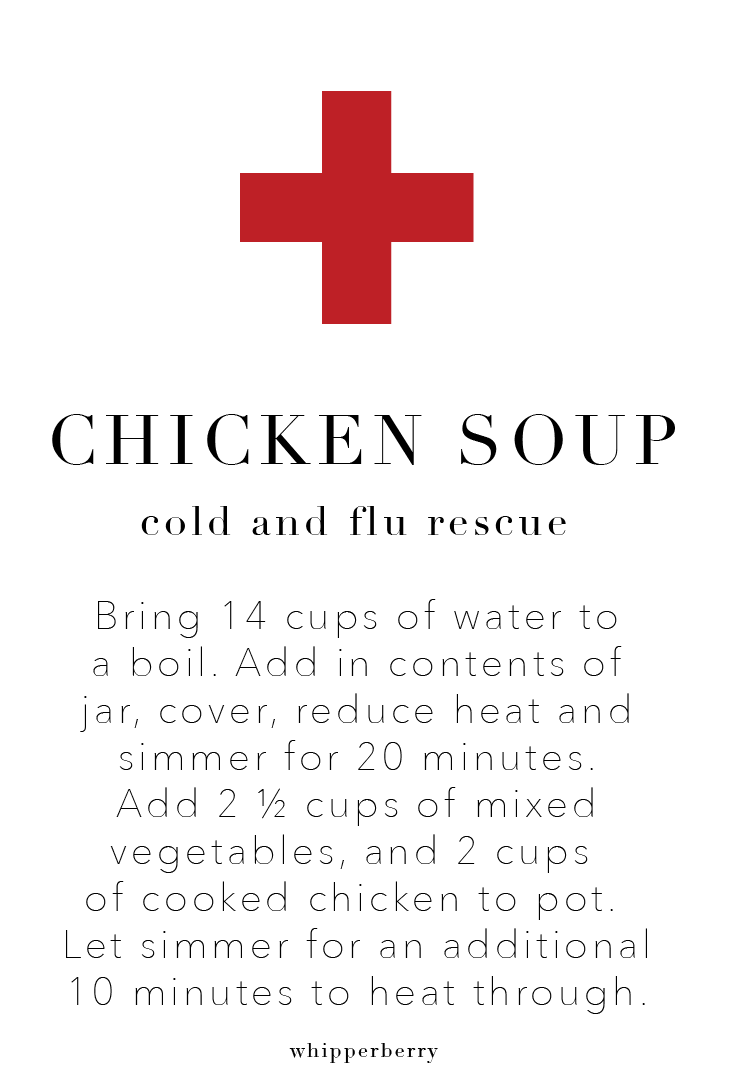
Print out the chicken soup recipe and add that to your kit and then you’re ready to go. Then Pin this one so that you don’t forget what to put in the jars. 

Place the Ball® Sharing Jars into a basket or a bin and run to the rescue of your family member, friend, co-worker or whomever STAT! They will truly appreciate this thoughtful gift as you come to their rescue in their time of need. 

Roasted Garlic and Roma Tomato Sauce + an Easy Shakshuka Recipe

36 · Aug 22, 2018 · Leave a Comment

This post is brought to you by Ball® Fresh Preserving Products by Newell Brands

Ahhhhh, tomato season… You’re finally here! When I was a little girl, tacos were not tacos if they weren’t topped with diced tomatoes, a sandwich simply could not be a true sandwich without a slice of tomato inside and don’t even get me started on burgers. You either love them or hate them but, I’m firmly in the LOVE those beautiful tomatoes camp. I was recently introduced to a simple Roasted Garlic and Roma tomato sauce recipe from Ball® Fresh Preserving that I have been dying to try. I knew it was going to be a GREAT base for my favorite Israeli Shakshuka dish and boy was I right. Come to learn how to make this fabulous sauce for your family. I was recently introduced to a simple Roasted Garlic and Roma tomato sauce recipe from Ball® Fresh Preserving that I have been dying to try. I knew it was going to be a GREAT base for my favorite Israeli Shakshuka dish and boy was I right. Come learn how to make this fabulous sauce for your family.

How to Know if Your Recipe is Safe for Preserving

You know what excites me about this sauce? I know exactly what has been added to it because I made it myself. I’ve cut sugar out of my diet and I’ve been blown away about how much sugar is added to most commercially prepared tomato sauces. It really gives me peace of mind when I make things from scratch using tested recipes from Ball® Canning.  When you use official recipes from Ball® you know that they have the highest standards for food safety and if followed to the “T”,  you will have a great end product. You can find all kinds of recipes on their website plus, they have several books that cover the ins & outs of preserving available on their site, Amazon, and other book retailers.  When it comes to things like preserving, you don’t want to take chances with recipes that have not been tested and approved. They can make your family terribly sick. Stay safe, and stick with the leaders in the preserving industry, Ball® Fresh Preserving.

Sauce Making Day

To me, canning is a social activity. When we would can as kids the whole family would gather in the kitchen with the music turned up and we would spend the entire day canning batch after batch of peaches, pears, elderberry jam & crabapple jelly. Sometimes, my Mom’s friends would come over and spend the day working the fruit and enjoying some girl talk.

I knew that when I was going to make this sauce, I wanted to invite a friend over so that we could work together and enjoy some idle chit-chat. That’s the real secret ingredient to anything preserved. Not only are you preserving the food but, you are also preserving precious memories!

Funny enough, my friend’s name is also Heather and together we make quite the crew. Heather and I grabbed our supplies and prepared to start, “Sauce Day!” Here is what you will need to have a successful sauce day yourself.

  • A nice clean kitchen – this is a must when canning. Because of the nature of preserving and the fact that the food will be stored unrefrigerated for up to a year, you must have a good clean working space sat you don’t risk introducing unwanted bacteria into your sauce.
  • Ball® canning jars – This recipe calls for quart jars and I opted for my new favorite quart sized Sharing Jars. 
  • Water Bath Canner – This sauce uses the type of canning method called water bath canning. Therefore you will need some type of water bath to process your jars of sauce.  If you have a gas stove top or an electric stove stop that has the electric coils, you will be able to use a large pot with a rack and a lid to process your jars of sauce. 
  • Important: If you have a glass top electric range, 
        • First check with the manufacture of the stove.

i.      If it’s safe for home canning then,

        1. Ensure that your canner has a completely flat bottom that comes in contact with the heating element.
        2. Ensure that the canner does not exceed the burner by more than one inch around.
        3. https://www.youtube.com/watch?v=KFUyaBFrcYU

ii.      If not, then you will need to use the Electric Water Bath Canner.

  • Clean towels – This is a must when canning. You will be using towels to set your processed jars on and for wiping the rims of your jars. Not to mention keeping your hands tidy during the prep process. Have a good supply of clean cotton and terry cloth kitchen towels on hand for sauce day.
  • Canning tools – These are the must-have tools when canning,
  • Jar Funnel: Place in mouth of the jar to fill without spilling I was recently introduced to a simple Roasted Garlic and Roma tomato sauce recipe from Ball® Fresh Preserving that I have been dying to try. I knew it was going to be a GREAT base for my favorite Israeli Shakshuka dish and boy was I right. Come learn how to make this fabulous sauce for your family.
  • Jar Lifter: Safely lift jars out of hot water with the green gripping end
  • Bubble Remover & Headspace Tool: Slide into the side of filled jar to release air bubbles and measure headspace I was recently introduced to a simple Roasted Garlic and Roma tomato sauce recipe from Ball® Fresh Preserving that I have been dying to try. I knew it was going to be a GREAT base for my favorite Israeli Shakshuka dish and boy was I right. Come learn how to make this fabulous sauce for your family.
  • Roasting supplies – for this recipe we will be roasting our garlic and tomatoes before we get started so, there are a few items that you will need for that,
    • baking sheets
    • parchment paper
    • aluminum foil

Roasted Garlic & Roma Tomato Sauce Recipe 

I was recently introduced to a simple Roasted Garlic and Roma tomato sauce recipe from Ball® Fresh Preserving that I have been dying to try. I knew it was going to be a GREAT base for my favorite Israeli Shakshuka dish and boy was I right. Come learn how to make this fabulous sauce for your family.

Roasted Garlic & Roma Tomato Sauce Recipe

Ball® Fresh Preserving
Roasting tomatoes and garlic brings out a sweet smokiness, adding a deep, rich flavor dynamic to your sauce.
Print Recipe Pin Recipe
Prep Time 1 hour hr
Cook Time 40 minutes mins
Total Time 1 hour hr 40 minutes mins
Cuisine Italian
Servings 3 32 oz. Jars

Ingredients
  

  • 10 lbs roma tomatoes rinsed
  • 3 small whole heads of garlic
  • 2 med onions diced small (about 1 cup)
  • 1 tsp olive oil
  • 1 tbsp fresh oregano minced
  • 2 tbsp fresh basil minced
  • 1 tsp salt
  • 1/2 tsp coarsely ground black pepper
  • Ball® Citric Acid or bottled lemon juice

Instructions
 

  • Roast tomatoes, in batches, on a grill or under a broiler until skins begin to wrinkle and blacken slightly, turning to roast on all sides. Repeat with remaining tomatoes. Place finished tomatoes in a large bowl.
  • Cover bowl of tomatoes tightly with plastic wrap. Let tomatoes steam and cool until they are easy to handle. 
  • Remove peel and core tomatoes. Slice each one in half and remove seeds; dice into 1-inch chunks. Place diced tomatoes, and any collected juices, into a large saucepan.
  • Slice top portion off the heads of garlic, revealing the cloves below, drizzle 1 teaspoon olive oil over cloves in each head. 
  • Wrap garlic tightly in aluminum foil and place top side down on the grill with tomatoes; grill until soft, about 30 minutes. Or, roast in a 350° oven for 60 minutes.
  • Prepare boiling water canner. Heat jars in simmering water until ready to use, do not boil. Wash lids in warm soapy water and set aside with bands.
  • Remove roasted garlic by squeezing the softened heads of garlic allowing the cloves to pop out. Combine garlic, onions, herbs, salt, and pepper with tomatoes. Cook over medium heat until heated through, stirring occasionally.
  • Add ½ teaspoon citric acid or 2 tablespoons lemon juice to a hot jar; ladle hot sauce into a hot jar 
  • leaving a ½ inch headspace. 
  • Remove air bubbles. 
  • Wipe jar rim. 
  • Center lid on jar and apply band, adjust to fingertip tight. Place jar in boiling water canner. Repeat until all jars are filled.
  • Process jars 40 minutes, adjusting for altitude. Turn off heat, remove lid, let jars stand 5 minutes. Remove jars and cool 12-24 hours. Check lids for seal, they should not flex when center is pressed.
Keyword homemade tomato sauce, Preserving tomato sauce

How to Use your AAAMAZING Sauce

Now, here’s the fun part… Cooking with your fantastic sauce. First off, I should have doubled the recipe on sauce day. The recipe makes approximately 3 quarts of sauce. Mine really only made 2 quarts and a pint.  After I sent one quart home with my friend, I only had 1 quart and 1 pint to use. Note to self,  always make 2-3 batches when making this great sauce.

Also, this is a GREAT gift for the holidays, housewarming, new baby… The list goes on and on. I LOVE the new Ball® Sharing Jars, they are so elegant and designed perfectly for adding a ribbon or gift tag right at the top, I adore them!

This sauce would be fantastic on its own just over some pasta but, I thought it would be perfect for Shakshuka! 

Shakshuka is a wonderful recipe that I was introduced to while traveling in Israel.  It is a very common dish there served any time of day. It’s a scrumptious tomato sauce filled with all kinds of earthy spices, herbs, onions & peppers. You top it off with some eggs and then serve right out of the pan with flatbread or a good crusty loaf of bread.  This is the Shakshuka that we ate in Jaffa, Israel and the fun outdoor restaurant where we enjoyed this dish.   

With the Roasted Garlic and Roma Tomato Sauce as our starting point, it already has the tomatoes, onions, garlic & herbs, all we need to add is the all-important spices & some peppers.   

Shakshuka

Heather T
This simple Israeli dish served with bread will soon become a favorite in your home. It's easy to prepare for any time of the day and packs all kinds of amazing flavor!
Print Recipe Pin Recipe
Prep Time 8 minutes mins
Cook Time 20 minutes mins
Total Time 28 minutes mins
Course Main Course
Cuisine Middle Eastern
Servings 4 servings

Ingredients
  

  • 2 tbsp olive oil
  • 2 tsp cumin
  • 1/2 tsp red pepper flakes
  • 1/2 tsp coriander
  • 1/4 tsp cayenne pepper
  • 1/2 tsp paprika
  • 2 tbsp tomato paste
  • 1 cup diced sweet peppers
  • salt & pepper
  • 5 eggs

Instructions
 

  • In a medium to large oven safe sauté pan over medium-high heat, add your olive oil & spices. 
  • Let your spices bloom for about 30 seconds then add your diced peppers, let the peppers cook down for a few minutes until nice and soft.
  • Add the tomato paste and cook for another minute. 
  • Add the roasted garlic and roma tomato sauce and stir to combine. Let this mixture come to a nice simmer.
  • Add 5-6 eggs and cover with a lid until the eggs are set to your desired taste. 
  • Traditionally they are pretty soft, but it's up to you. Serve with a nice loaf of bread or pita.
Keyword eggs, shakshuka


Kosher Dill Pickle and Sausage Rolls

21 · Jul 24, 2018 · 1 Comment

Growing up in my house, one could no more refuse a good dill pickle than one could refuse an ice cream sundae. We were most certainly fans. As kids, my sisters and I would argue over who got to drink the pickle juice at the end of the jar of pickles. Kind of weird, I know! I’m sure we weren’t the only ones with a love of pickles that extended past the pickles themselves. We also had a love of a good sausage paired with our favorite pickles. Naturally, I love to share these fun summer traditions with my family now, all wrapped up together in a tasty dill pickle and sausage rolls.

•  This post is brought to you by Ball® Fresh Preserving Products by Newell Brands  •

Picking the Right Cucumbers for Pickles

I remember as a kid when my Mom would pickle cucumbers, I was always so leery of those poky cucumbers that she assured me would turn into pickles. They sure didn’t look like the cucumbers I was used to. Mom was right of course, a few weeks later her silly looking cucumbers were the best dill pickles I had ever had the chance to eat. 

When it comes to pickling cucumbers there are a few different things to keep in mind.

  • The right variety – in all reality any cucumber can be pickled. However, you may not be too thrilled with the results. Small to medium size Kirby cucumbers are typically the best. They have a thicker skin that can stand up to the brine and will remain crunchy after they have been pickled.
  • The right size – the key here is to find cucumbers that are close to the same size. For this recipe, we are looking for a small to medium size that ranges between 3-4 inches. Try to find cucumbers within that size range to have a consistent final product.
  • The right age – Yes, your cucumbers have an age. Too young and thin-skinned, and they will not hold up to the pickling process. Too old, and they’ll have tough, fibrous skin and large, bitter seeds. How can you tell a cucumber’s age? Size is an indicator (again, go for small-medium), and also, taste. If it’s sweet, with a good crunch when you bite into it, it’s a keeper.

Kosher Dill Pickle Recipe

A “kosher” dill pickle is not necessarily kosher in the sense that it has been prepared in accordance with Jewish dietary law. Rather, it is a pickle made in the traditional manner of Jewish New York City pickle makers, with a generous addition of garlic and dill to a natural salt brine.

To me, a kosher dill is exactly what I think of when it comes to a nice crunchy pickle paired with my favorite sandwich. Luckily, it’s also an easy recipe perfect for beginning picklers. 

Before you get started, make sure you have 4 of my favorite pint jars from Ball® Canning. I’m loving the new fancy jars that are so fun to share with family and friends.

1 vote

Print

Kosher Dill Pickles

Yield 4 (16 oz.) pint jars

A classic dill pickle full of robust flavor, this a great place to start if you are new to canning pickles. A pinch of Ball® Pickle Crisp will help keep the crunch.  

Ingredients

  • 2 ½ lbs 3-4 inch pickling cucumbers
  • 2- ½ cups water
  • 2 cups white vinegar
  • 1/4 cup sugar
  • 1/4 cup Ball® Salt for Pickling and Preserving
  • 4 cloves garlic
  • 4 small bay leaves
  • 12 dill sprigs
  • 2 tsp yellow mustard seeds                                                                                                                                                                                                                                                                                                                                                                               
  • 4 small hot peppers (optional)
  • Ball ®Pickle Crisp (optional)

Instructions

  1.   Prepare boiling water canner. Heat jars in simmering water until ready to use, do not boil. Wash lids in warm soapy water and set aside with bands.

  1. Wash cucumbers and hot peppers in cold water. Slice 1/16 of an inch off the blossom end of each cucumber; trim stem ends so cucumbers measure about 3 inches. Cut cucumbers into quarters lengthwise.

  1. Combine water, vinegar, sugar, and salt in a small stainless saucepan. Bring to a boil over medium heat. Lower heat to simmer.
  1. Place 1 garlic clove, 3 dill sprigs, ½ tsp mustard seed, 1 bay leaf and 1 red pepper and Ball® Pickle Crisp (if desired) into a hot jar that is sitting on a towel (not directly on the counter.) Pack cucumber spears into the jar, leaving a ½ inch headspace. Trim any cucumbers that are too tall. 

  1. Ladle hot brine into a hot jar leaving a ½ inch headspace. Remove air bubbles. Wipe jar rim. Center lid on the jar and apply the band, adjust to fingertip tight. Place jar in boiling water canner. Repeat until all jars are filled.

  1.   Process jars 15 minutes, adjusting for altitude. Turn off heat, remove the lid, let jars stand 5 minutes. Remove jars and cool 12-24 hours. Check lids for a seal, they should not flex when the center is pressed.


Kosher Dill Pickle and Sausage Rolls

This is where this simple kosher dill pickle becomes extra scrumptious! I’ve created a cheesy pickle spread that is perfect for the inside of the sausage roll or, on its own as a dip for veggies and chips.

1 vote

Print

Kosher Dill Pickle and Sausage Roll Recipe

Yield 8 rolls

Ingredients

  • 8 oz cream cheese at room temperature
  • 1/2 cup sour cream
  • 1 cup of diced kosher dill pickles
  •   1/4 cup of diced green onion
  • 1/2 tsp. garlic salt
  • 1/4 tsp. onion salt
  • salt and pepper to taste
  • 4 polish sausages cut in half
  • 8 kosher dill pickle spears
  • 8 large freezer roll dough balls brought to room temp and allowed to rise
  • everything but the bagel seasoning blend (optional)

Instructions

  1. Preheat oven to 350˚ F
  2. In a medium bowl combine softened cream cheese, sour cream, diced kosher dill pickles, green onion, garlic salt, onion salt, salt and pepper. Whisk together and set aside.
  3. On a clean surface roll out the risen roll dough ball until about 5 inches across but, make sure not to roll the dough too thin.
  4.   Place a piece of sausage, pickle spear & about 2 tablespoons of the cream cheese mixture in the center of the dough.

  1.   Roll the ingredients up into the dough and secure the seams by pinching them together.

  1.   If using the seasoning bled, place a 1/4 tsp. of the blend on your surface and roll the sausage roll through the seasoning blend to imbed the s  easoning into the dough. 
  1.   Place the roll on a parchment lined baking sheet. Repeat the process for the remaining ingredients.
  1.   Place baking sheet into the oven and bake for 20-25 minutes or until the top of the roll is a nice golden brown.
  1.   Remove from oven and let cool for 10 minutes.
  1.   Serve with the remaining dill pickle and cream cheese dip. 

SaveSave

SaveSave

SaveSave

SaveSave

SaveSave

Mummy Hot Dogs • How To Video

13 · Sep 26, 2017 · Leave a Comment

There’s nothing better than a simple, scrumptious and slightly spooky treat for Halloween! Come learn how easy it is to make these frightfully delicious Mummy Hot Dogs for your little {and BIG} Trick-or-Treaters.

• Disclaimer – This post brought to you by Pillsbury™ & Walmart. All thoughts, ideas & opinions are my own •

There’s nothing better than a simple, scrumptious and slightly spooky treat for Halloween! Come learn how easy it is to make these frightfully delicious Mummy Hot Dogs for your little {and BIG} Trick-or-Treaters • WhipperBerry

You guys… Halloween is almost upon us and it’s time to start preparing for the fun night. My little guy is super excited and the funny thing is my older kiddos are just as excited. Part of the fun for us adults is in creating the magic for our kiddos. It’s so fun to create creepy treats that have that weird quality of visually grossing you out, and then actually tasty quite good. Have you seen the brain cake that’s going around these day… eeeew! I’m not sure I could do that one.

Pillsbury™ has a classic addition to the Halloween meal menu, the Mummy Hot Dog. This one is almost a little too cute to be creepy… My kiddos love them! We headed to Walmart today and grabbed some Mummy Hot Dog supplies. You’ll need…

Mummy Hot Dog Ingredients

There’s nothing better than a simple, scrumptious and slightly spooky treat for Halloween! Come learn how easy it is to make these frightfully delicious Mummy Hot Dogs for your little {and BIG} Trick-or-Treaters • WhipperBerry

•Hot dogs

•Pillsbury™ Crescent Rolls

•Sliced cheese

•Whole cloves

They are super easy to make. Here is a little video that I put together to show how fun they can be…

How cool is that? It’s one of those fun meals that the whole family can make together. You can change up the hot dog option for Dad and use a cooked brat instead or, how good would they be with pepper jack cheese… Really, the sky’s the limit. You can have all kinds of fun with this meal.

  • Page 1
  • Page 2
  • Page 3
  • Interim pages omitted …
  • Page 13
  • Go to Next Page »

Primary Sidebar

Heather from Whipperberry
Hello... my name is Heather and I'm the creator of WhipperBerry a creative lifestyle blog packed full of great recipes and creative ideas for your home and family. I find I am happiest when I'm living a creative life and I love to share what I've been up to along the way... Come explore, my hope is that you'll leave inspired!

Footer

  • Privacy Policy
  • Crafts
  • Food
  • Gifts
  • Holidays
  • Home
  • Mom Life
  • Recipes
  • Travel

Copyright © 2026 · Seasoned Pro