This post brought to you by KC Masterpiece® // I am a BBQ girl through and through. As a kid, I could not wait for grilling season to start! I’ve been known to grill through all kinds of weather, snow be darned (my mom reads this, gotta keep it PG.)
Even as a kiddo, I remember how important the sauce was. For years my Dad (he’s the primary griller in the house) would ALWAYS use KC Masterpiece®, always. My mom would stock-up and buy like 15,000 of them at a time (ok, maybe 6) and the panic button would be activated when we opened the last bottle. Yes, the sauce was that important in our house.
The same holds true for my house. I would have to say that there are very few products that I can claim brand loyalty for three decades and barbecue sauce is one of them, the other being my ketchup, but that another story. KC Masterpiece® has always been our go-to. Did you know that KC Masterpiece® was created by Dr. Rich Davis from Kansas City back in 1978. He created it for the first ever American Royal Barbecue Sauce Competition and won. The folks at KC Masterpiece® are celebrating a big anniversary this year… 35 years!!
To celebrate they have released a limited edition 35th Anniversary Sauce that is reminiscent of the original competition recipe from 1978. It’s lovely!

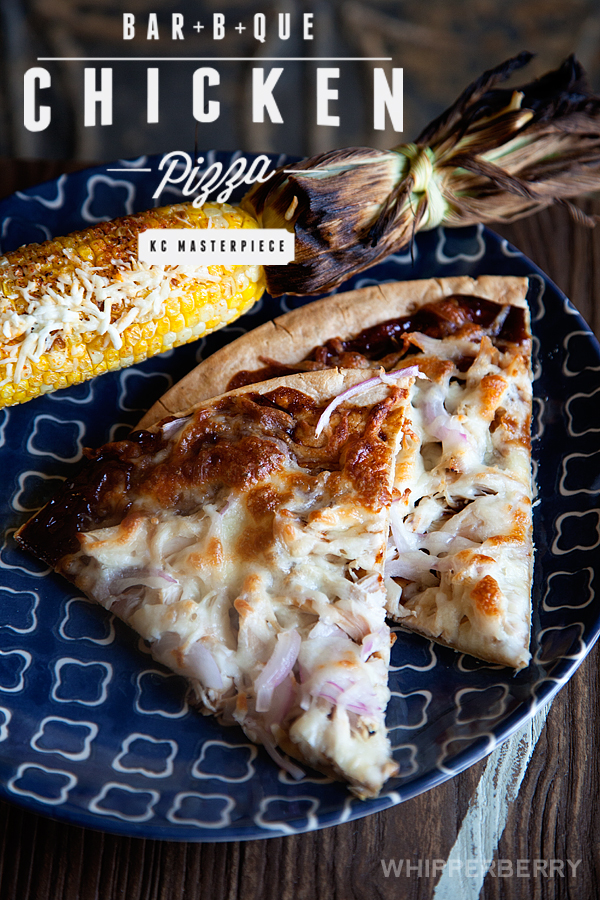
When the folks at KC Masterpiece® asked me to come up with a recipe for the special sauce, I knew instantly what I had to share. Our family’s favorite go-to dinner… Barbecue Chicken Pizza.
This recipe is so easy, it only has FIVE ingredients and it takes about FIVE minutes to pull together.
It’s one of those meals that I pull out several times a month on those busy nights when you need something quick, but still tasty. It’s also my go-to meal when I’m taking a meal to a family who is in need of a dinner. You know when Mom just had a baby or is sick. I make up a couple of these beauties in a snap, I take them over assembled but not baked. They can bake them when they are ready, they can even toss them in the freezer if they aren’t in immediate need. It’s PERFECT!
Barbecue Chicken Pizza
2 store bought already baked pizza crust
1 1/4 cups of KC Masterpiece Barbecue Sauce
1 store bought rotisserie chicken
1/2 of a large red onion sliced thin
3 cups of shredded mozzarella cheese
Yep, I told you it’s embarrassingly easy. I don’t even prepare the chicken. The secret is in the sauce. Seriously, I’ve made this meal at least 100 times and I have experimented with different sauces and it truly is the KC Masterpiece® sauce that makes it amazing.
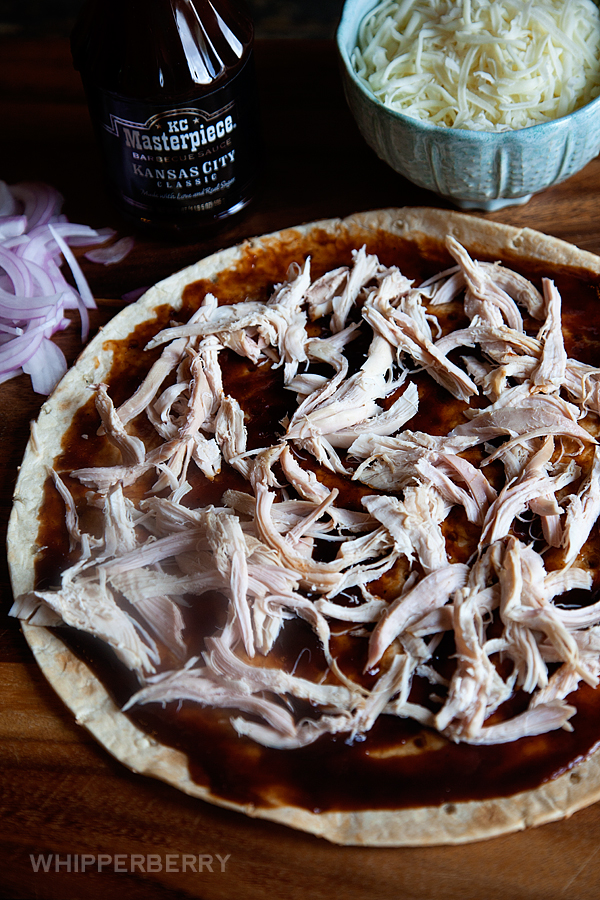
I place the store bought pizza crust on a baking sheet. Side note... You can use store bought crust, make your own crust, use pita bread, biscuit dough, really anything for the crust. Our family likes thin crust pizza, so I buy the super thin store bought crust. Then I pour about 3/4 a cup of sauce on the crust and spread it all over.
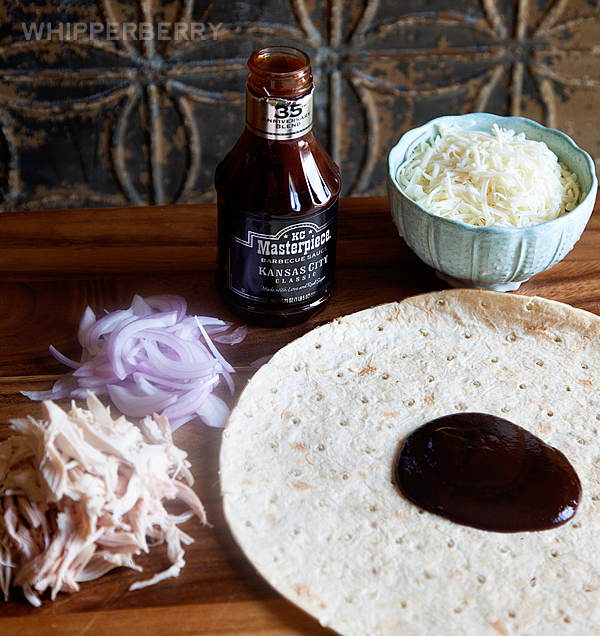
Then I shred the chicken and place a heavy layer of chicken all over the crust. Another side note… On those nights when I’m not in that big of a rush, I make my own chicken by either roasting my own, boiling a couple of chicken breasts or even grilling them. It’s really whatever you like. I would have to say that 75% of the time I use the tasty store bought rotisserie chicken.
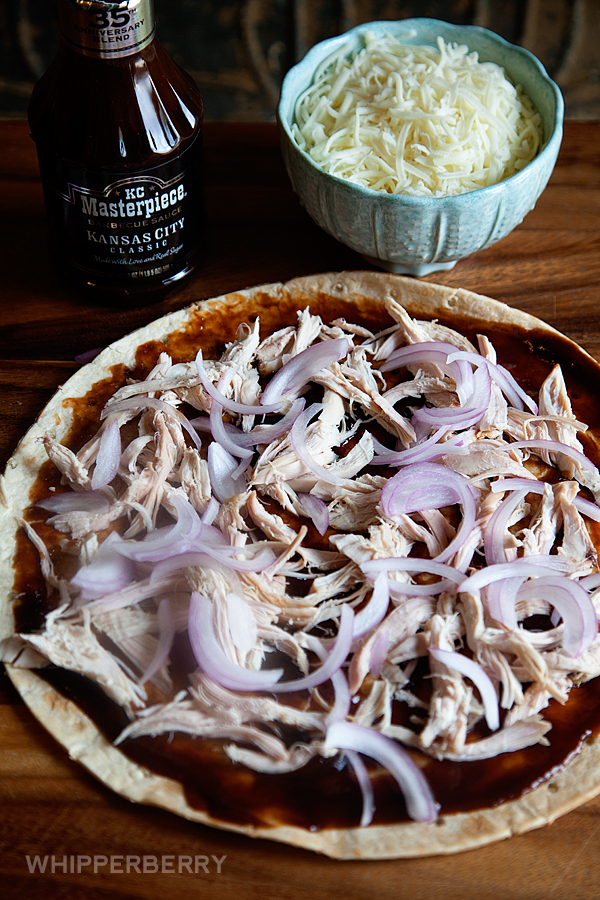
Then I add a layer of red onion… This is also a very important layer. Don’t skimp on the onion. This is what makes this pizza aaaamazing!
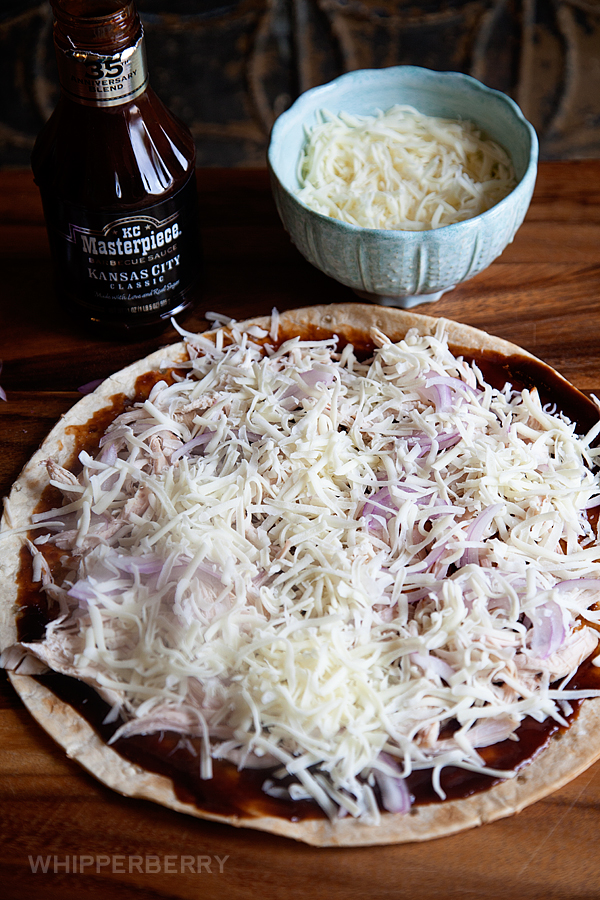
Next comes the cheese…
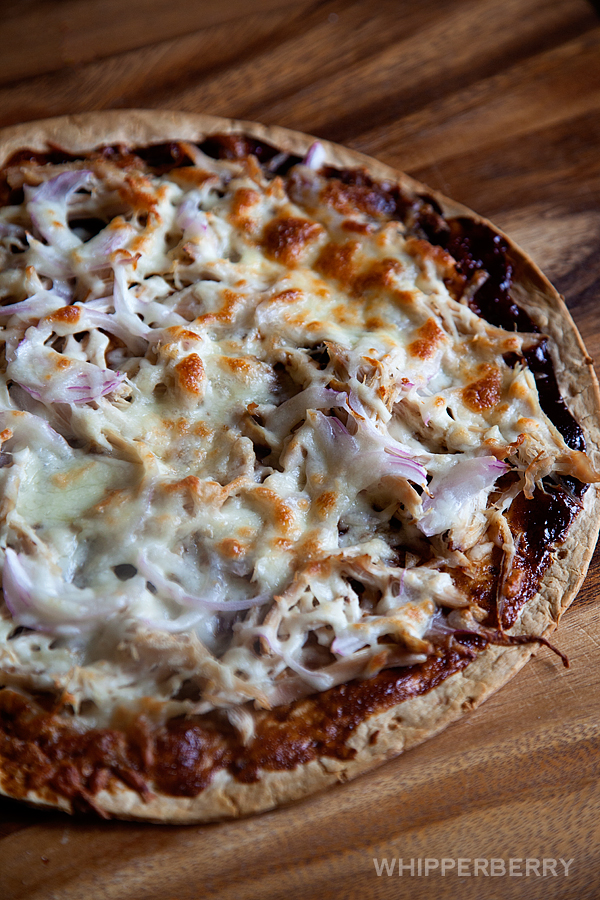
That’s it… Place it in a 400˚ oven for 12-15 minutes or until the cheese has melted and has lightly browned. You could even toss it on a grill if you don’t want to heat up your kitchen.
Serve with some grilled corn or a nice tossed salad and you have a wonderful easy to prepare dinner that literally took minutes to make and is a real crowd pleaser thanks to KC Masterpiece® and their amazing sauce! For more recipe ideas, you can visit KC Masterpiece® on Facebook or Twitter for all kinds of BBQ inspiration.
KC Masterpiece® barbecue sauce has been delivering authentic barbecue taste and creating culinary masterpieces for 35 years. For more recipe ideas, tips and tricks visit www.KCMasterpiece.com.
This is a sponsored conversation written by me on behalf of KC Masterpiece®. The opinions and text are all mine.