• Skip to primary navigation
  • Skip to main content
  • Skip to primary sidebar
  • Skip to footer

Whipperberry

WhipperBerry • Your Home For Creative Inspiration

  • Home
  • Recipes
    • Starters
    • Easy Weeknight Dinners
    • Main Dish
    • Salads
    • Side Dish
    • Soups & Stews
    • Desserts
    • Breakfast
    • Miscellaneous
  • Tutorials
    • Creative Crafts
    • DIY Decor
    • Fabric Crafts
    • Food How-To
    • Jewlery
    • Paint Projects
    • Paper Art
    • Party Styling
    • Photography and Graphic Design
    • Silhouette
  • Holidays
    • Easter
    • Mother’s Day
    • Father’s Day
    • 4th of July
    • Halloween
    • Thanksgiving
    • Christmas
    • Valentine’s Day
  • Gift Ideas
    • Gifts For Everyone
    • Gifts for Dad
    • Mother’s day
    • For The Girls
    • For The Kids
    • Teacher Gift Ideas
    • Christmas
  • Printables
    • Holiday
    • Gift Idea
    • LDS Primary
  • Travel
  • About
    • Terms
  • Contact
  • Nav Social Menu

    • Facebook
    • Instagram
    • Pinterest
    • RSS
    • Twitter

Recipes

Peanut Brittle & Pretzel Chocolate Chip Cookies

0 · Mar 4, 2014 · 6 Comments

Hi Whipperberry friends!  It’s Jo-Anna from A Pretty Life in the Suburbs back again!

Has it already been a month since I was here last?  It’s been too long I’d say…so I decided it was time to come over and make you some cookies!  And not just any cookies.  Cookies chock full of chocolate and peanut butter chips, peanut brittle, and salted pretzels.  Wow.

Peanut Brittle & Pretzel Chocolate Chip Cookies

Peanut Brittle & Pretzel Chocolate Chip Cookies {A Pretty Life}

These cookies are chocolate-y, peanut-y, sweet, crunchy and a little bit salty all at the same time.  So basically they satisfy the whole spectrum of cravings.  These could make great addition to your homemade gift basket or package. True story.

Peanut Brittle & Pretzel Chocolate Chip Cookies {A Pretty Life}

And eaten right out of the oven…oh my…there was never a better tasting cookie.

Whisk

Peanut Brittle & Pretzel Chocolate Chip Cookies
 
Save Print
Ingredients
  • 1 cup butter
  • 1½ cups brown sugar, packed
  • 3 eggs
  • 1 tsp vanilla
  • 3 cups flour
  • 1 tsp baking powder
  • 1 tsp baking soda
  • ½ tsp salt
  • ½ cup raisins
  • ⅓ cup chopped peanut brittle
  • ⅓ cup chopped salted pretzels
  • ½ cup chocolate chips
  • ⅓ cup peanut butter chips
Instructions
  1. Preheat your oven to 375 degrees.
  2. Line your cookie sheets with parchment paper, and set aside.
  3. With a mixer, cream together the butter and sugar until it is creamy and smooth.
  4. Beat in the eggs, one at a time.
  5. Add the vanilla, and mix.
  6. In a separate bowl, whisk together the flour, baking powder, baking soda and salt.
  7. To the butter/sugar mixture, slowly add the flour mixture until well combined.
  8. Add the remaining ingredients: raisins, peanut brittle, pretzels, chocolate chips and peanut butter chips.
  9. Drop the batter by the tablespoon, about 1 inch apart, and bake for 7 - 9 minutes.
  10. Cool on a cookie sheet and enjoy!
3.2.1275

Recipe inspired by Company’s Coming:  Cookies

– – – – – – – – – –

Have fun with this recipe too!  Switch up the added ingredients and put in what ever you like:  toffee bits, butterscotch chips, white chocolate chunks…YUM

Thanks again so much for having me over here!  Have a delicious day!
Signature

For more delicious cookie recipes, check out some of my favourites from my blog!

Cookies-{A-Pretty-Life}

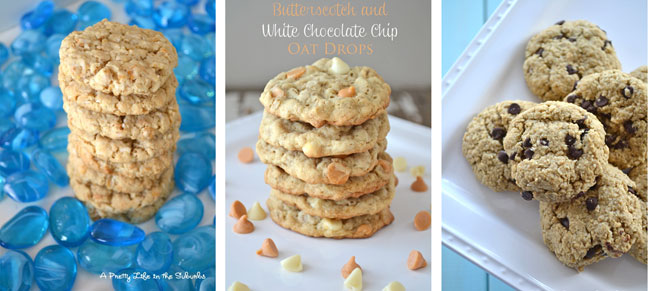
Forest Rangers  //  Butterscotch & White Chocolate Chip Oat Drops  //  Wheat Free Chocolate Chip Cookies

Huevos Rancheros Bake // Recipe

8 · Feb 27, 2014 · 11 Comments

// huevos rancheros bake recipe //

huevos-rancheros-bake-recipe-#whipperberry

I’ve become obsessed with eggs lately. I love how versatile they are, I love how they taste when dressed up, I especially love how they are easy on the grocery budget. I have started making egg dishes a couple of nights a week because they are EASY, inexpensive and the family is still getting a great source of protein without the more expensive meat or poultry options.

As a kid my Mom would make Huevos Rancheros every once in a while and I LOVED it.  The flavor combinations are fantastic.  A typical huevos rancheros recipe has some type of tomato based salsa, fried or poached eggs, tortilla and sometimes cheese on top.  This version is a bit different. It still has eggs and salsa, but I took some liberties when it comes to the tortilla and the cooking method.

The other night we hosted a taco dinner with some family and we ended up with some left over spanish rice. I tend to over do it at times and we had rice for an army.  I had just made a couple of packages of Old El Paso Mexican Rice  and added a can of  Muir Glen Organic Fire Roasted Diced Tomatoes to the pot when I cooked up the rice. You’ll have to adjust the liquid a bit, but it sure makes a lovely mexican rice!

Anyway… I had a bit of left over rice and thought… I could use this as a base for a lovely baked egg dish! That’s how the recipe development started. I wanted something easy to throw together using some simple taco night left overs.  You know those side dishes that we never know what to do with after taco night!  Here is how I layered my egg dish…

huevos-rancheros-bake-recipe-#whipperberry-3

The first layer is the leftover mexican rice, the second layer is just a can of rinsed black beans or refried beans, or any bean dish that you may have left over. Then a layer of your favorite salsa, we like Pace Chunky Salsa,  then top with an egg and some salt & pepper. Super simple and a GREAT way to use up those leftovers!

huevos-rancheros-bake-recipe-#whipperberry-2

Before I placed it in the oven I topped it off with some shredded cheddar cheese and some green onion a perfect way to add a little kick to the dish. After they finished baking, we let them cool for a few minutes and then dove right in. My husband and I had to do a double take. The addition of the egg to these simple ingredients made for a lovely meal, it tasted amazing!! I was thrilled to have a dish that came together so fast, not to mention a dish that the whole family loves and that uses up those pesky taco night left overs… It’s PERFECT!  Here’s the full recipe with all the specifics…

Huevos Rancheros Bake
 
Save Print
Prep time
5 mins
Cook time
20 mins
Total time
25 mins
 
An easy weeknight dinner that capitalizes on those pesky taco night leftovers.
Author: Heather Thoming
Recipe type: Easy Weeknight Dinner
Cuisine: Mexican
Serves: 4
Ingredients
  • baking spray
  • 2 cups mexican rice
  • 1 cup black beans
  • 1 cup salsa
  • 4 eggs
  • 1 cup shredded cheddar cheese
  • ¼ cup sliced green onion
  • salt & pepper
Instructions
  1. For this recipe you can use a number of different baking dishes. You can bake the egg dish in a small baking dish, small oven safe ramekins or even a large muffin tin. Whatever you have on hand really. I've used each method and they all work great.
  2. Preheat the oven to 350˚ and prepare your baking dish or dishes with non-stick baking spray.
  3. Start with the rice layer on the bottom. Smooth it out and add the beans on top of the rice. Then add a nice layer of salsa. At this point, place the dish or dishes in to the oven for 10 minutes to bring up to temperature before added your eggs.
  4. Remove from oven and add your eggs, salt, pepper, cheese and green onion and place back in the oven for an additional 6-10 minutes or until the whites of the eggs have set. You may need to turn in the oven once to promote even baking.
  5. Remove from the oven and let cool for a few minutes, but serve not to long after it comes out of the oven.
3.2.1275

Easy Baked Pear Crisp Recipe

2 · Feb 20, 2014 · 4 Comments

Baked Pear Crisp Recipe // Hello Whipperberry Readers! Jenn here again from Clean and Scentsible. I hope you have all had a good month and, for those of you covered in all of that snow, I hope that you have managed to stay warm and cozy. Spring just can’t get here soon enough for me!

Today I wanted to share one of my new favorite treats with you – this quick and easy pear crisp. It is a great way to warm up on a cold winter’s night and is oh so tasty!

Pear-Crisp-600

I have always been a big fan of fruit crisps and this one only takes a few minutes of prep time and has such a pretty presentation. Although this recipe can be done with apples as well, I have really been loving the pears and it provides a nice switch from the old standard.

INGREDIENTS

  • 2 firm but ripe Bartlett pears {I did not peal them but you could if you prefer}
  • 1/2 cup chopped pecans
  • 3 tbsp. quick cooking oatmeal
  • 3 tbsp. honey
  • 3 tbsp. cold unsalted butter
  • 1/4 tsp cinnamon
  • 1/4 tsp. salt

Pear Crisp - So quick and easy and lighter in calories!

Directions

  • Preheat the oven to 375 F.
  • Cut pears in half lengthwise, and use a teaspoon to scoop out the core.
  • Grease bottom of a small glass or ceramic ovenproof baking dish with butter. Place the pears cut side down in the dish and bake for approximately 15 minutes.
  • While the pears are baking, combine the pecans, oatmeal, honey, butter, cinnamon, and salt in a bowl using your fingers to combine.
  • Divide the crumble into 4 portions. Pack into each pear half and over the top. Place the pears back in the dish (this time cut side up) and bake for an additional 15-20 minutes until the crumble is browned and the pear cuts easily with a fork.
  • Top with whipping cream, vanilla ice cream or Greek yogurt as desired.

Pear Crisp - So quick and easy to make and lighter in calories!

They are SO tasty and relatively easy on the calories. I hope you are able to give them a try!

Easy Baked Pear Crisp Recipe
 
Save Print
Prep time
10 mins
Cook time
35 mins
Total time
45 mins
 
Author: Jenn from Clean & Scentsible
Recipe type: Dessert
Serves: 4
Ingredients
  • 2 firm but ripe Bartlett pears {I did not peal them but you could if you prefer}
  • ½ cup chopped pecans
  • 3 tbsp. quick cooking oatmeal
  • 3 tbsp. honey
  • 3 tbsp. cold unsalted butter
  • ¼ tsp cinnamon
  • ¼ tsp. salt
Instructions
  1. Preheat the oven to 375 F.
  2. Cut pears in half lengthwise, and use a teaspoon to scoop out the core.
  3. Grease bottom of a small glass or ceramic ovenproof baking dish with butter. Place the pears cut side down in the dish and bake for approximately 15 minutes.
  4. While the pears are baking, combine the pecans, oatmeal, honey, butter, cinnamon, and salt in a bowl using your fingers to combine.
  5. Divide the crumble into 4 portions. Pack into each pear half and over the top. Place the pears back in the dish (this time cut side up) and bake for an additional 15-20 minutes until the crumble is browned and the pear cuts easily with a fork.
  6. Top with whipping cream, vanilla ice cream or Greek yogurt as desired.
3.2.1275

If you get a chance, I would love for you to drop by the blog and say hello! This month I have been busy cleaning and organizing our kitchen…

Whipperberry February

How to Create a Cleaning Binder {with free printables}

Kitchen Command Center

How to Clean and Organize Your Kitchen

Thanks so much to Heather for having me! Have a wonderful day!

Cinnamon Roll Donuts

1 · Feb 17, 2014 · 6 Comments

Cinnamon Roll Donuts // Let’s start this post with a little back story.  You can’t just jump straight into a post titled cinnamon roll donuts without knowing a little about where this crazy idea came from… A few weeks ago we were talking to our four year old asking him what type of cake he would like for his birthday. His answer surprised both me and his dad when he replied, “I think I’ll go with a dozen donuts instead of cake this year.”

Um… donuts?! That sent me searching the web for the best donuts in Utah and I came up with a few awesome suggestions. We started our quest for the perfect donut and made it through several great bakeries before my little guy decided on a winner. On the drive home I started to think of how a donut is made… Most are risen dough that are deep fried and coated with glaze. A lot like a cinnamon roll… And THAT is when I decided to test out this idea. Deep. Fried. Cinnamon rolls.

cinnamon-bun-donuts

Cinnamon Roll Donut Recipe

1 batch of your favorite cinnamon roll recipe, risen 
oil for frying
your favorite frosting

Directions

Heat your oil over medium heat.

Place one or two rolls into your hot oil. Cook for one minute, or until browned, flip and cook an additional minute.

Drain on a wire rack. Toss in cinnamon and sugar or dip in your favorite glaze.


cinnamon-roll-donuts

Is that delicious looking, or what? If you wanted to get super crazy you could try this recipe with bacon pieces added to your sweet roll… or maybe even blueberries. They aren’t a typical donut flavor, definitely not good for you, but oh so worth making once… or twice.


fried-cinnamon-rolls

I can’t stress enough how careful you should be when working with hot oil. Burns and fires are not something I want to see happen with anyone!

Like this recipe? Check out these others from One Sweet Appetite:

orange-rolls_thumb.jpg     cinnamon-rolls.jpg     banana-pancakes_thumb.jpg 

Orange Sweet Rolls // Cinnamon Rolls // Chunky Monkey Pancakes

  • « Go to Previous Page
  • Page 1
  • Interim pages omitted …
  • Page 39
  • Page 40
  • Page 41
  • Page 42
  • Page 43
  • Interim pages omitted …
  • Page 66
  • Go to Next Page »

Primary Sidebar

Heather from Whipperberry
Hello... my name is Heather and I'm the creator of WhipperBerry a creative lifestyle blog packed full of great recipes and creative ideas for your home and family. I find I am happiest when I'm living a creative life and I love to share what I've been up to along the way... Come explore, my hope is that you'll leave inspired!

Footer

  • Privacy Policy
  • Crafts
  • Food
  • Gifts
  • Holidays
  • Home
  • Mom Life
  • Recipes
  • Travel

Copyright © 2026 · Seasoned Pro