• Skip to primary navigation
  • Skip to main content
  • Skip to primary sidebar
  • Skip to footer

Whipperberry

WhipperBerry • Your Home For Creative Inspiration

  • Home
  • Recipes
    • Starters
    • Easy Weeknight Dinners
    • Main Dish
    • Salads
    • Side Dish
    • Soups & Stews
    • Desserts
    • Breakfast
    • Miscellaneous
  • Tutorials
    • Creative Crafts
    • DIY Decor
    • Fabric Crafts
    • Food How-To
    • Jewlery
    • Paint Projects
    • Paper Art
    • Party Styling
    • Photography and Graphic Design
    • Silhouette
  • Holidays
    • Easter
    • Mother’s Day
    • Father’s Day
    • 4th of July
    • Halloween
    • Thanksgiving
    • Christmas
    • Valentine’s Day
  • Gift Ideas
    • Gifts For Everyone
    • Gifts for Dad
    • Mother’s day
    • For The Girls
    • For The Kids
    • Teacher Gift Ideas
    • Christmas
  • Printables
    • Holiday
    • Gift Idea
    • LDS Primary
  • Travel
  • About
    • Terms
  • Contact
  • Nav Social Menu

    • Facebook
    • Instagram
    • Pinterest
    • RSS
    • Twitter

Recipes

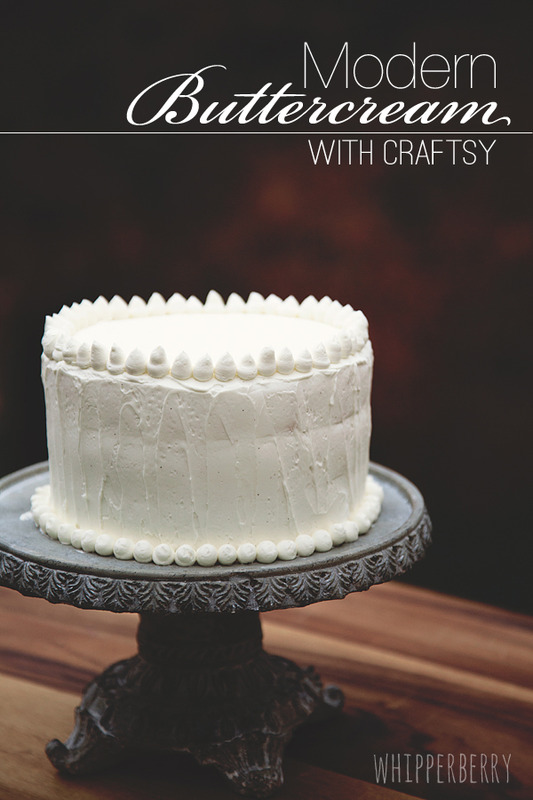
Modern Buttercream with Craftsy

2 · Oct 31, 2013 · 1 Comment

This post brought to you by Craftsty // I LOVE learning new skills and one of my go to places for that is… Craftsy. Have you discovered Craftsy yet? Craftsy is your premiere online learning resource for anything creative. They have sewing, knitting, jewelry making, cooking and cake decorating to name just a few. They have gathered top experts in their field to create high quality classes for you to enjoy and learn from right in your home and on your own time schedule. The other day I took one of their free classes that they have available, Modern Buttercream…

Now, I'm no stranger to cake making, but… I am no expert. I am self taught, I have been dying to learn how to make my cakes look a little more professional. I knew it was time to take a class, but who has time to take a class? I sure don't. That's why Craftsy is perfect! I logged onto my class while sitting on my couch in my PJ's with Gage (my three year old tag along) hanging out with me. It was perfect, I didn't have to find a babysitter or even get dressed. I was able to learn the finer points of creating a buttercream cake from Joshua John Russell. He is an amazing cake artist who I've been watching for several years on the Food Network. He is super talented and a fabulous teacher…

I am blown away every time a take a class through Craftsy. They are indepth and create a class that you can really learn from. I learned a ton from Joshua. Like how to carve a cake so that it not only looks good, but tastes even better too.

I have always used a "buttercream" that is simple to make, but it's not a real buttercream. In this class Joshua teaches how to make a traditional Swiss Buttercream and then how to frost your cake so that it looks like a professional decorated it. Another tip I learned, drizzle a simple syrup on your cake before you assemble. this way your cake stays nice and moist…

I was able to watch right along with Joshua on my iPad while I worked right along with him…

Craftsy even has their very own app so it's even easier to watch your classes on your mobile device. 

I was able to practice my carving skills (which I still need more practice.) 

Then I practiced my crumb coating skills. Do you know why you use a crumb coat? You'll have to come take the class to find out.

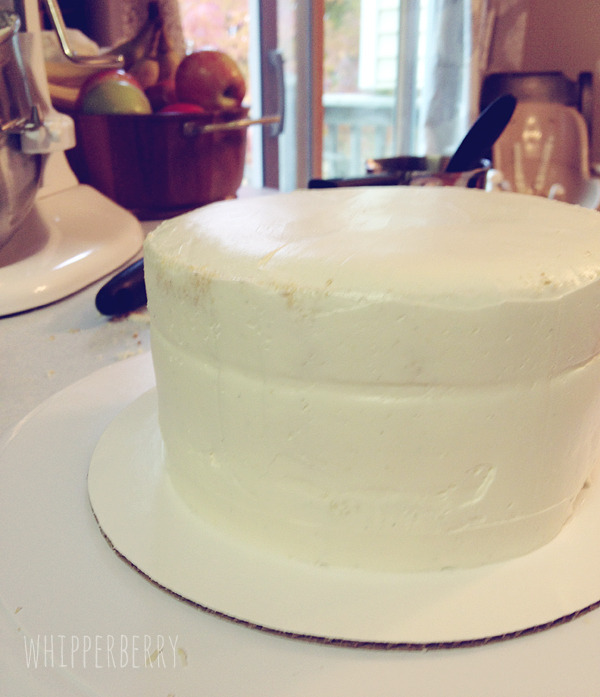
Then I did my final coat and a simple decoration and a rustic finish for my first  buttercream cake…

It turned out pretty good, but I'm ready for some more practice so I can make a cake just like Joshua. The nice thing… it tasted amazing! I did add a little more sugar to his buttercream recipe because I like my buttercream a little sweeter, but overall this class was excellent. I am going to work on another autumn themed cake this weekend to practice my skills. I'll let you know how it turns out next week. In the mean time… You should head over to Craftsy and take one of their free classes to see how amazing the platform is. They have this Modern Buttercream class and Fondant and Hand Painted Cake classes… You'll be amazed!! 

Come back next week for my second cake, I have a few more secret tips that I will be sharing!

This is a sponsored conversation written by me on behalf of Craftsy. The opinions and text are all mine.


Gilgamesh Oatmeal with Bob’s Red Mill Oats

0 · Oct 28, 2013 · 2 Comments


This post brought to you my Bob's Red Mill // I’m part Scottish… By definition I was born with oatmeal in my blood. OK, not really… But, oatmeal is a large part of my Scottish heritage and one part that I really love. It’s one of those foods that you don’t have to feel one iota of guilt for loving. No matter what your taste, there is an oatmeal for you.

oatmeal

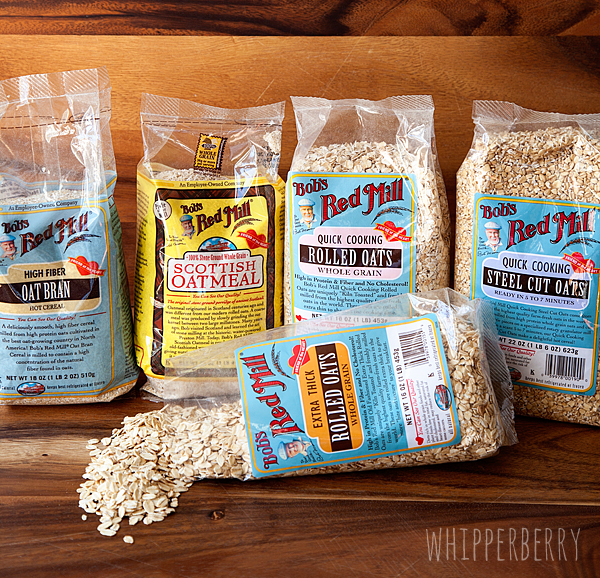
Bob’s Red Mill has a whole collection of different types of oatmeal… Organic Extra Thick, Steel Cut, Scottish, Rolled. Old fashioned and quick cooking, they even have Oat Bran. So no matter how you like your oatmeal, Bob’s Red Mill has you covered. They are an employee owned company that has a passion for creating quality products with time honored processes. Rather than trying to find new technology to process fine whole grain products, they use time tested, traditional techniques that preserve the quality and integrity of the grain, which in turn brings even better nutrition to your table.  


The folks at Bob’s Red Mill challenged me to try one of their fun recipes to try with their oatmeal.


Bob's Red Mill Oatmeal

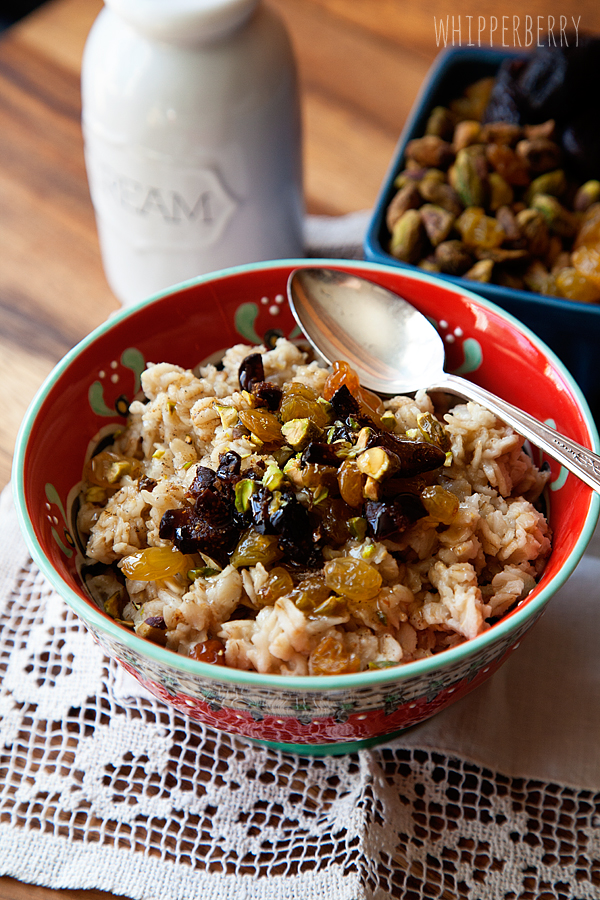
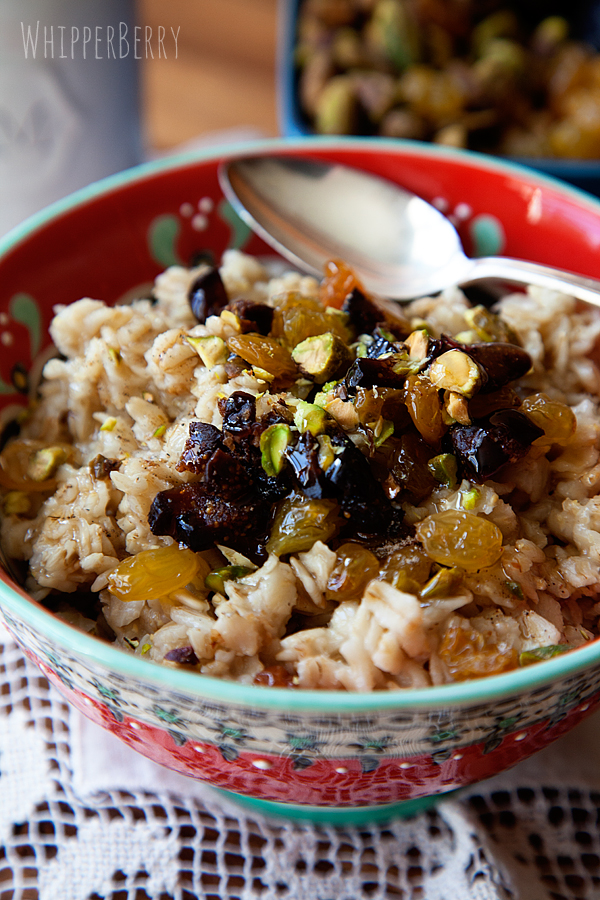
I chose their Gilgamesh recipe and added a few more little treats to fit my tastes. It has a bit of an exotic taste that takes me back to my travels in Israel. I made mine with the Organic Extra Thick Rolled Oats to have a real hearty bite. Here’s how you make it…


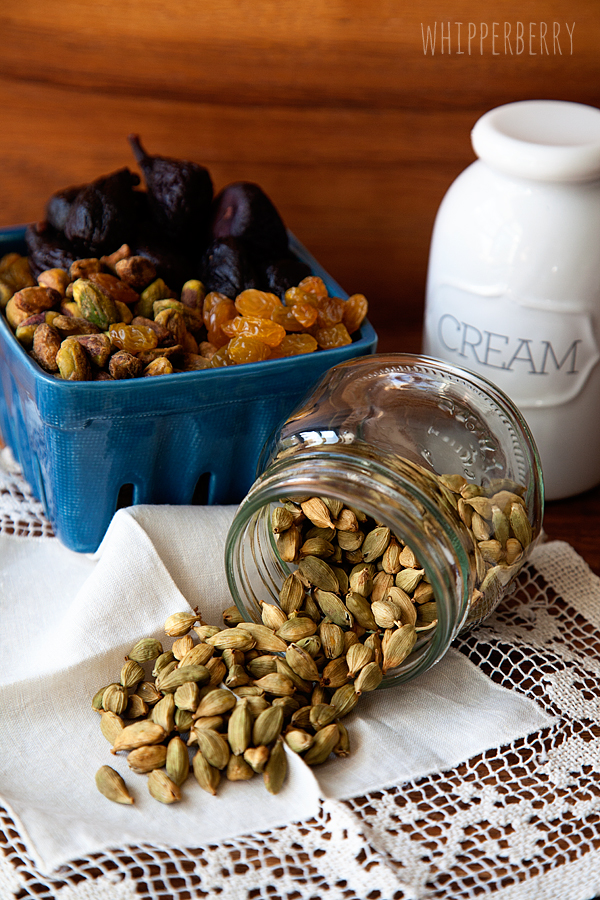
Gilgamesh Oatmeal Toppings


Gilgamesh Oatmeal Ingredients


Pistachios

Chopped Dates or Dried Figs 

Golden Raisins

Honey

Milk or cream

Cardamom or Cinnamon (you could even do a small pinch of both)


Gilgamesh Oatmeal Directions


Cook your favorite type of Oatmeal according to package directions. Once slightly cool, place in a bowl and top with chopped pistachios, chopped dates or dried figs (I couldn’t find dates so I went with dried figs), golden raisins, a splash of milk or cream, a drizzle of honey and a small pinch of cardamom and/or cinnamon. 


You will be transported to the Mediterranean and all the spicy flavors of that part of the world. It’s a trip in a bowl for sure!


Gilgamesh Oatmeal with Bob's Red Mill Oatmeal


Spicy & exotic not your style? Don’t worry… the folks at Bob’s Red Barn have all kinds of ideas up their sleeves.


BRM_Oat Calendar_Live sm[2]

So, what’s your favorite way to eat your oatmeal? What’s your favorite type of oatmeal? Come share some of your favorite toppings!


Disclaimer // This is a post sponsored by Bob's Red Mill. I received product and payment for this post. However, all thoughts and opinions are my very own. 

Turkey, Pear & Brie Sandwich with Hidden Valley™ Ranch Oven Roasted Garlic Sandwich Spread

0 · Oct 24, 2013 ·

A few years ago my family and I traveled to Europe and spent several weeks traveling in Germany and France. While we were there I fell head over heels in LOVE with their rustic style sandwiches. They are always simple with layers of flavor created by using the finest ingredients. They always start with a nice crusty bread and then, the magic is up to you. You pick the scrumptious fresh veggies or even fruit in this case. Find some fine cuts of meat and your favorite cheese and then tie the whole sandwich together with a lovely spread.  When the folks at Hidden Valley™ asked me to create a sandwich using one of their new line of Hidden Valley™ Ranch Sandwich Spreads, I knew right off the bat exactly what I was going to make. A rustic turkey, pear & Brie sandwich on a crusty French loaf with a spread of their new Oven Roasted Garlic Parmesan spread to tie it all together.

This sandwich is so simple and yet full of complex flavors. First, I sliced a nice crusty loaf of French bread length wise and spread some of the tasty Hidden Valley™ Ranch Oven Roasted Garlic Sandwich Spread on the bread…

Made with cream cheese and white beans, the Hidden Valley™ Sandwich Spreads & Dips are low fat with one-third the calories of mayonnaise and only two grams of fat per serving. You can't go wrong with that AT ALL!! Next, I layered the turkey, pear, brie & some parmesan shavings onto the bread…

Then all you need to do top off the sandwich with the bread, slice and serve. This is a perfect sandwich to share with a group of friends. Slice it on the bias and your have a beautiful presentation showing off all the lovely layers of this rustic treat…

Serve with a bowl of olives and some bagel chips along side a bowl with some extra sandwich spread. It's a perfect dip as well!!

Hidden Valley’s line of new Sandwich Spreads & Dips will take your boring sandwich routine to another level. With new flavors like Spicy Chipotle Pepper and Oven Roasted Garlic Parmesan, your mouth will be thanking you and you’ll be on your way to delivering sandwich-envy.
 

This is a sponsored conversation written by me on behalf of Hidden Valley Ranch. The opinions and text are all mine.


Salted Caramel Apple Pie Recipe

2 · Oct 17, 2013 · 18 Comments

Salted Caramel Apple Pie Recipe // Hello Whipperberry readers!  It's Jenn here from Clean and Scentsible. I'm so excited to be visiting again today and have brought along my new favorite dessert – salted caramel apple pie!  I normally prefer desserts with chocolate so you know this has got to be good! 🙂

Salted Caramel Apple Pie.  SO good!

This would make the perfect dessert for Thanksgiving or any other fall dinner party!

Ingredients

Crust

  • 2 cups all purpose flour
  • 1 tsp. salt
  • 3/4 cup vegetable shortening {cut into 1/2 inch cubes}
  • 6-8 tbsp ice cold water

Filling

  • 2 tbsp butter
  • 8 medium apples peeled, cored, and cut into 1/2 inch cubes
  • 1 tbsp. butter
  • 2 tbsp. all purpose flour
  • 1 can Dulce de Leche Caramel sauce {available in the sweetened condensed milk section}
  • 1 tsp. cinnamon
  • 1 1/2 tsp. sea salt

Topping

  • one egg, beaten
  • 1-2 tbsp. sugar
  • 1/2 tsp sea salt

Salted Caramel Apple Pie

Directions

Crust

Combine the flour and salt in a large bowl. Add the shortening, working it into the mixture using a pastry blender until course crumbs form.  Fill a bowl with water and some ice cubes.  Sprinkle about 2-3 tbsp. of the water over the mixture distributing it evenly.  Continue to add water 1 tbsp. at a time until the dough will hold together when pressed.  Divide the dough into two balls, one slightly larger than the other and then flatten into 1/2 inch thick discs.  Chill for at least 30 minutes.

Filling

Cook the cubed apples with 2 tbsp. of butter in a large skillet for 10 minutes over medium heat.  Allow to cool.  In a sauce pan, melt 1 tbsp. of butter with the flour and cook on low for 1 minute.  Add the caramel sauce, cinnamon and salt.  Continue to cook for approximately 3 minutes.  Combine approximately 3/4 of the mixture with the cooled apples.  Save the remaining caramel sauce for the topping.

Putting it Together

Preheat the oven to 375F.  Lightly flour your workspace and roll out the larger ball of dough into a large circle to line the bottom and sides of your pie plate {approximately an 11 inch circle}.  Place the dough in a nine inch pie plate and fill with the apple mixture.  Roll out the remaining dough to form the top of the pie.  Brush the edges of the pie with the beaten egg and press to seal.  Cut some vent slits in the center of the pie.  Brush the top of the pie with egg and sprinkle with the sugar and salt.  Bake for 55-60 minutes until the crust is golden brown.

Top with vanilla ice cream and drizzle with the remaining caramel sauce.  Pure deliciousness!  I promise that you won't be disappointed!

Salted Caramel Apple Pie.  SO good!!

If you are looking for some other Thanksgiving ideas, you might like these posts as well…

Thanksgiving Ideas

Chocolate Turkey Fruit Fondue / Thanksgiving Decor / Turkey Treats


You can also visit me with here: FACEBOOK / PINTEREST / INSTAGRAM / TWITTER

Thanks so much to Heather for having me! Hope you all have a wonderful day!

  • « Go to Previous Page
  • Page 1
  • Interim pages omitted …
  • Page 47
  • Page 48
  • Page 49
  • Page 50
  • Page 51
  • Interim pages omitted …
  • Page 67
  • Go to Next Page »

Primary Sidebar

Heather from Whipperberry
Hello... my name is Heather and I'm the creator of WhipperBerry a creative lifestyle blog packed full of great recipes and creative ideas for your home and family. I find I am happiest when I'm living a creative life and I love to share what I've been up to along the way... Come explore, my hope is that you'll leave inspired!

Footer

  • Privacy Policy
  • Crafts
  • Food
  • Gifts
  • Holidays
  • Home
  • Mom Life
  • Recipes
  • Travel

Copyright © 2026 · Seasoned Pro