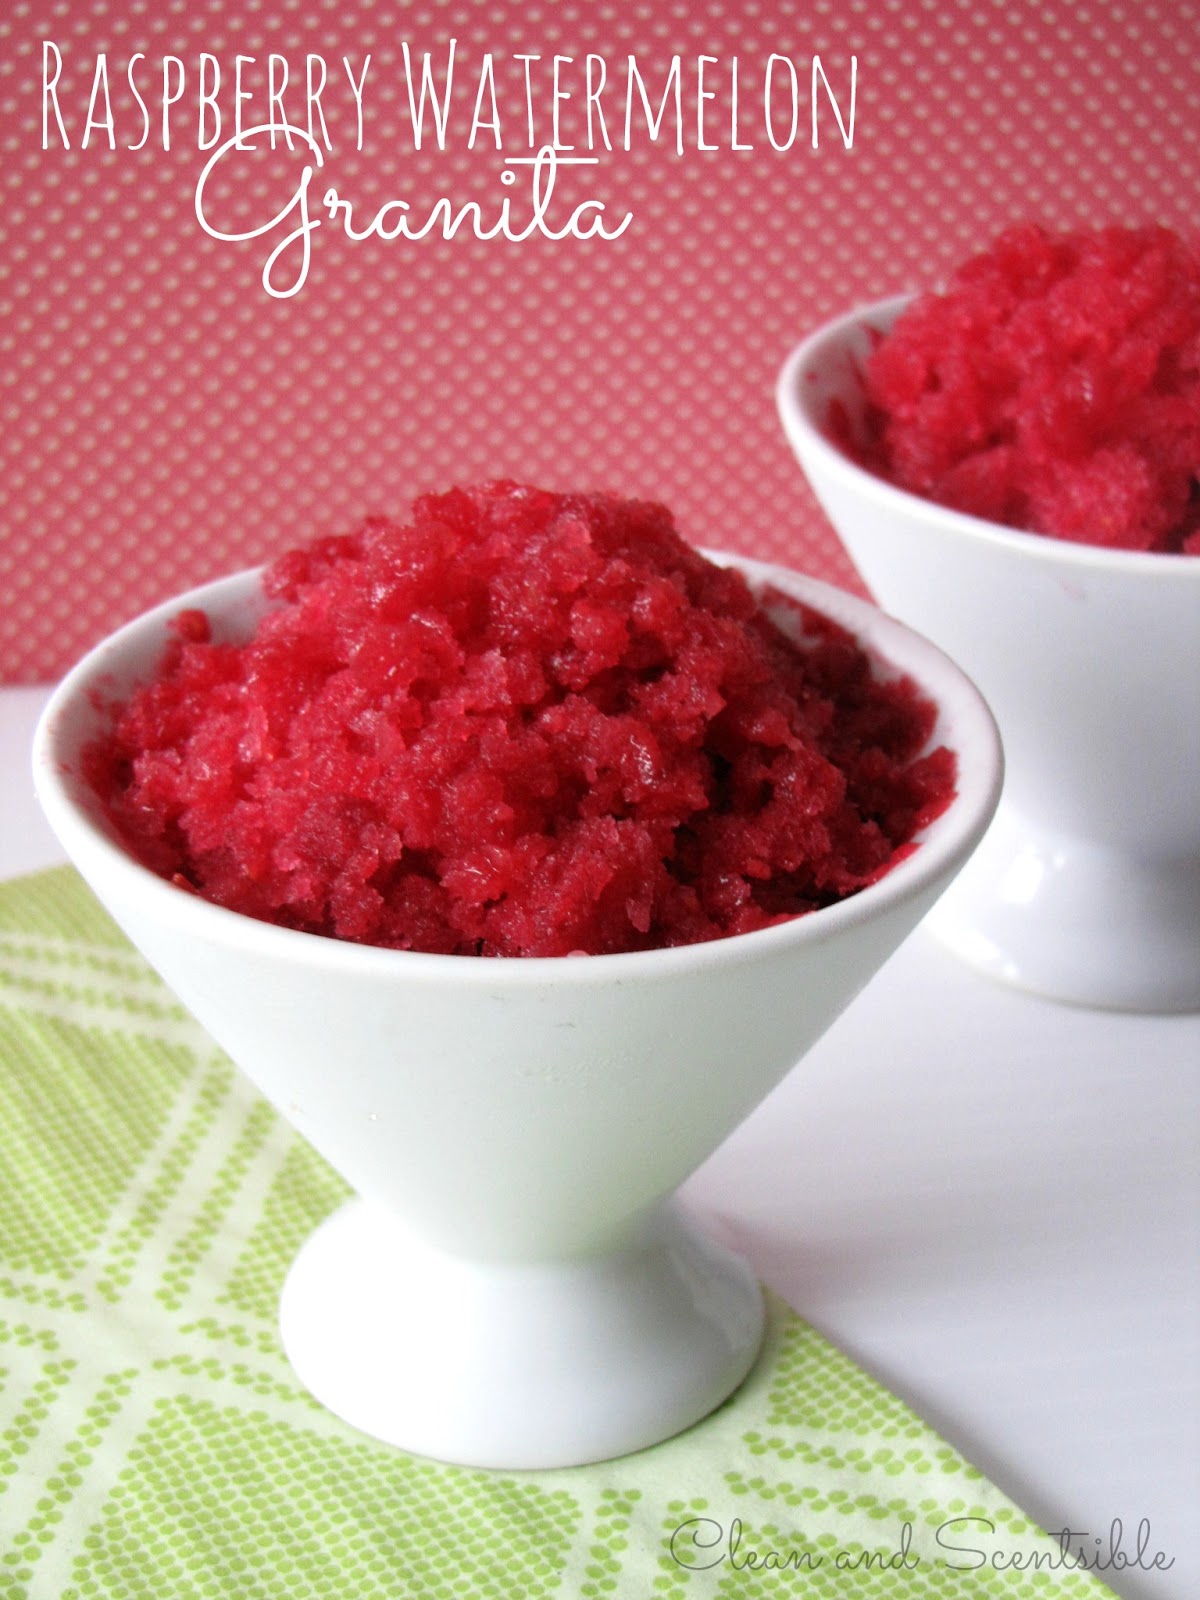
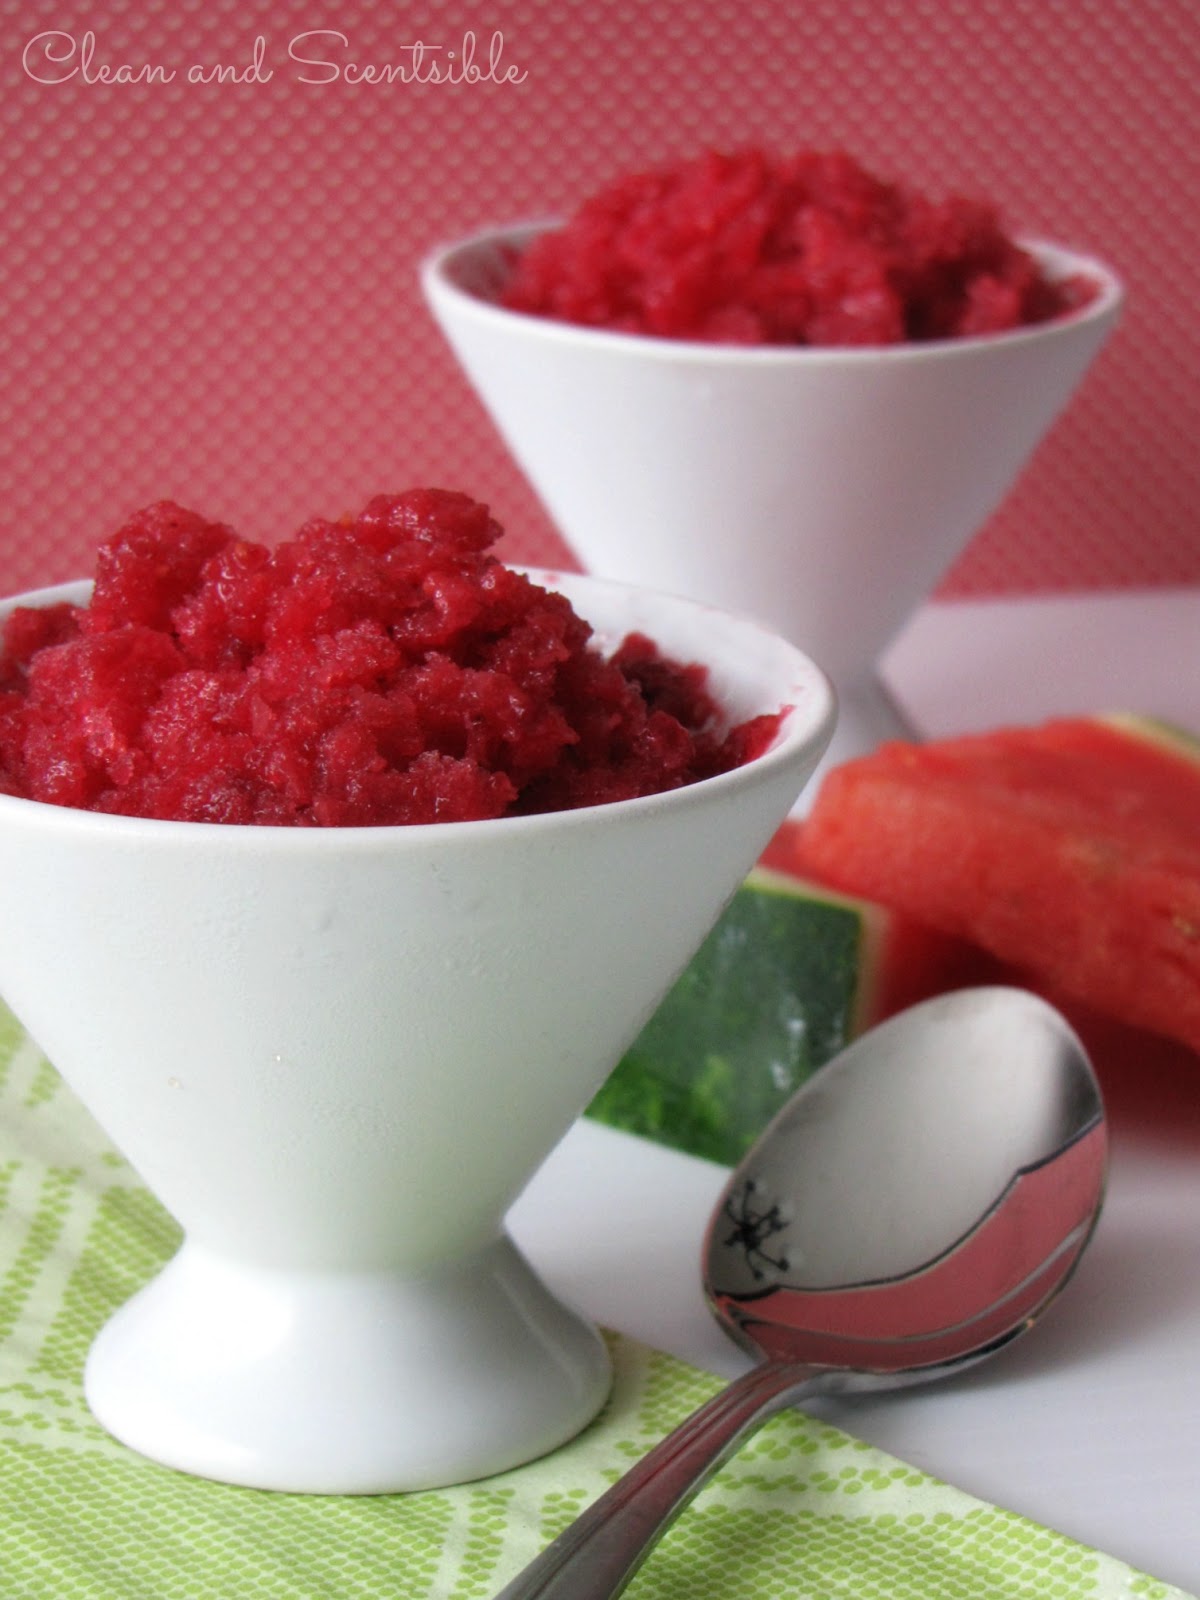
Le Creuset Sponsored Giveaway // As a LONG time fan of Julia Child and Ina Garten (the Barefoot Contessa), I have always wanted to make Beef Bourguignon, BUT… I've had to wait for the RIGHT pot before I tackled this beauty.
As any artist will tell you, your work is only as good as the tools in your bag. The same goes for when you are working in the kitchen. My grandparents were the first exposer I had to the foodie world. My grandfather was connoisseur of fine food and fine cookware. It was his kitchen where I was first introduced to Le Creuset. As a little girl, I was intrigued by the colors of these magical pots and pans that were all over my grandparent's kitchen. I knew when I grew up, I wanted to have the colorful pots in my kitchen. As I got older, and became more educated about cookware, I learned that Le Creuset was one of the finest cookware brands around. The cast iron coupled with the enamel make for some of the best cooking surfaces out there and again, I knew this was a tool I wanted in my kitchen tool box.
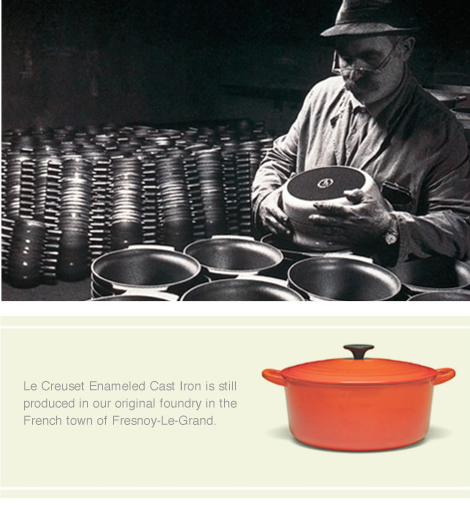
Le Creuset was founded in France in 1925. Although they have branched out into many different types of products the cast iron line is still produced in the same factory today…
 With that history, it's no wonder Le Creuset is some of the most sought after cookware around the globe. They last from generation to generation, my family is still cooking with the same cocottes (French ovens) today. Sadly the older generation of my family has yet to let go and pass them down to my generation their prized French Ovens just yet. No worries… the lovely folks at Le Creuset sent one of their famous French Ovens my way to take for a spin around the block. To say that I was over the moon excited is truly and understatement.
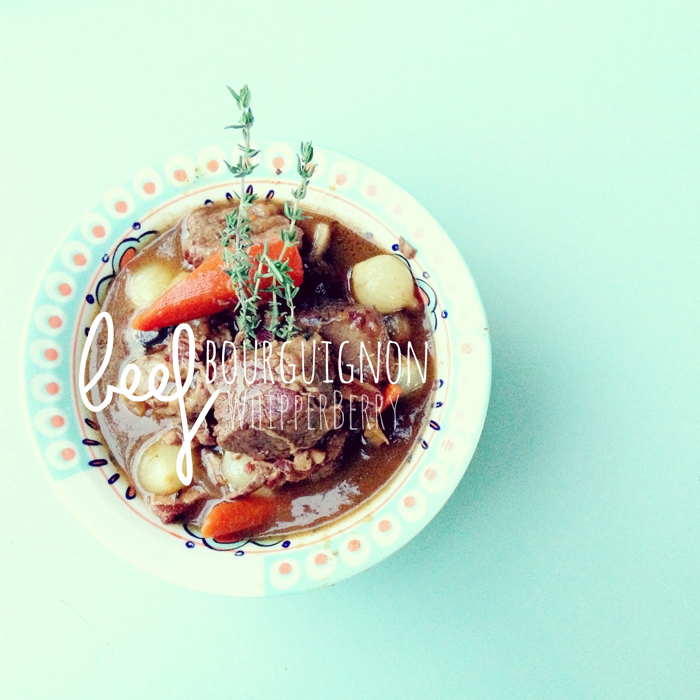
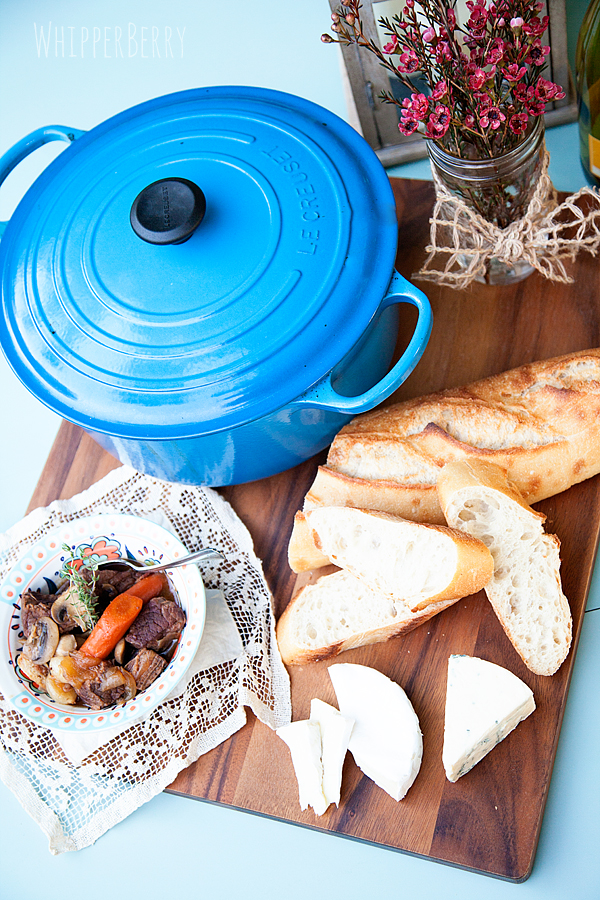
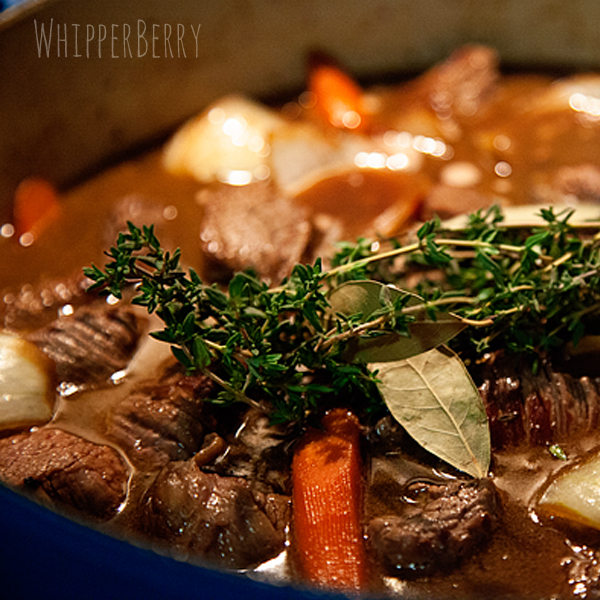
I knew with my love of Julia Child and Ina Garten, the way I needed to christen my new Cocotte was with a lovely Beef Bourguignon. It just had to be done. I took a little bit from Julia's recipe along with Ina's recipe and added a little splash of WhipperBerry to it and came up with this gem of a recipe that my husband said, if he hadn't already married me… He would most certainly marry me again after that meal! Seriously, he thought he had died and gone to Heaven.
flower source // flowerworks
Beef Bourguignon Recipe
1 T olive oil
1/2 lb thick cut bacon
3 lbs of boneless beef short ribs cut into 2 inch chunks
salt & pepper
2 yellow onions
2 cloves of garlic
1/2 c Cognac
1 bottle of red wine like a Pinot Noir
2-3 c beef stock
1 T tomato paste
4-5 sprigs of fresh thyme or 1/2 t dried
2-3 bay leaves
3 T Worcestershire Sauce
3 T B-V Beef Broth and Sauce Concentrate
4 T unsalted butter (melted)
3 T all-purpose flour
1 lb frozen whole onions
1 lb fresh mushrooms
1-2 loaves of crusty french bread
Instructions
Preheat the oven to 250 degrees F.
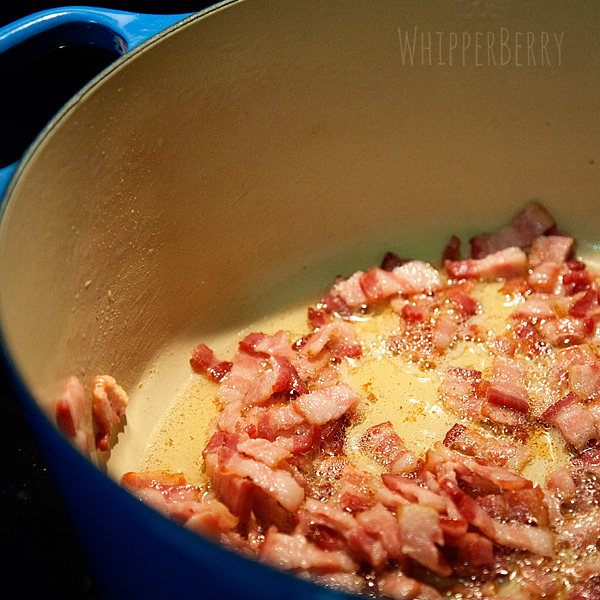
In a large French Oven heat olive oil and add the bacon that has been cut into small pieces. Cook over medium heat for 10 minutes or until lightly brown. Remove bacon and reserve for later. If you have a lot of bacon grease, remove a bit saving a small layer to cook your beef in.
Dry your beef with paper towels and sprinkle with salt and pepper. Over medium heat add small batches to your pot to brown on all sides. Make sure you don't over crowd the pot. This will lead to the beef steaming rather than browning and who wants yucky gray meat? Not me! Remove the seared cubes and set aside.

Add the carrots (that have been peeled and cut into 2 inch pieces) along with the onions to the pot with 1 tablespoon of salt and 2 teaspoons of pepper and cook for 10-15 minutes stirring occasionally until the onions have started to brown.
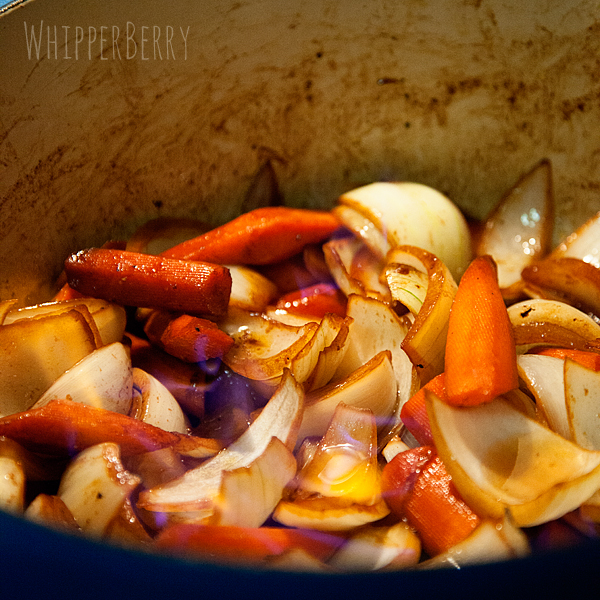
Add the garlic and cook for another minute. Next, carefully add the Cognac, stand back, and ignite with a match. This will burn off the alcohol. You can see in the photo above, a little bit of the flame. It's kind of cool!
NOTE // I don't drink alcohol, but I do cook with it. You can find small bottles of items like Cognac at your local liqueur store behind the counter, just ask the clerk. That way, if you are like me and don't drink it, you don't have to buy an entire expensive bottle.
Put the beef and the bacon back into the pot with all of the collected juices. Add the bottle of wine, plus enough beef broth to cover the stew. Add the tomato paste, Worcestershire Sauce, B-V, thyme & bay leaves. Bring to a simmer and then place in the 250 degree oven for 2 1/2 hours or until the meat is very tender.
Remove from the over and place on the stove and bring to a simmer. Combine 2 tablespoons of melted butter with the flour and add to the pot. This will thicken the stew. Add the frozen onions.
In a separate pan, add two tablespoons of butter and sauté the mushrooms until lightly browned. Add to the stew pot and let simmer for 15 more minutes. Season to taste.
Serve with a nice crusty french bread that has been lightly toasted in the oven. This recipe will serve a crowd of anywhere from 8-12.
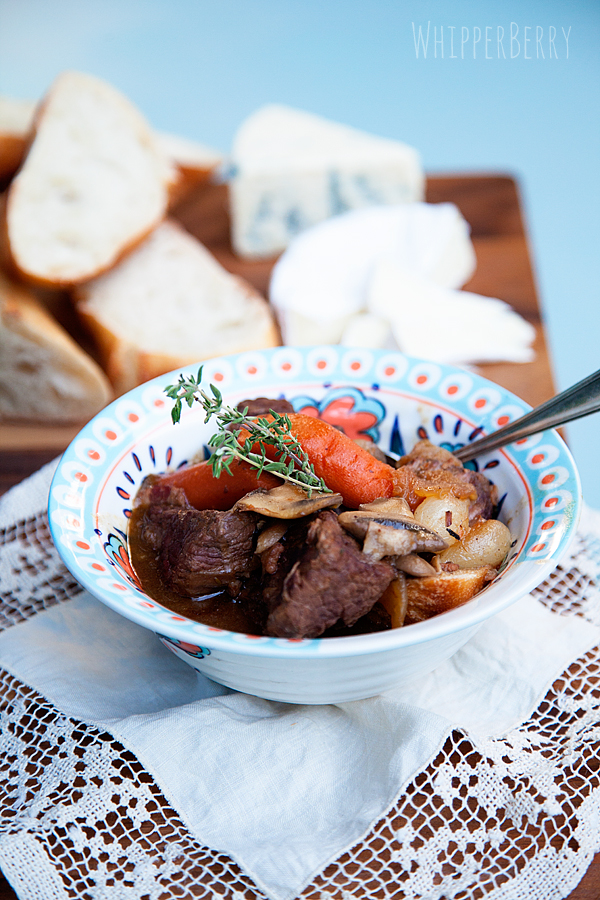
This recipe is amazing!! It's one of those recipes that you have to make at least once in your life, just to say that you follow in the grand tradition of Julia Child and Ina Garten. The lovely folks at Le Creuset would LOVE to help with that tradition as well and have offered one of you a chance to win a Le Creuset Cocoette (French Oven) just like mine!!!

All you have to do to enter is, follow the directions on the Rafflecopter below. This giveaway is for a 9 qt. round French Oven valued at $350 and is open to residence of the United States. The giveaway has been sponsored by Le Creuset. They have provided a 9 qt French Oven for me to review and the giveaway prize. I did not receive payment for the review and all thoughts, ideas and opinions are my own.