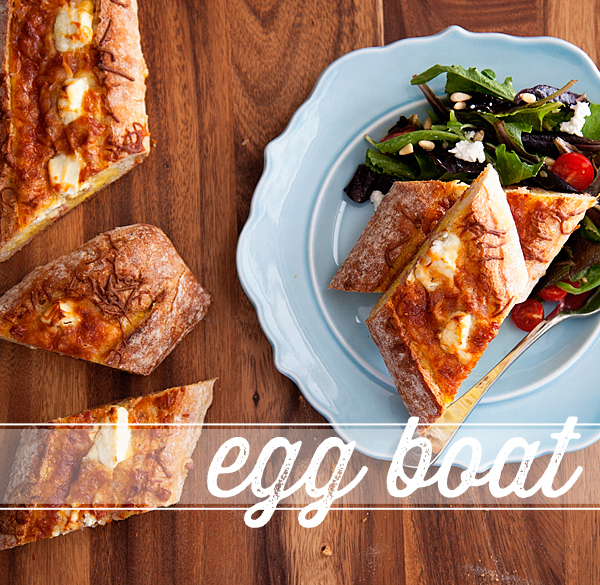
Spring Egg Boats // Have you ever had an ah ha moment that makes you feel pretty silly? When I discovered this recipe a few weeks ago, my first thought was… Holy cow, why didn't I think of that!! I've been making all kinds of egg / bread dishes for years. Why hadn't I ever thought of just putting the egg right into the bread itself and baking it just like that. Total paradigm shift for me. What I love most about this recipe is how easy it is to make and yet it presents really well. This would be a fabulous Easter brunch dish idea, your guests will think you are a culinary genius! Yet it's simple enough for an easy weeknight meal as well. It's the best of both worlds.
Ham and Cheese Egg Boats
This recipe is an adaption of a recipe originally found on Spoon Fork Bacon.
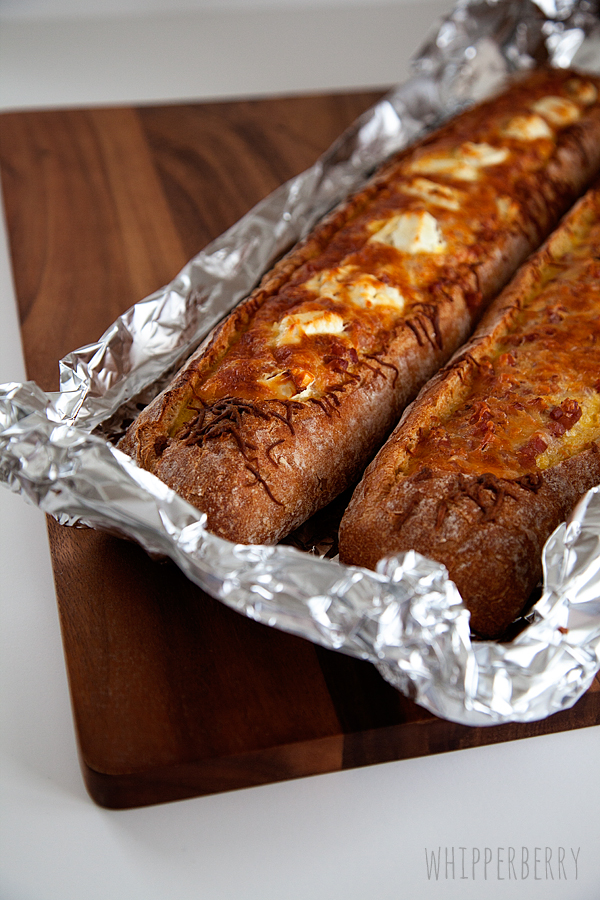
Large loaf of french or sour dough bread
6 eggs
1/4 cup whole milk or cream
Tabasco sauce to taste
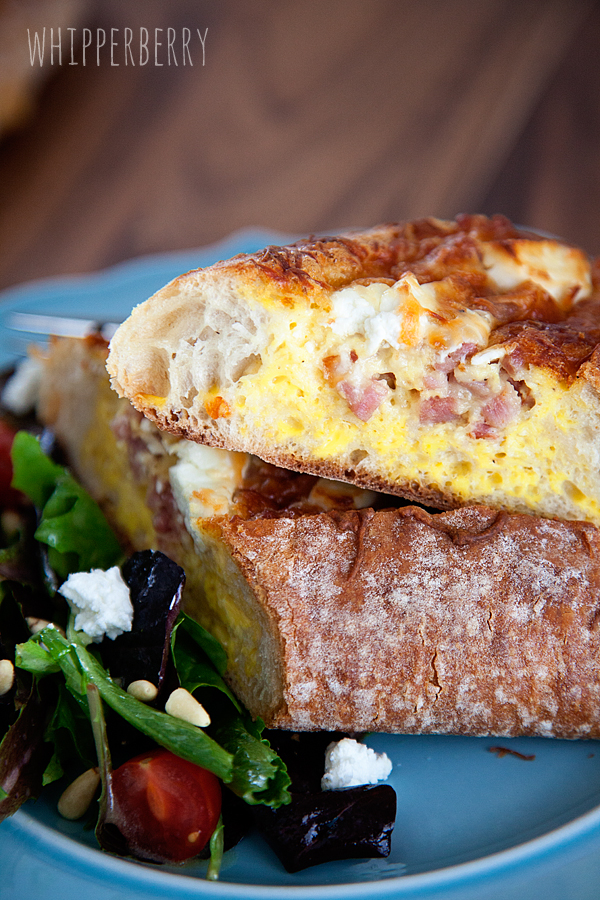
1 cup of diced ham
3/4 cup of shredded cheese (I used an Italian blend of shredded cheese but cheddar would work fine too.)
Goat cheese (optional)
Directions
Cut a long narrow trough in the bread and scoop out a bit of the bread to make room for the egg mixture and set a side. In a bowl whisk together the eggs, milk, Tabasco (I usually put in about 6-10 dashes, but that's up to your taste), and 1/2 cup of the shredded cheese. Once the mixture has been whisked well, add the ham and carefully pour into the bread. Sprinkle the remaining cheese on top of the egg boat. If you are a goat cheese lover, you can add some little dollops of goat cheese on top as well. I love goat cheese but other members of my family do not. So, I made one with and one without.
Now to bake this, if you are using a full size french loaf can be a little tricky. The loaf does not fit on a traditional baking sheet, so I had to improvise. I turned the baking sheet over and then used aluminum foil to create a baking dish for the loaf. That way if there were any spills, the foil would catch the mess and the inverted baking sheet provided stability. It worked like a charm.
Place in a 350 degree oven for 20-30 minutes or until the egg has fully set. Let the egg boat cool for 10-15 and then slice into sections for your family or guests. I served mine with a lovely salad of mixed greens, tomatoes, goat cheese and pine nuts with a bright lemon vinaigrette.
Now that I've found this gem of a recipe, I can't wait to try all kinds of different variations. I can see all kinds of fun combinations with mushrooms, spinach, sausage you name it… Anything that would normally work in an omelet would be lovely. What combination would you try? Leave a comment and share and let's see what other amazing ideas we can all come up with!