• Skip to primary navigation
  • Skip to main content
  • Skip to primary sidebar
  • Skip to footer

Whipperberry

WhipperBerry • Your Home For Creative Inspiration

  • Home
  • Recipes
    • Starters
    • Easy Weeknight Dinners
    • Main Dish
    • Salads
    • Side Dish
    • Soups & Stews
    • Desserts
    • Breakfast
    • Miscellaneous
  • Tutorials
    • Creative Crafts
    • DIY Decor
    • Fabric Crafts
    • Food How-To
    • Jewlery
    • Paint Projects
    • Paper Art
    • Party Styling
    • Photography and Graphic Design
    • Silhouette
  • Holidays
    • Easter
    • Mother’s Day
    • Father’s Day
    • 4th of July
    • Halloween
    • Thanksgiving
    • Christmas
    • Valentine’s Day
  • Gift Ideas
    • Gifts For Everyone
    • Gifts for Dad
    • Mother’s day
    • For The Girls
    • For The Kids
    • Teacher Gift Ideas
    • Christmas
  • Printables
    • Holiday
    • Gift Idea
    • LDS Primary
  • Travel
  • About
    • Terms
  • Contact
  • Nav Social Menu

    • Facebook
    • Instagram
    • Pinterest
    • RSS
    • Twitter

Recipes

Vanilla Salted Chocolate Chip Cookies

8 · Jan 10, 2013 · 17 Comments

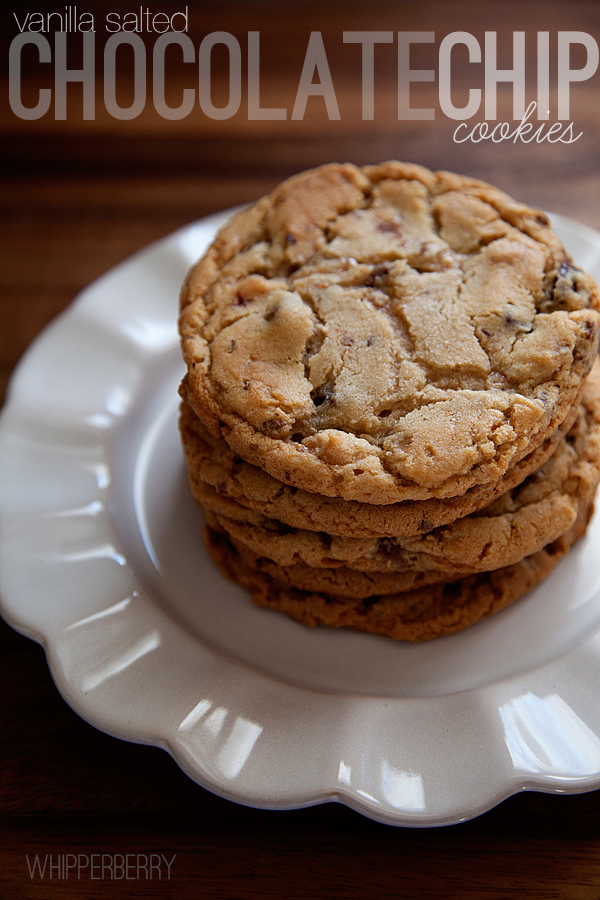
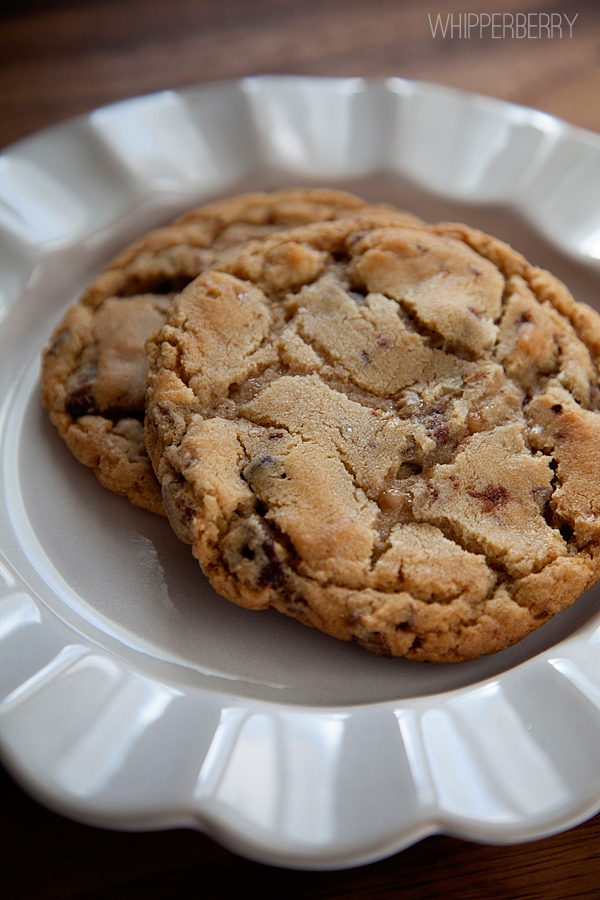
Vanilla salted chocolate chip cookie recipe // I don't know anyone who doesn't go weak in the knees when served a nice warm chocolate chip cookie… They are truly mom's love right on a plate. Now, there are many different recipes for this beloved cookie but I have stumbled across THE PERFECT chocolate chip cookies recipe…

vanilla salted chocolate chip cookies

I grew up with the classic Toll House cookie recipe that my Mom has made for decades and I'm a fan, but I also felt like there was something missing with this recipe. I stumbled across a chocolate chip recipe on Tidy Mom that challenged my idea of a good chocolate chip cookie. Cheryl's recipe is the New York Times chocolate chip cookie recipe adapted from the original recipe from Jacques Torres. This recipe calls for slightly different ingredients than your traditional cookie, like the addition of baking powder and for the dough to be chilled no-less than 24 hours before baking. The big new ingredient for this recipe is the addition of a sprinkle of course sea salt on top of the cookie before baking. It's kind of like the popular salted caramel concept. I decided to take the addition of sea salt to the next level… Have you ever heard of Vanilla Sea Salt?

I discovered Vanilla Sea Salt or Vanilla Fleur de Sel,  last year when I was doing research for my homemade Vanilla Extract. I ordered a bottle because I thought it would be perfect for caramels, little did I know that it would also be wonderful with these cookies. I do believe we can make our own vanilla sea salt, I'm going to work on that and see what I come up with. 

Vanilla Sea Salt Chocolate Chip Cookies

Here is my adaptation of this famous New York Times recipe…

2  (minus 2 tablespoons) cups cake flour

1 2/3 cups of All-Purpose Flour

1 1/4 teaspoon baking soda

1 1/2 teaspoon baking powder

1 1/2 teaspoon salt salt

2 1/2 sticks unsalted butter (room temp)

1 1/4 cups of brown sugar

1 cup of sugar

2 large eggs

2 teaspoons of vanilla extract

1 1/4 pounds of bittersweet chocolate 

vanilla sea salt

Directions

In a large bowl mix sift the the dry ingredients together starting with the flours then adding baking soda, baking powder and salt. Set aside. In the bowl of an electric mixer cream the butter and sugars together. Mix on high for 5 minutes until the mixer is really light and fluffy. Add the eggs and vanilla and mix on high for 1 more minute. Slowly combine the butter and sugar mixer with the dry ingredients and mix just until combined. Add the chocolate and place in a large storage container. Cover the dough with plastic wrap and then place the lid on the storage container. Place in the refrigerator for at least 24 hours, 72 would be best.

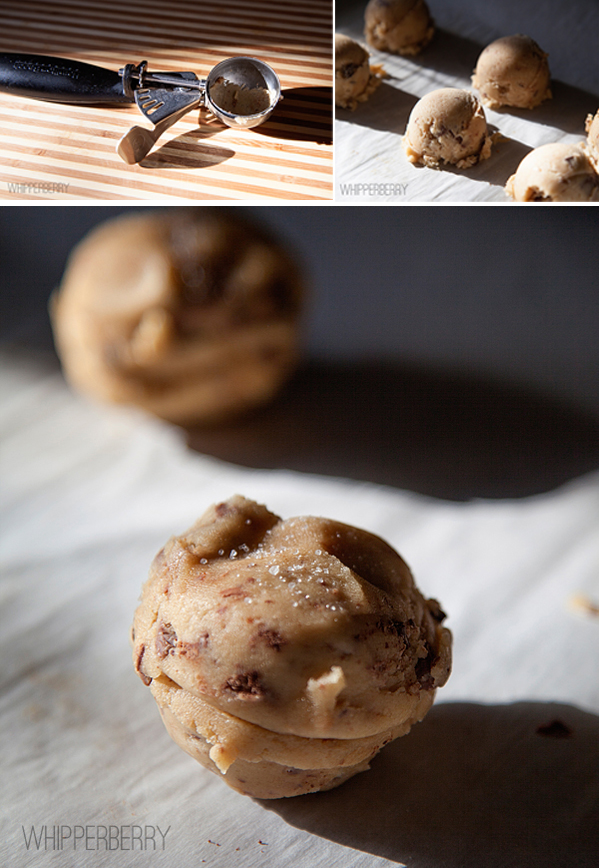
When you are ready to bake the cookies, pre-heat the oven to 350 degree. Prepare your baking sheet with parchment paper or a non-stick cooking mat. Scoop six 2 1/2 ounce dough balls. I used this one ounce scoop and placed two generous scoops together to create one large ball and then sprinkle a pinch of the vanilla sea salt on top of the dough.

how to prepare your chocolate chip cookies

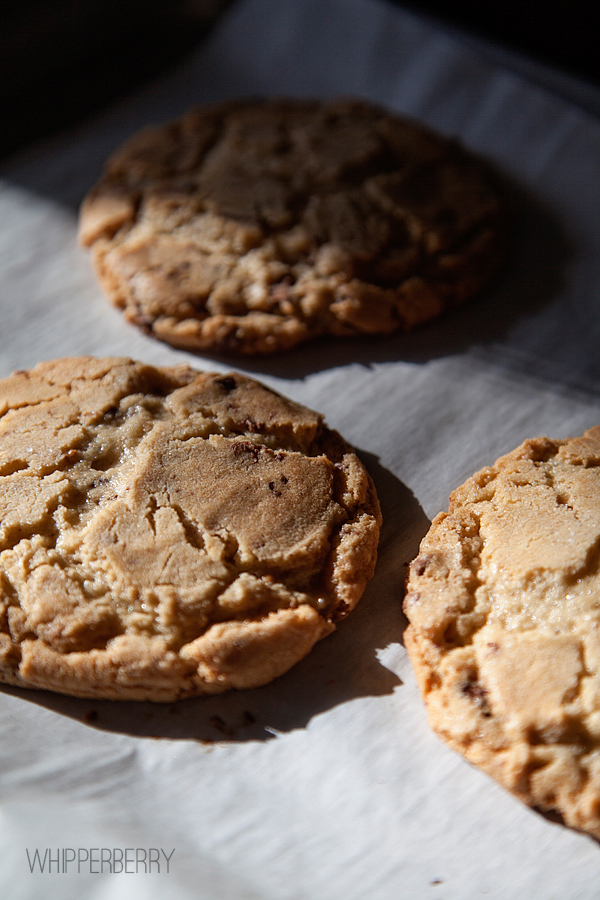
Place in the oven and bake for 18-20 minutes, just until it starts to brown. When you take the cookie out of the oven it will look slightly underdone. You want them that way. That's what makes these cookies magical…

chocolate chip cookies

Let the cookies cool. You will find that after they have cooled a bit, these cookies have a crisp texture on the outside and are still soft and chewy on the inside.When you bite into one you will have that sweet taste of the cookie and every once in a while you will have a lovely burst of salt from that vanilla sea salt and you will be in heaven. Quite honestly this is the perfect chocolate chip cookie in my book! 

the world best chocolate chip cookie

What's your favorite cookie recipe? Have you found "the perfect" cookie recipe for your taste? Let us know, we would love to try some more idea!

I'm linking up with…

Today's Creative Blog

Valentine’s Day Red Velvet Pancakes with Buttermilk Syrup // Recipe

24 · Jan 2, 2013 · 22 Comments

Red Velvet Pancakes with Buttermilk Syrup // While I'm taking a little break with the family for our holiday vacation, I thought I would share an older post from a few years back.  A fun Valentine's Day breakfast idea, Red Velvet Pancakes with Buttermilk Syrup.

heart shaped red velvet pancakes

Serve up a romantic breakfast-in-bed for your Valentine with these decadent pancakes.  Simply beautiful, and yet more pleasing to the taste-buds than even the eyes.  I know my sweetheart revels in any opportunity to feel just so pampered. How fun it is to celebrate the month of love through the delights of sweet treats.

Red Velvet Pancakes:

1 1/2 C. Buttermilk

4  Eggs

4 Tbsp. Butter, melted

1 tsp. Vanilla

2 Tbsp. Red Food Coloring

2 C. Flour

2 Tbsp. Cocoa

1/3 cup Sugar

2 tsp. Baking Powder

1/2 tsp. Baking Soda

1 tsp. Salt

 Buttermilk Syrup:

 1 C Butter

1 C Buttermilk

2 C Sugar

2 T Vanilla

1 t Baking Soda

Directions

For the pancakes, mix together dry ingredients and set aside. Melt butter in separate bowl, then add buttermilk, eggs, vanilla, and food coloring. Blend well. Pour in dry mixture and beat until smooth.

Pour ½ cup of the whipped batter on a greased skillet. Pan fry on medium heat until browned. Flip over and brown again. Top with desired toppings and serve warm.

(To make a heart shaped pancake (optional), place a heart shaped cookie cutter on the skillet, and pour batter into the cookie cutter. Remove form before flipping.)

Make the syrup by bringing the first three ingredients to a boil and boil for one minute, stirring constantly.  Remove from heat and add vanilla and baking soda.  Stir and Serve.

*Optional toppings include syrup, butter, whipping cream, and shaved chocolate.

Eat In with Castle Wood Lunch Meat // $100 Giveaway

0 · Dec 14, 2012 · 8 Comments

Life is crazy these days! The girls are all in three different schools, with three different sets of activities. The little guy and I are ALWAYS busy working on WhipperBerry at home. By the time Mike’s home from work dinner is the last thing I want to think about.  It’s always so tempting to just grab everyone and head off to one of our local restaurants, but that’s sooooo expensive. It’s fine a few times a month, but more than that the wallets really starts to feel the pinch. We MUST figure out how to make dinner fast and inexpensive at the same time… I was giving the opportunity to visit our local Sam’s Club this week to try out their Castle Wood deli section to create a sandwich for our family on the go.

Eat In with Castle Wood Lunchmeat

Yesterday was super busy.  I had a ton of work to do AND a whole bunch of Hales a.k.a. Lil’Whip friend’s were coming over after school. They all needed head shots for an audition next week for the school musical, and I offered to help them with that.

Needless to say, the schedule was tight, plus I had even more mouths to feed. I headed over to Sam’s Club and shopped for sandwich fixin’s for our crew. You can join me over at Google+ to follow along while I sign-up for a Sam’s Club membership and shop for our busy night.

photo 21  photo 6

Gage and I found all kinds of goodies for our busy dinner in the Castle Wood section. We finally decided on a few Castle Wood products for our sandwiches…

Castle Wood Lunch Meat  Castle Wood Cheese from Sam's Club

Then we headed home to put together our yummy dinner. Now, you may think sandwiches are boring, but they don’t have to be. I kept our sandwich simple, but it is FULL of flavor. The key is working with good, flavor packed ingredients.

sandwich incrediants for Castle Wood lunchmeat sandwich

I selected to use The Castle Wood Four Pepper Oven Roasted Turkey Breast along with the Castle Wood Pepper Jack.  Then I paired those two stars with a fabulous supporting cast of tomatoes, cucumber and hummus… Yes, hummus!  It’s a full flavor, less fat option to mayonnaise or Miracle Whip.

Recipe

2 slices of bread

1-2 T hummus

1-2 oz. Castle Wood Four Pepper Oven Roasted Turkey Breast

1-2 slices of Castle Wood Pepper Jack cheese

8-10 slices of cucumber

2-4 slices of tomato

Spread hummus on bread and then layer the turkey, cheese, cucumber and tomato.

Servings // 1

This sandwich is bursting with flavor and is perfect for those meals when you would like to save on time and money. With Castle Wood Lunch Meat Sam’s Club signature brand, you can create a fabulous sandwich for $1… Yep, that’s ONE DOLLAR!! You can’t get that at your local sandwich shop. This was perfect for our busy night of photos for all the high school kiddos. I made up a bunch of sandwiches, wrapped them in parchment paper to keep them fresh and served them with sweet potato chips and a couple of cookies and they were HAPPY and I was happy that I was able to feed the crowd without breaking the budget.

perfect lunch with Castle Wood Lunchmeat

The folks at Sam’s Club would love to help you Eat In a little more often with a $100 gift card.  Follow the directions in the Rafflecopter box below to enter!

a Rafflecopter giveaway

““I am a member of the Collective Bias®  Social Fabric® Community.  This shop has been compensated as part of a social shopper insights study for Collective Bias®  and Castle Wood Lunch Meat #CBias #SocialFabric”

Sharing Holiday Joy with Chocolate Peanut Butter Bars

3 · Dec 6, 2012 · 29 Comments

Chocolate Peanut Butter Bars // My all time favorite Christmas goodies are my Mom's Chocolate Peanut Butter Bars…

Some of my earliest Christmas memories are hanging out in the kitchen with my Mom and sometimes my Dad while they made their famous holiday concoctions. They had a few staples on the list… Fudge, peanut brittle (not my favorite,) your classic Christmas Sugar cookie and then my favorite the chocolate peanut butter bar. I remember dreaming about this little treat all though out the year. Not to mention the anticipation I would feel when Mom would start the task of holiday baking. She always kept the pans of goodies out in our cool garage which acted as our overflow kitchen storage. They were supposedly hidden from sticky little fingers, but no… I always found them. Nibbling little morsels here and there until the sad day when the pan of chocolate peanut butter goodness was gone for another year.

I remember that sense of pride I felt as we would travel out as a family to deliver our plate of goodies to friends and neighbors. I always felt like my Mom's holiday plate was just a little extra special because of the chocolate peanut butter bars. My Mom would always make them in a 9×13 pan and then cut them into bars. This year I made some for my family and friends in these super cute mini paper loaf pans that I found at Walmart and then wrapped them with decorative parchment paper tied with bakers twine. A nice little updated touch to an old family classic.

I just love these little treats full of messages of love from giver to the lucky person receiving the special gift. Whether it's a personalized card or cookies right out of the oven, I love sharing the warmth of the holiday season with my family, friends and, of course, my readers! 

Chocolate Peanut Butter Bars

2 cups graham cracker crumbs

1 cup peanut butter

2 cups powdered sugar

2 sticks butter (melted)

2 cups chocolate chips

Directions

Mix graham crakers crumbs, peanut butter, sugar and butter together well and press into a 8×8 pan. Melt chocolate and spread on top of peanut butter mixture and chill for 30 minutes. Cut into small squares and serve at room temperature.

  • « Go to Previous Page
  • Page 1
  • Interim pages omitted …
  • Page 55
  • Page 56
  • Page 57
  • Page 58
  • Page 59
  • Interim pages omitted …
  • Page 66
  • Go to Next Page »

Primary Sidebar

Heather from Whipperberry
Hello... my name is Heather and I'm the creator of WhipperBerry a creative lifestyle blog packed full of great recipes and creative ideas for your home and family. I find I am happiest when I'm living a creative life and I love to share what I've been up to along the way... Come explore, my hope is that you'll leave inspired!

Footer

  • Privacy Policy
  • Crafts
  • Food
  • Gifts
  • Holidays
  • Home
  • Mom Life
  • Recipes
  • Travel

Copyright © 2026 · Seasoned Pro