// This post brought to you by Bing Rewards //

How many times a day do you have a burning question that you need to have answered?
How many cups in a gallon of milk?
How many calories are in my favorite sandwich at Panera?
When did Thomas Edison invent the light bulb?
Where should we go for lunch?
What is the temperature going to be today?
What is the best time to plan my vacation to Hawaii?
Now… how many times to your turn to your smartphone or the internet to help answer these questions? If you are anything like us, almost 100% of the time! I laugh every single time my husband and I go out on a date. We sit and chat about all kinds of stuff and inevitably, one of us brings up and fun idea or some type of question that we need a little more information on. Within seconds my husband heads straight to his iPhone and almost instantly we have answers to our query!
We live in amazing times… We have a record amount of data and information right at our finger tips. Homework for our kiddos has been revolutionized with the advent of the internet. When I was growing up, if I had a question that needed to be answered for school I had to either rely on my parents knowledge (amazing in some areas, weak in anything that predated Eisenhower), turn to our 1970’s era World Book collection where Nixon was still in office, or high tail it to the library for hours and hours of digging through card catalogs and books. Either way, a research paper in my day involved TONS of effort on my part. Our kids are sooooo lucky they have amazing tools like…

With Bing, you have the answer to ANY question right at your finger tips within seconds.
Want to sweeten the deal?
Did you know that you can be rewarded for your curiosity? Have you heard of Bing Rewards? You can actually earn points every time you Bing something! You can then redeem your points for all kinds of goodies like restaurant gift cards, movie tickets, credit for online boutiques, all kinds of fun stuff. How cool is that? I can earn a Starbucks gift card for just doing what I normally do everyday!
How to Start Earning Bing Rewards
First, all you have to do is visit Bing Rewards and sign up for the program.
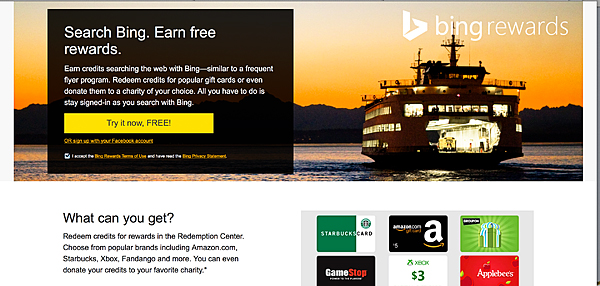
Don’t worry it’s super quick and they don’t ask any personal information. Then all you have to do is start Binging! They even have extra ways to earn more point by doing little things like making Bing your homepage and stuff. I love checking out the bing home page everyday. The imagery is amazing!
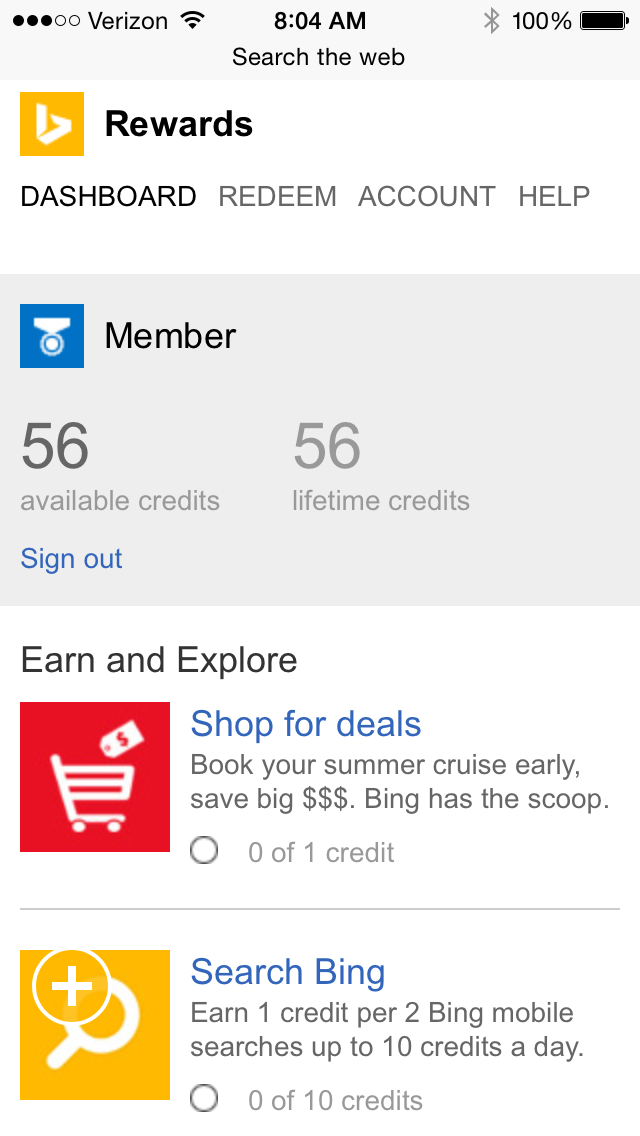
Don’t worry if you aren’t by your computer all the time… You can even Bing on your smartphone!! Just add the Bing app to your Apple or Android phone and you’re in business…

Doesn’t it look fabulous?! I’m such a visual person and I love it. Now I can earn points every time my husband and I come up with some dorky question while we’re out and about. Then I can keep track of my points right on my phone as well…
Why not get paid to do something we are already doing? It’s a win/win if you ask me. Visit Bing Rewards today and start getting paid for your curiosity!!
I’m required to disclose a sponsored partnership between our site and Bing. I have been compensated in exchange for this post in the form of payment, product or experiences.