• Skip to primary navigation
  • Skip to main content
  • Skip to primary sidebar
  • Skip to footer

Whipperberry

WhipperBerry • Your Home For Creative Inspiration

  • Home
  • Recipes
    • Starters
    • Easy Weeknight Dinners
    • Main Dish
    • Salads
    • Side Dish
    • Soups & Stews
    • Desserts
    • Breakfast
    • Miscellaneous
  • Tutorials
    • Creative Crafts
    • DIY Decor
    • Fabric Crafts
    • Food How-To
    • Jewlery
    • Paint Projects
    • Paper Art
    • Party Styling
    • Photography and Graphic Design
    • Silhouette
  • Holidays
    • Easter
    • Mother’s Day
    • Father’s Day
    • 4th of July
    • Halloween
    • Thanksgiving
    • Christmas
    • Valentine’s Day
  • Gift Ideas
    • Gifts For Everyone
    • Gifts for Dad
    • Mother’s day
    • For The Girls
    • For The Kids
    • Teacher Gift Ideas
    • Christmas
  • Printables
    • Holiday
    • Gift Idea
    • LDS Primary
  • Travel
  • About
    • Terms
  • Contact
  • Nav Social Menu

    • Facebook
    • Instagram
    • Pinterest
    • RSS
    • Twitter

Cricut

Party Like A Pineapple Party

21 · May 30, 2017 · 5 Comments

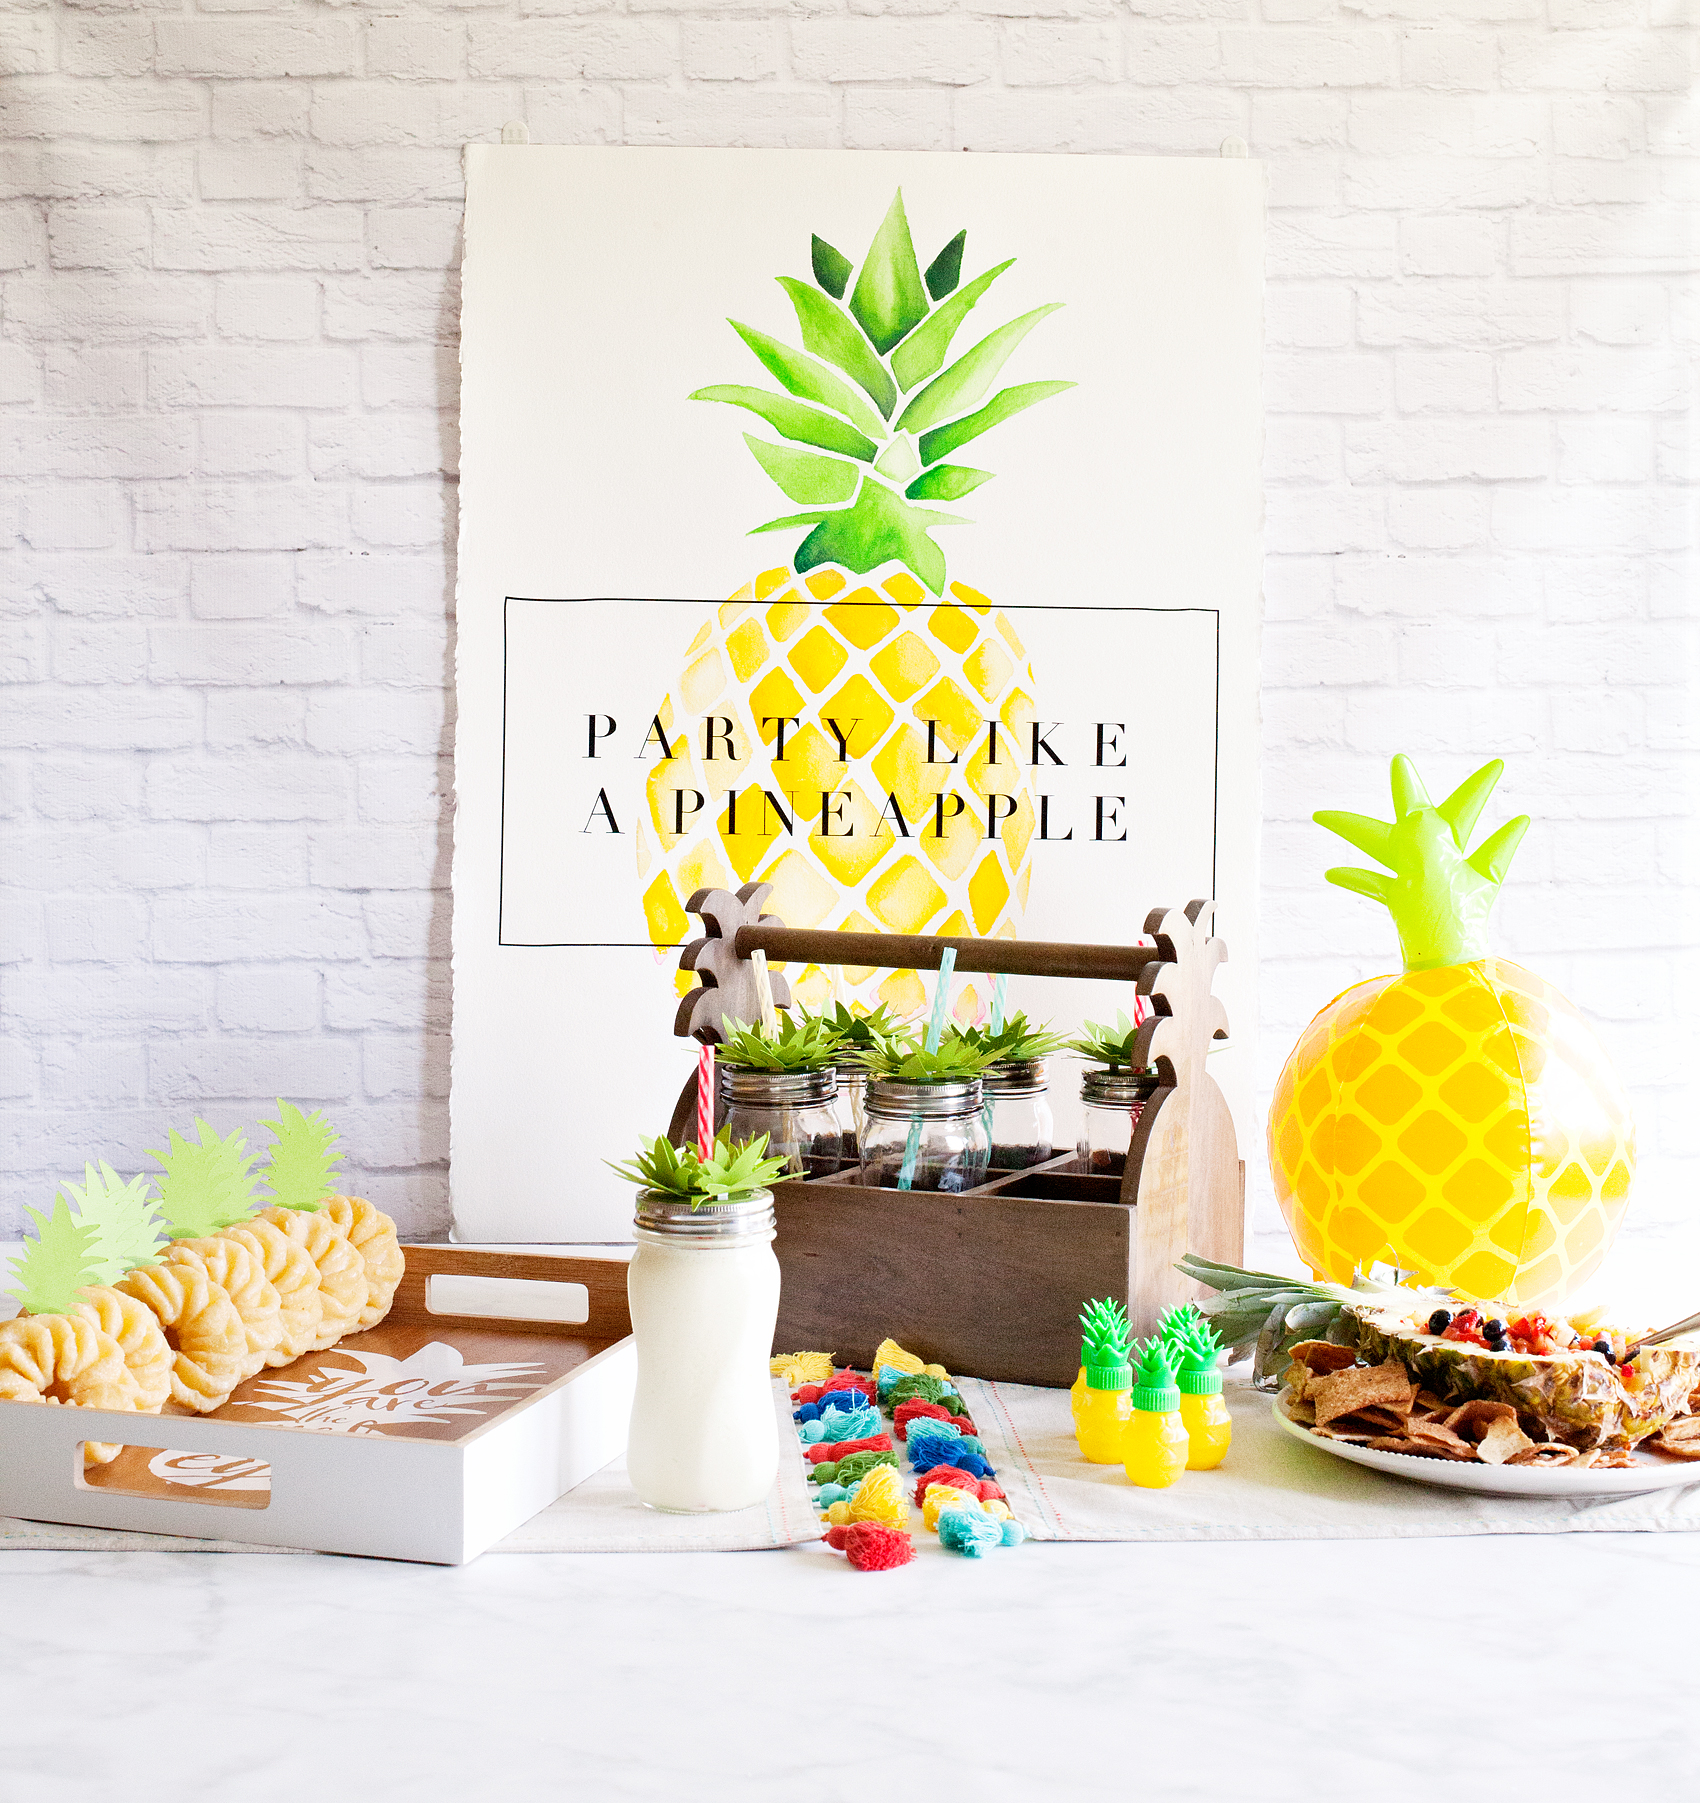
Whimsical and tasty, this Pineapple Party is the perfect summer hit for all ages. Come learn how I created this EASY and scrumptious party…

Who doesn’t love a whimsical and tasty party? This Pineapple Party is perfect for all ages. Come on over to WhipperBerry to learn how to recreate this EASY party!

Party Like a Pineapple post brought to you by • Cricut

My sweet Em just turned 13 and of course we needed to have a fabulous, colorful party to celebrate this fun milestone. Em and I chatted about some party theme ideas and finally settled a PINEAPPLE PARTY, because… Who doesn’t love to Party like a Pineapple?! Well, to be quite honest, I’m not really sure how pineapples party BUT, the idea sounded colorful and fun. We set to work coming up with a few ideas for the party.

Now, my idea of a good party is one that doesn’t overwhelm me. I don’t want 20 different dishes and elements to put together. I also don’t want it to cost an arm and a leg either. Together Em and I decided on 6 design elements, 3 simple treats and 2 playful party favors. All of this in my mind was eye catching, scrumptious and easy to pull together. Here are the basic elements…

Who doesn’t love a whimsical and tasty party? This Pineapple Party is perfect for all ages. Come on over to WhipperBerry to learn how to recreate this EASY party!

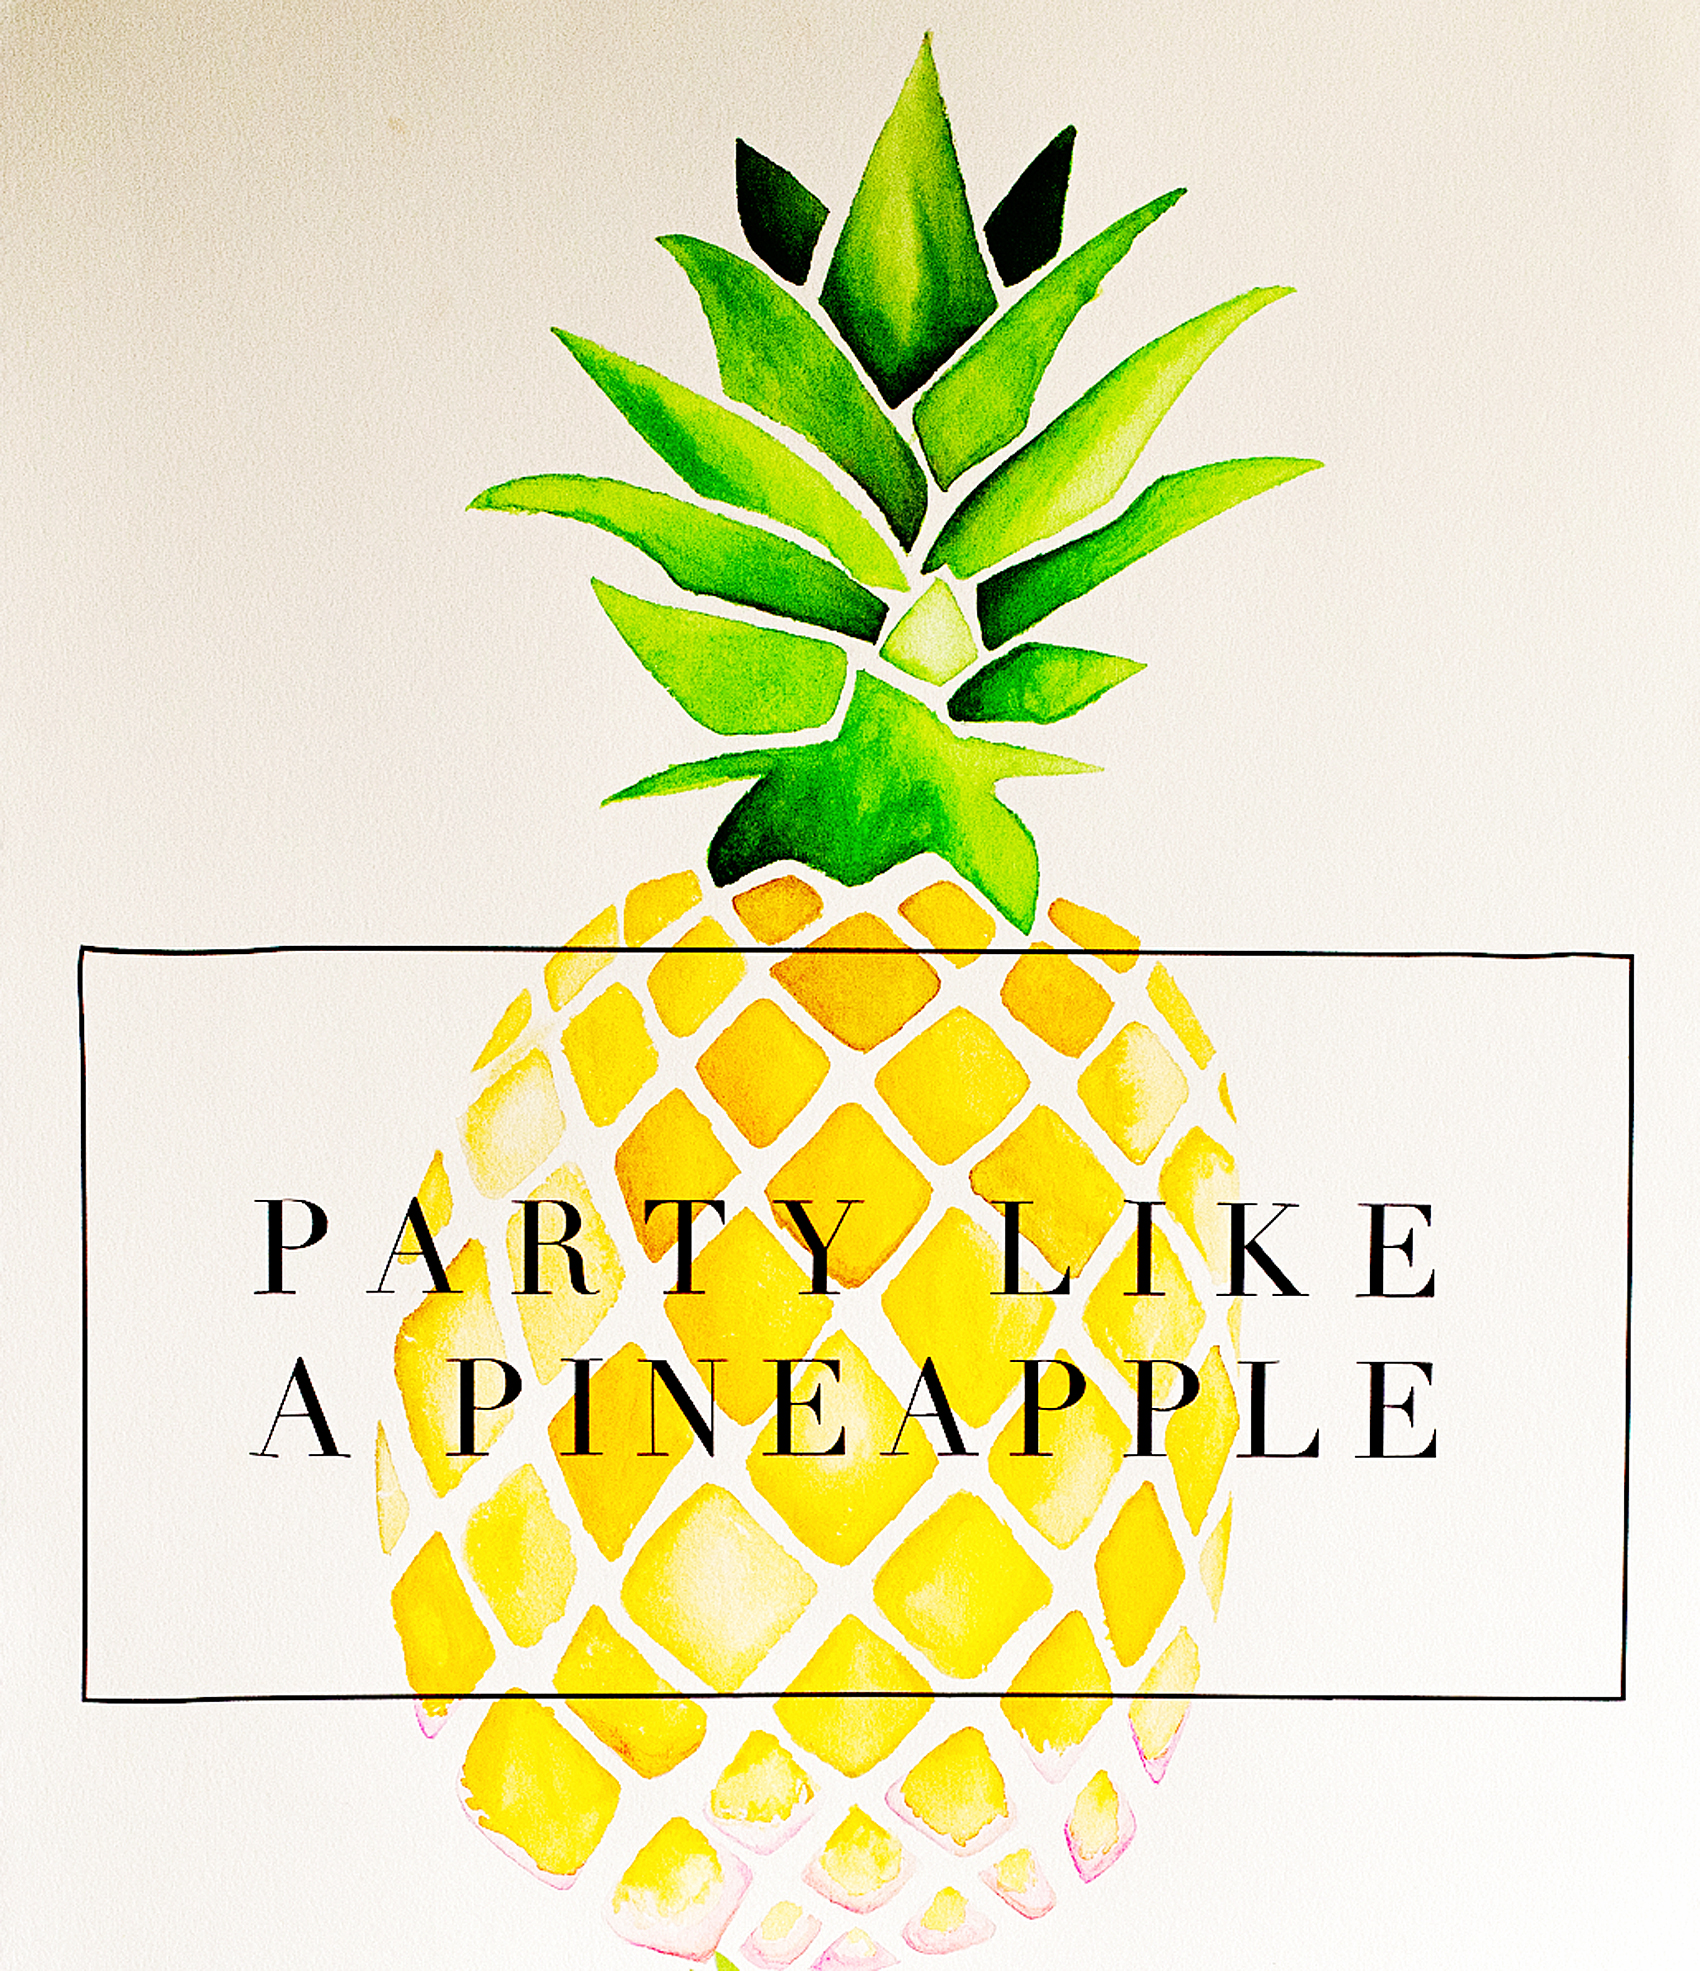
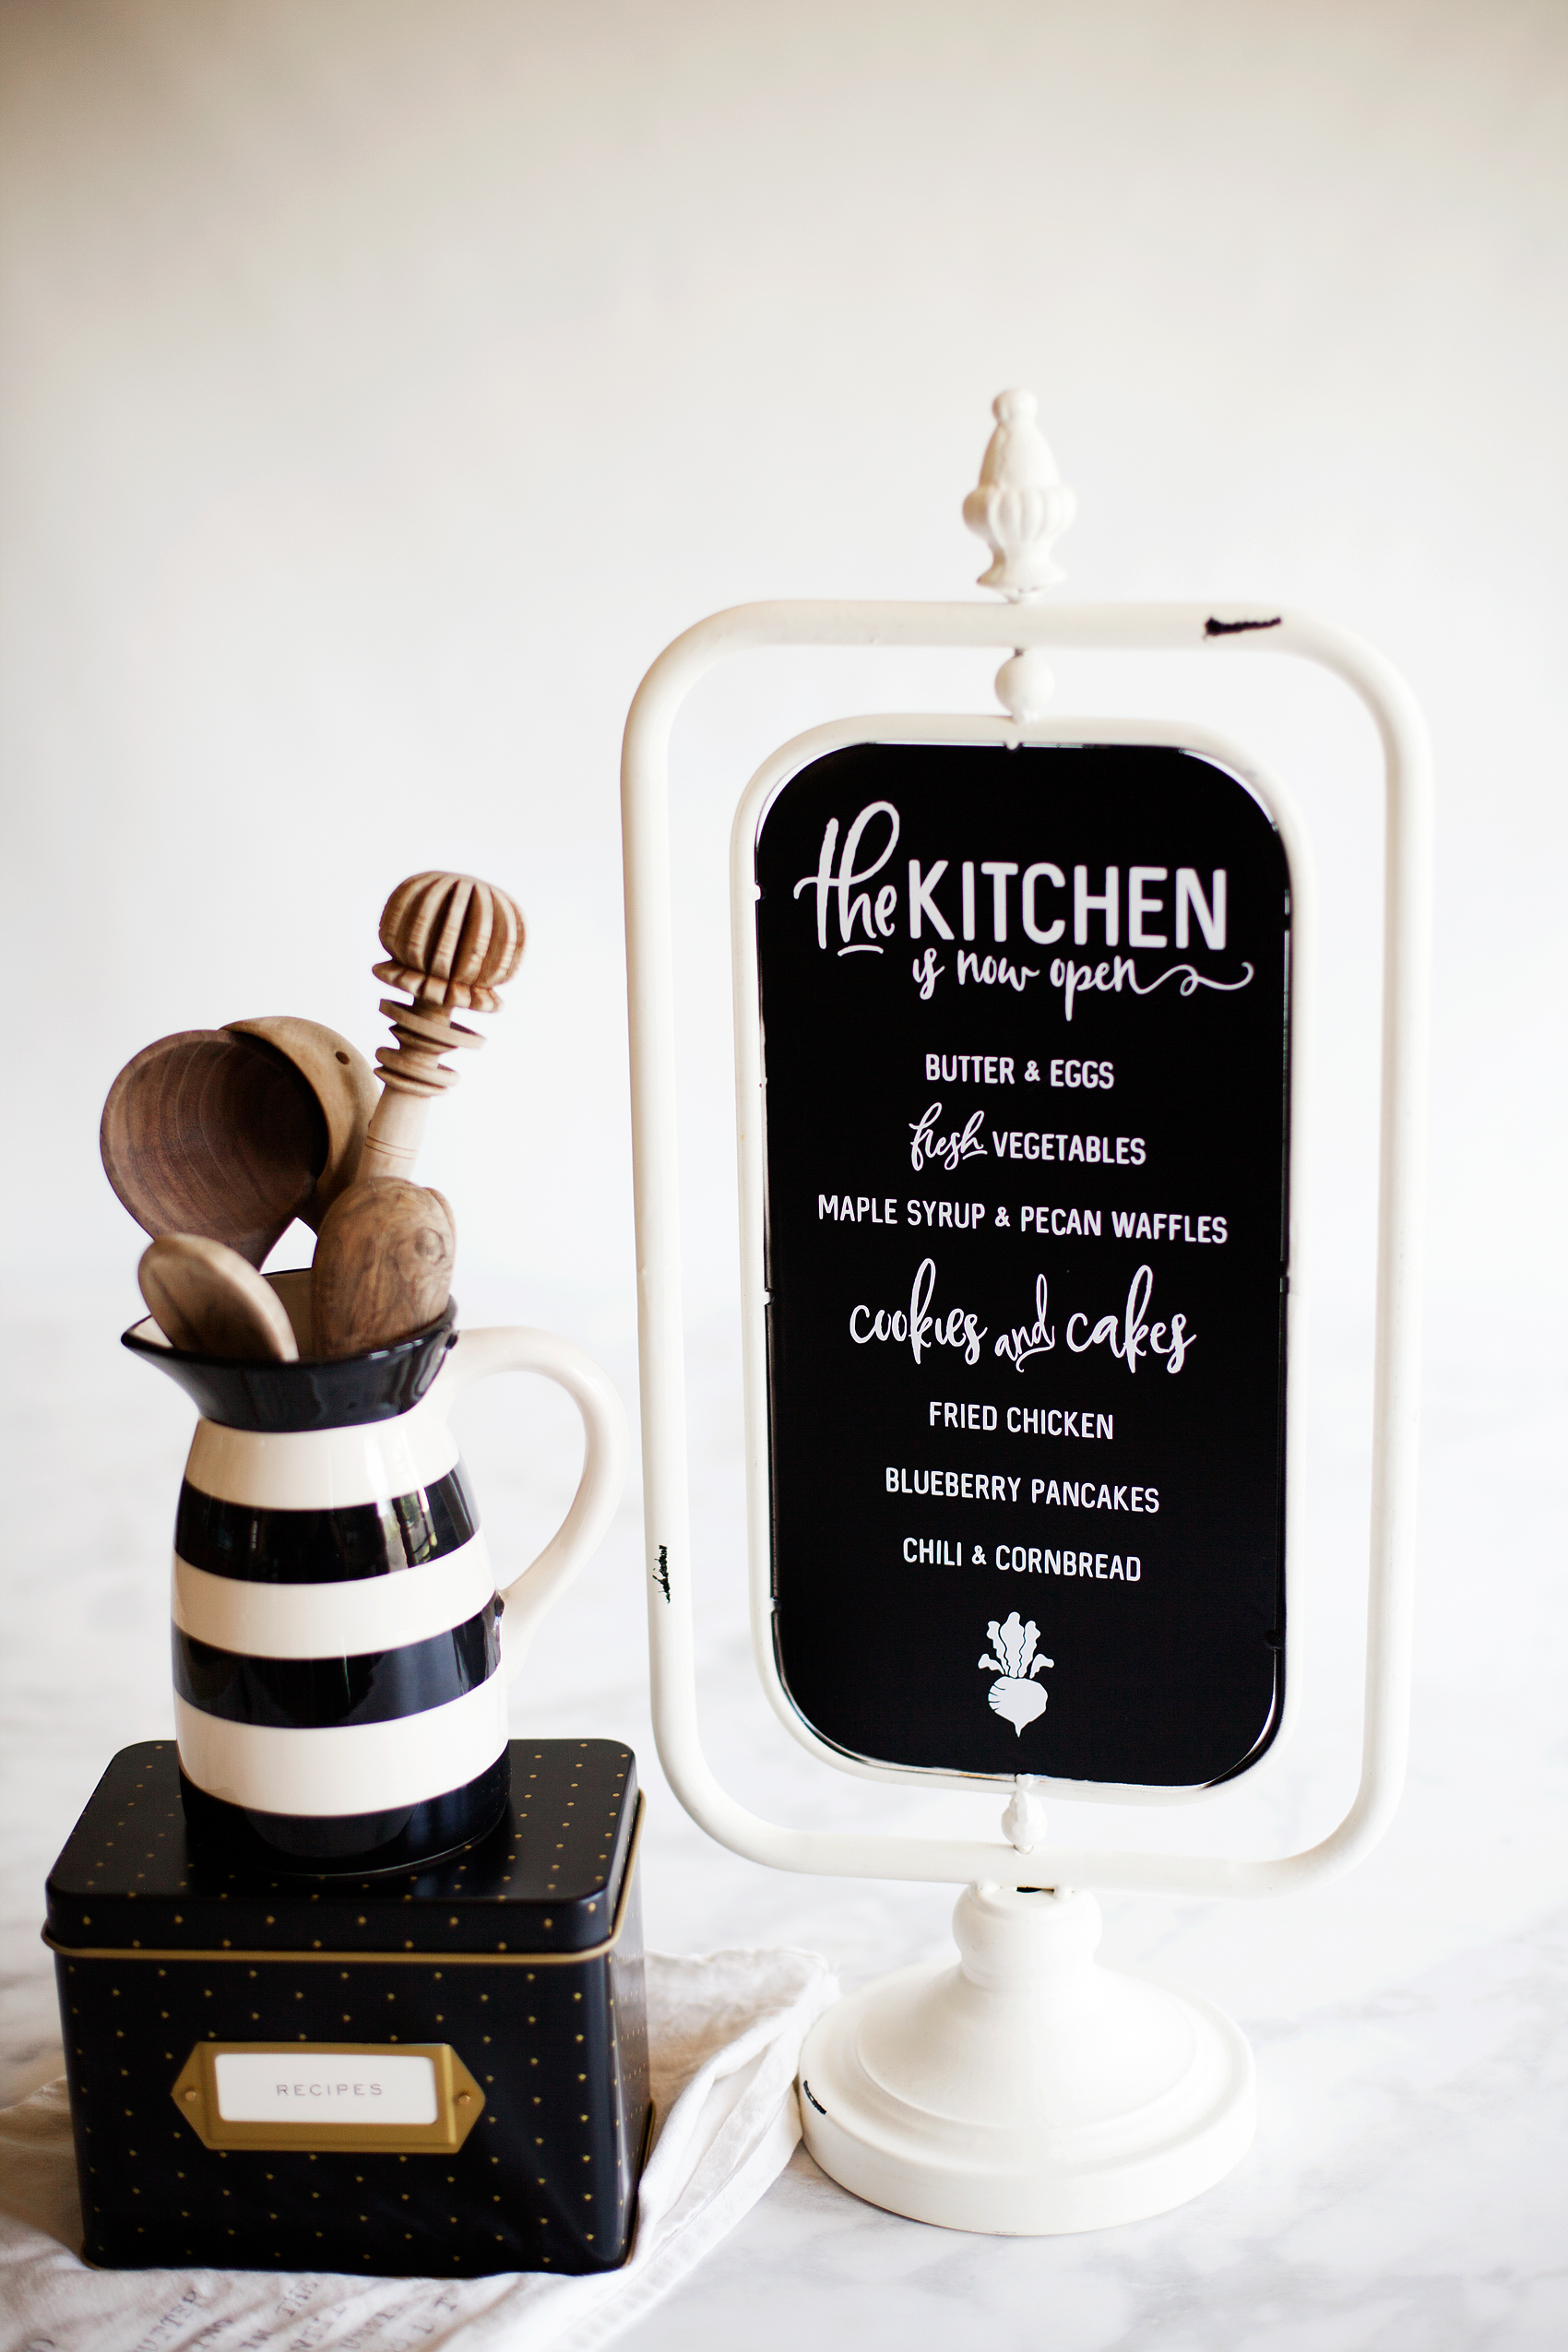
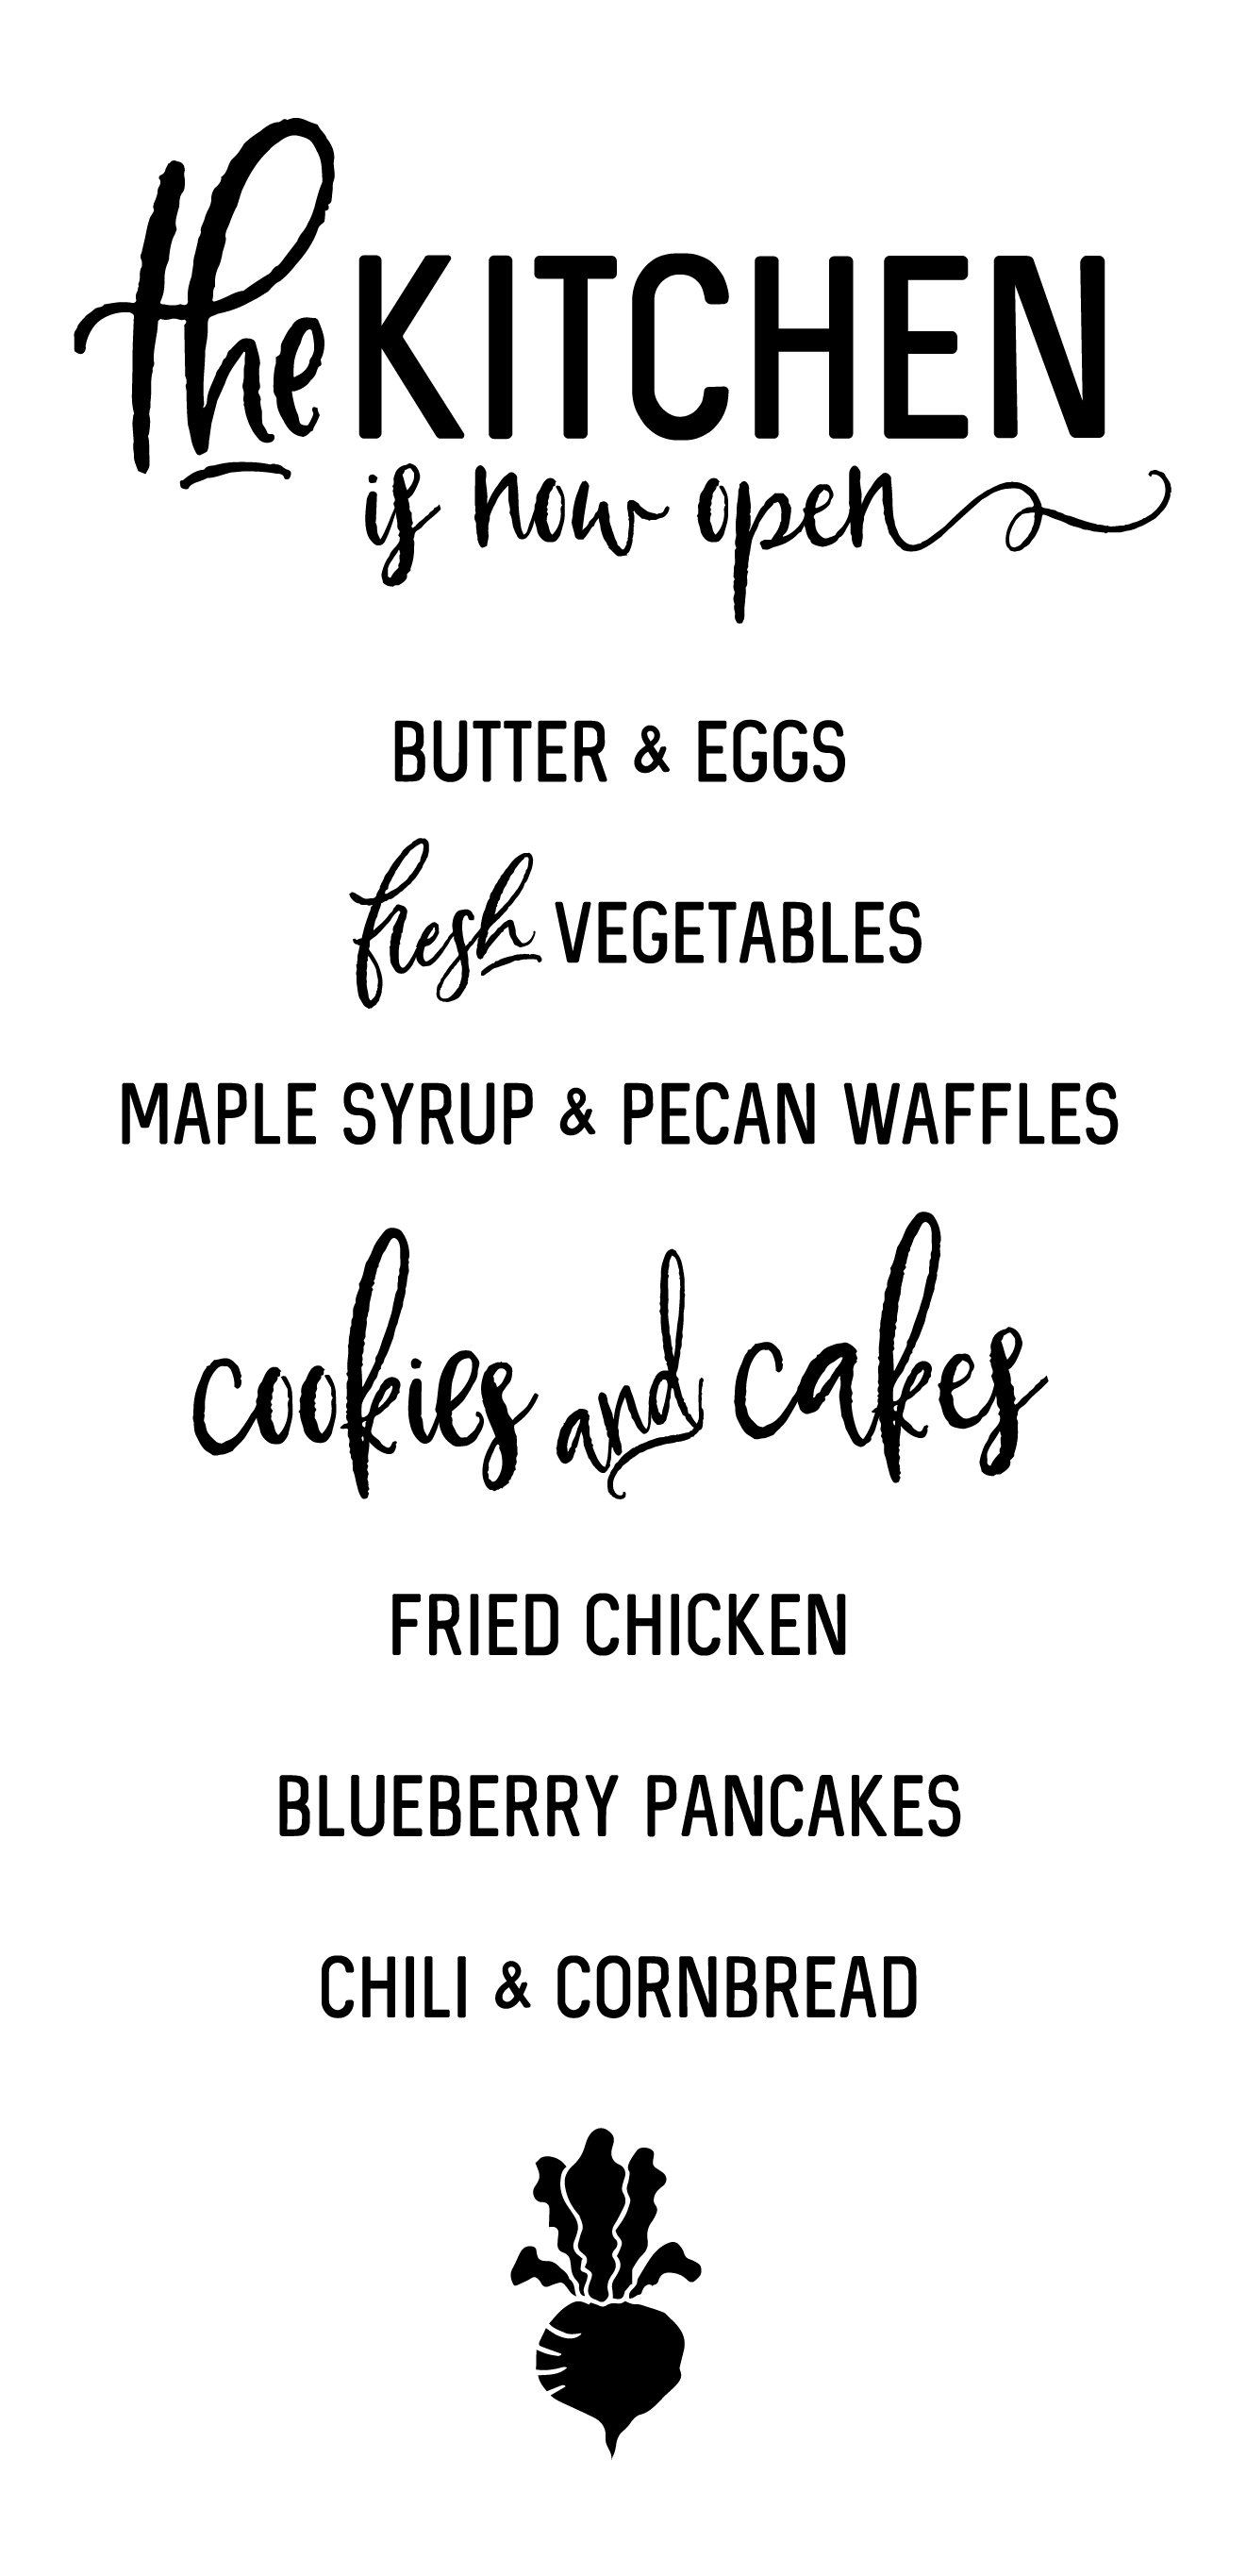
Design Element 1 | Party Like a Pineapple Watercolor Sign

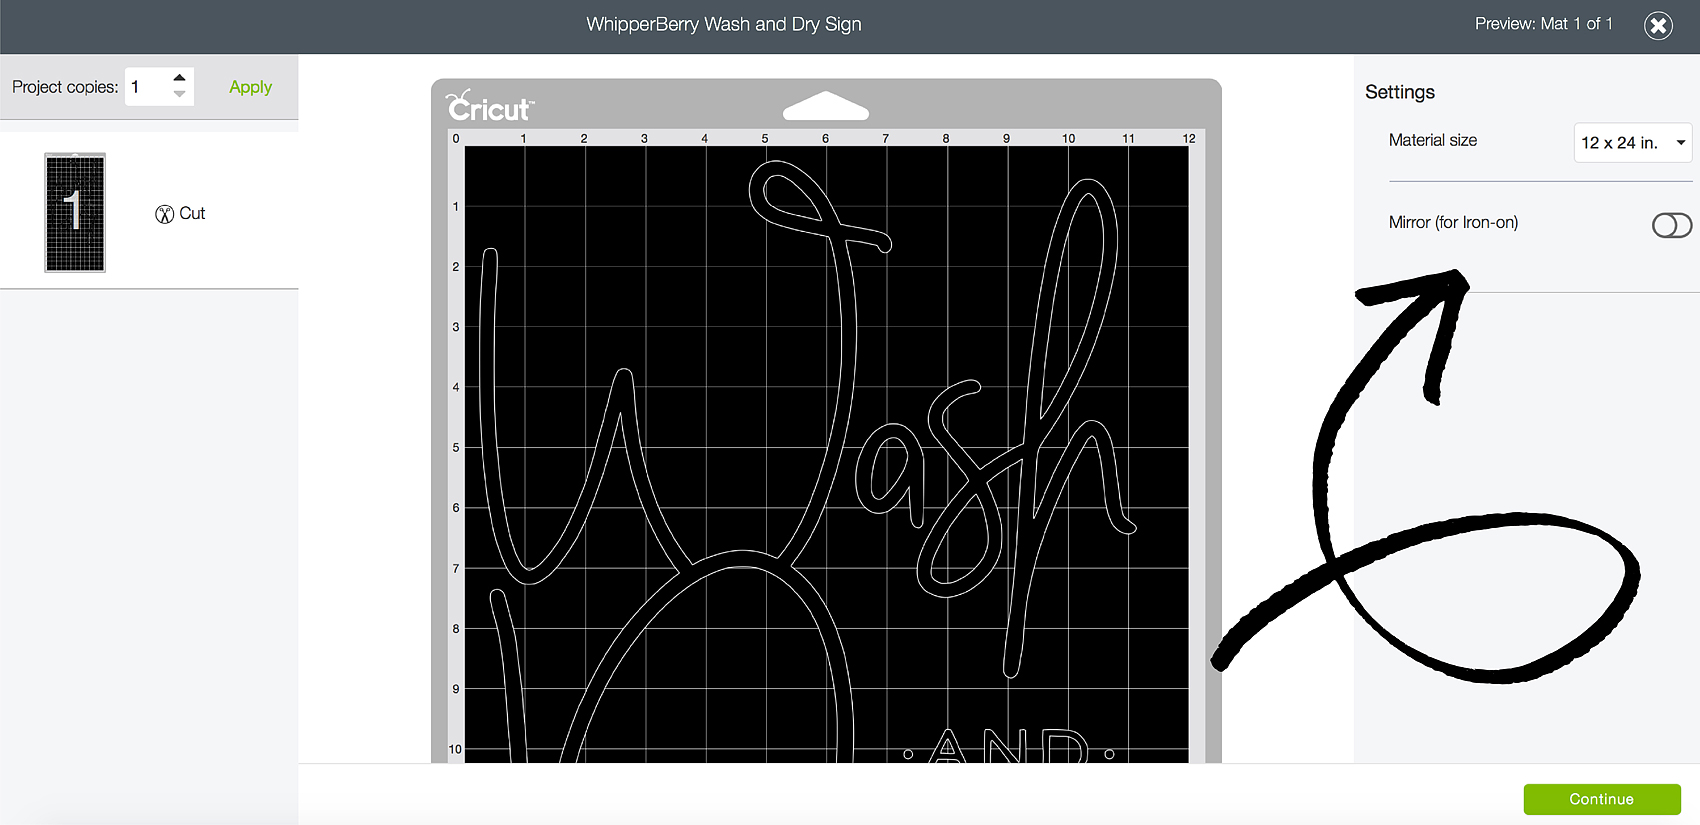
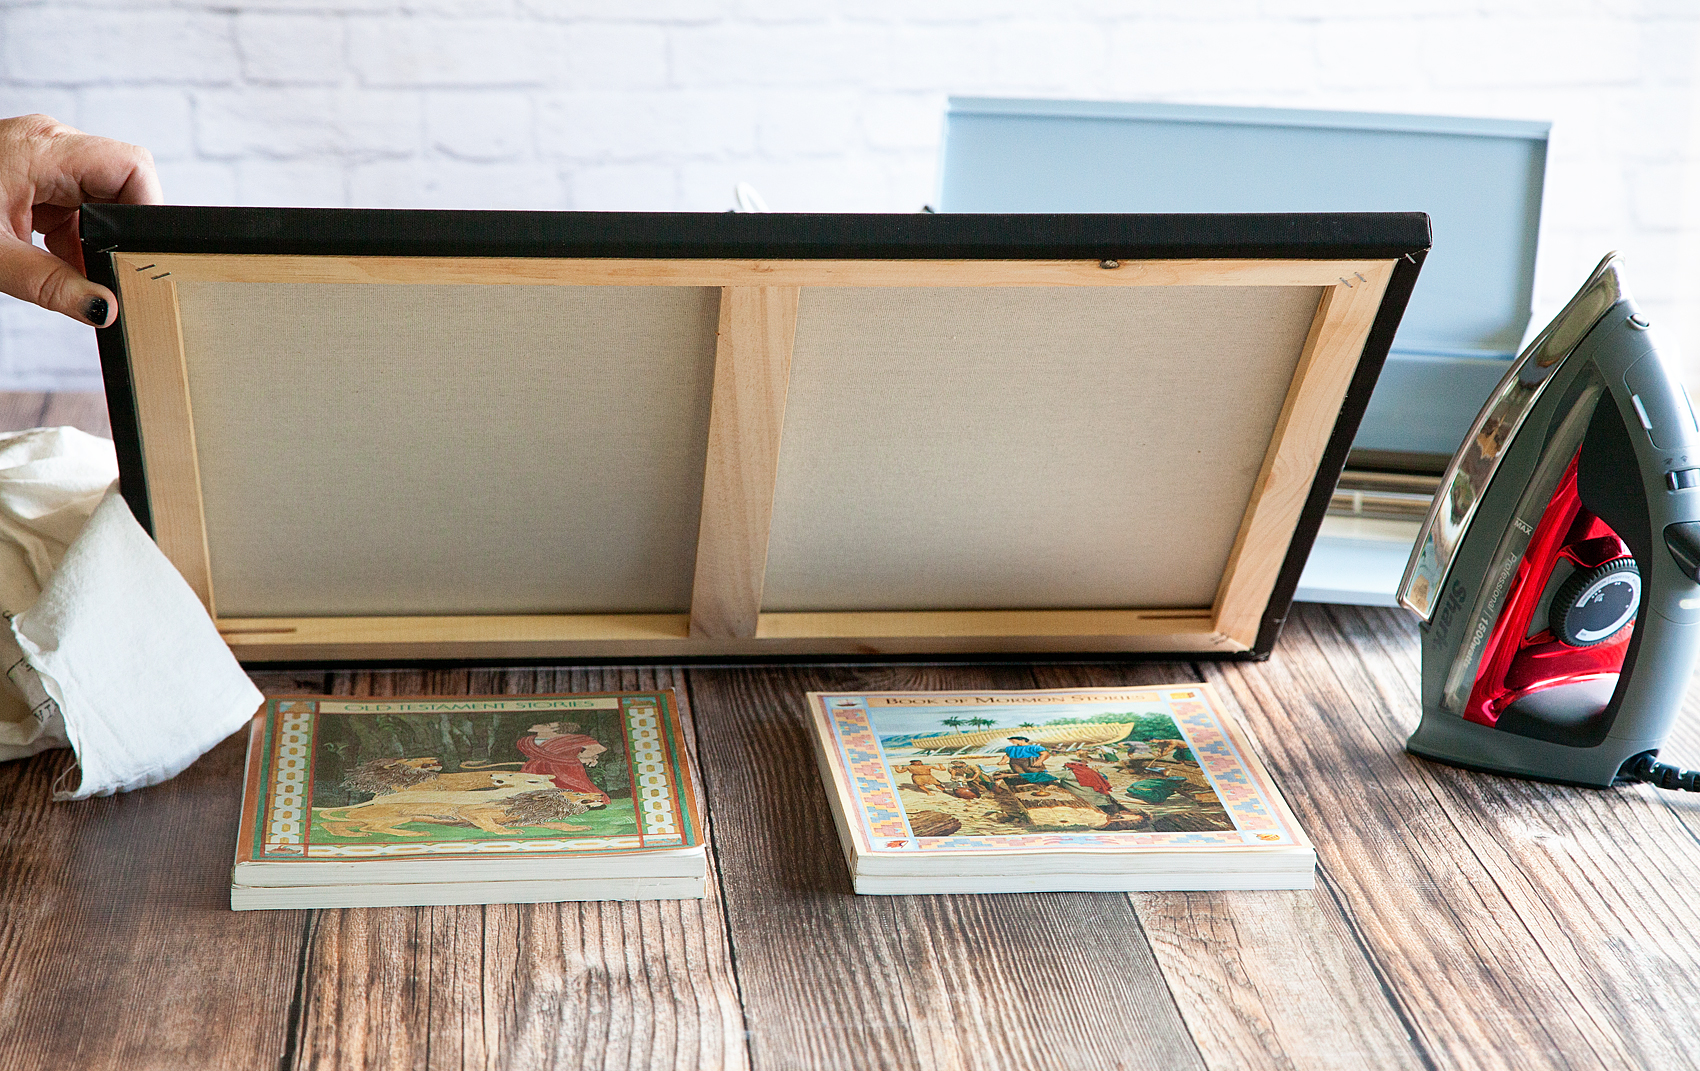
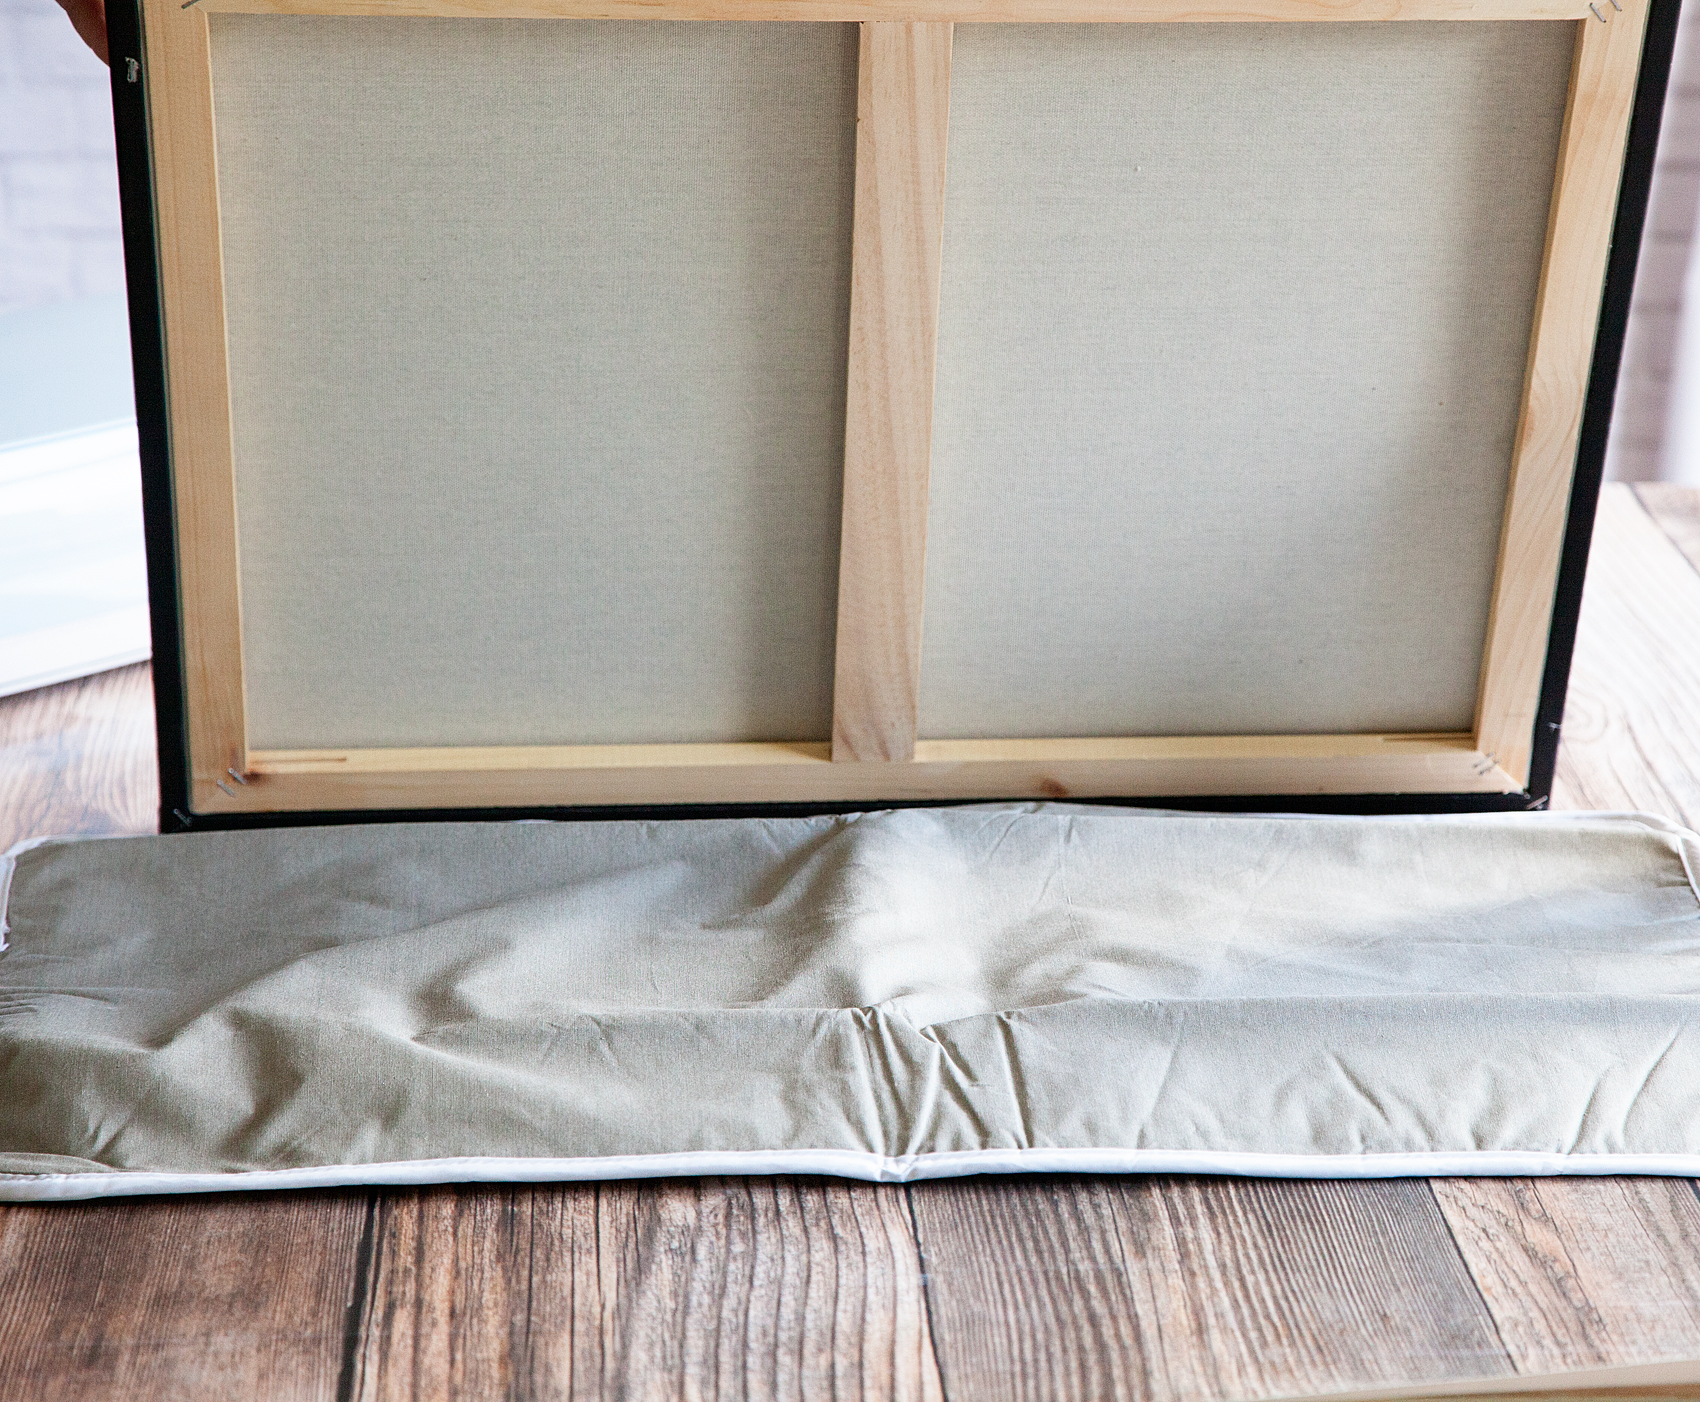
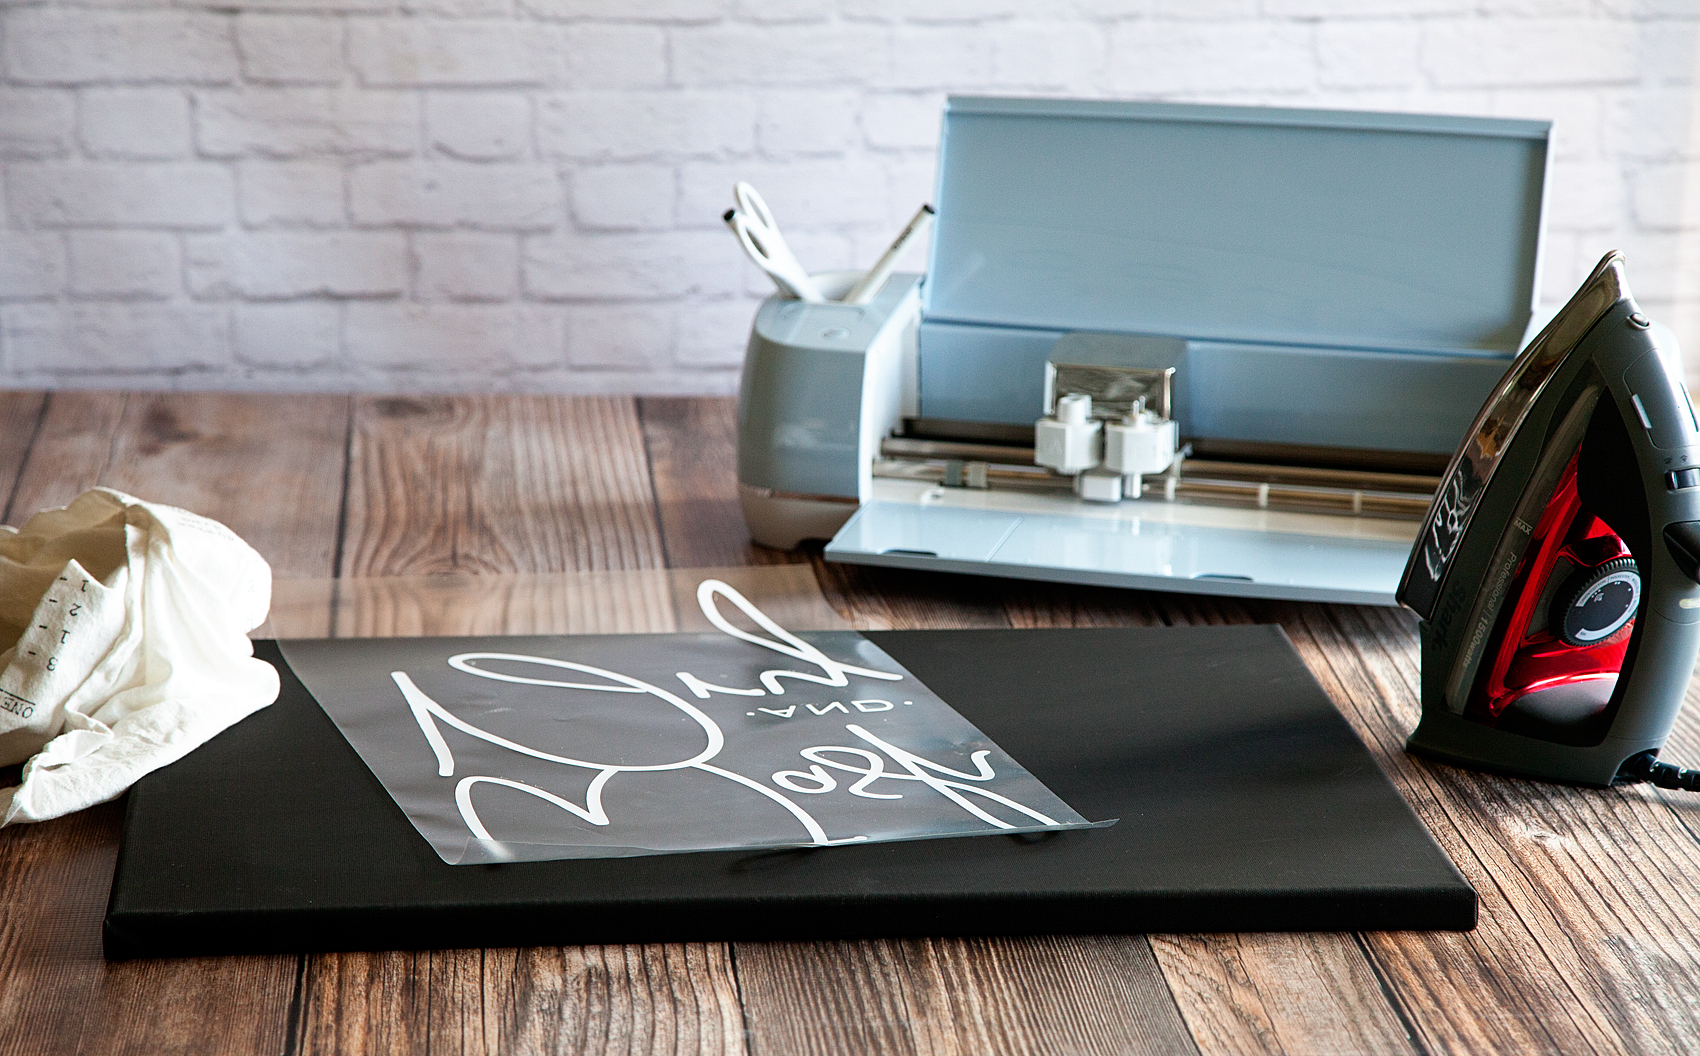
This beautiful sign was a fun collaboration with my other daughter Jane and myself. Jane is super talented when it comes to art and I had her create this large water color pineapple for me and then I overlaid it with black vinyl cut on my Cricut Explore Air 2 to create the backdrop of the party. Don’t worry though… If you don’t have the watercolor gene, I have you covered there and will teach you how coming up in my next post so stay tuned!

You are the Pineapple of my Eye tray created for a Pineapple Party • This Pineapple Party is perfect for all ages. Come on over to WhipperBerry to learn how to recreate this EASY party!

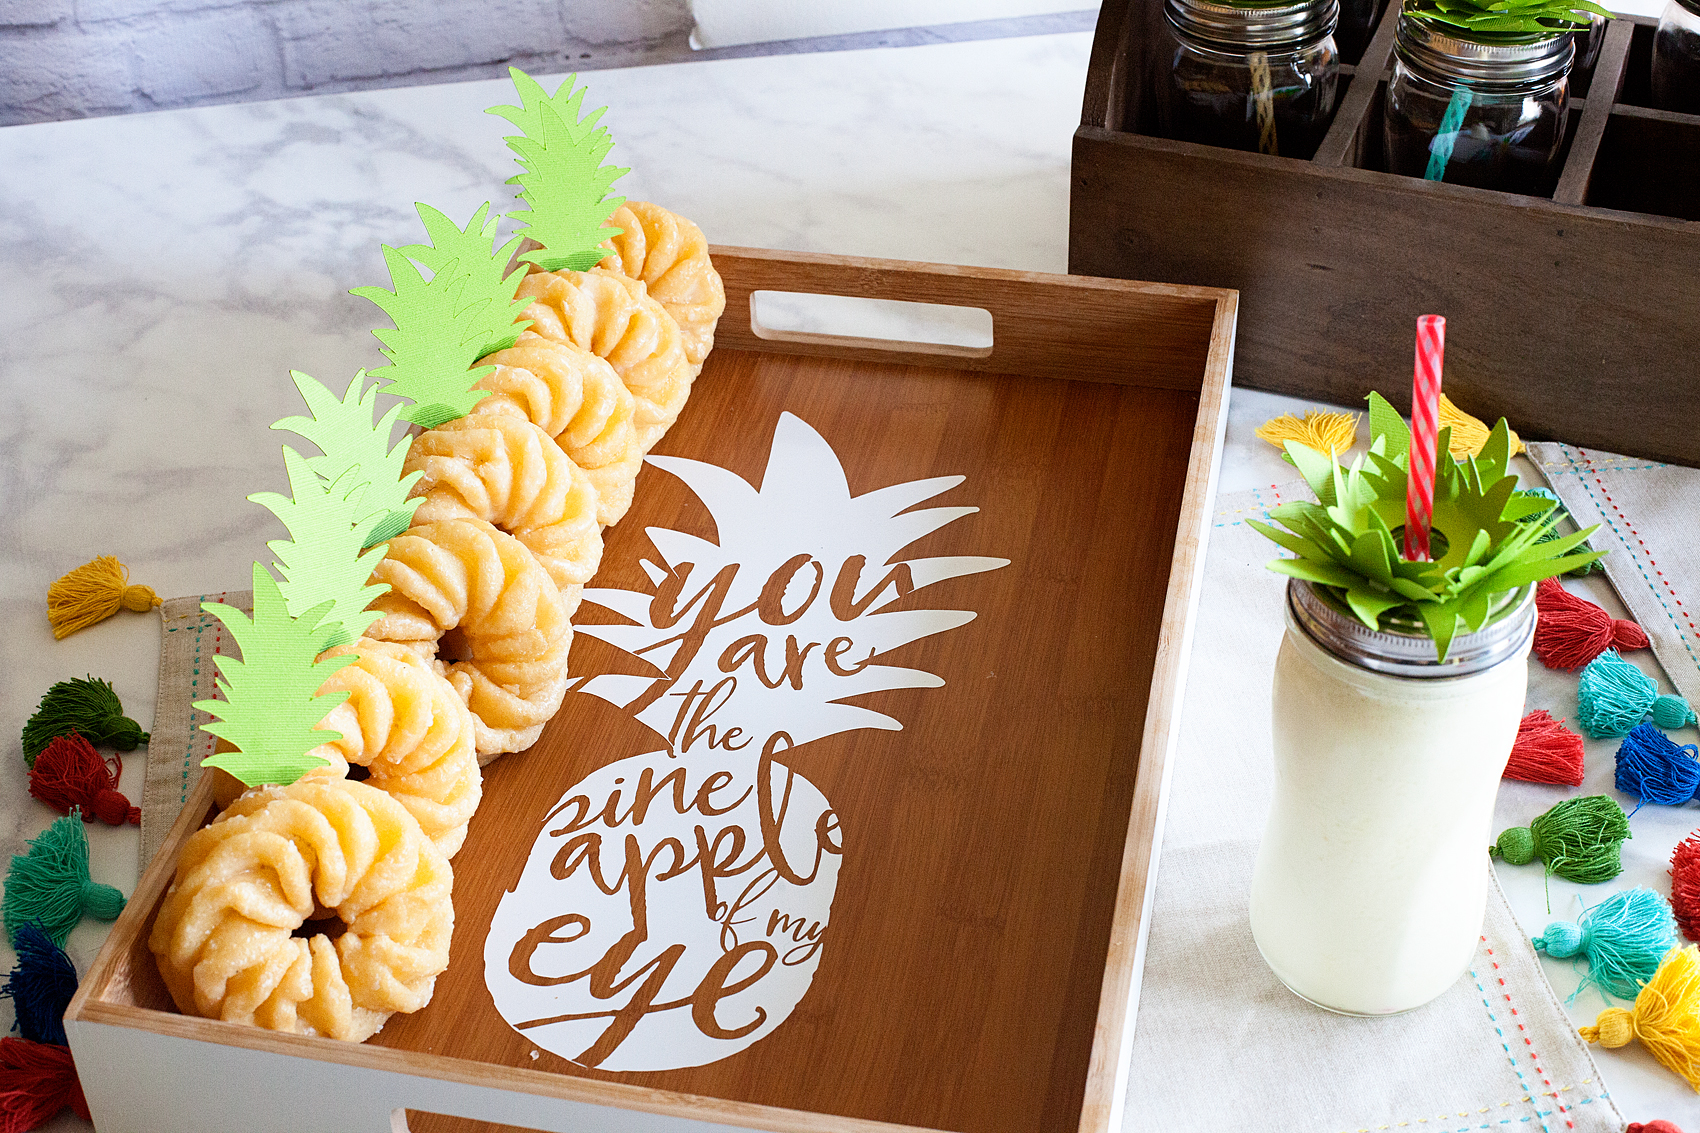
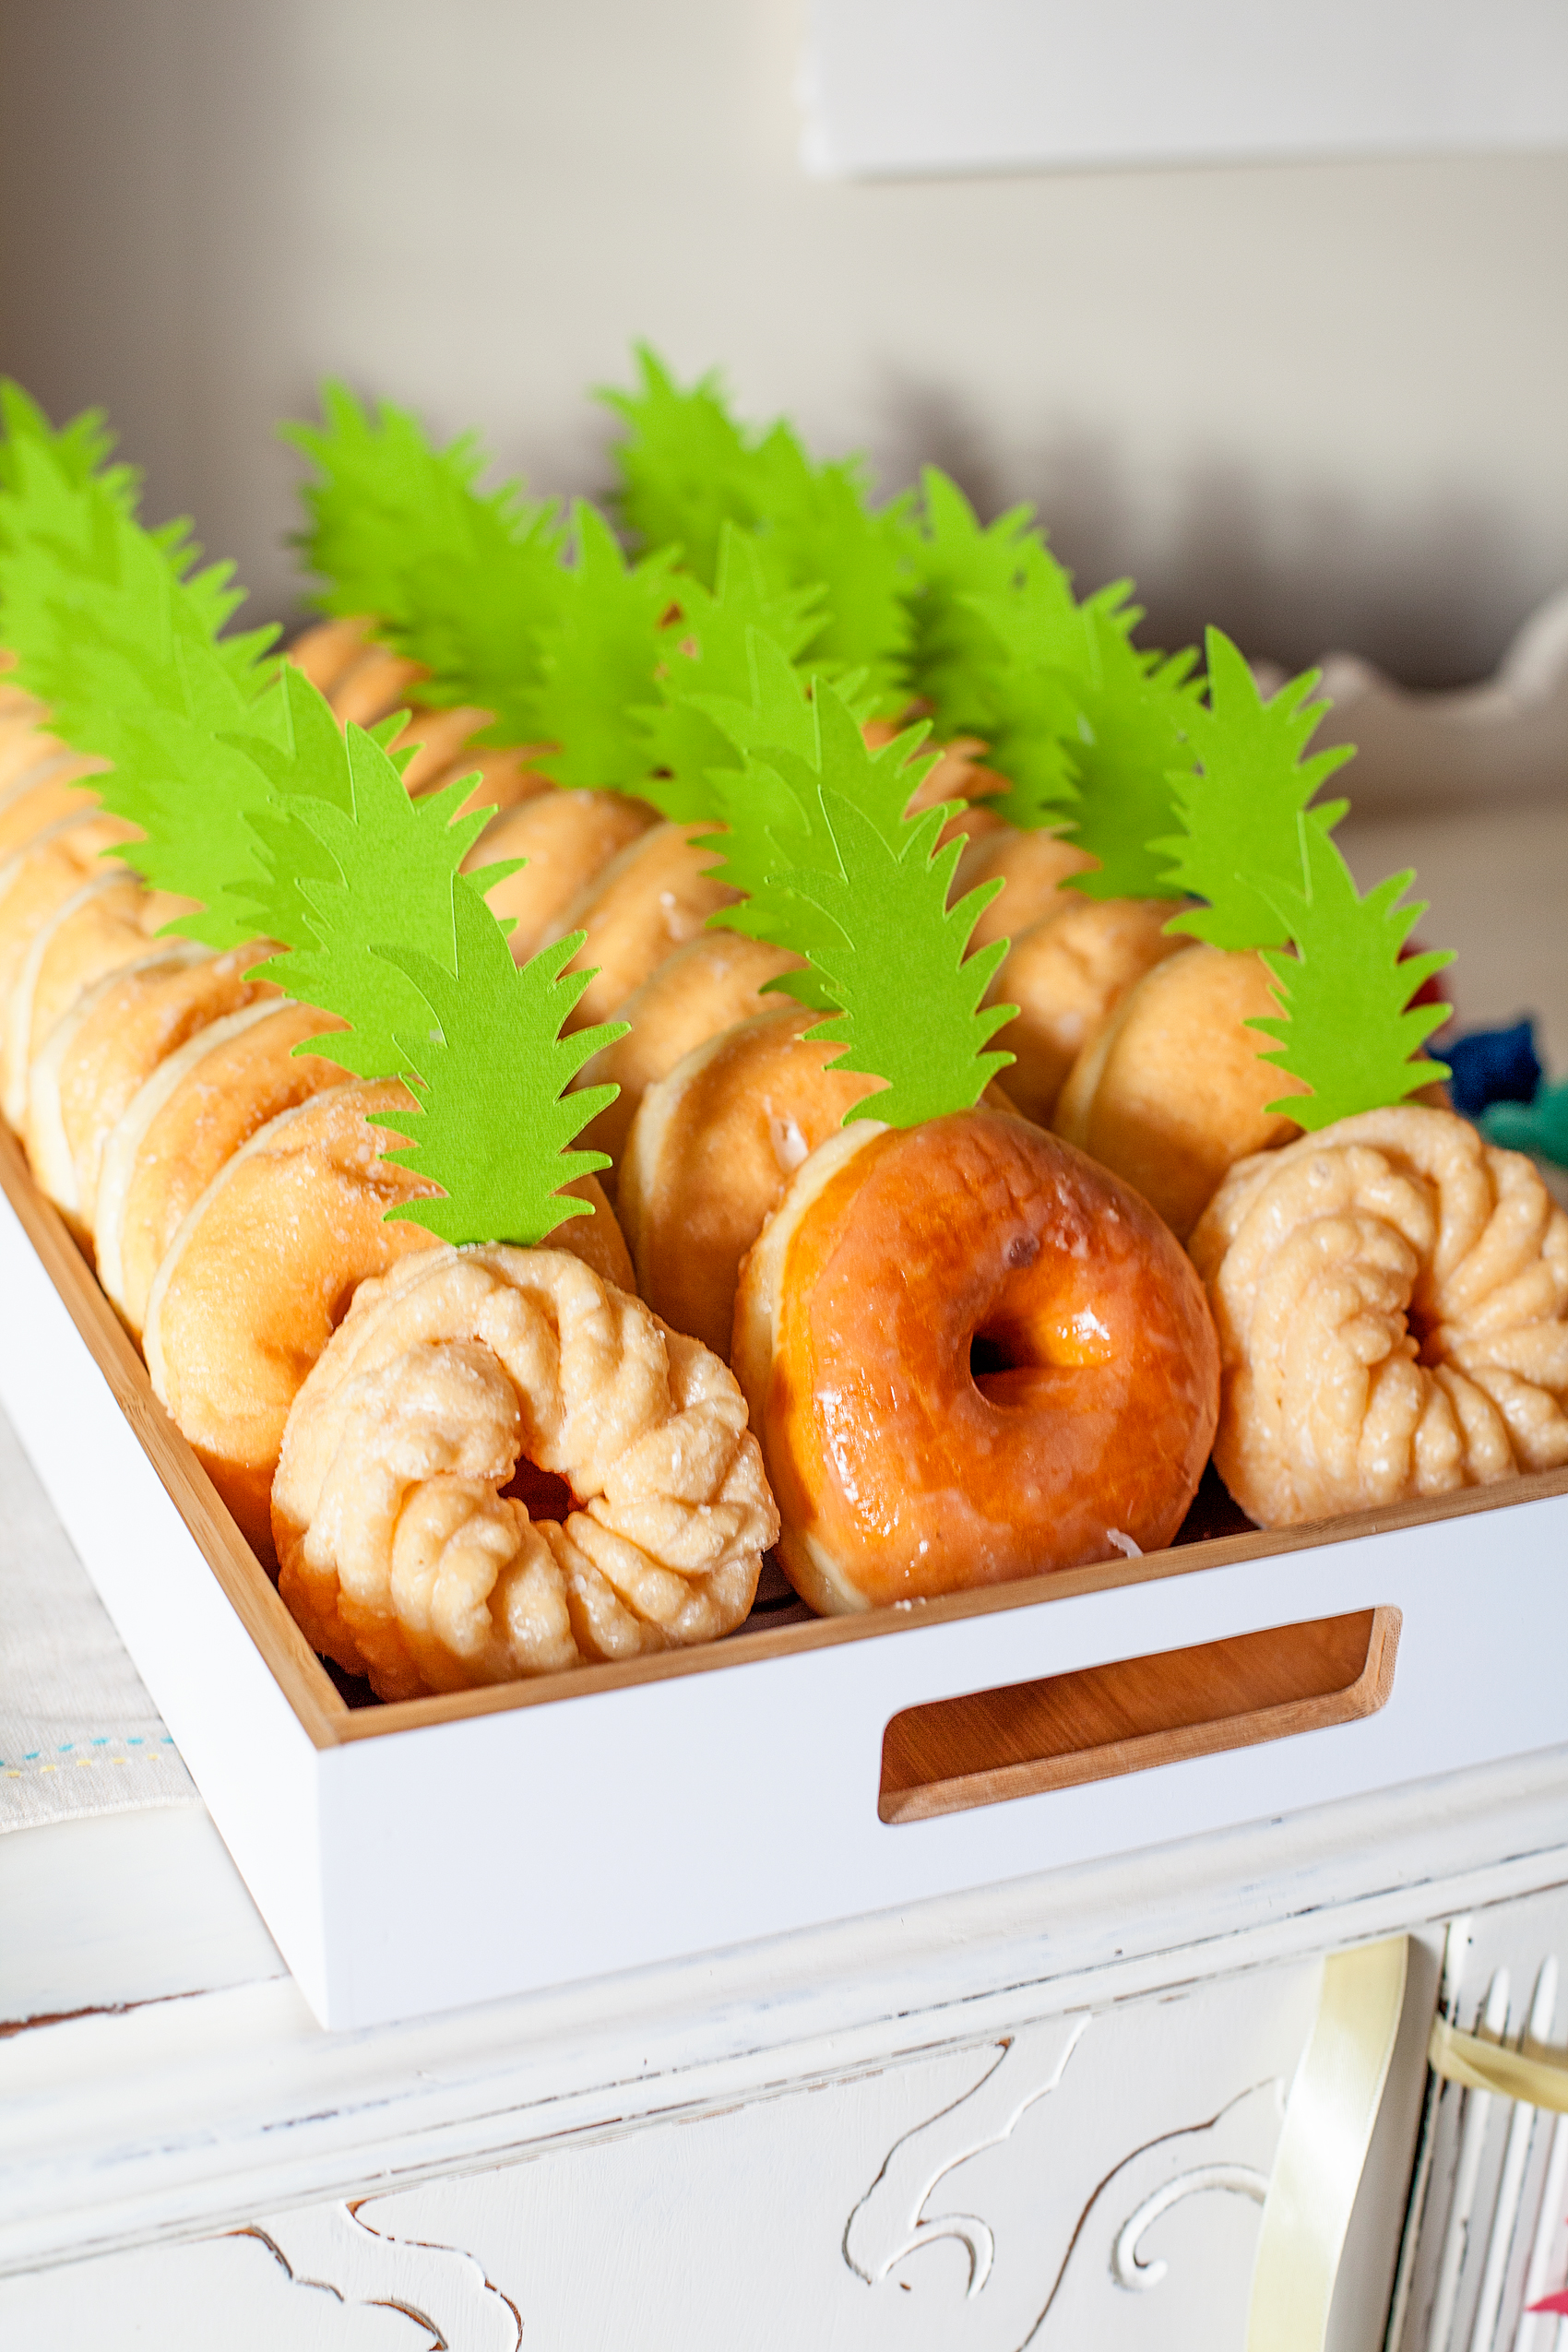
Design Element 2 | You are the Pineapple of my Eye Doughnut Tray

This tray turned out so cute! Em has always preferred doughnuts over cake so, I thought it would be fun to create a tray with a secret message. As the guests take their doughnuts the secret message is revealed. How fun is that?! Again, I created this with my favorite Premium Outdoor Vinyl from Cricut and I’ll be sharing my design with you guys so you can use it for your own projects.

How CUTE are these "pineapple" doughnuts? This Pineapple Party is perfect for all ages. Come on over to WhipperBerry to learn how to recreate this EASY party!

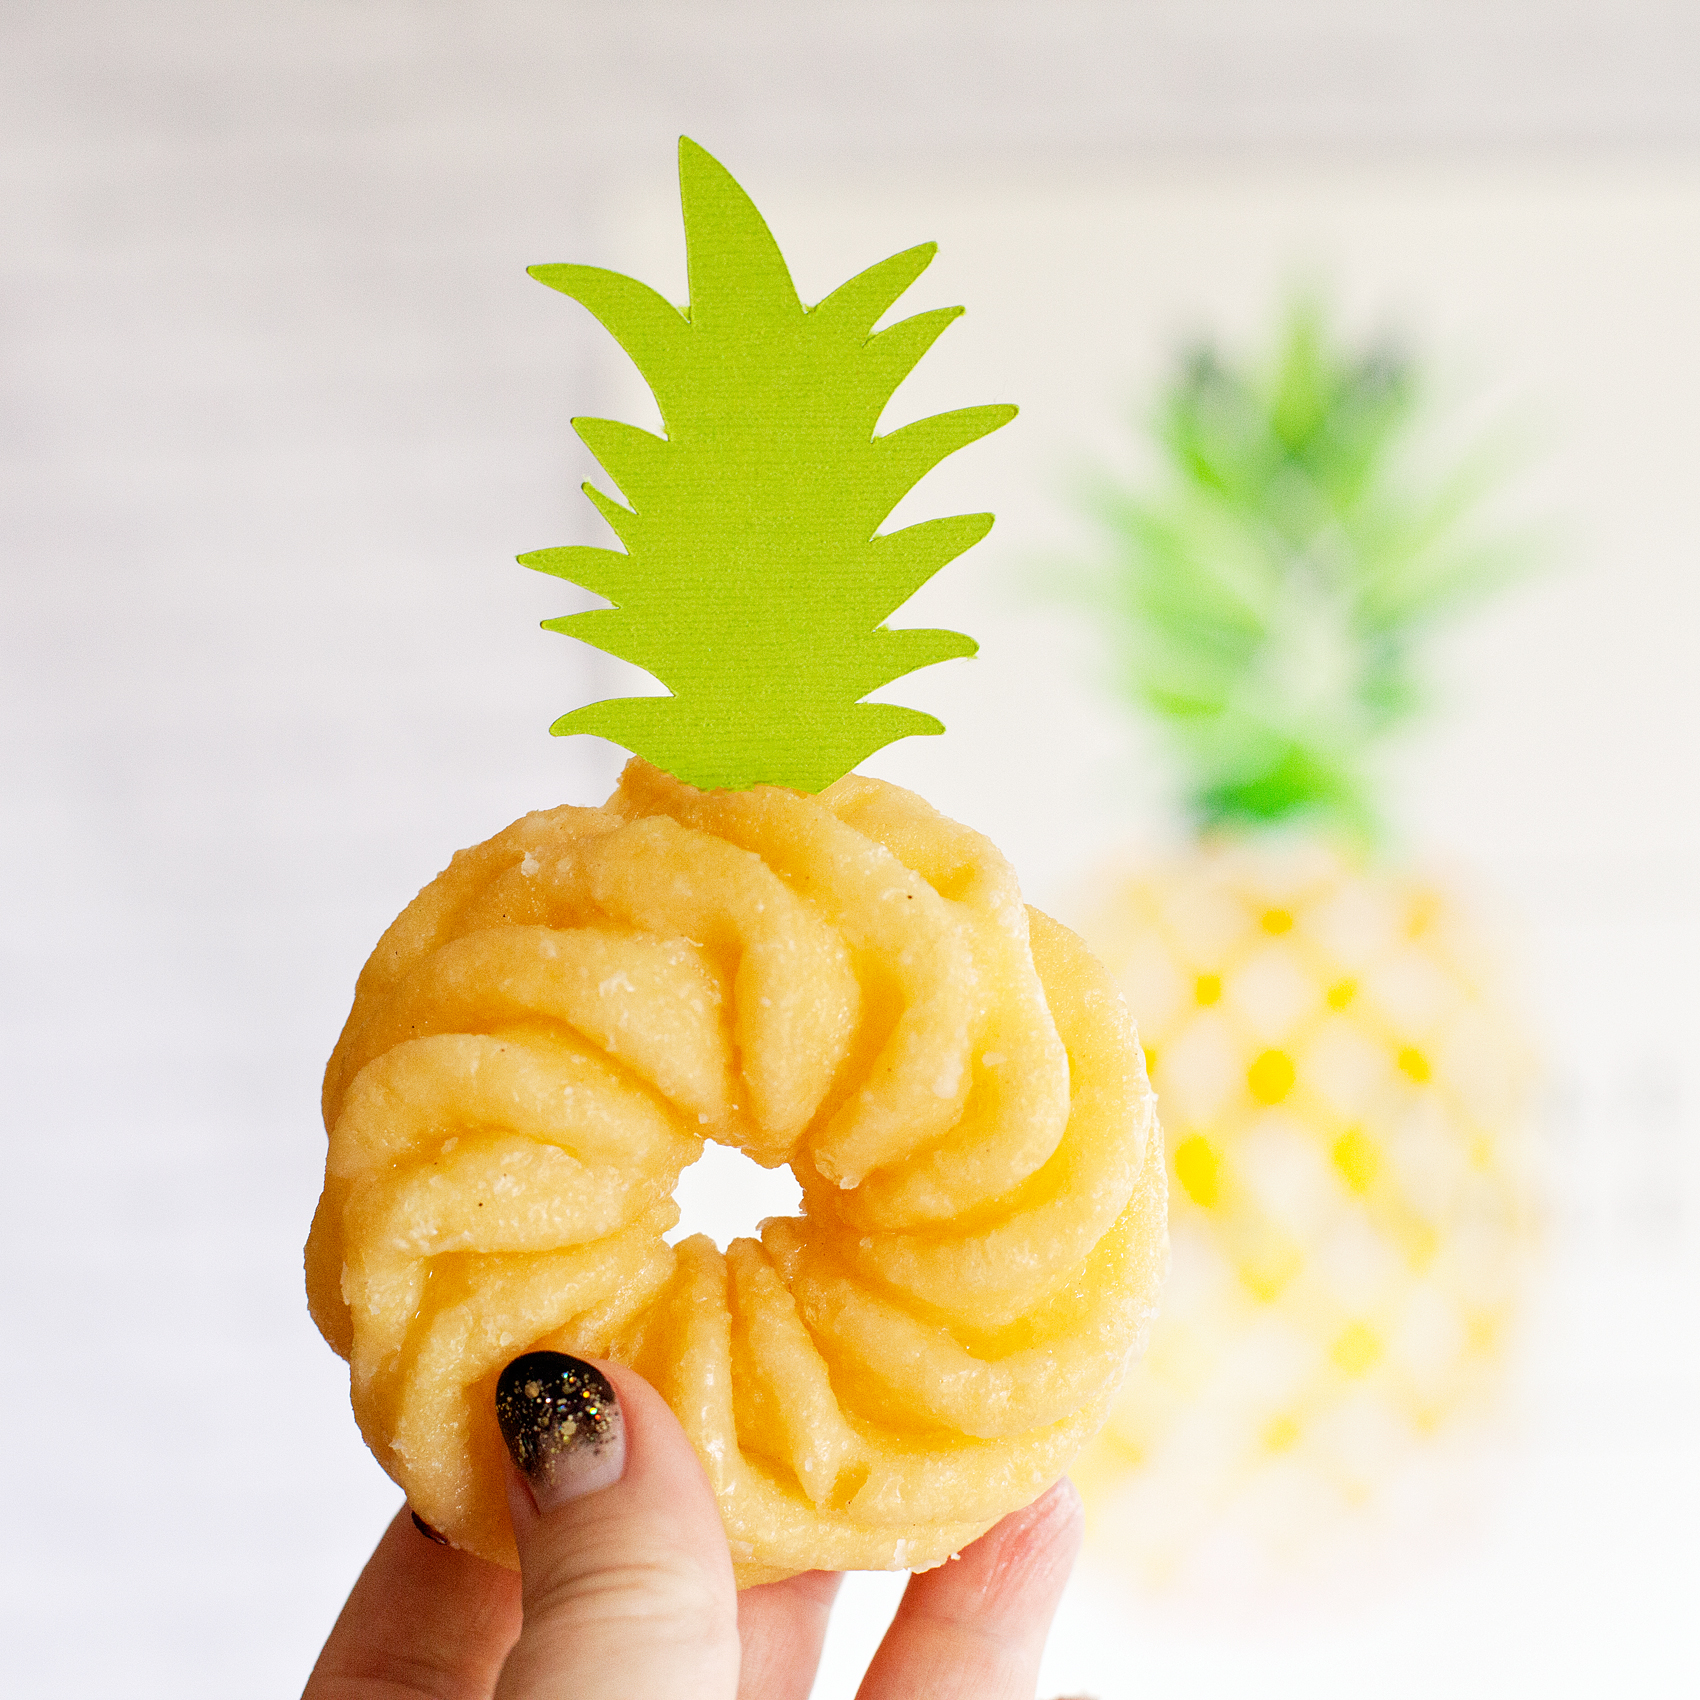
Design Element 3 | The cutest Pineapple Doughnuts EVER

Um, hello? Are these not CUTE?! This is by far the EASIEST birthday cake I have ever “made.” I cut out the pineapple leave topper with my Cricut and then taped the leaves onto a toothpick, stuck it in the doughnut and voilá… A Pineapple Doughnut! I’ll be sharing my cut files for this simple project as well shortly.

The cutest Dole Whip EVER! This Pineapple Party is perfect for all ages. Come on over to WhipperBerry to learn how to recreate this EASY party!

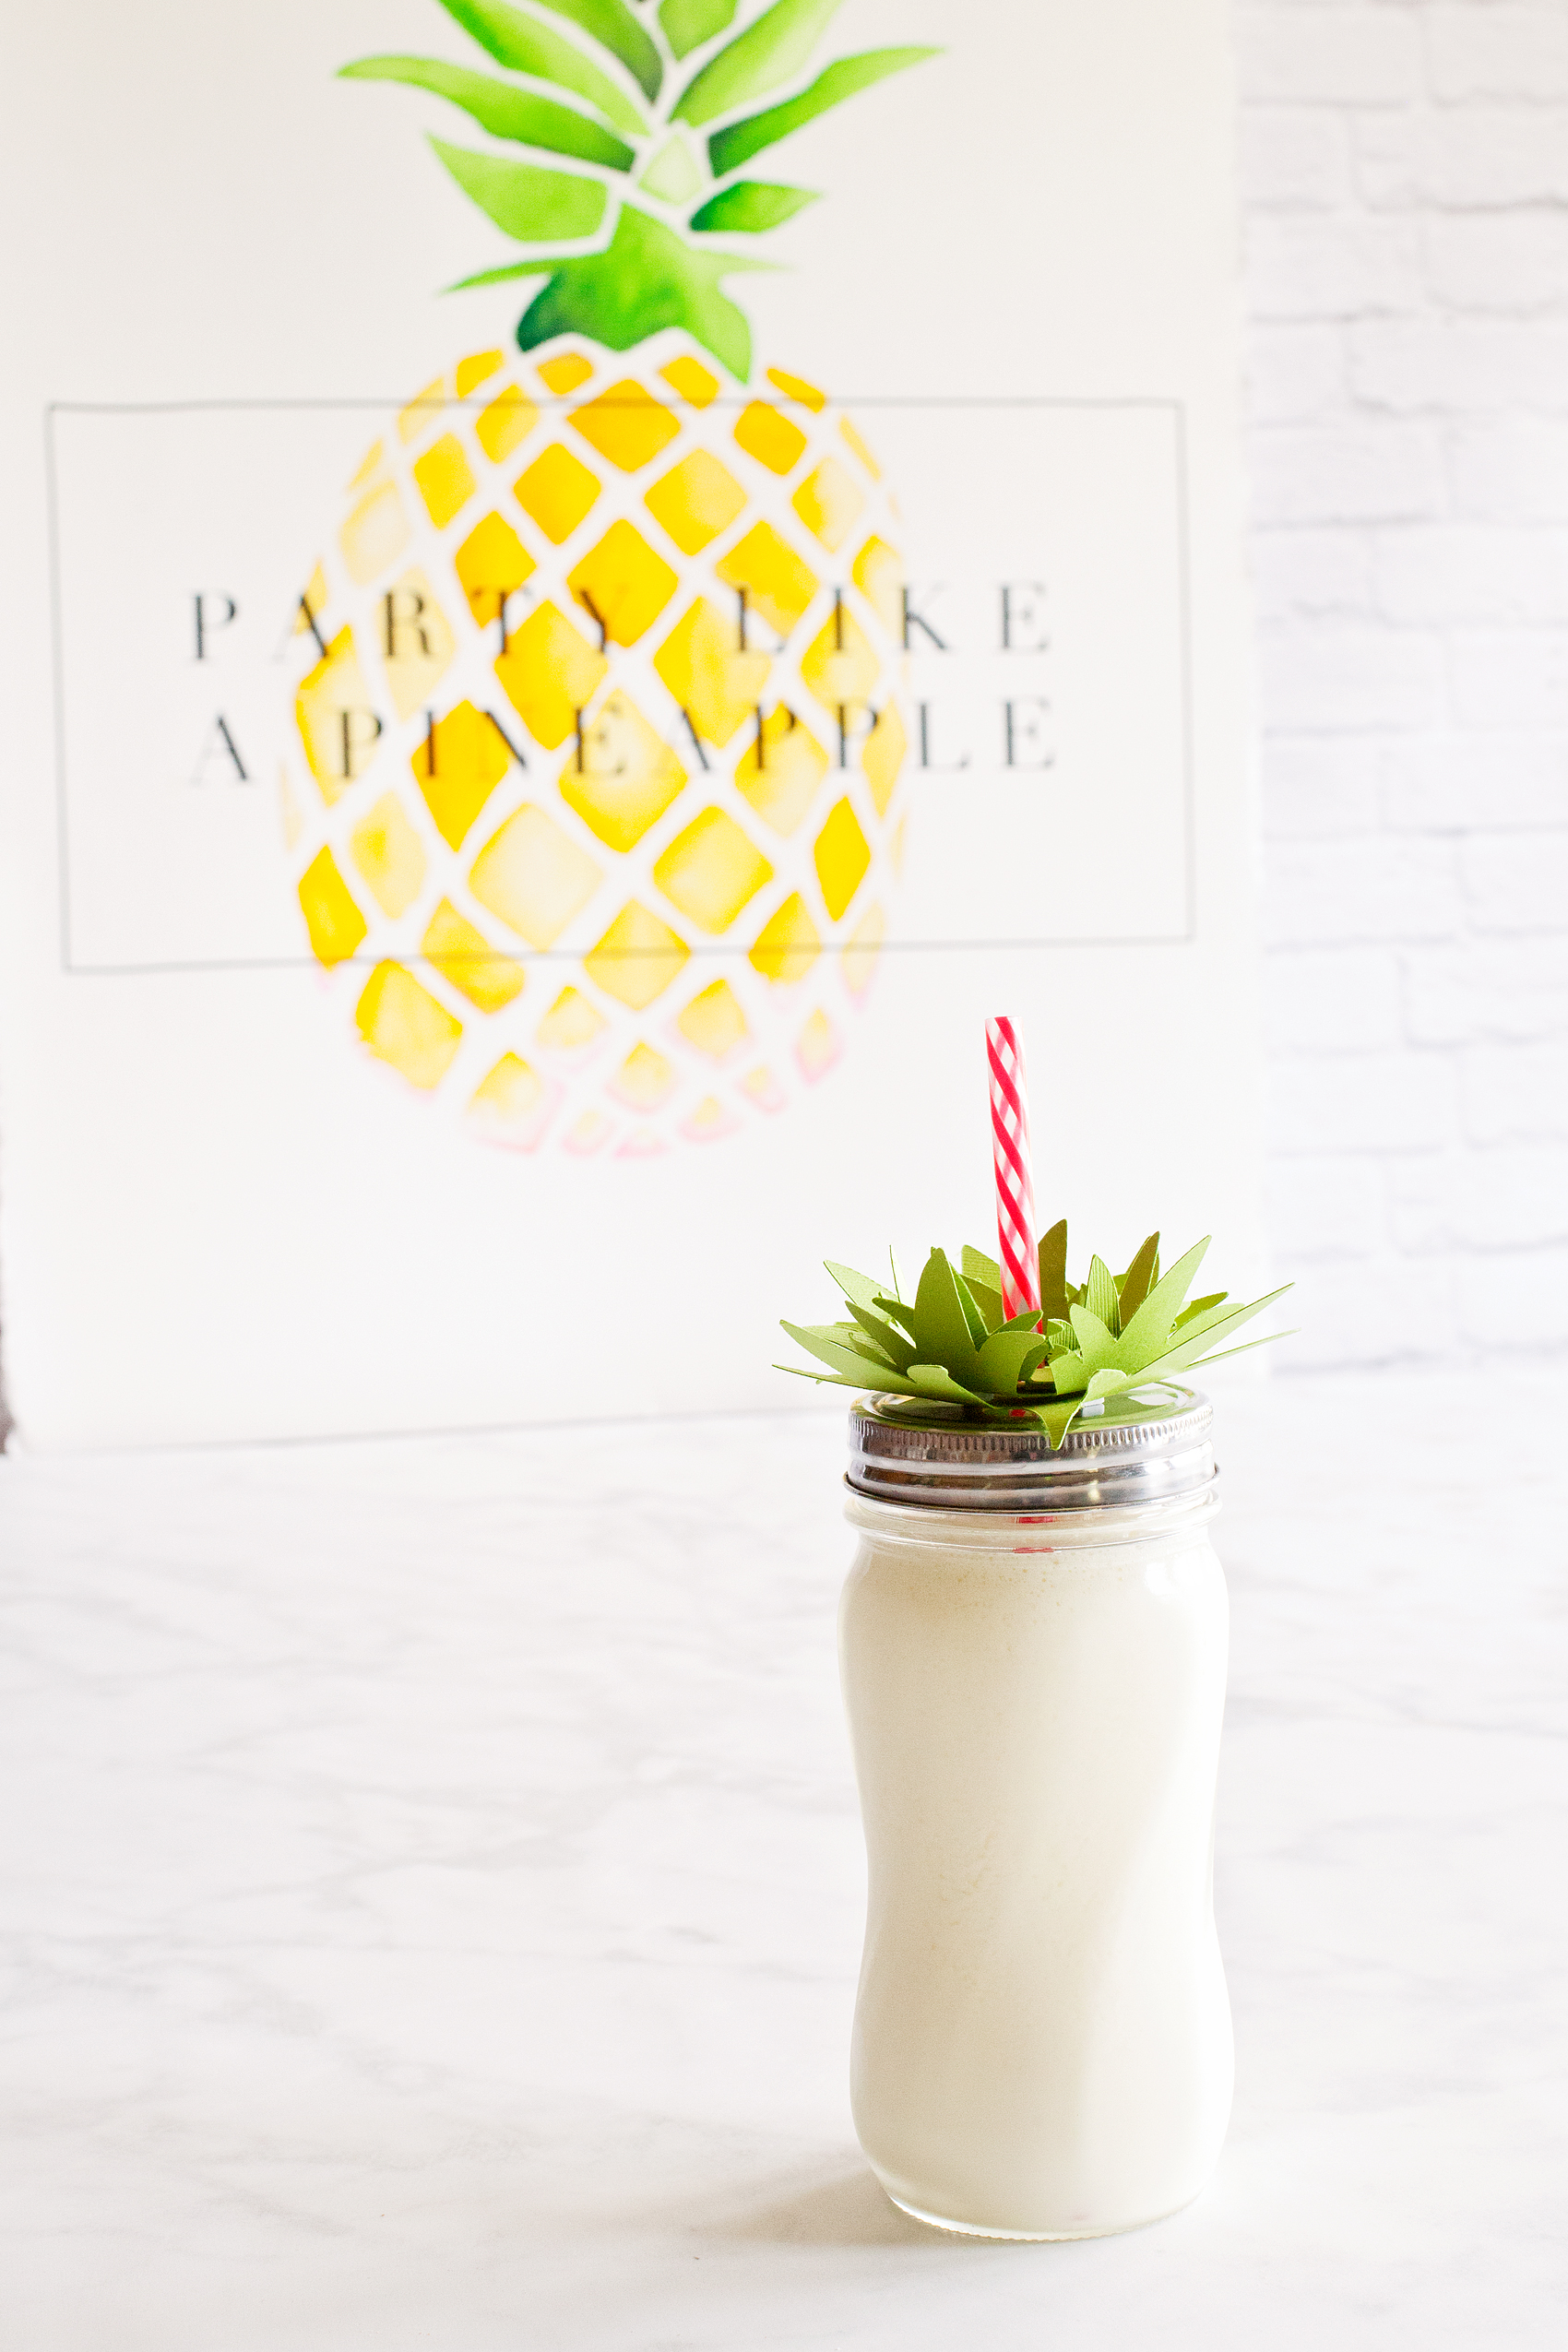
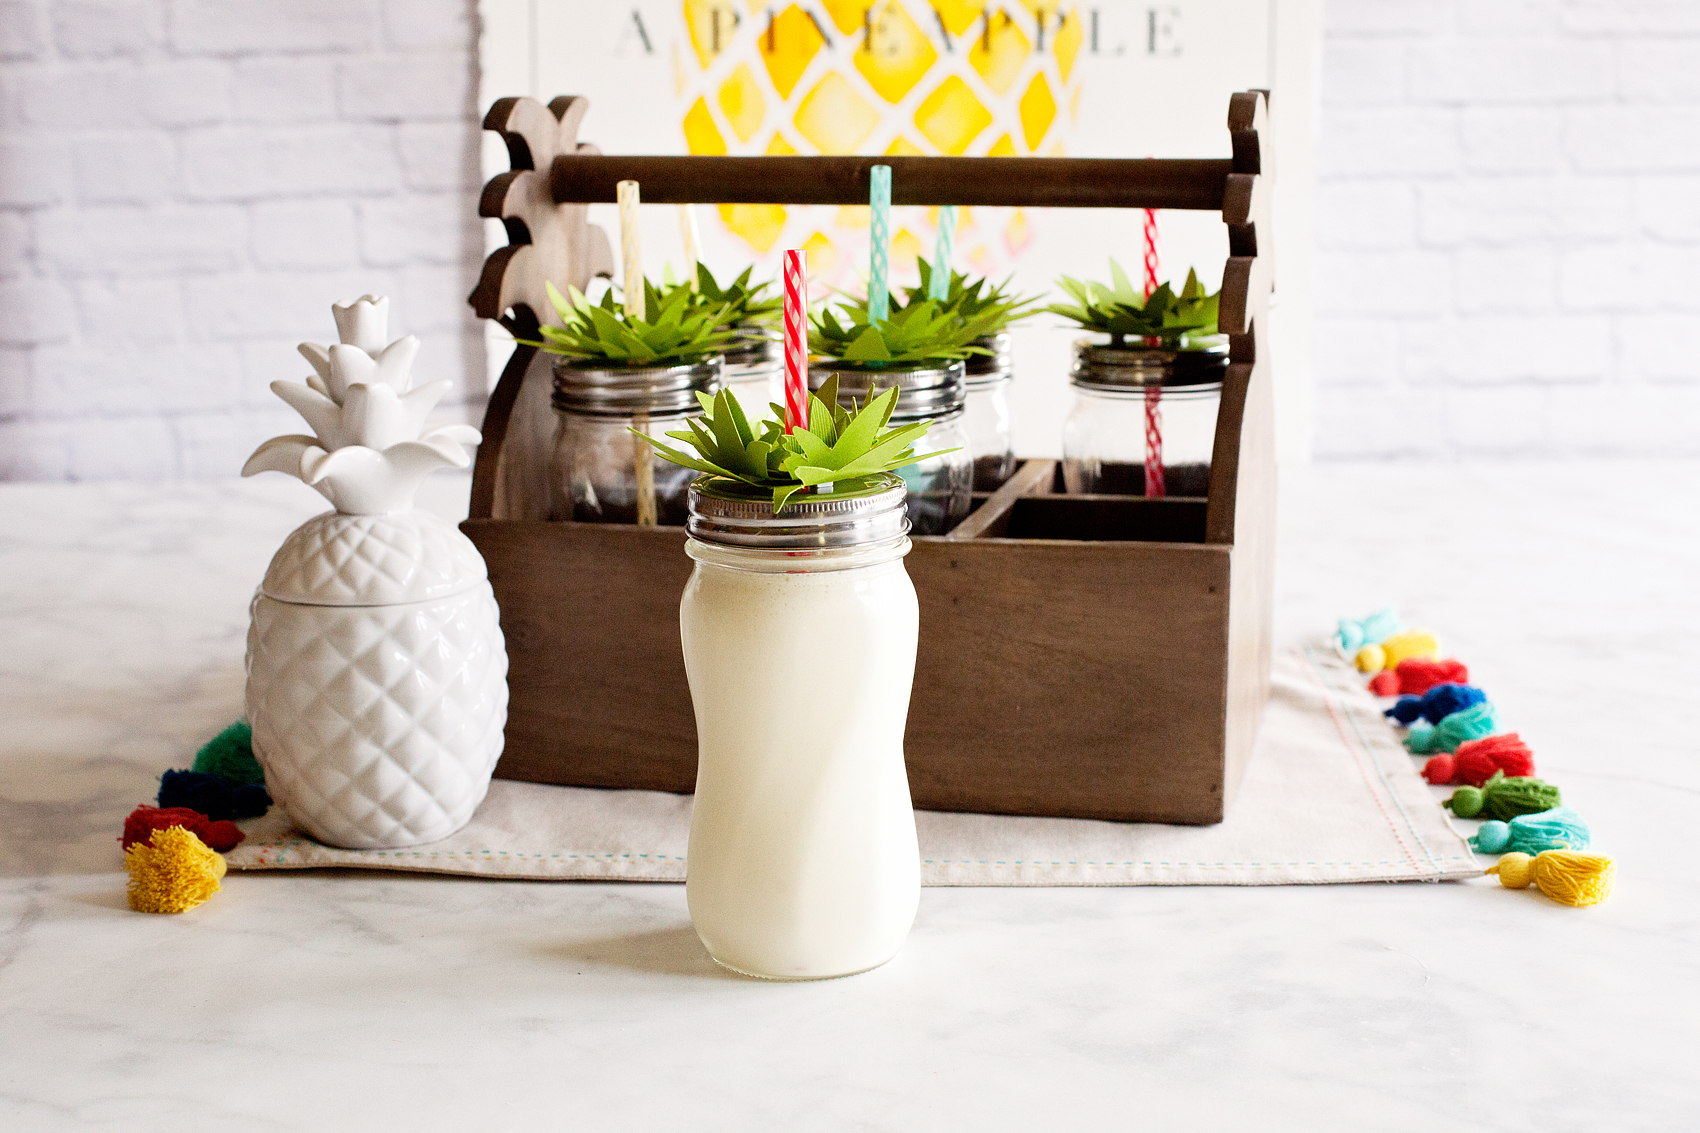
Design Element 4 | Pineapple Jars For Our Drinks

Another simple, yet eye catching design element that everyone will LOVE! I created my leaf pattern in Adobe Illustrator and then turned it into a cut file via the NEW Cricut Design Space software. Again, don’t worry! I’m sharing my files and will teach you how and what to use to recreate this fun drink idea.

Who doesn’t love a whimsical and tasty party? This Pineapple Party Banner is perfect for all ages. Come on over to WhipperBerry to learn how to recreate this EASY party!

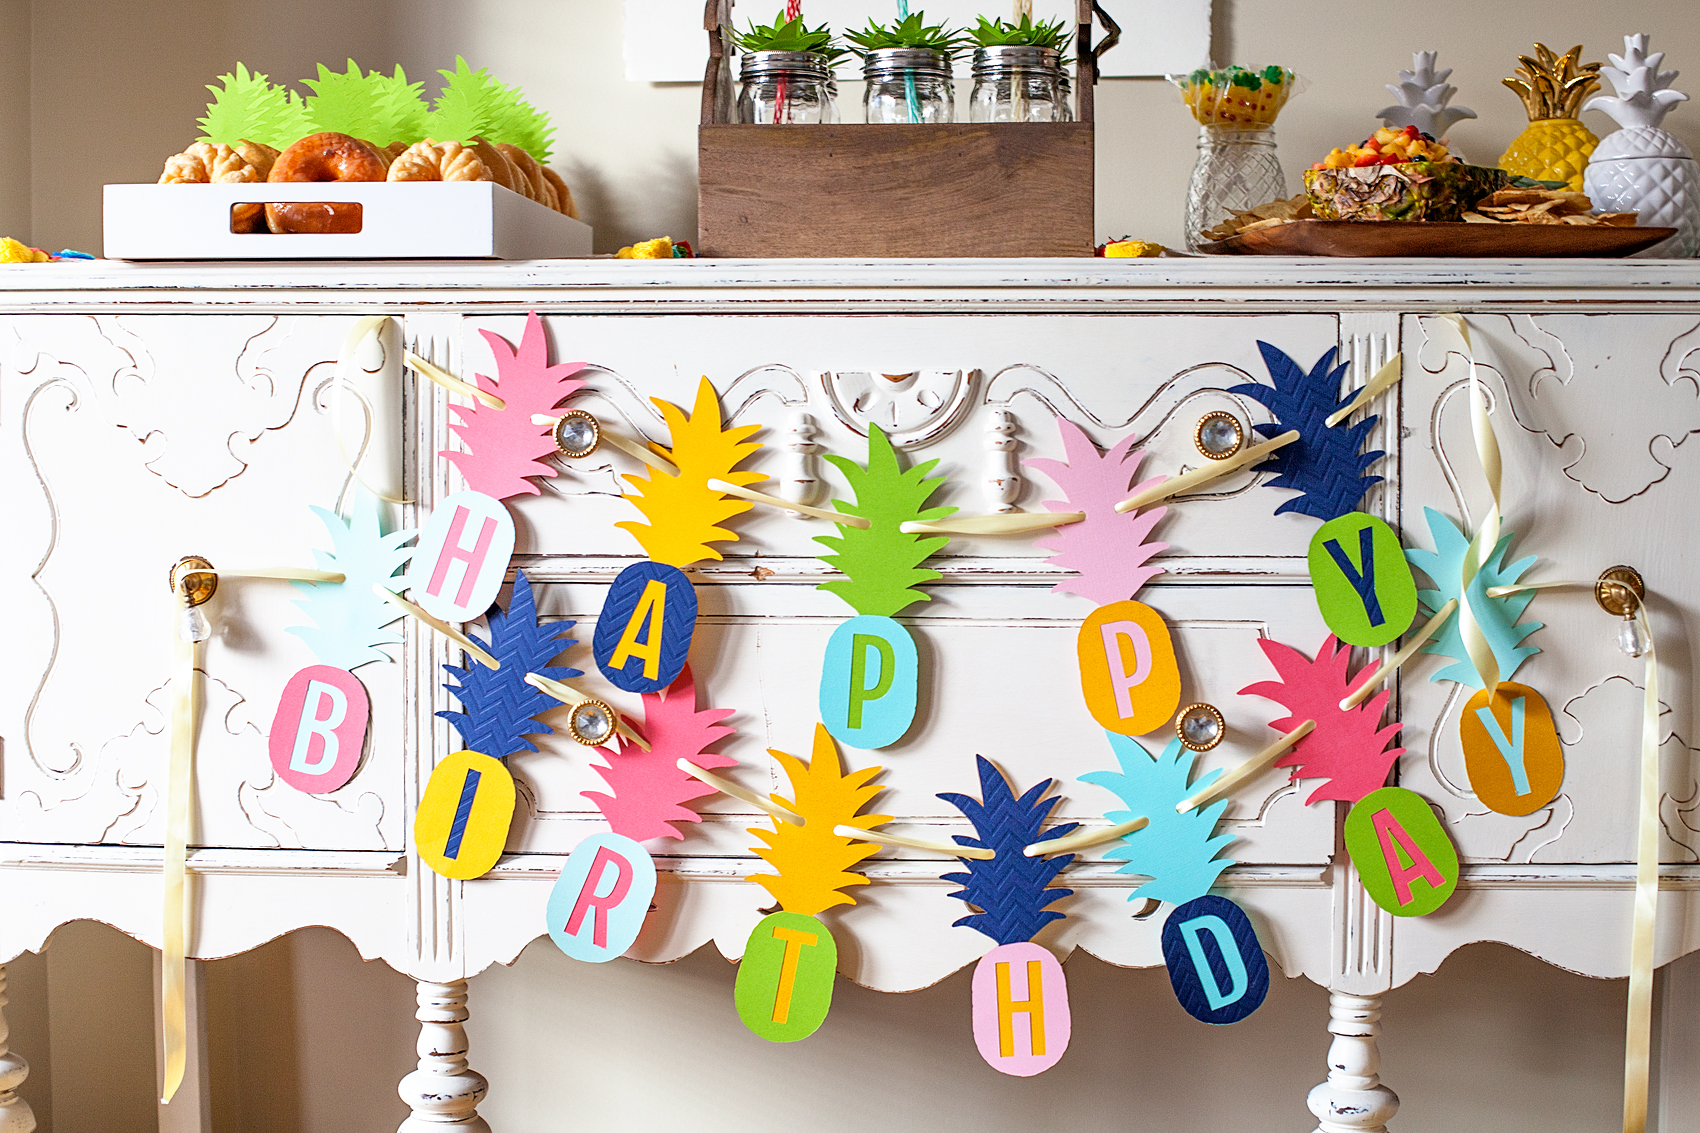
Design Element 5 | Pineapple Party Birthday Banner

You know… One of my favorite things about creating with my Cricut Explore Air 2 is, I’m not tied to someone else’s color scheme. I can use whatever colors I would like! Em and I went to Michaels and picked out some of her favorite colors in their craft paper section and when to town creating this fun pineapple birthday banner. Yep, you got it. I’ll be sharing this design that I created with you for your little pineapple’s birthday.

Pineapple Party Birthday Invitations • Who doesn’t love a whimsical and tasty party? This Pineapple Party is perfect for all ages. Come on over to WhipperBerry to learn how to recreate this EASY party!

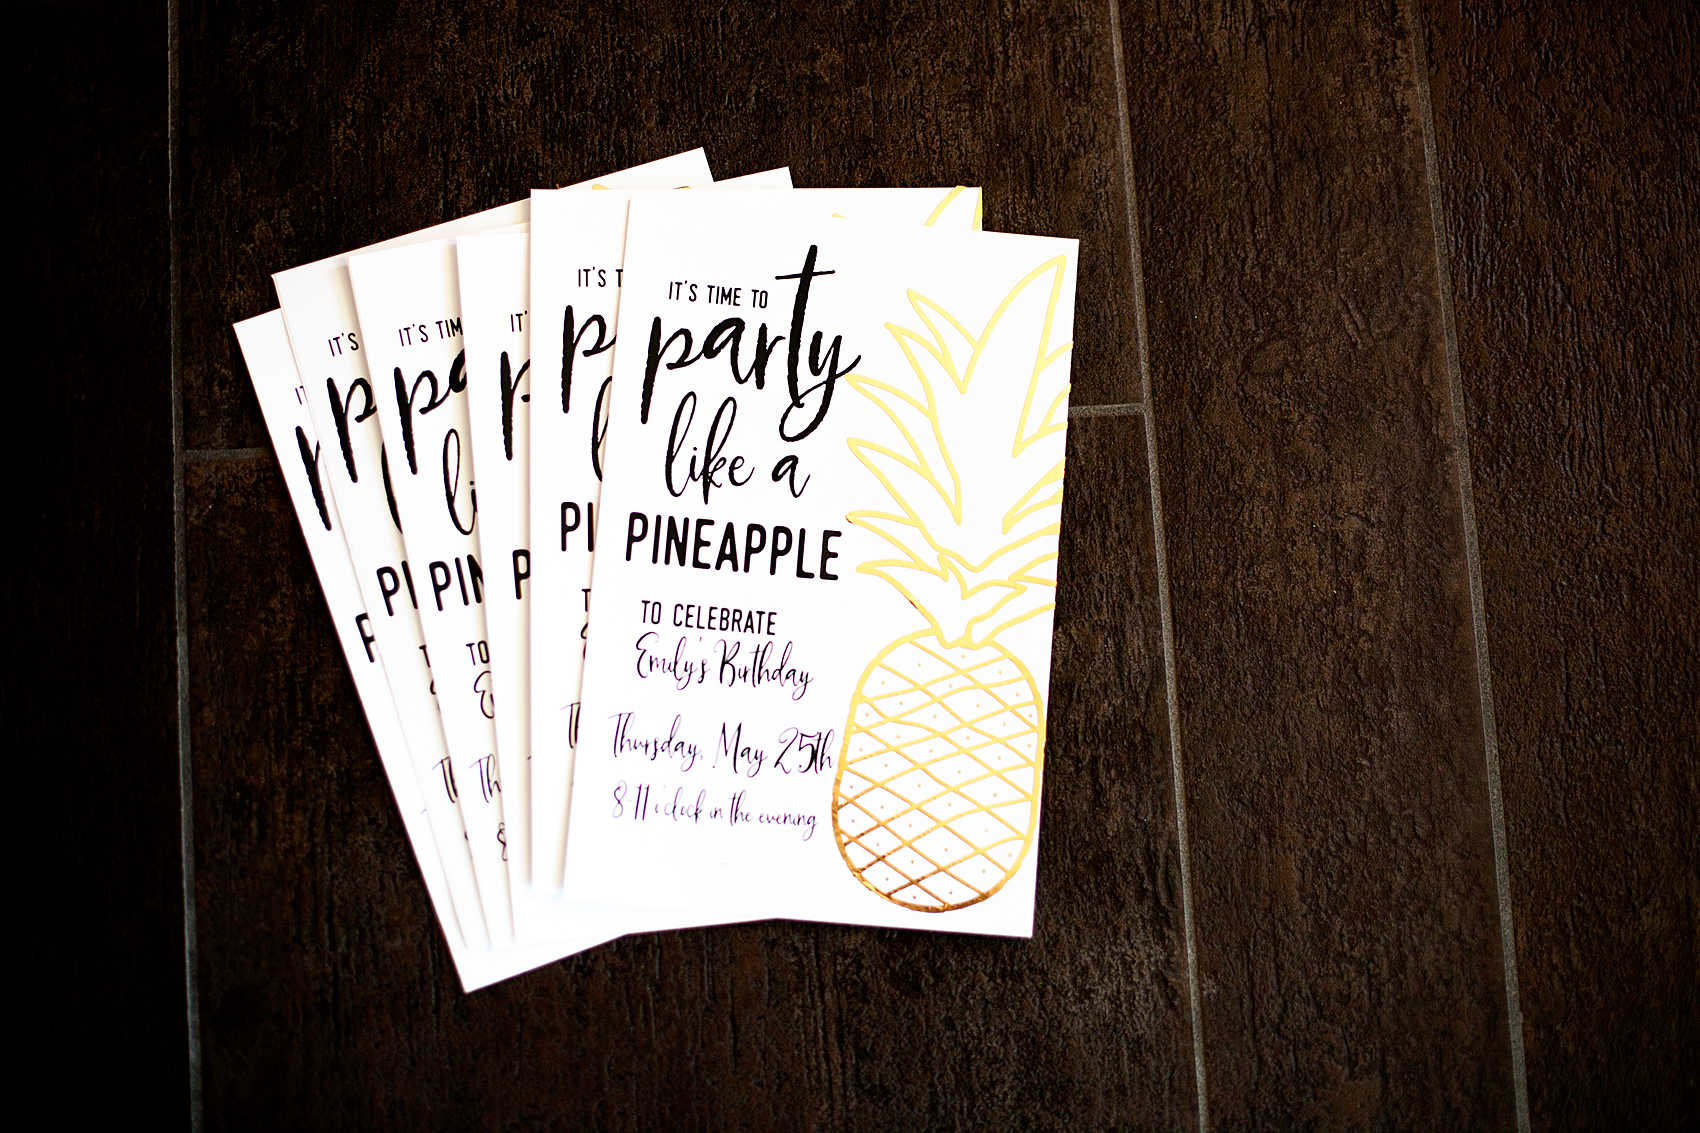
Design Element 6 | Party like a Pineapple Invitations

Every good party starts with fabulous invitations! That’s my motto anyway. I printed this simple invitations right at home on cardstock and then added some foil love with the Cricut Adhesive Foil. Oh foil, how do I love thee, let me count the ways. I love adding foil elements to all kinds of stuff and the Cricut Adhesive Foil is top notch. I’ll share all of my files for this invitation as well.

Pineapple Salsa, perfect treat for any summer party. Come on over to WhipperBerry to learn how to make it.

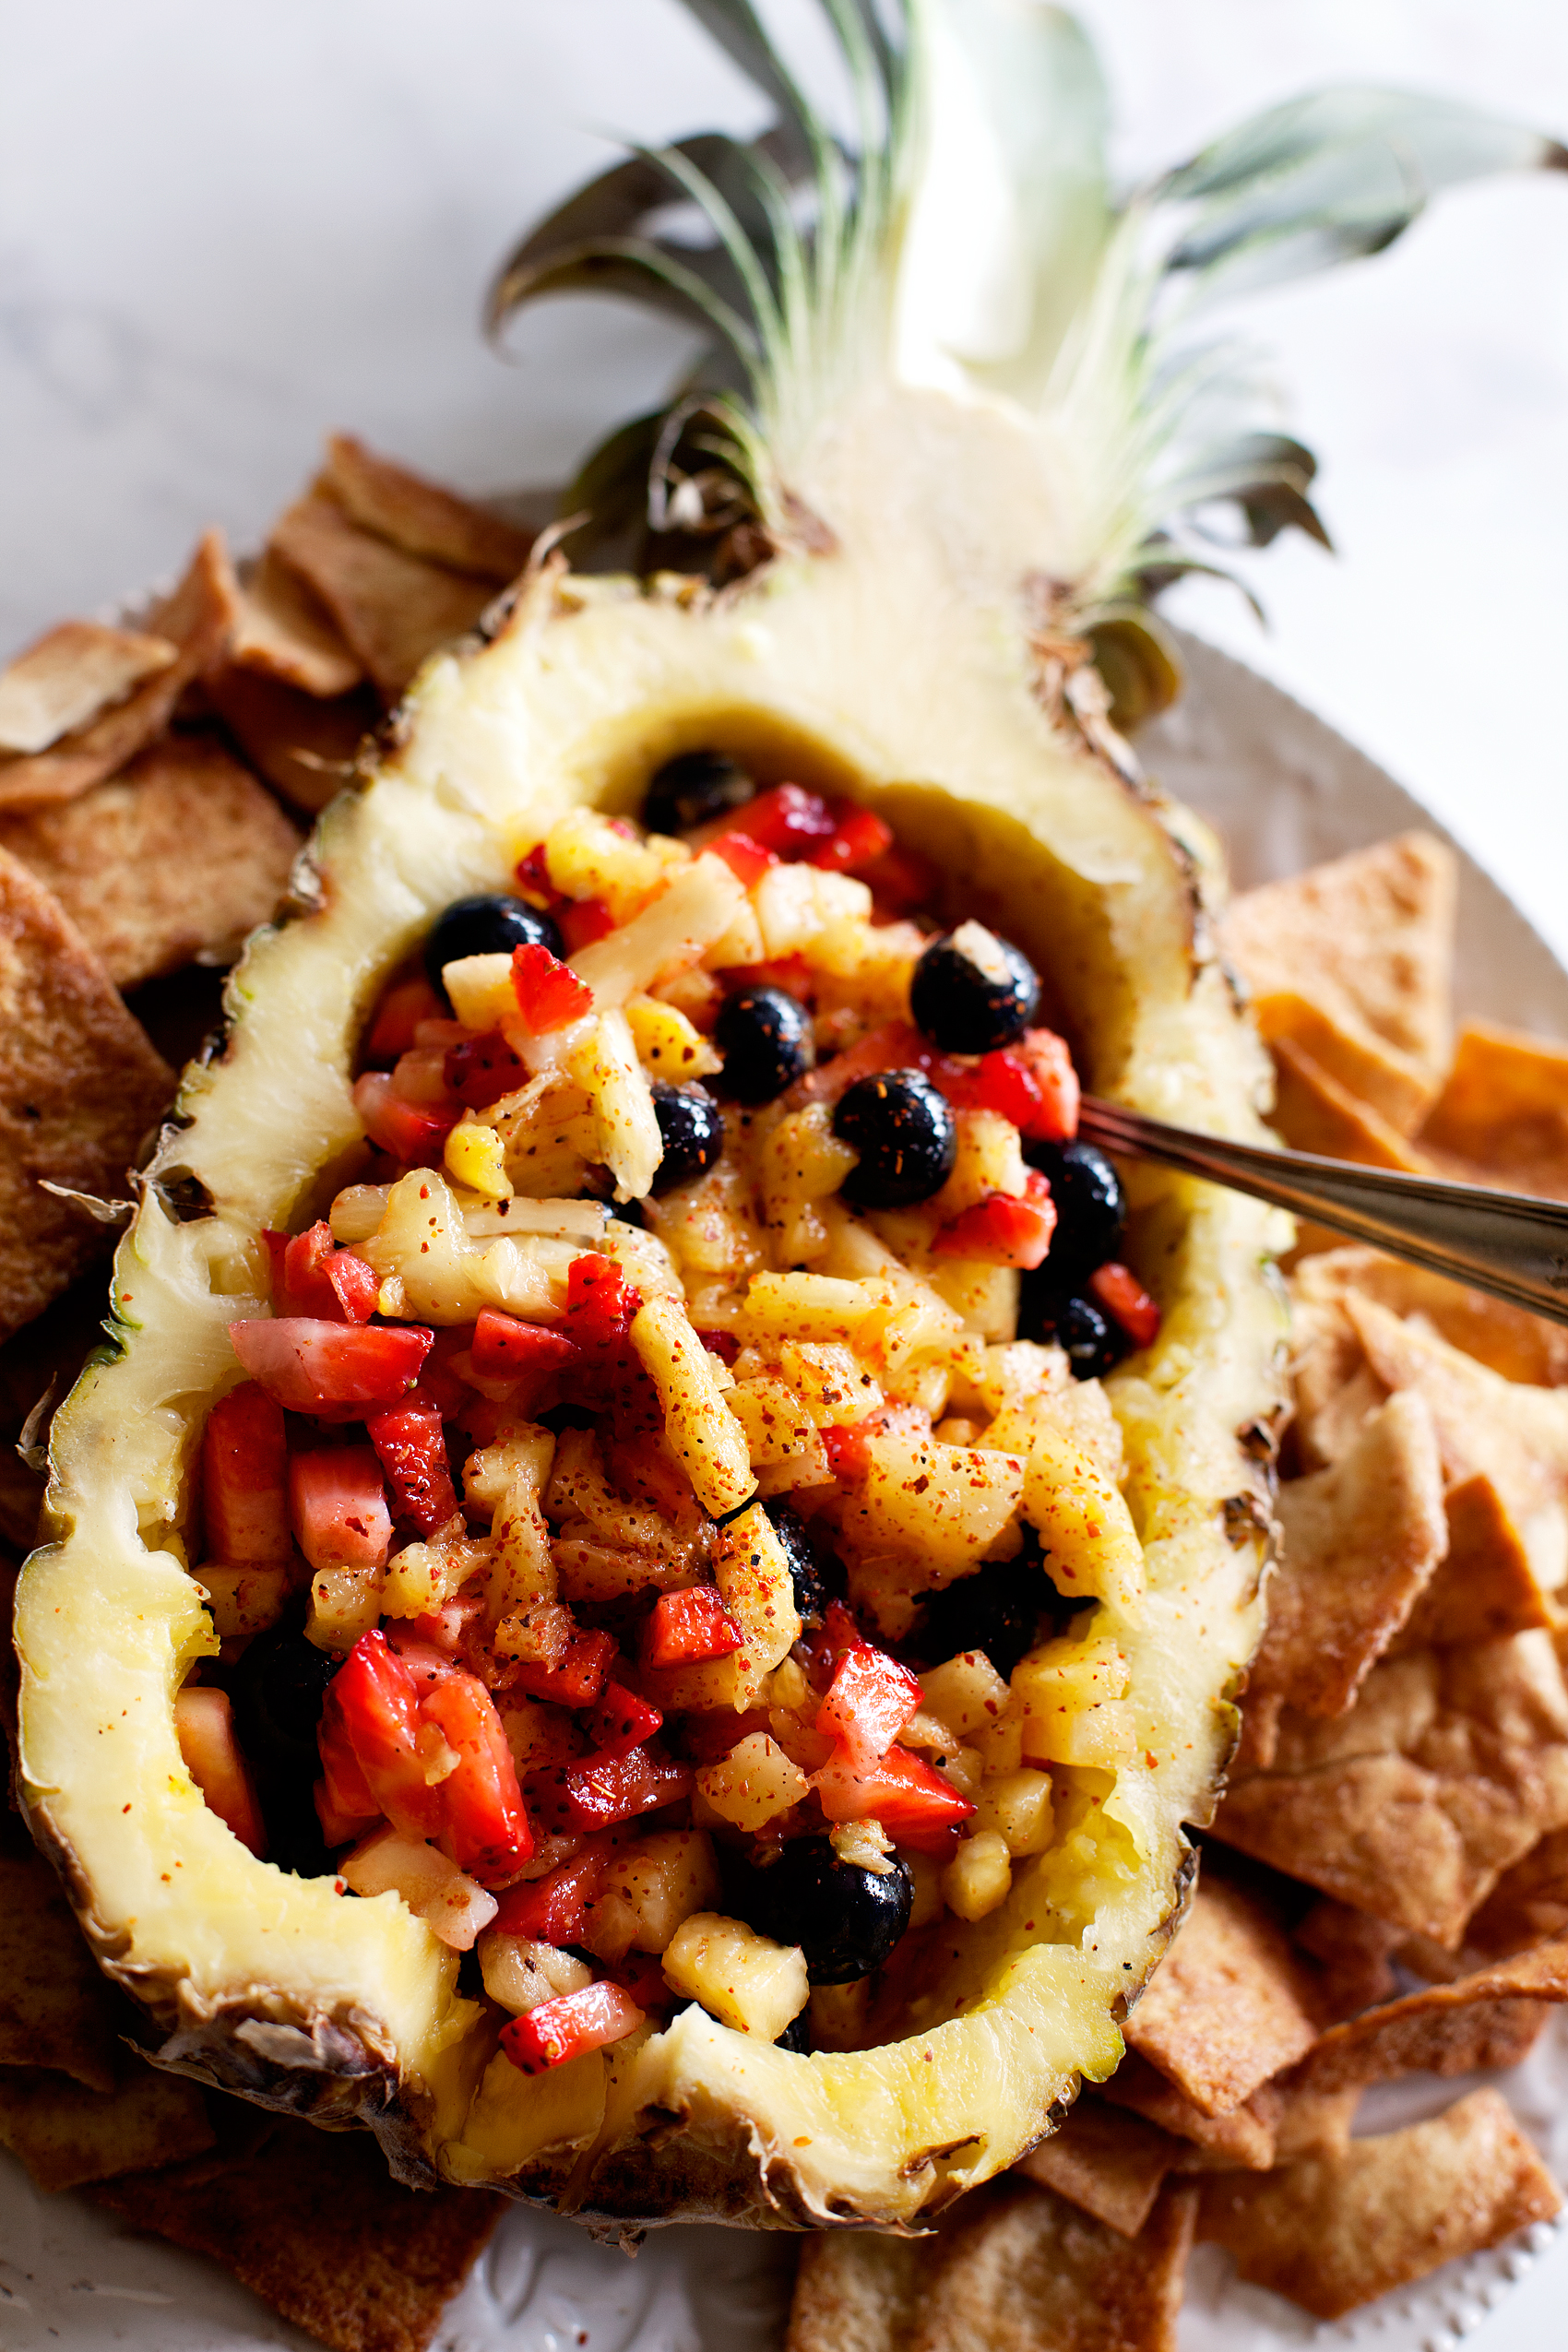
Tasty Treat 1 | Pineapple Salsa and Cinnamon Chips

This fruity pineapple salsa is the bee’s knees. It’s full of fresh flavor and a few secret ingredient that I’m sure will tickle your taste buds. Soon, I’ll be sharing this recipe so you can mix it up for your next party!

How CUTE are these "pineapple" doughnuts? This Pineapple Party is perfect for all ages. Come on over to WhipperBerry to learn how to recreate this EASY party!

Tasty Treat 2 | “Pineapple” Doughnut Cake

Like I said before, the EASIEST birthday cake EVER!! I ran to my favorite local doughnut shop and grab a couple dozen, topped them with my paper toppers and we were good to go. Done! Love those quick little time savers when it comes to party planning.

The cutest Dole Whip EVER! This Pineapple Party is perfect for all ages. Come on over to WhipperBerry to learn how to recreate this EASY party!

Tasty Treat 3 | Dole Whips

Now, any Pineapple Party worth it’s weight will for sure have Dole Whips at some point in the evening. It’s a must my friends. I have the perfect Dole Whip recipe that only has three ingredients and you’ll LOVE it.

Who doesn’t love a whimsical and tasty party? This Pineapple Party is perfect for all ages. Come on over to WhipperBerry to learn how to recreate this EASY party!

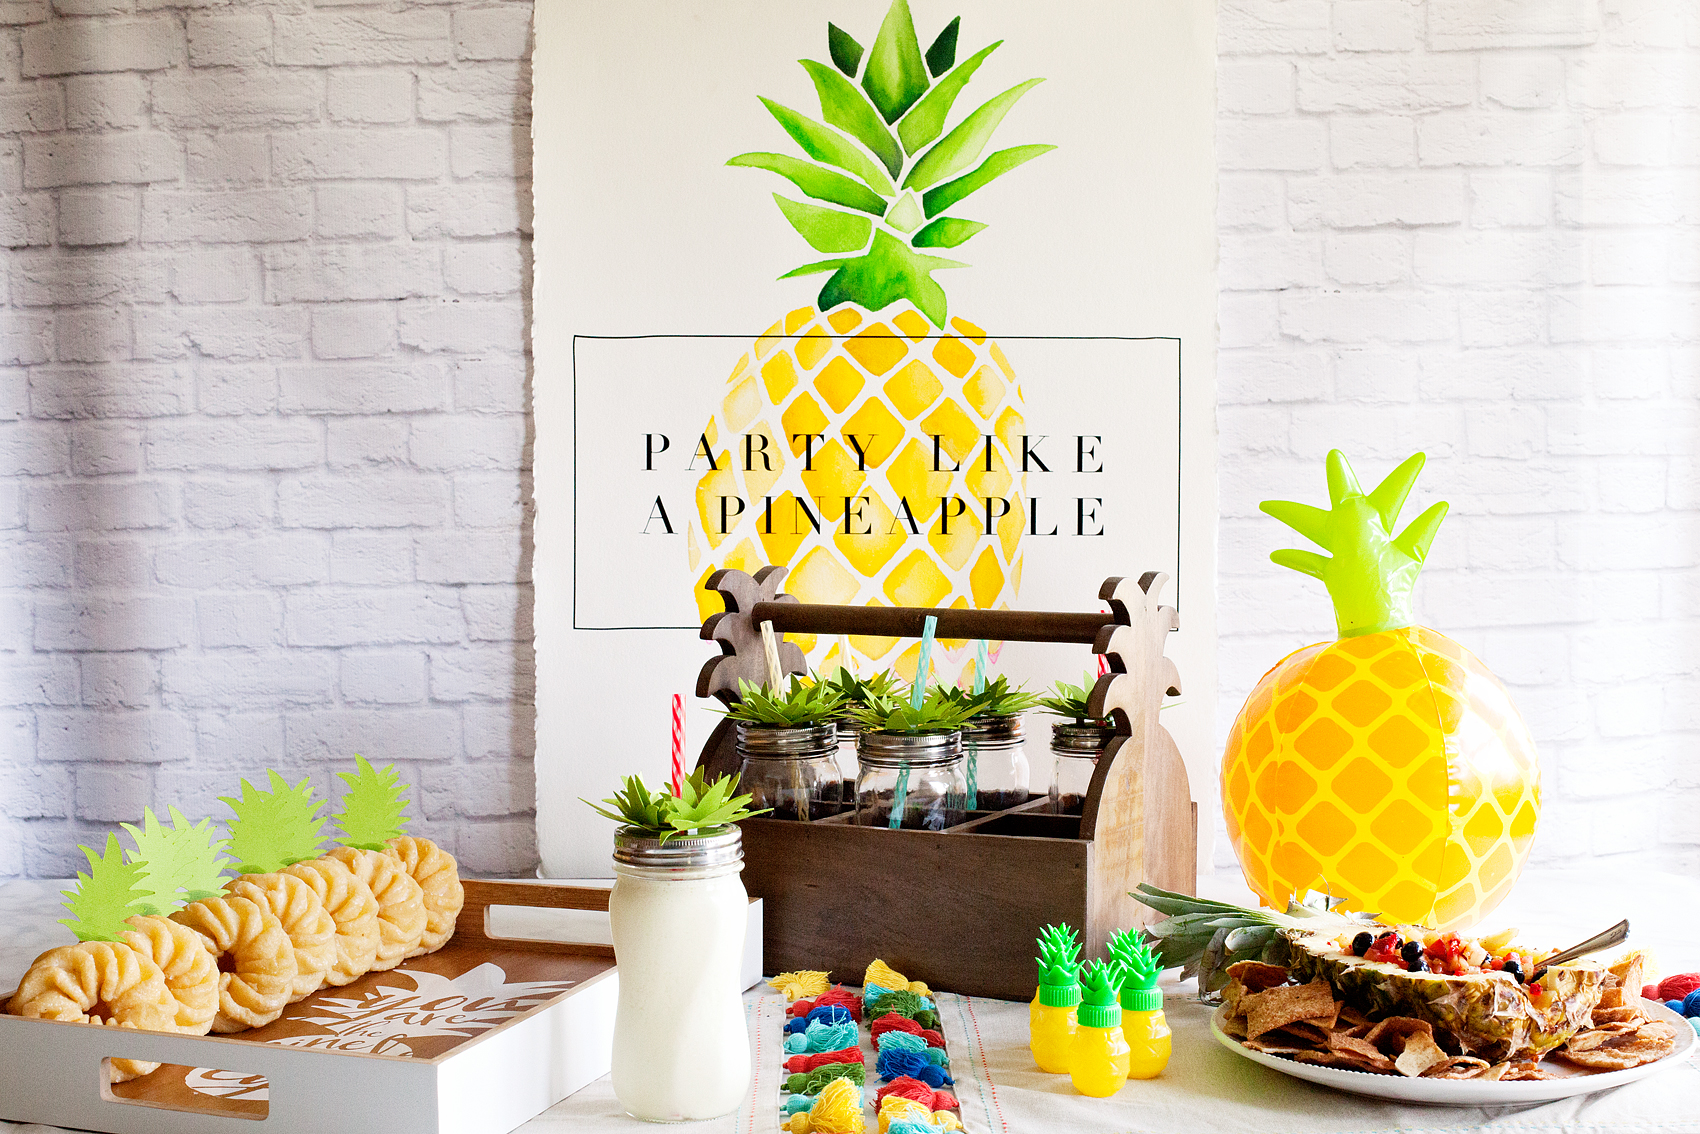
Party Favors | Pineapple Beach Balls & Pineapple Bubbles

I’m sorry, I don’t care what your age is, everyone loves beach balls and bubbles. The fact that you can get the two from Oriental Trading is just icing on the pineapple cake. I’ll be sharing all of the details here as well.

Doesn’t it all look fun? Well, with that… I need to get to work. I have several posts to work on to help you guys have a fun Pineapple Party too. Keep and eye out, follow along on Facebook and Instagram to see when the posts go live.

Don’t forget to PARTY LIKE A PINEAPPLE!

How to Apply Vinyl Tutorial + New Kitchen Sign Design

5 · May 9, 2017 · 2 Comments

Have you always wanted to create beautiful vinyl signs but, can’t quite get the hang of applying vinyl? Look no further, I’m sharing my pro tips for how to apply vinyl to create beautiful vinyl signs.

How to Apply Vinyl Have you always wanted to create beautiful vinyl signs but, can’t quite get the hang of applying vinyl? Look no further, I’m sharing my pro tips for how to apply vinyl to create beautiful vinyl signs.

how to transfer vinyl tutorial • brought to you by Cricut

Recently, we moved to our new forever home and I have been madly creating all kinds of fun things to make the space my own. I LOVE creating word art whether it be for vinyl signs, painted signs, or for printables, for some reason that kind of decor always speaks to me. (No pun intended!) I love typography and everything that comes with creating with words and letters. I love watching trends come and go and adding my version to the fray.

Right now, with the popularity of the show Fixer-Upper, word art is hot. I have all kinds of farmhouse/industrial signs all over my house. I found a fun, blank chalkboard stand at Michaels in their decor section and thought it would be fun to create a new “The Kitchen is Now Open” Sign for my counters. After a little bit of playing around, this is the design that I settled on…

How to Apply Vinyl Have you always wanted to create beautiful vinyl signs but, can’t quite get the hang of applying vinyl? Look no further, I’m sharing my pro tips for how to apply vinyl to create beautiful vinyl signs like this, "The Kitchen is Now Open Sign" with menu from WhipperBerry.

Download Kitchen Sign for Free

It has a little bit of farmhouse flair that so many of us are in love with right now. Now, this sign could be a little intimidating with all of the little letters but, don’t let it be intimidating. YOU CAN DO THIS! All you need is a little patience. So many people try and rush through a project and they get easily frustrated and then their project fails. That is so SAD! Step back, grab a Diet Coke (or, whatever it is that makes you happy), and ENJOY the process of creating.

For today, I’m focusing on just the vinyl transfer part of sign making. I’m working on a few more tutorials on how to create your sign in the NEW Cricut Design Space that was launched in BETA mode a week ago. It’s fabulous! I’ve been having a ball getting to know the new, faster & more user-friendly Design Space. I’m sure you’re going to love it too! It’s so easy to create your own designs within the Design Space or you can create in other programs like Photoshop or Illustrator and import your PNG files directly into Design Space and create that way as well. I’ll be working on more tutorials for both of those options soon.

I’m also working on a video tutorial on how to weed your vinyl. That’s the process of removing the negative part of your design in the vinyl. It’s really not hard, but I have a few tricks up my sleeve that will make it a little easier. Today, I’m just going to focus on how to apply vinyl. Here’s a quick video to show you how to apply vinyl to any type of smooth surface.

Video Tutorial for How to Apply Vinyl

How to Apply Vinyl by WhipperBerry from Heather Thoming on Vimeo.

See, isn’t that simple! Honestly, the trickiest part is making sure that the design is centered onto your surface. As long as you stick with these simple tips, you can become a vinyl sign PRO!

Pro Tips for Applying Vinyl

How to Apply Vinyl Have you always wanted to create beautiful vinyl signs but, can’t quite get the hang of applying vinyl? Look no further, I’m sharing my pro tips for how to apply vinyl to create beautiful vinyl signs like this, "The Kitchen is Now Open Sign" with menu from WhipperBerry.

  • Take your time – like I said before, don’t rush. If some of the vinyl lifts while you are transferring it to either the transfer tape or your sign… Don’t stress out. Lay that section back down and press on the vinyl with your finger and then try again. You’ll get it, just don’t rush.
  • Make sure your surface is clean – Now think about this, if you try and place a sticker on a surface covered in dust, dirt, sand, or general grime, what will happen? The sticker won’t stick. Same thing with adhesive vinyl. Whatever you are adhering it to needs to be clean. Nothing is more frustrating than laying down some vinyl and then finding a little piece of dirt stuck under the vinyl image making an unsightly bump. Take the time to make sure everything is clean.
  • Trim excess vinyl backing – Again, vinyl is just one big sticker. Stickers are placed on backing to keep the adhesive side sticky. The same applies to vinyl. Once you have cut your design on your Cricut machine, you’ll weed your vinyl and then you’ll want to cut away the excess vinyl backing. This will help when laying down your design and making sure it is placed the way you would like it.
  • Create a hinge – Several years ago, when the Cricut cutting machines made cutting your own vinyl possible, a good friend of mine, who owned a large-scale sign-making company, taught me her tricks for applying vinyl. Each of these tricks, I still use them every time. One of them is to use the transfer tape to create a “hinge” at the top of your design. Check out the video and you’ll see what I mean.
  • Pull transfer tape low, slow, and diagonally – My sign-making friend also taught me this years ago. When removing the transfer tape, pull low, slow and diagonally. What I mean by low is, that you are essentially folding the non-sticky side over on itself as you are pulling as close to your surface as possible. When do that along with pulling diagonally, you’ll be less likely to pull the vinyl back up as you remove the transfer tape.

A Quick Note on Materials

Here we have it… Not all vinyl and transfer tapes are created equal!! I have tried many brands of both vinyl and transfer tape. I’ve used what the professionals use and basic crafters vinyl. I LOVE the Cricut Transfer Tape!! It’s clear and so easy to use. I’ve also been very happy with the Cricut Vinyl. I have exclusively used the Premium Outdoor Vinyl for most of my projects and have been thrilled with the results. I made some travel mugs with the Premium Vinyl and have run them through the dishwasher many, many times and have yet to have any issues with the vinyl coming off. I LOVE that!

Stay tuned for more Cricut tutorials and projects coming to WhipperBerry! By the way… If you have any questions, feel free to leave a comment here. I would be happy to help!

How to Apply Vinyl Have you always wanted to create beautiful vinyl signs but, can’t quite get the hang of applying vinyl? Look no further, I’m sharing my pro tips for how to apply vinyl to create beautiful vinyl signs like this, "The Kitchen is Now Open Sign" with menu from WhipperBerry.

Disclaimer // I am a Cricut Ambassador and receive  product and payment to help with my projects. As always, I will NEVER promote a product that I don’t truly believe in!

Wash and Dry Sign • Iron-On Vinyl on Black Canvas

11 · Apr 28, 2017 · 3 Comments

Every laundry room or bathroom for that matter, needs a Wash and Dry sign, right? Let me show you how to make a simple Fixer-Upper inspired sign with Cricut Iron-On Vinyl and a black canvas. Fixer-Upper inspired Wash and Dry Sign created by WhipperBerry • Create this easy to make sign using your @cricut® machine and their Iron-On Vinyl •  Download the digital design file at WhipperBerry.com

• This post is brought to you by Cricut •

A few weeks ago, I had the wonderful experience of traveling to Austin, Texas for the Indulge Conference (which was fabulous by the way!) On the last day of the conference, we hopped onto a bus and made our way to Mecca, I mean Magnolia Market a.k.a The Silos in Waco, Texas. To say that my heart was full that day would be an understatement. I came home with all kinds of goodies AND inspiration as well. They have a laundry room Wash and Dry sign at the Magnolia Market that I’ve been eyeing for awhile and I wanted to create something similar for my laundry room.

Prdctmgnl_1_of_8_1024x1024

Magnolia Market  •  Wash and Dry Sign

The WhipperBerry Wash and Dry Sign Design

I set to work to create a Wash and Dry sign that fit my style and this is what I came up with…

Fixer-Upper inspired Wash and Dry Sign created by WhipperBerry • Create this easy to make sign using your @cricut® machine and their Iron-On Vinyl •  Download the digital design file at WhipperBerry.com

It has a little of JoJo’s vibe with more of a modern flair I would say. I kind of love it! For those of you who would like to download this sign design, click HERE for the PNG file. Shortly, I will have a full tutorial on how to use a PNG file in the NEW Cricut Design Space. It’s sooooo cool, so stay tuned!

How to create the Wash and Dry Sign

Once I had the design created, I needed to find the easiest way to create a nice looking sign. I decided that a black canvas with Cricut’s Iron-On Vinyl would be the best and easiest way to accomplish my mission. I grabbed a black canvas at Michaels and set to work… Here’s what you’ll need.

Wash and Dry Sign Supplies

  • Black Canvas 18×24
  • Cricut Machine { I use the Cricut Explore Air 2 }
  • Cricut Design Space { I don’t want to knock your socks off BUT… The new Cricut Design Space has launched in BETA. That is a link to the new, awesome software!! No more Flash, which means… No more lag time! }
  • Computer / Tablet / Phone { You guys… They all work WIRELESSLY with the Cricut Explore Air 2 }
  • White Cricut Iron-On Lite
  • Cricut 12×24 Light Grip Cutting Mat
  • Light cotton tea towel { flower sack material is great } OR Parchment paper

Fixer-Upper inspired Wash and Dry Sign created by WhipperBerry • Create this easy to make sign using your @cricut® machine and their Iron-On Vinyl •  Download the digital design file at WhipperBerry.com

Ok, before we get started on the project, here’s a quick time lapse that shows how I made the sign…

Wash & Dry Sign by WhipperBerry from Heather Thoming on Vimeo.

Seriously, to quote Ina Garten… “How easy was that?” Let’s go into it in a little more detail starting with my tips and tricks for a successful project.

Fixer-Upper inspired Wash and Dry Sign created by WhipperBerry • Create this easy to make sign using your @cricut® machine and their Iron-On Vinyl •  Download the digital design file at WhipperBerry.com

First tip, take your time. Many people try and rush through their projects and get frustrated when they don’t turn out right. SLOW DOWN! Especially if this is your first time working with the heat transfer vinyl. You want to love your project, take the time to do it right.

Cutting out the Iron-On Lite Material

First thing you need to do is, cut your file on the Iron-On Lite material via your Cricut machine. When working with Iron-On lite, you’ll want to place the material with the shiny protective film down and the matte side facing up. Yep, I’ve messed that up a few times so, don’t beat yourself up if you do as well!

Another key item, make sure that you select the iron-on button when setting up your design in Design Space. This will mirror your image so that it will work with the iron-on vinyl.

Fixer-Upper inspired Wash and Dry Sign created by WhipperBerry • Create this easy to make sign using your @cricut® machine and their Iron-On Vinyl •  Download the digital design file at WhipperBerry.com

Next step, weeding your Iron-On Lite vinyl. This is my favorite part and if you don’t believe me, watch my Instagram story from yesterday. You’ll see why I love it and, you’ll get to see more of the project!

Wash and Dry Instagram Story @whipperberry from Heather Thoming on Vimeo.

Adhering your Iron-On Lite Vinyl to Your Canvas

Now, working with traditional stretched canvas rather than your fabric does provide for a few little obstacles. Namely, the canvas is stretched on a wood frame which makes it hard to “iron-on” something to it. To get a good transfer of the vinyl you need to apply pressure on a hard surface and the raised nature of the canvas makes that a challenge. To solve this problem, I put some books under the canvas to provide that firm surface that I needed.

Fixer-Upper inspired Wash and Dry Sign created by WhipperBerry • Create this easy to make sign using your @cricut® machine and their Iron-On Vinyl •  Download the digital design file at WhipperBerry.com

I also placed a heat mat on top of the books to protect them from the heat of the iron. I found this portable heat mat at Target in the laundry section.

Fixer-Upper inspired Wash and Dry Sign created by WhipperBerry • Create this easy to make sign using your @cricut® machine and their Iron-On Vinyl •  Download the digital design file at WhipperBerry.com

You’ll lay down your design onto the surface of your canvas with the protective film on top. That protective film is your friend at this point. It’s a bit sticky so it holds your design in place for you.

Fixer-Upper inspired Wash and Dry Sign created by WhipperBerry • Create this easy to make sign using your @cricut® machine and their Iron-On Vinyl •  Download the digital design file at WhipperBerry.com

Fixer-Upper inspired Wash and Dry Sign created by WhipperBerry • Create this easy to make sign using your @cricut® machine and their Iron-On Vinyl •  Download the digital design file at WhipperBerry.com

Cover your design with a light cotton cloth or some parchment paper. Set your iron to it’s hottest setting and then start to iron-on your design.

Now… This is not like ironing a shirt. You don’t want to use steam and it’s going to take a little time. You are basically wanting the vinyl to melt into the canvas and that takes a little time. DO NOT iron directly on the protective film OR place your iron on a section and just leave it there. Keep the iron moving and firmly press down on the canvas. This will help adhere the heat transfer vinyl to the canvas.

After a few minutes, check to see how things are sticking. Look at the protective film and you’ll kind of be able to see that the vinyl is pulling away from it and sticking to the canvas. You may find a few spots that need a little more time. Replace the cloth and continue to iron. Once you feel good about the adhesion, pull the protective film away and admire your sign.

At this point, I actually replace the cloth and do another light pass with the iron to make sure the vinyl is good and set. You could even flip your canvas over and iron on the back side with the protective film still in place to again make sure the vinyl is set.

Now, all you have to do is step back and admire your work! It’s so EASY and it looks AAAAMAZING!

Fixer-Upper inspired Wash and Dry Sign created by WhipperBerry • Create this easy to make sign using your @cricut® machine and their Iron-On Vinyl •  Download the digital design file at WhipperBerry.com

Disclaimer // I am a Cricut Ambassador and receive  product and payment to help with my projects. As always, I will NEVER promote a product that I don’t truly believe in!

How to Write on Labels with Cricut to Create Your Own Handwritten Labels

129 · Mar 28, 2017 · Leave a Comment

Love the look of handwritten labels but you’re not in love with your own handwriting? No problem! These Cricut handwritten labels come to the rescue!

Handwritten label by Cricut. Get that perfect look for your home weather it's; industrial labels, farmhouse labels or modern labels. You can achieve that perfect "handwritten" look even if you don't have great hand writing with the Cricut using your favorite handwritten fonts.

My Handwritten Labels Circut Explore Air 2 Project

Did you know that you can WRITE with your Cricut and cut out cute labels? You can even write on Avery labels with your Cricut! I put the Cricut markers to the test and created an easy-to-follow video to show you how to create some simple industrial-style labels that everyone loves right now. Here’s what inspired this project…

I have become obsessed with herbal tea this winter. My husband and I would share a mug of tea every night before bed to warm ourselves before hitting the hay. We started with one flavor of tea, Camomile, and over the chilly months, we started collecting all kinds of new flavors. Soon our collection of herbal tea started to take over our kitchen and I decided that it was time to find a better storage solution for our newfound tea love. I found a great industrial-style cabinet that fits perfectly in our kitchen and loaded it up with all of our tea.

The next step was to create some labels for our new tea storage solution. Because the cabinet was an industrial-style cabinet I wanted to create some industrial-looking labels that were handwritten. The problem… I’m not a huge fan of my handwriting. I was just not blessed with that gift, nor do I have the time to practice, practice, practice. I remembered that my Cricut Explore Air 2 has a great “handwritten” option using the Cricut Explore Pens.

Handwritten label by Cricut. Get that perfect look for your home weather it's; industrial labels, farmhouse labels or modern labels. You can achieve that perfect "handwritten" look even if you don't have great hand writing with the Cricut using your favorite handwritten fonts.

How to Write on Avery Labels with Your Cricut – Handwritten Label Inspiration

This is such a simple beginner project that anyone at any creative level can create for their home with their Cricut machine. For this industrial-style label, I kept things simple. I really only needed a “handwritten” tea name with a rectangle cut around it… Pretty basic. However, you can create all kinds of great “handwritten” labels with fancy shapes as well. I created a Label Design Pinterest board with some inspiration for all kinds of fun “handwritten” labels that you can make with the Cricut Explore Air 2.

The video below shows you in-depth how to create the lables.

How to Make Your Own Handwritten Labels With Cricut Explore Air 2

With all of that inspiration, you have to be chomping at the bit to get started. I created a simple, easy-to-follow video to show you exactly how to make these basic handwritten labels for a storage solution in your home. Grab a cup of tea, sit back and learn how to make your own labels.


Here’s What You Need to Make These Cricut Handwritten Labels

There are a few things you’ll need to make these awesome labels. The good news is you can get all of them online. Since you’re reading this I bet you already have a Cricut machine but if not, what are you waiting for!? The rest of the tools you may or may not have and I’d recommend picking them up to get this project going 🙂

  1. Cricut Machine (I used the Explore Air 2 for this)
  2. Cricut Pens
  3. Cricut Cutting Mat
  4. Avery Lables
  5. Optional but helpful: The Cricut spatula tool
  6. And just a little bit of practice!

That’s all you really need for this project. Most of these items are very cheap unless you don’t already have a Cricut machine. Even then, if you want to get into DIY home crafts and projects, the machines really are a bargain!

Tips & Tricks for Handwritten Cricut Labels

"Handwritten" label by Cricut. Get that perfect look for your home weather it's; industrial labels, farmhouse labels or modern labels. You can achieve that perfect "handwritten" look even if you don't have great hand writing with the Cricut using your favorite handwritten fonts.

Here are a few tips & tricks that I learned along the way.

  • STOP and think about your end game. What style are you looking to create with your handwritten labels? Make sure you are selecting fonts that pair well with that design concept. If you are going for an industrial look, you aren’t going to use a font that is more shabby chic. If you have a farmhouse style in your home, you aren’t going to select a modern-style font and so on.
  • When working within Cricut Design Space, don’t forget to ATTACH your layers before you send your design to your machine. We go over this in the video so make sure you check that out before you get started.
  • The Cricut Design Space makes it super easy to tell the difference between a handwritten layer and a cut layer in your label design. Keep an eye on the icons to tell the difference between the layers. (HINT… I cover this in the video.)
  • USE your Cricut tools! I always want to move too fast and forget that Cricut has created some great tools to help make your projects the best they can be. When removing card stock paper from the cutting mat, use the SPATULA TOOL to keep your paper nice and flat. If you remove the paper by just pulling it away from the cutting mat, it will curl slightly.
  • Don’t forget to watch the video! It’s less than 10 minutes and it covers everything you’ll need to know to create your own “handwritten” labels.

Now hopefully you know how to make labels with your Cricut Explore Air 2. As always, If you have questions post them in the comments below and I will answer!

  • « Go to Previous Page
  • Page 1
  • Interim pages omitted …
  • Page 8
  • Page 9
  • Page 10
  • Page 11
  • Go to Next Page »

Primary Sidebar

Heather from Whipperberry
Hello... my name is Heather and I'm the creator of WhipperBerry a creative lifestyle blog packed full of great recipes and creative ideas for your home and family. I find I am happiest when I'm living a creative life and I love to share what I've been up to along the way... Come explore, my hope is that you'll leave inspired!

Footer

  • Privacy Policy
  • Crafts
  • Food
  • Gifts
  • Holidays
  • Home
  • Mom Life
  • Recipes
  • Travel

Copyright © 2026 · Seasoned Pro