• Skip to primary navigation
  • Skip to main content
  • Skip to primary sidebar
  • Skip to footer

Whipperberry

WhipperBerry • Your Home For Creative Inspiration

  • Home
  • Recipes
    • Starters
    • Easy Weeknight Dinners
    • Main Dish
    • Salads
    • Side Dish
    • Soups & Stews
    • Desserts
    • Breakfast
    • Miscellaneous
  • Tutorials
    • Creative Crafts
    • DIY Decor
    • Fabric Crafts
    • Food How-To
    • Jewlery
    • Paint Projects
    • Paper Art
    • Party Styling
    • Photography and Graphic Design
    • Silhouette
  • Holidays
    • Easter
    • Mother’s Day
    • Father’s Day
    • 4th of July
    • Halloween
    • Thanksgiving
    • Christmas
    • Valentine’s Day
  • Gift Ideas
    • Gifts For Everyone
    • Gifts for Dad
    • Mother’s day
    • For The Girls
    • For The Kids
    • Teacher Gift Ideas
    • Christmas
  • Printables
    • Holiday
    • Gift Idea
    • LDS Primary
  • Travel
  • About
    • Terms
  • Contact
  • Nav Social Menu

    • Facebook
    • Instagram
    • Pinterest
    • RSS
    • Twitter

dessert

Cinnamon Roll House Centerpiece

11 · Dec 5, 2016 · 1 Comment

There is something truly magical about baking during the Christmas season. I have very fond memories in the kitchen with my family during the holidays making all kinds of goodies. Cookies, fudge, peanut brittle, my favorite cinnamon roll and all kinds of candies and goodies to pass out to friends and family. I loved to watch my parents in the kitchen working on these projects together. When I was little, my Dad never really spent a whole lot of time in the kitchen except for Christmas. That was the time of year he would join my Mom in the kitchen helping her make up the magical Christmas goodies and making up the scrumptious plates that would be whisked off to our loved ones.

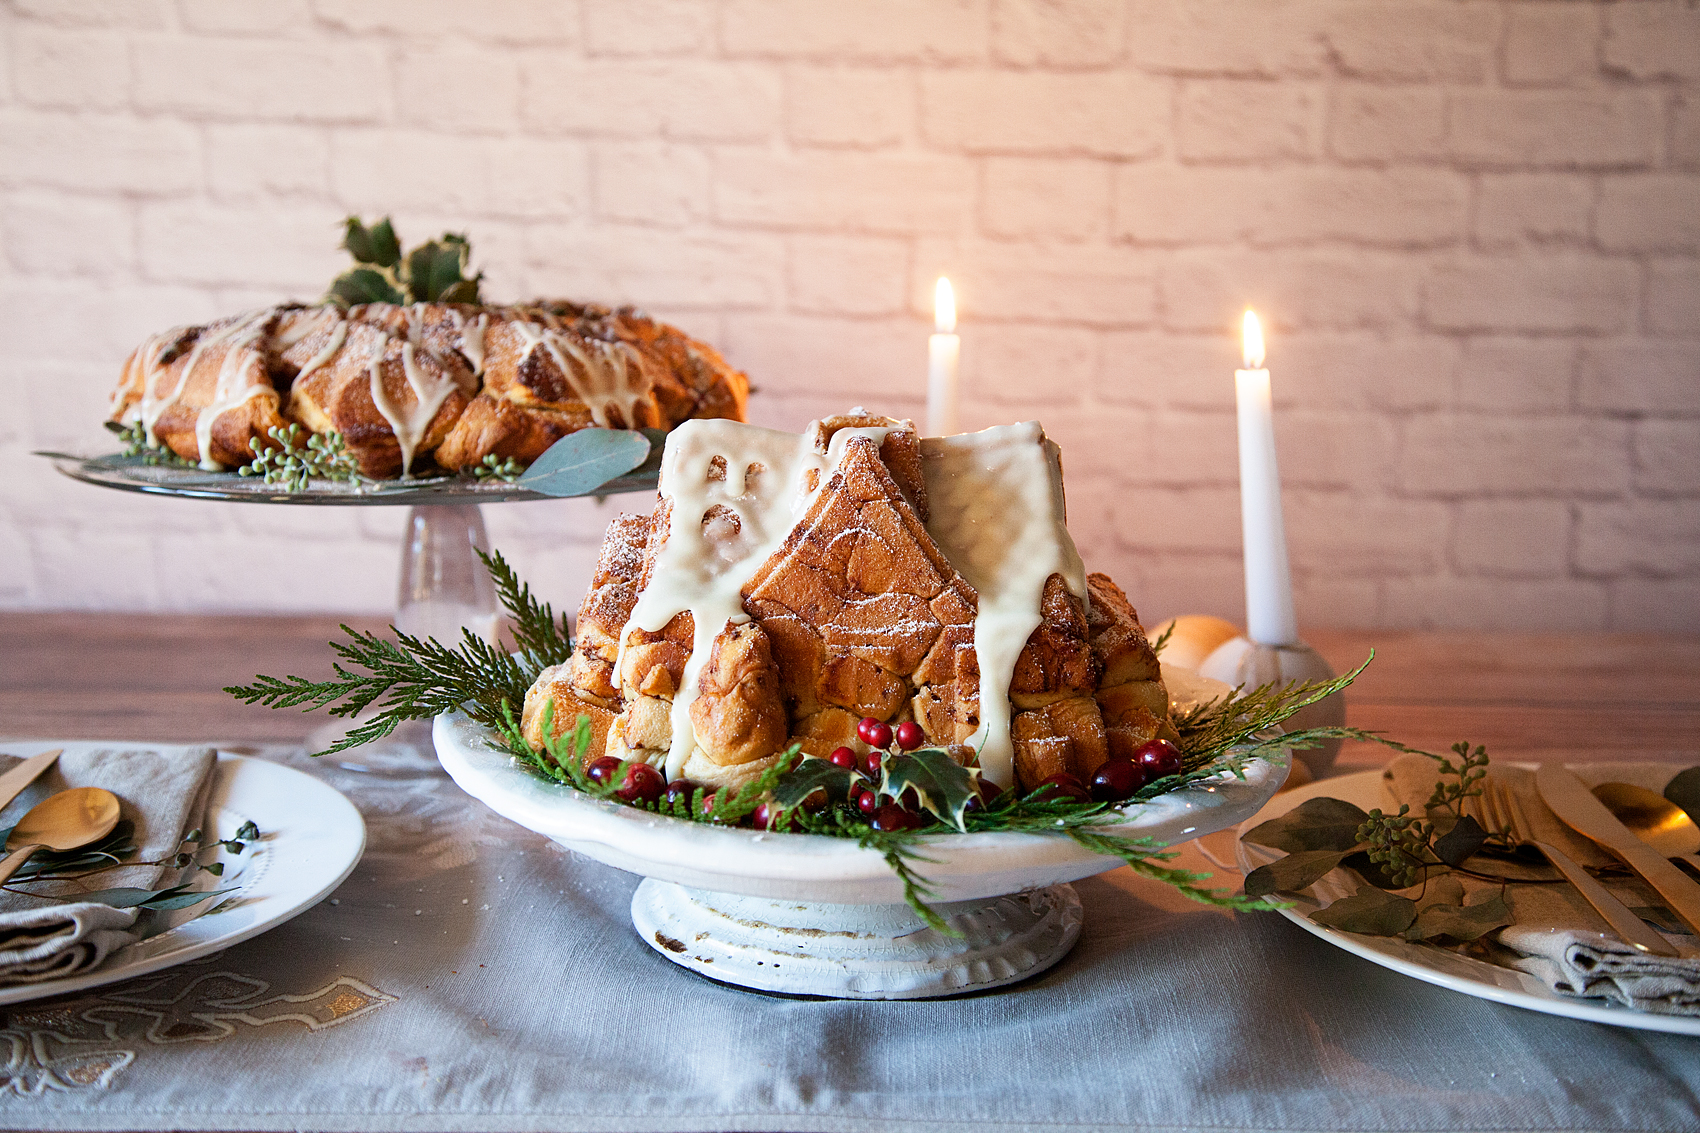
The years we made cinnamon rolls were some of my favorite. As I thought back on those memories, I thought it would be fun to make a centerpiece for our Christmas table out of cinnamon rolls. I mean really, that’s a perfect holiday centerpiece!

Pillsbury Cinnamon Roll House for your Christmas Table from WhipperBerry

I headed off to Walmart to get some inspiration and boy did I find it. I found this fun Gingerbread House Bundt Pan and thought it would be great to make the house out of CINNAMON ROLLS!

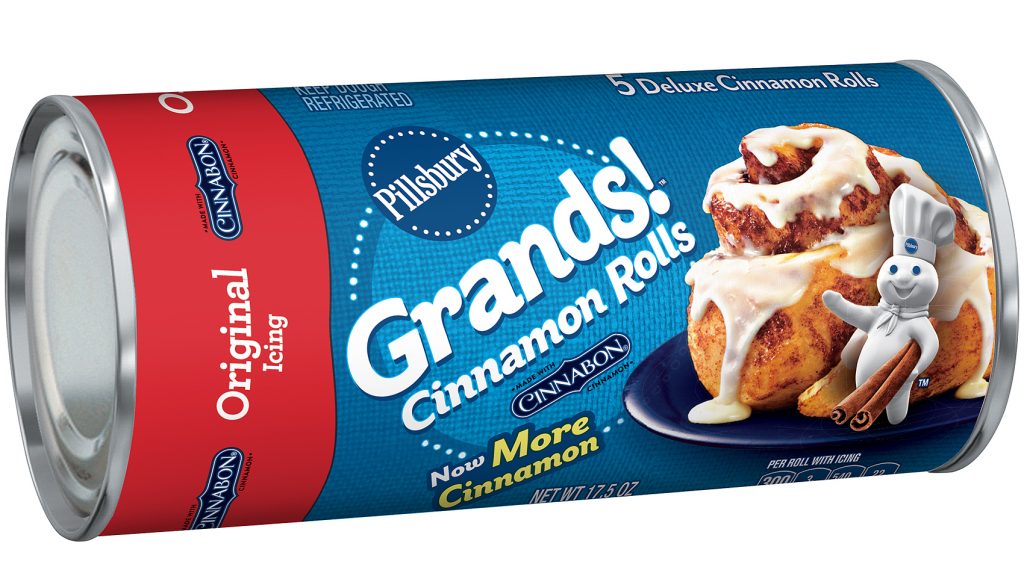
It would bring back those memories in the Christmas kitchen with my parents along with bringing in a new tradition with my kiddos. To make it even easier, I decided to make our cinnamon roll house with Pillsbury Grand Cinnamon Rolls. Super easy & tasty as well.

pillsbury-grands-cinnamon-rolls

You know when you dream up an idea and then cross your fingers and toes in hopes that it will work? Well, I was beyond thrilled with how this one turned out and it hardly took any of our precious holiday time to make the magic happen. Here’s a quick little video to show you how to make one as well…

I’m mean really, how fun is that?

All you really need to do is…

Spray your pan with non-stick cooking spray.

Layer your Pillsbury Grands Cinnamon Rolls in the gingerbread house pan. I used three cans of Pillsbury Grands Cinnamon Rolls Make sure to press it a bit into the nooks and crannies.

Bake at 350˚ for 50-60 minutes.

You may need to cover it with foil after about 30 minutes to avoid over browning on the bottom.

Once it is baked all the way through (make sure to test with a cake tester), remove from the oven and let sit for 5 minutes and then turn out onto a cooling rack.

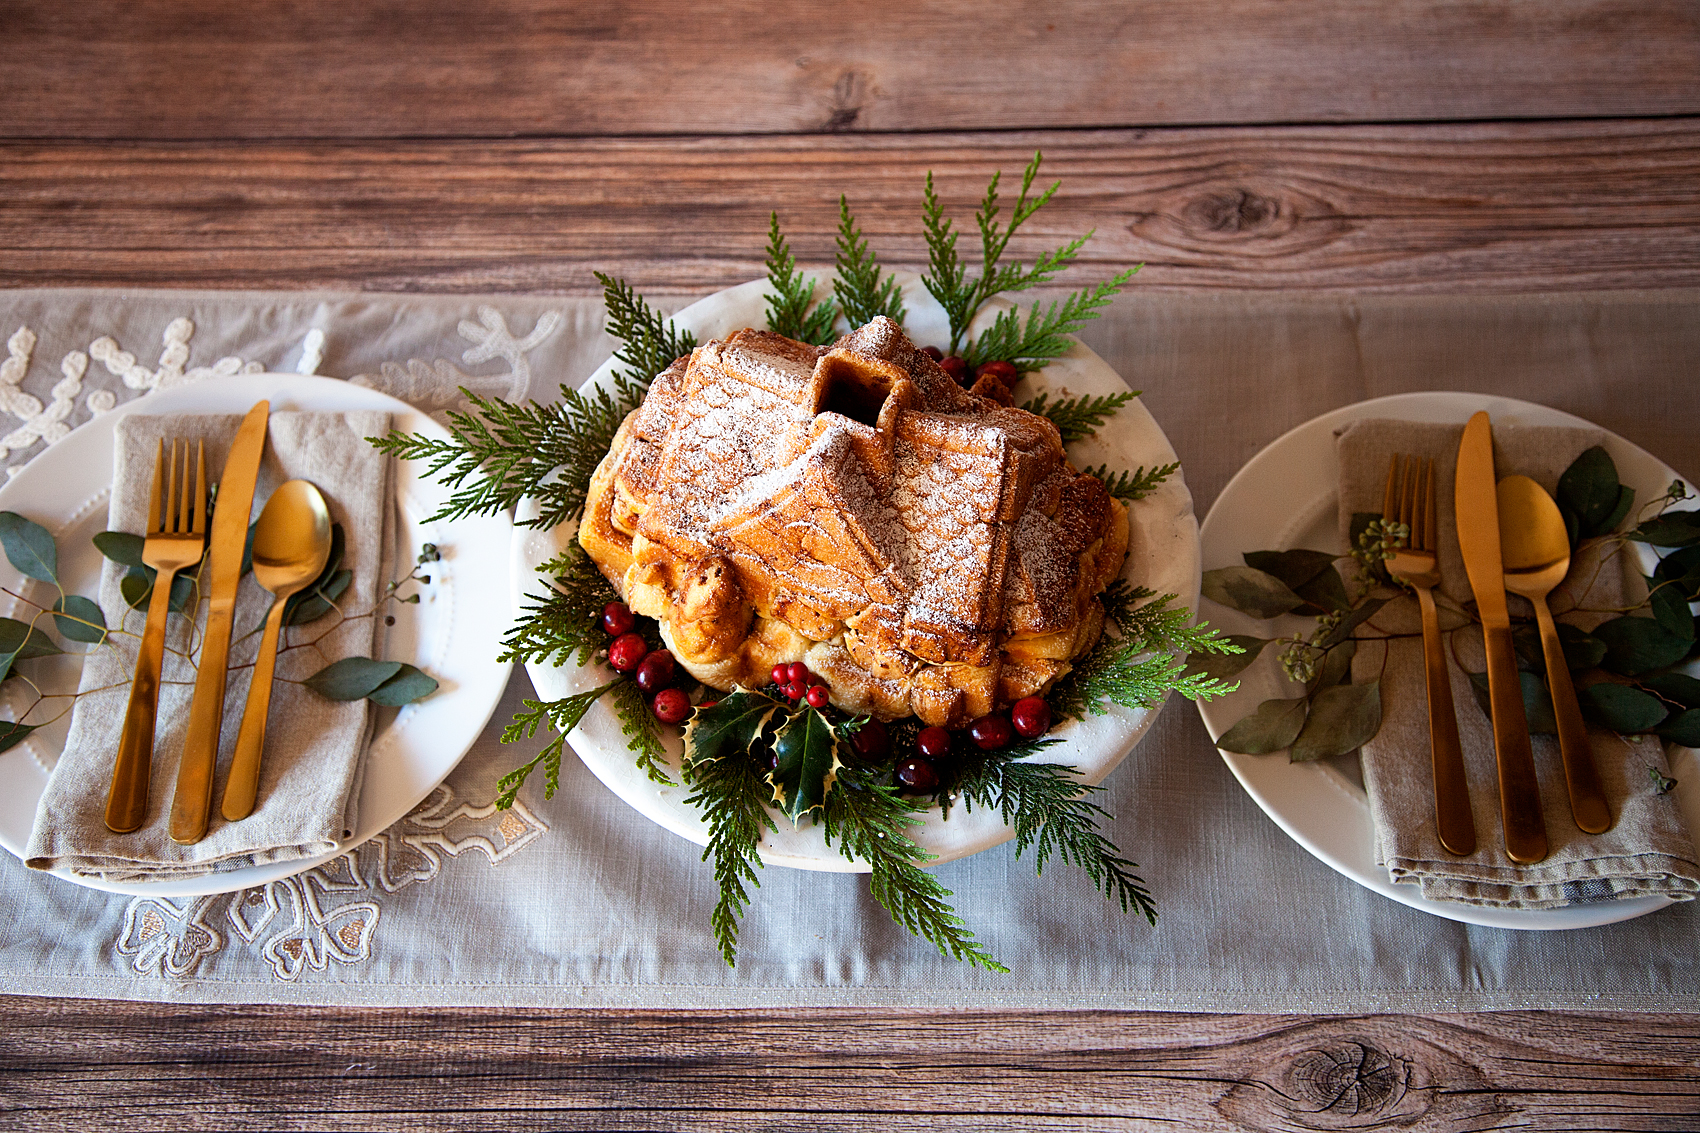
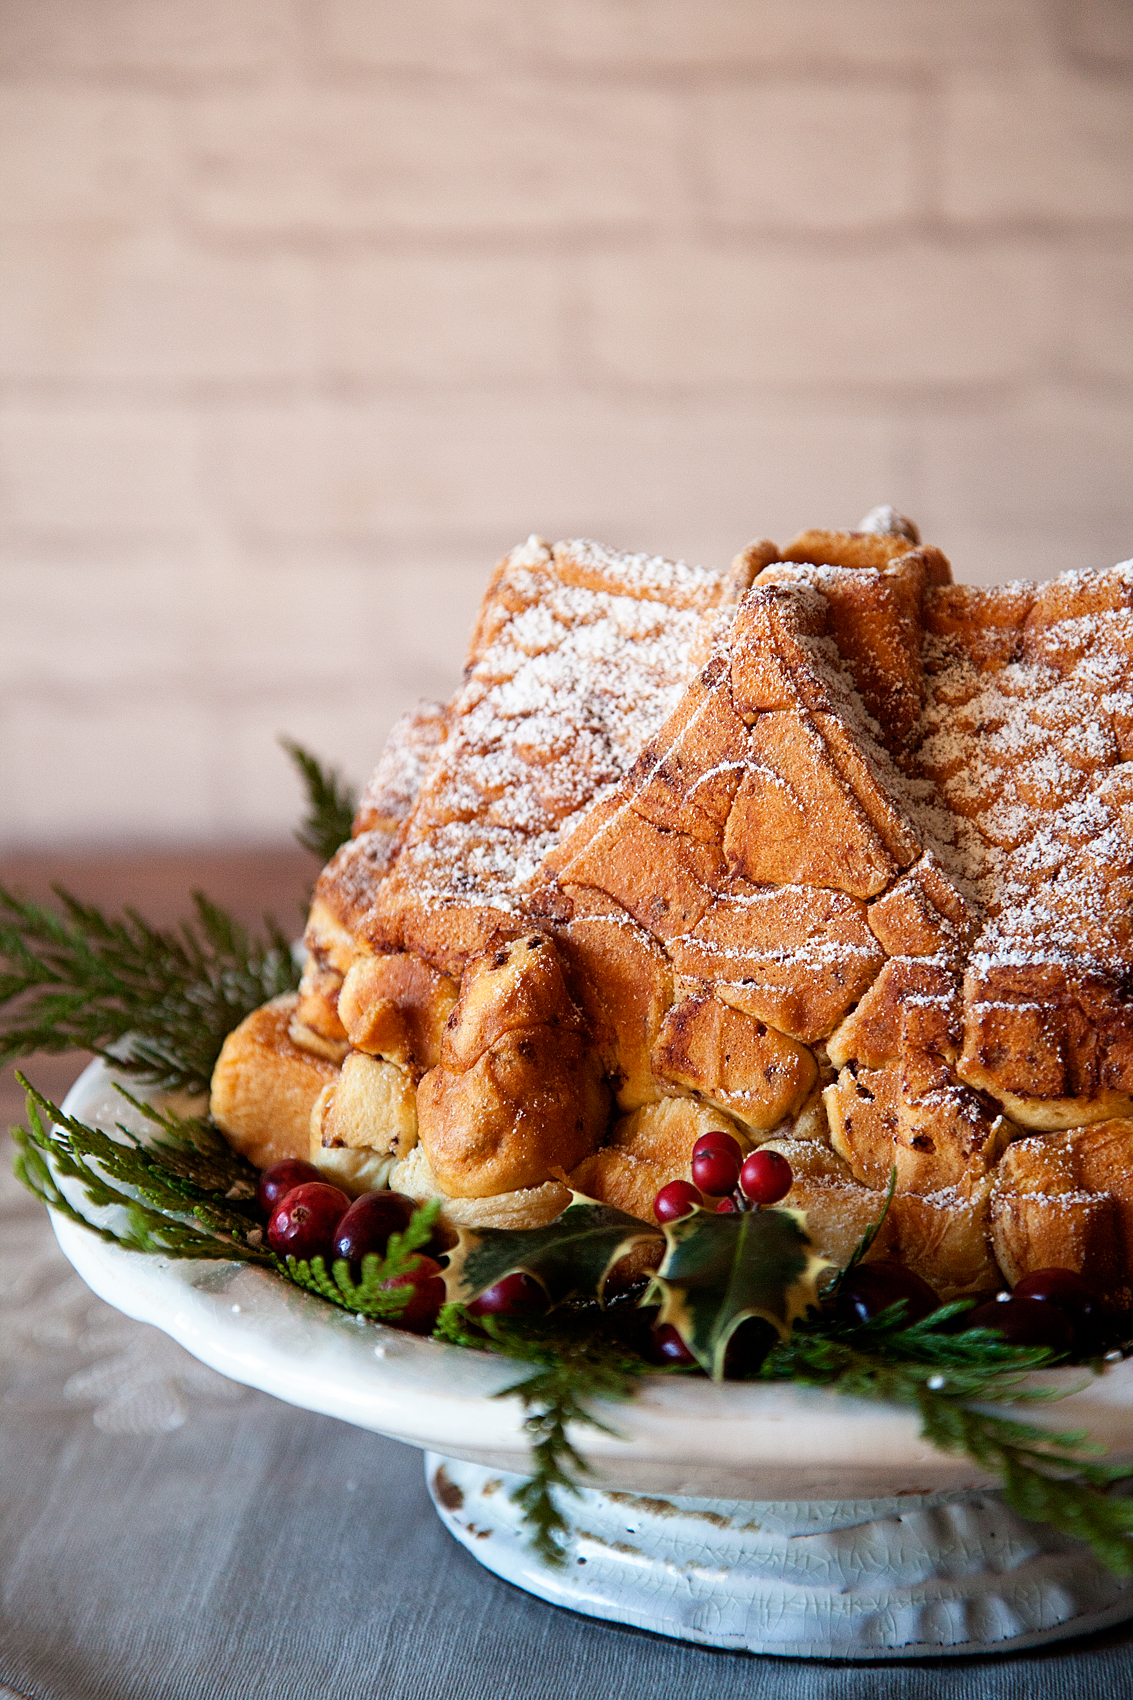
I dressed mine up with holiday greenery, some cranberries, powdered sugar and then at the last minute thought I would try it with a drizzle of the icing on top.

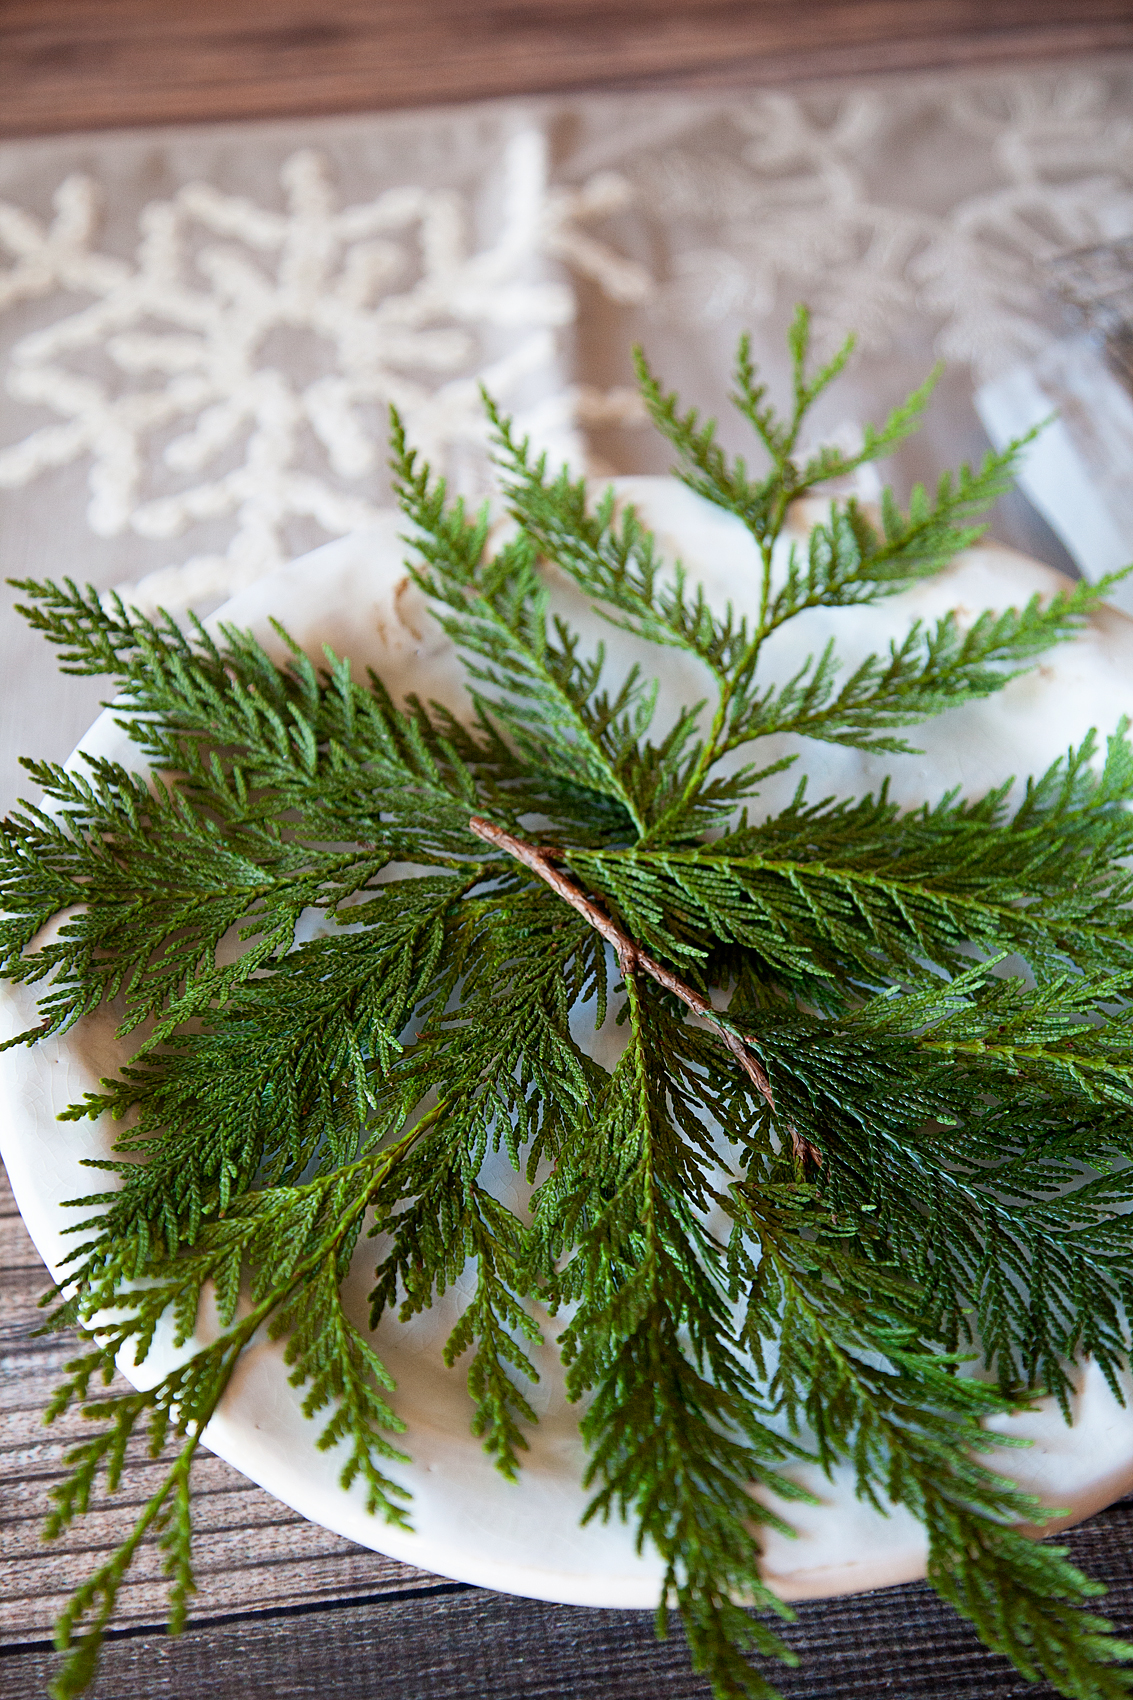
First, I laid down some of the greenery on a cake plate.

Pillsbury Cinnamon Roll House for your Christmas Table from WhipperBerry

Then I placed my cinnamon roll house on top and dusted it with powdered sugar and placed a few cranberries and a festive sprig of holly at the door…

Pillsbury Cinnamon Roll House for your Christmas Table from WhipperBerry

Then I thought, you could either leave it like this with the powdered sugar, you could even decorate it with Royal Icing just like a gingerbread house OR, you could drizzle the icing that comes with the Pillsbury Grands Cinnamon Rolls on top of the roof.

Pillsbury Cinnamon Roll House for your Christmas Table from WhipperBerry

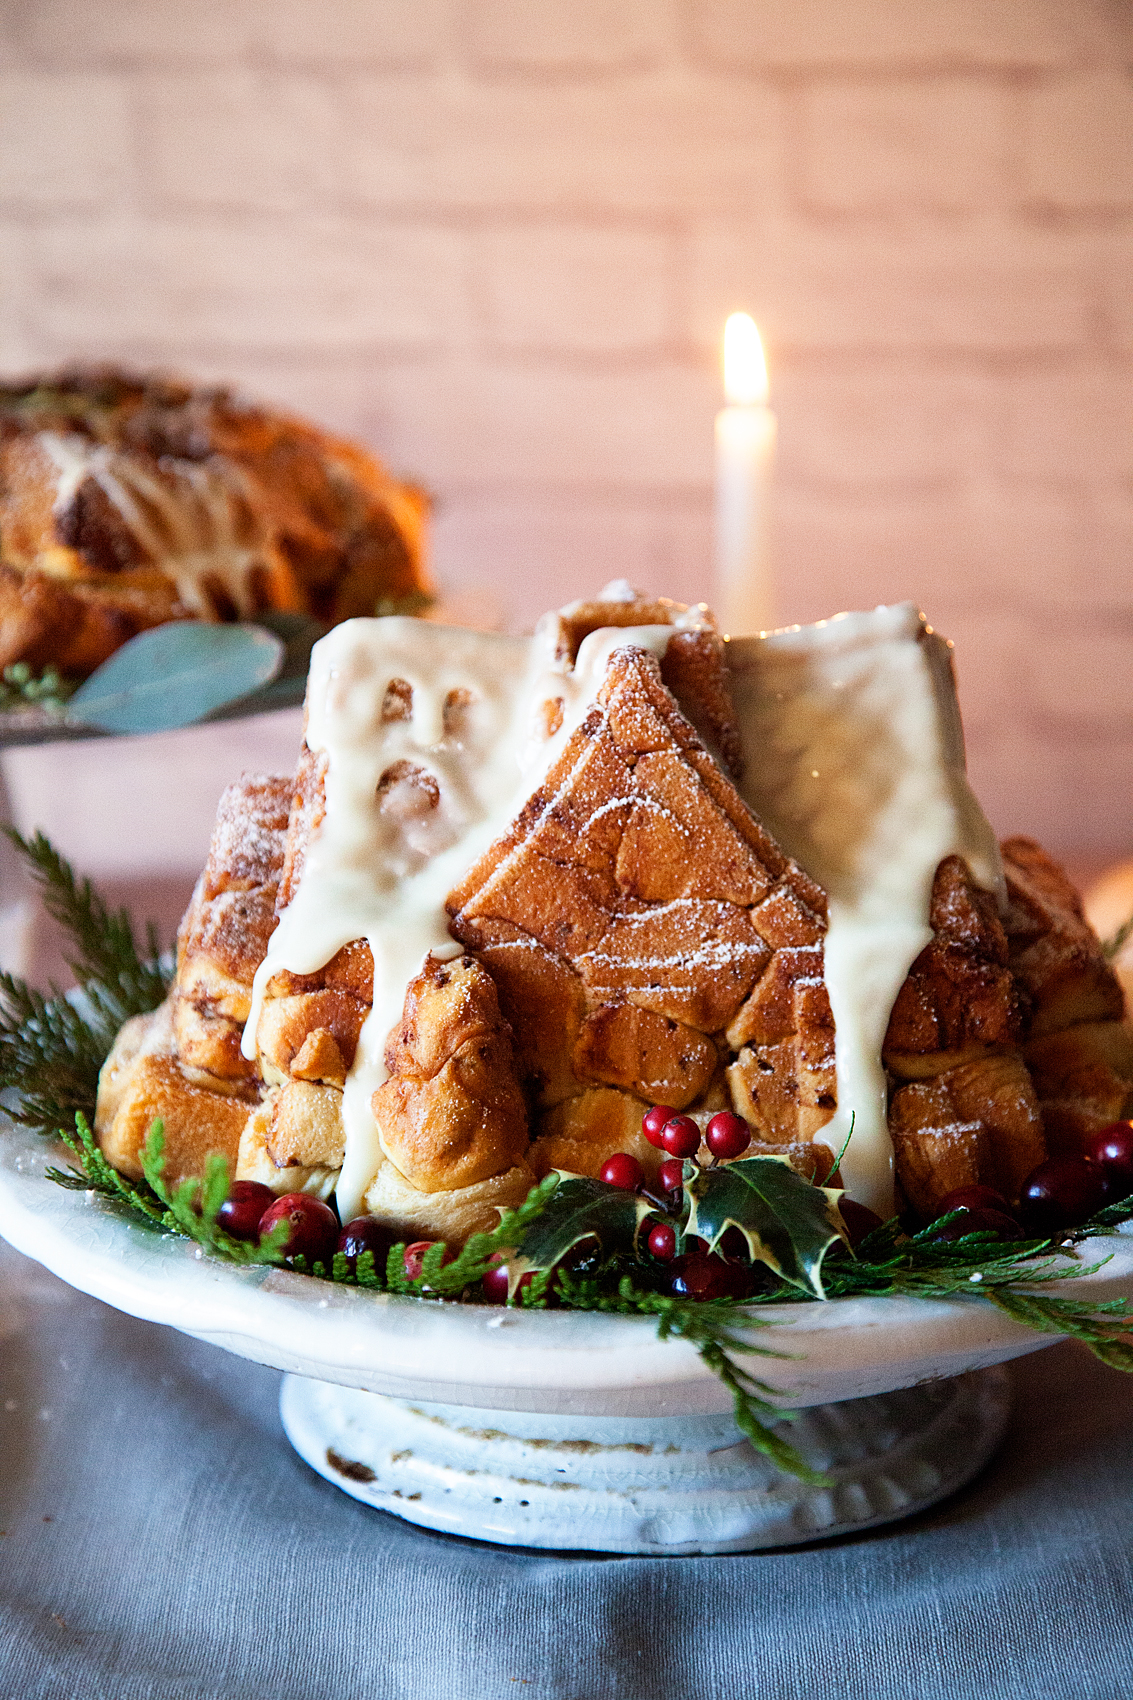
I love it BOTH ways! I decided it didn’t need the full Royal Icing treatment. I love the rustic look of the powdered sugar and/or the Pillsbury icing. PLUS, it makes it so much easier to make and extra tasty as well.

So, what do you think? Are you inspired to make a Cinnamon Roll House for your Christmas table?

Pillsbury Cinnamon Roll House for your Christmas Table from WhipperBerry

Disclaimer // This is a Pillsbury sponsored post. All thoughts, ideas and opinions are my very own. Rest assured, I will never promote a brand that I don’t truly love and use in my every day life.

Creamy Berry Gelatin Dessert Recipe

6 · Aug 19, 2016 · 2 Comments

+ This Creamy Berry Gelatin Dessert Recipe is brought to you by International Delight +

Creamy Layered Berry Gelatin Dessert from WhipperBerry

I don’t know about you, but every time I see some fancy layered gelatin dessert I feel like a kid again!

There is just something about the magic of those suspended layers that brings a little magic back into life. I love making this kind of dessert for my kiddos and I hope when they grow-up they’ll feel the same way about this magical treat. One of my favorite ways to make it is to add creamer to a few layers with some unflavored gelatin. It adds this creamy layer that just makes the dessert POP!

I use International Delight Simply Pure for most of my gelatin desserts. It’s so perfect, I don’t need to add anything else to the mix. No added sugar or anything. Simply Pure is just right. Then for a surprise, I create a layer of blueberries in the middle with again, more unflavored gelatin mixed with white grape juice. The kiddos love it!

Watch this video I made to show how to make the Creamy Berry Gelatin Dessert.

Creamy Berry Gelatin Recipe from Heather Thoming on Vimeo.

Doesn’t it look simple! What a fun way to close-out the summer with your family with this scrumptious dessert. I love how International Delight has the Simply Pure line… Cream, vanilla and sugar, that’s it. It taste’s so good. Here’s the recipe…

Creamy Berry Gelatin Dessert Recipe

Creamy Berry Gelatin Dessert Recipe
 
Save Print
Prep time
30 mins
Cook time
6 hours
Total time
6 hours 30 mins
 
Your family will love this layered gelatin dessert with a couple of fun surprises inside!
Author: Heather // WhipperBerry
Recipe type: Dessert
Serves: 6-8
Ingredients
  • 2 small box of berry flavored gelatin
  • 6 small packets of unflavored gelatin
  • 3 cups International Delight Vanilla Simply Pure
  • 1 cup white grape juice
  • 1 cup blueberries
  • water
  • ice cubes
  • whipped cream
  • cookies for garnish
Instructions
  1. Mix up the first berry flavored gelatin according to package directions. I use the ice method to speed up the gelling process.
  2. Pour into your clear serving containers and refrigerate until firm.
  3. Mix up two clear unflavored gelatin packets using ½ cup of hot water and then 1½ cups of Simply Pure.
  4. Pour on top of the berry gelatin layer. Place in the refrigerator until firm.
  5. Mix up two clear unflavored gelatin packets using ½ cup of hot water and then 1½ cups of cold white grape juice.
  6. Place a handful of blueberries on top of the cream layer and then pour the clear gelatin over the berries.
  7. Put back into the fridge until firm.
  8. Repeat the Simply Pure layer and refrigerate until firm.
  9. Repeat the berry gelatin layer and again refrigerate until firm.
  10. Once it's ready to serve, top with whipped cream, more blueberries and vanilla cookies as a garnish.
3.4.3177

Creamy Layered Berry Gelatin Dessert from WhipperBerry

This dessert can be made with any type of berry or most fruits. Play around with it and find your favorite creamy flavor combination!

Creamy Layered Berry Gelatin Dessert from WhipperBerry

Creamy Layered Berry Gelatin Dessert from WhipperBerry

I’m a big fan of International Delight. It’s amazing what you can do with their products. Not too long ago, I shared a divine recipe for Overnight French Toast that is perfect for breakfast or brunch!

Simple-Overnight-French-Toast-from-WhipperBerry-3

Looking for more ideas? Visit the International Delight website and sign-up for their newsletter, or follow them on Facebook, Instagram or Pinterest for all kinds of recipes and ideas.

This is a sponsored conversation written by me on behalf of International Delight. The opinions and text are all mine.

Holiday Nog Panna Cotta Topped with Bischoff Cookie Crumbles

23 · Nov 29, 2015 · Leave a Comment

+ This Holiday Nog Panna Cotta Recipe Post brought to you by the folk at Silk +

Holiday-Nog-Panna-Cotta-from-WhipperBerry

It’s here, it’s HERE!

The Holiday Season is in full swing and that means it’s…

Holiday Nog TIME!!

Our family ADORES Egg Nog, I mean really, who doesn’t? It’s rich and creamy and has all of the flavors of the season. The thing is… with all of the other goodies of the season, traditional Egg Nog may not be the best choice. A few years back I was introduced to the Silk Holiday Nog and our family hasn’t ever looked back!

With Silk Holiday Nog you can ring in the season with notes of nutmeg and cinnamon, and a smooth velvety flavor. You can raise a festive glass or two without feeling naughty because it’s made without eggs, dairy or saturated fat. This year they have a few additions to the Holiday Nog family, Almond Holiday Nog & Almond Holiday Nog Pumpkin Spice Flavor.

Egg-Nog-Panna-Cotta-from-WhipperBerry-1

I’ve loved creating all kinds of Holiday Nog goodies throughout the years. Here are a couple of my favorites… Spice Cookies with Holiday Nog Glaze & Holiday Nog Pull-Apart Bread.

Today, I’m sharing my Holiday Nog Panna Cotta recipe. Holiday Nog is perfect for Panna Cotta because traditionally Panna Cotta is a rich creamy eggless custard. If you were making this with regular Egg Nog, you would be introducing eggs into the mix. With Holiday Nog, you can have all the flavor without the addition of eggs.

This recipe is PERFECT for the busy Holiday Season. It’s a cinch to make and it really has a huge bang for your buck. Forget slaving over a pie or cookies… Take a few minutes to whip-up a Holiday Nog Panna Cotta Recipe and you’re GOLDEN!

Holiday Nog Panna Cotta Recipe

Egg-Nog-Panna-Cotta-from-WhipperBerry-2

2 cups Silk Holiday Nog

2 cups heavy cream

1 cup sugar

2 teaspoons vanilla extract – Homemade is the BEST!

1/4 teaspoon fresh ground nutmeg

2 packets of Knox Gelatin (aff link)

4 Bischoff Cookies (aff link)

In a medium sauce pan add your sugar,

Egg-Nog-Panna-Cotta-from-WhipperBerry-3

Cream,

Egg-Nog-Panna-Cotta-from-WhipperBerry-4

Holiday Nog,

Egg-Nog-Panna-Cotta-from-WhipperBerry-5

 vanilla,

Egg-Nog-Panna-Cotta-from-WhipperBerry-6

and nutmeg.

Egg-Nog-Panna-Cotta-from-WhipperBerry-7

Place over medium heat and bring to a light simmer. Once it starts to simmer, remove from heat and whisk in your gelatin. Pour into small 1 cup serving bowls and place in the refrigerator for at least three hours to set. Once the Panna Cotta is set, top with whipped cream and crushed Bischoff Cookies.

This recipe serves four.

Egg-Nog-Panna-Cotta-from-WhipperBerry-9

It really can’t get any easier that that!!

Egg-Nog-Panna-Cotta-from-WhipperBerry-16

Give it a try, your friends and family will LOVE YOU!!

Egg-Nog-Panna-Cotta-from-WhipperBerry-8

For more Holiday Nog ideas and coupons visit the Silk Holiday Headquarters!

This is a sponsored conversation written by me on behalf of Silk . The opinions and text are all mine.

Airheads Drink Gems

0 · Nov 13, 2015 · Leave a Comment

+ This Airheads Drink Gems post brought to you by Airheads. All thoughts, ideas and opinions are my very own. +

Air-Heads-Drink-Gems-from-WhipperBerry

Picture this scene… You have a house full of 10 and 11 year old girls. They are looking for something fun to do.

You are scrambling to find something “cool” to do that won’t embarrass your daughter and force your family to enter the Middle School Protection Program and relocate the entire family to Cleveland (sorry friends in Cleveland… I’m sure it’s a lovely city! I just needed to pick a place.) They are hungry and thirsty and things are starting to escalate… Your “cool” factor is dropping dramatically.

You’ve never been there? Boy, I have! I have three girls and the last one just started Middle School this year and the fun has started all over again. Take it from and experienced tween Mom… You need to stock-up on Airheads so that you can up your “cool” factor higher than you can even imagine!

Airhead-Drinks-from-WhipperBerry-9

 If you have a room full of restless kiddos, pull out your Airheads, some cutting boards, rolling pins and some small cookie cutters or cupcake decorating tips and let them go to town.

You’ll be the coolest Mom in town if you teach them how to make Airhead Drink Gems. They will LOVE it, plus it will kill some time before you have to come-up with some other non-cringe worthy activity.

Here’s how you can look like a rockstar…

Airhead-Drinks-from-WhipperBerry-1

I used a fondant rolling pin, but any kind will work. Unwrap 3-4 Airheads of the same color, place them in a microwave safe bowl. Microwave for 5-8 seconds to soften them up. Kneed them in your hand to work them together. Lay them on a cutting board and then use small cookie cutters or a large cupcake decorating tip to cut out your shapes.

All you need to do is gather some clear class cups or jars and then affix them to the side of the glass.

Airhead-Drinks-from-WhipperBerry-8

They are easy to affix… All you need to do is slightly dampen a paper towel. Just like you would dampen a stamp, lightly r ub one side of your shape on the paper towel, slightly dampening it. Place it on the side of the glass and voilá, you’ve created your first Airhead Drink Gem!

Drink-Decor-with-Air-Heads-from-WhipperBerry-2

Let them go to town designing their own glasses, they’ll love it!

Drink-Decor-with-Air-Heads-from-WhipperBerry-3

Once they are finished you can add some clear soda or seltzer water to the glass and watch the dr  ink take on the color of the gems. This is RIGHT DOWN THEIR ALLEY! You’re officially a ROCK STAR!

If you want to be extra cool… You can help them make their own Airheads Straw as well.

Drink-Decor-with-Air-Heads-from-WhipperBerry-5

You can make all kinds of stuff with Airheads! For more fun ideas on how to craft with Airheads visit and follow them on Pinterest. To learn more about Airheads candy visit their website and follow them on Facebook, Twitter, Instagram, and YouTube!

Yes, even YOU can be a cool mom with Airheads!

Disclaimer // This post is sponsored by Airheads. All thoughts, ideas & opinions are my very own.

Airhead-Drinks-from-WhipperBerry-6

  • « Go to Previous Page
  • Page 1
  • Page 2
  • Page 3
  • Page 4
  • Interim pages omitted …
  • Page 6
  • Go to Next Page »

Primary Sidebar

Heather from Whipperberry
Hello... my name is Heather and I'm the creator of WhipperBerry a creative lifestyle blog packed full of great recipes and creative ideas for your home and family. I find I am happiest when I'm living a creative life and I love to share what I've been up to along the way... Come explore, my hope is that you'll leave inspired!

Footer

  • Privacy Policy
  • Crafts
  • Food
  • Gifts
  • Holidays
  • Home
  • Mom Life
  • Recipes
  • Travel

Copyright © 2026 · Seasoned Pro