• Skip to primary navigation
  • Skip to main content
  • Skip to primary sidebar
  • Skip to footer

Whipperberry

WhipperBerry • Your Home For Creative Inspiration

  • Home
  • Recipes
    • Starters
    • Easy Weeknight Dinners
    • Main Dish
    • Salads
    • Side Dish
    • Soups & Stews
    • Desserts
    • Breakfast
    • Miscellaneous
  • Tutorials
    • Creative Crafts
    • DIY Decor
    • Fabric Crafts
    • Food How-To
    • Jewlery
    • Paint Projects
    • Paper Art
    • Party Styling
    • Photography and Graphic Design
    • Silhouette
  • Holidays
    • Easter
    • Mother’s Day
    • Father’s Day
    • 4th of July
    • Halloween
    • Thanksgiving
    • Christmas
    • Valentine’s Day
  • Gift Ideas
    • Gifts For Everyone
    • Gifts for Dad
    • Mother’s day
    • For The Girls
    • For The Kids
    • Teacher Gift Ideas
    • Christmas
  • Printables
    • Holiday
    • Gift Idea
    • LDS Primary
  • Travel
  • About
    • Terms
  • Contact
  • Nav Social Menu

    • Facebook
    • Instagram
    • Pinterest
    • RSS
    • Twitter

Recipe

Butternut Squash Coconut and Lentil Stew

1 · May 31, 2014 · 1 Comment

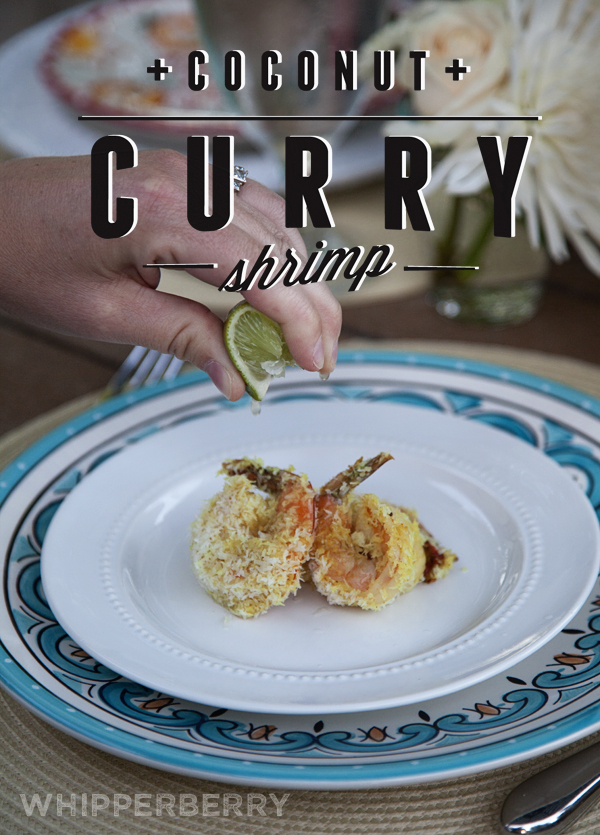
+ Wake-up your tastebuds with this butternut squash coconut and lentil stew +

butternut-squash-lentil-stew-#whipperberry

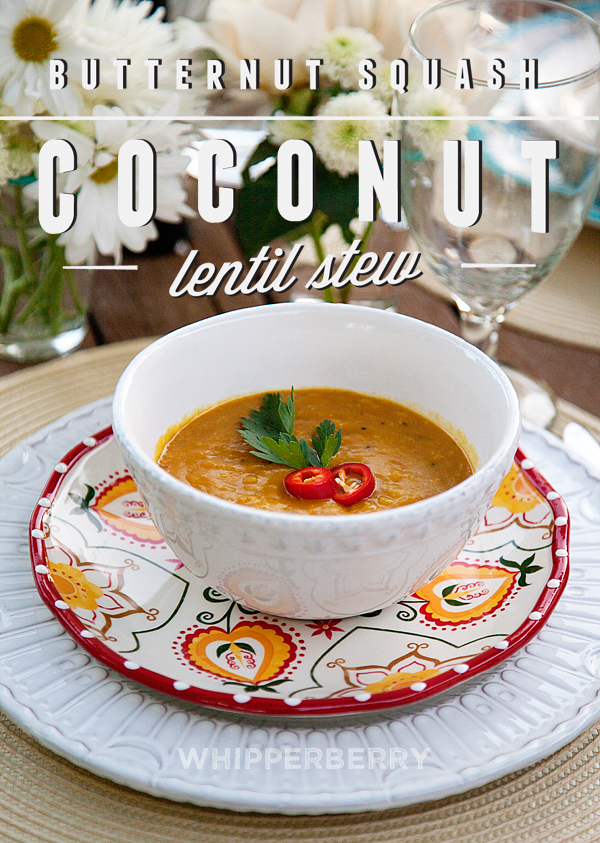
I’m a soup girl by nature and this hearty soup/stew is one of my favorites. It has all kinds of complex flavors and yet it’s super simple to make. I shared it with some friend the other night for a Coconut inspired dinner party and everyone loved it!

Time Saving Tip // You can make this soup ahead of time and they reheat and serve the day of your dinner party. Just hold off adding the spice oil and add that at the very last minute before you serve.

Butternut Squash Coconut Lentil Stew
 
Save Print
Prep time
20 mins
Cook time
60 mins
Total time
1 hour 20 mins
 
Tickle your taste buds with this super simple yet scrumptious stew.
Author: Heather // WhipperBerry
Recipe type: soup/ stew
Cuisine: Indian
Serves: 6
Ingredients
  • Stew
  • 1 cup yellow split pigeon peas (toor dal)
  • 2 18.8 oz cans of Campbell's Homestyle Butternut Squash Bisque
  • 1 cup Roma tomatoes, diced
  • ½ cup dried shredded coconut (unsweetened)
  • ½ teaspoon tumeric
  • 1 teaspoon cumin
  • 4 cups of Silk Original Coconut Milk

  • Spice Oil
  • 2 tablespoons coconut oil
  • 2 teaspoon black or brown mustard seeds
  • ½ teaspoon crushed red pepper flakes
  • 1 garlic clove minced
  • 1½ teaspoons kosher salt
  • 1 tablespoon honey
  • 1 lime, juiced
  • ¼ cup flat leaf Italian parsley or cilantro
Instructions
  1. Rinse the yellow split pigeon peas in a couple of changes of water. Remove any stones or off color peas.
  2. In a large soup pot, add the pigeon peas, tomato, coconut, turmeric, cumin and Silk Coconut Milk. Bring to a low simmer, cover and let cook for 30 minutes.
  3. Remove the lid, add the Butternut Squash Bisque and simmer uncovered for an additional 30 minutes.
  4. In a small sauté pan, add the oil over medium high heat. Heat until the oil is almost smoking, add the mustard seeds and cover with a lid, they will pop.
  5. Once the popping has died down, add the red pepper flakes and cook for an additional 30 seconds.
  6. Add the garlic and salt and cook for another 30 seconds.
  7. Pour into soup pot and stir to combine.
  8. Finish the stew with honey, lime juice, parsley (or cilantro.)
3.2.2310

Coconut Curry Meatballs with Rice

2 · May 31, 2014 · Leave a Comment

+ Coconut Curry Meatballs, a fresh new take on Curry +

coconut-curry-meatballs-#whipperberry

The other night I hosted a coconut inspired dinner party and these meatballs were the home run hit of the evening! Kick the idea of the traditional Italian meatball out of your mind. These meatballs have a whole new flavor profile and they are scrumptious. Pair them with the Coconut curry sauce and rice and you’re in business!

Time Saving Tip // If you are serving this for a dinner party, you can make the meatballs and the sauce in advance and then combine and reheat right before you serve. Perfect for a dinner party!

Meatball Curry Recipe
 
Save Print
Prep time
20 mins
Cook time
30 mins
Total time
50 mins
 
These scrumptious meatballs with the heat from the pepper and the bite of the ginger will be the home run hit of the night!
Author: Heather // WhipperBerry
Recipe type: Main Dish or Appetizer
Cuisine: Indian
Serves: 5-6
Ingredients
  • Meatballs
  • 1 pound ground beef
  • 1 green serrano chile, minced
  • 1 tablespoon ginger, minced
  • 2 tablespoons italian flat leaf parsley or cilantro, minced
  • 1 teaspoon salt
  • 1 egg
  • 2 slices of bread
  • 1 cup Silk Original Coconut Milk

  • Curry
  • 3 tablespoons coconut oil
  • ½ teaspoon brown or black mustard seeds
  • 4 shallots thinly sliced
  • 5 cloves garlic, minced
  • 1 inch piece of ginger, minced
  • 2 teaspoons coriander
  • 2 teaspoons cumin
  • ½ teaspoon cayenne pepper
  • 2 medium plum tomatoes, finely diced
  • 1 (14 oz.) can of full fat coconut milk
  • ½ cups of Silk Original Coconut Milk
  • salt to taste

  • Garnish
  • 1 tablespoons of Italian flat leaf parsley or cilantro
  • lime wedges
Instructions
  1. Meatballs
  2. In a small bowl, place your bread and coconut milk and let soak.
  3. In a large bowl, place your ground beaf, chile, ginger, and parsley (or cilantro), egg and salt. Squeeze out excess coconut milk out of your bread and break into small pieces and add the the large mixing bowl. Combine the mixture, being careful not to over mix.
  4. Using a 1 ounce scoop, make your meatballs (roughly 16) and place on top of a wire rack that has been sprayed with cooking spray, over a baking sheet.
  5. Place in a 400˚ oven for 15 minutes. Remove from oven and add to the curry sauce to finish cooking.

  6. Curry
  7. In a large skillet over medium high heat, add the coconut oil and heat until nearly smoking. Add the mustard seeds, cover the pan with a lid because the seeds will pop. Once the popping has died down, add the shallots, garlic and ginger and cook until golden brown 1-2 minutes. Add the coriander, cumin and cayenne pepper, stir cook for 30 seconds, then add the tomatoes. Cook for about 5 minutes until the tomatoes are soft.
  8. Add the full fat coconut milk, the silk coconut milk, ½ teaspoon salt and bring to a simmer. Add the meatballs and simmer for and additional 15-20.
  9. Finish with parsley (or cilantro) and lime juice and serve over a bead of rice.
3.2.2310

Coconut Curry Shrimp Recipe

0 · May 31, 2014 · Leave a Comment

+ Coconut Curry Shrimp Recipe +

coconut-curry-shrimp-#whipperberry

Looking for a fun way to jazz up your shrimp? I hosted a coconut dinner party the other night and these Coconut Curry Shrimp were tasty little bites! Not your traditional coconut shrimp which usually has a tropical flair, this recipe takes it’s inspiration from India and there is no deep frying involved.

Time Saving Tip // You can make up your sauce before hand to save time and then reheat and cook the shrimp right before you serve to your guest.

Coconut Curry Shrimp Recipe
 
Save Print
Prep time
10 mins
Cook time
20 mins
Total time
30 mins
 
These quick and tasty little bites are a perfect appetizer that your guest will love!
Author: Heather // WhipperBerry
Recipe type: Appetizer
Cuisine: Indian
Serves: 8
Ingredients
  • 1 pound of large shrimp, peeled and deveined
  • 1½ cups of Silk Original Coconut Milk
  • 1 tablespoon curry powder
  • 1 tablespoon minced ginger
  • 2 whole cloves of garlic (leave as a whole clove but smash)
  • salt and pepper to taste
  • 1 tablespoon fresh lime juice
  • 1 cup coconut powder
  • fresh lime wedges for serving
Instructions
  1. In a medium sauté pan, mix together the coconut milk, curry powder, ginger and garlic. Slowly bring to a boil over medium low heat. Simmer for 7-10 minutes until the sauce starts to thicken. Add salt, pepper and lime juice.
  2. (At this point, you can refrigerate your sauce and save until right before you want to serve your shrimp before your event.)
  3. Once your sauce is simmering, add your cleaned shrimp, toss around in the sauce and cook until the shrimp have turned pink and are opaque in color. Do not over cook. This will take about 4-5 minutes depending on the size of your shrimp.
  4. Place your coconut powder in a bowl. Toss your cooked shrimp in the coconut to coat. Serve with a lime wedge and enjoy!
3.2.2310

Pickled Tomatoes

28 · May 29, 2014 · 10 Comments

This post brought to you by Pompeian Red Wine Vinegar // I’m a pickle girl… Honestly, I don’t think I’ve met a pickle that I didn’t like.  I love all kinds of pickles not just pickled cucumbers. Have you every tried pickled okra, cauliflower, carrots… they are amazing!  We have a restaurant here in Lincoln called Granite City and they have a steak salad that I ADORE and they have a pickled tomato relish on the salad and it’s divine.  The whole idea intrigued me, so I thought I would try and come up with some pickled tomatoes of my own…

Pickled-Tomato-&-Steak-Salad-with-Pompeian-Red-Wine-Vinegar-#whipperberry-3

I love that I will have tomatoes along with some red onions that are pickled and ready in my fridge at any time. I was one of the kiddos that when my mom made salad or tacos I wouldn’t eat them if they didn’t have tomatoes, it just didn’t seem complete to me. This way I always have tomatoes on hand even when I haven’t made it to the market for a few days. This whole idea is super simple and only takes about 45 minutes to pull together. I used my favorite Pompeian Red Wine vinegar for these pickled tomatoes. You need to check out their whole line of vinegars, they have some amazing flavors!

First, I prepared my four 1 quart wide mouth Ball canning jars, by sterilizing them in the dishwasher.

Pickled-Tomato-&-Steak-Salad-with-Pompeian-Red-Wine-Vinegar-#whipperberry-10

I gathered my simple ingredients, tomatoes, salt, sugar, garlic, Pompeian Red Wine Vinegar, red onion, dill and pepper corns…

Pickled-Tomato-&-Steak-Salad-with-Pompeian-Red-Wine-Vinegar-#whipperberry-1

I prepared my pickle brine from the recipe below and while it cooled I prepped my veggies. I cut my tomatoes into large pieces, sliced my onions and peeled the garlic. I layered my veggies in the sterilized jars…

Pickled-Tomato-&-Steak-Salad-with-Pompeian-Red-Wine-Vinegar-#whipperberry-11

Now, this is a cold pickle so I wanted the brine to be cool, so that it wouldn’t cook the tomatoes. This also means that I just put the pickled tomatoes into the fridge and I don’t go through the whole preserving process. This means that I will have to keep the pickles in the fridge because they have not been officially preserved by the full canning process which kills all the possible bacteria.

The tomatoes will become rather soft, so you may want to use a small grape or cherry type tomato and not cut them for a firmer pickled tomato.

Once the brine is cool, pour it into the jar, seal the jar with the lid and place in the refrigerator. Let the tomatoes “pickle” for a few days and then serve with your favorite salad, cottage cheese, use as a burger topping… the skies the limit!  I will be sharing my copy cat Steak Salad from Granite City in a bit and share how I like to eat my pickled tomatoes.

Balsamic-Steak-Salad-with-Pickled-Tomato-Relish-#whipperberry-2

Pickled Tomatoes
 
Save Print
Prep time
15 mins
Cook time
5 mins
Total time
20 mins
 
These pickled tomatoes are a sure fire way to impress your family and friends this summer!
Author: Heather // WhipperBerry
Recipe type: condiment
Cuisine: American
Serves: 25
Ingredients
  • 3 cups Pompeian Red Wine Vinegar
  • 3 cups water
  • 3 tablespoons salt
  • ⅓ cup sugar
  • 8 garlic cloves
  • 2 tablespoons peppercorns
  • 25-30 medium sized tomatoes
  • 2 red onions
  • 1 bunch of dill
Instructions
  1. Prepare your brine by placing the vinegar, water, salt and sugar into a sauce pan over medium high heat. Heat the brine mixture until the salt and sugar have dissolved about 4 minutes over medium heat stirring occasionally. Let brine cool.
  2. Prepare your veggies by cutting the tomatoes into large pieces and slicing the red onion in onion rings and peeling the garlic. Layer the veggies in your sterilized 1 quart wide mouth Ball canning jars. Pour cooled brine into the jars and place the lid on the jars. Place in the refrigerator.
3.2.2310

Disclaimer // This post is sponsored by Pompeian. I received product and payment for my recipe. However, as always… All thoughts, ideas and opinions are my very own!

  • « Go to Previous Page
  • Page 1
  • Interim pages omitted …
  • Page 24
  • Page 25
  • Page 26
  • Page 27
  • Page 28
  • Interim pages omitted …
  • Page 53
  • Go to Next Page »

Primary Sidebar

Heather from Whipperberry
Hello... my name is Heather and I'm the creator of WhipperBerry a creative lifestyle blog packed full of great recipes and creative ideas for your home and family. I find I am happiest when I'm living a creative life and I love to share what I've been up to along the way... Come explore, my hope is that you'll leave inspired!

Footer

  • Privacy Policy
  • Crafts
  • Food
  • Gifts
  • Holidays
  • Home
  • Mom Life
  • Recipes
  • Travel

Copyright © 2026 · Seasoned Pro