• Skip to primary navigation
  • Skip to main content
  • Skip to primary sidebar
  • Skip to footer

Whipperberry

WhipperBerry • Your Home For Creative Inspiration

  • Home
  • Recipes
    • Starters
    • Easy Weeknight Dinners
    • Main Dish
    • Salads
    • Side Dish
    • Soups & Stews
    • Desserts
    • Breakfast
    • Miscellaneous
  • Tutorials
    • Creative Crafts
    • DIY Decor
    • Fabric Crafts
    • Food How-To
    • Jewlery
    • Paint Projects
    • Paper Art
    • Party Styling
    • Photography and Graphic Design
    • Silhouette
  • Holidays
    • Easter
    • Mother’s Day
    • Father’s Day
    • 4th of July
    • Halloween
    • Thanksgiving
    • Christmas
    • Valentine’s Day
  • Gift Ideas
    • Gifts For Everyone
    • Gifts for Dad
    • Mother’s day
    • For The Girls
    • For The Kids
    • Teacher Gift Ideas
    • Christmas
  • Printables
    • Holiday
    • Gift Idea
    • LDS Primary
  • Travel
  • About
    • Terms
  • Contact
  • Nav Social Menu

    • Facebook
    • Instagram
    • Pinterest
    • RSS
    • Twitter

DecoArt

Scandinavian Style Blanket Storage Box

5 · Oct 16, 2018 · Leave a Comment

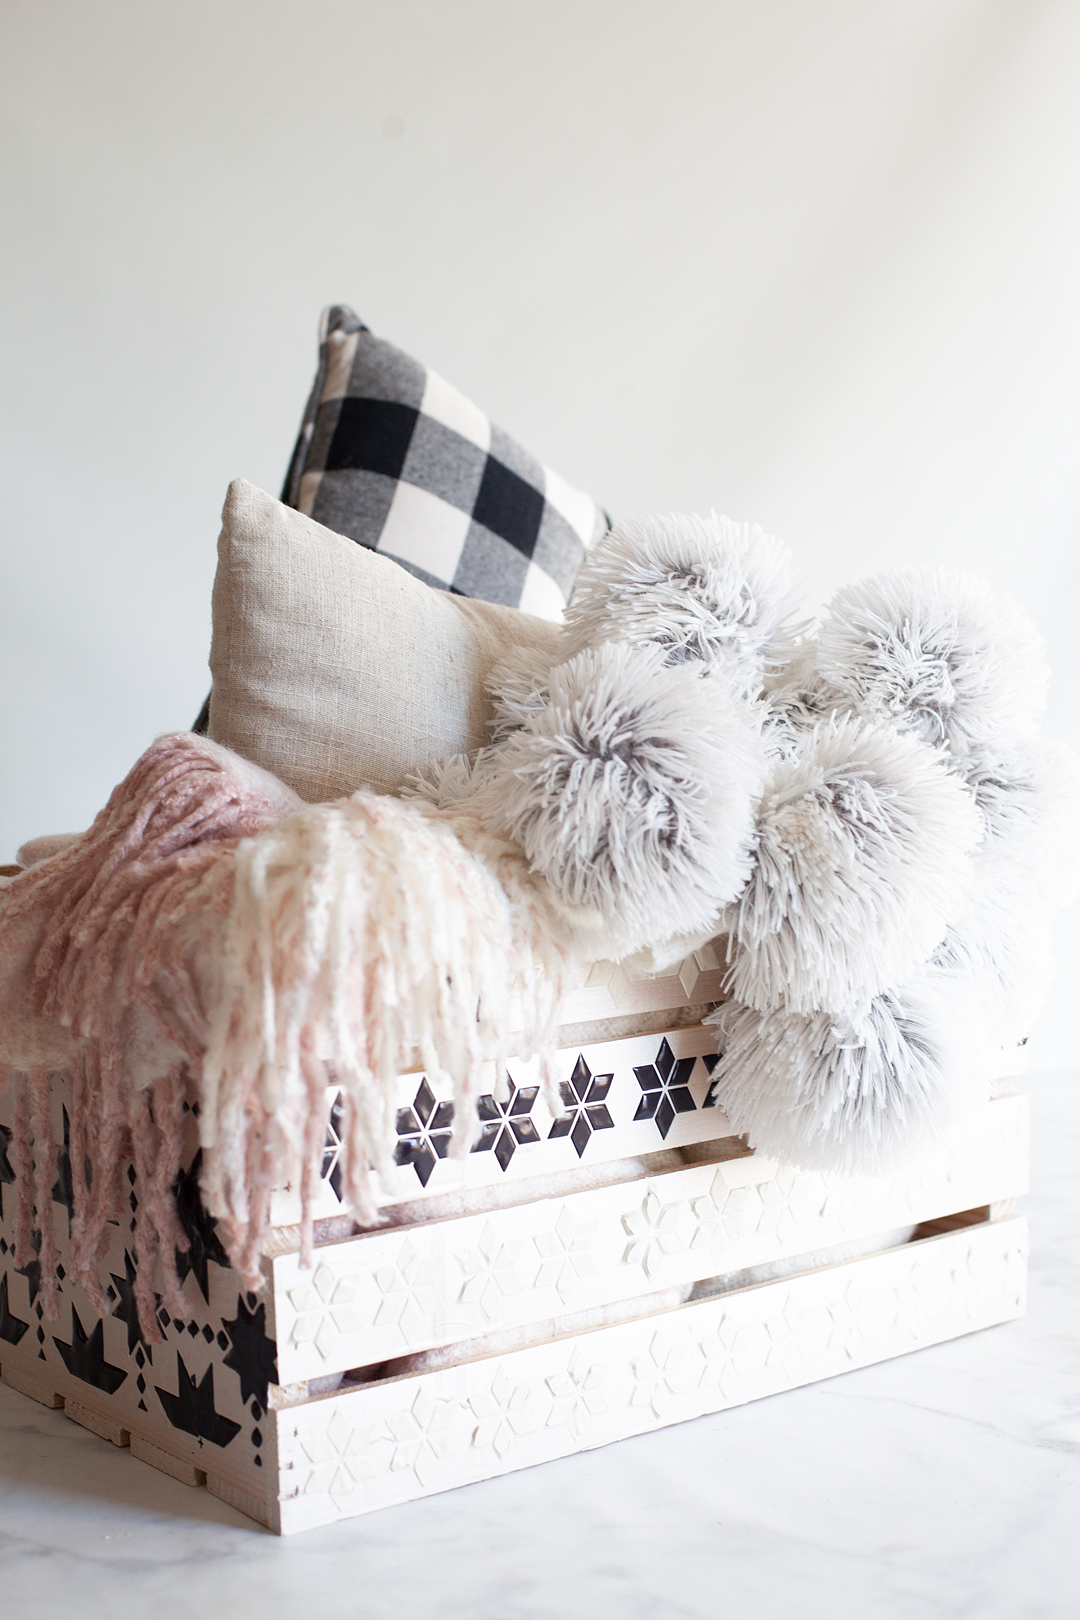
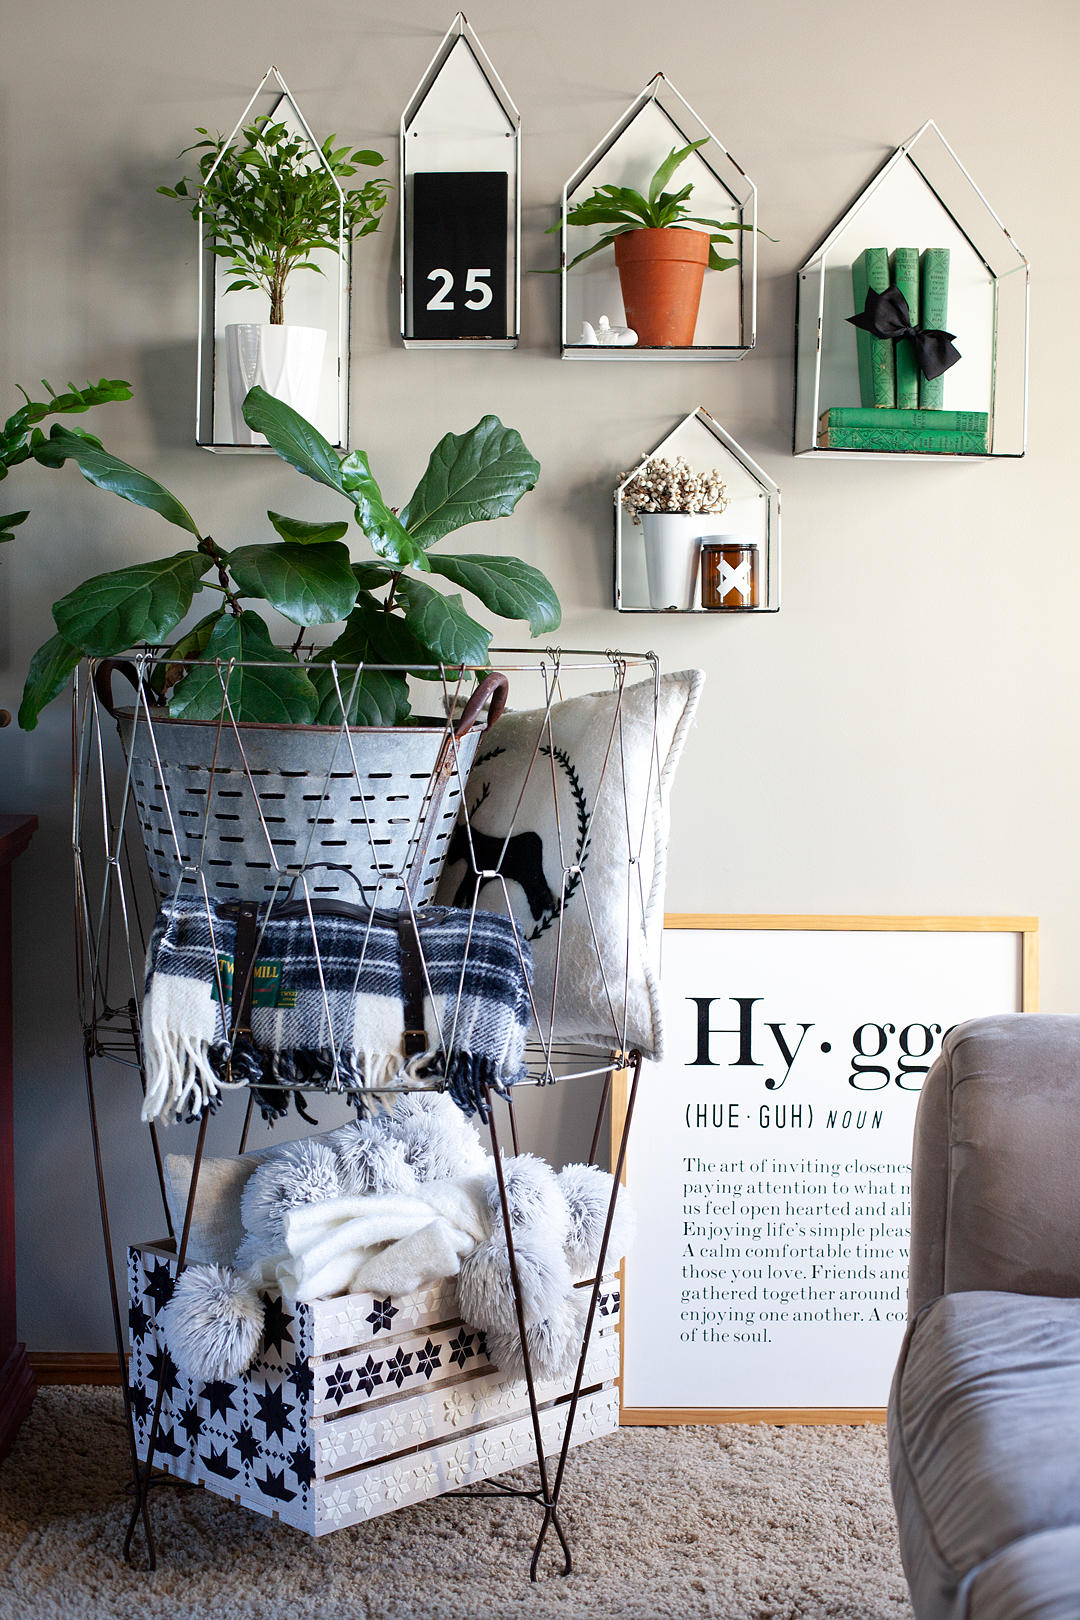
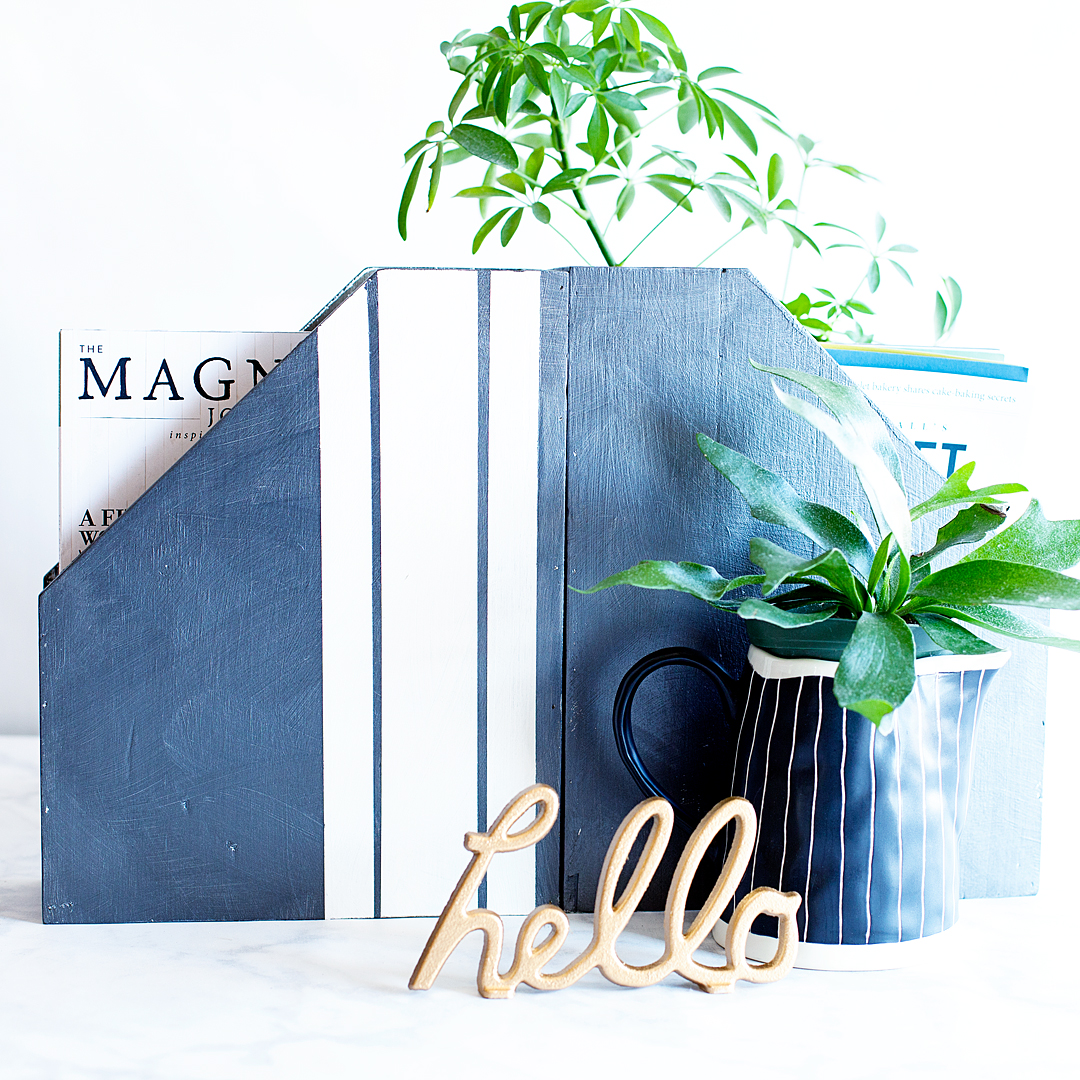
The weather is getting chilly and we are all working on bringing out our warm and cozy home decor items as we dress our homes for the season. Our family loves to have cozy blankets close at hand when we are hanging out watching TV or playing games. The problem is that they end up making the room look like trash as they are left strewn about the room. I thought it would be fun to create a blanket & throw pillow storage box that could add a little design to the room as well. I’ve always loved Norwegian & Scandinavian design especially when it comes to winter designs and that was my inspiration for my new Scandinavian Style Blanket Storage Box created using Americana Decor Texture & the Americana Decor Stencils from DecoArt.

+ This post is brought to you by the lovely folks at DecoArt +I've always loved Norwegian & Scandinavian design especially when it comes to winter designs and that was my inspiration for my new Scandinavian Style Blanket Storage Box created using Americana Decor Texture & the Americana Decor Stencils from DecoArt.

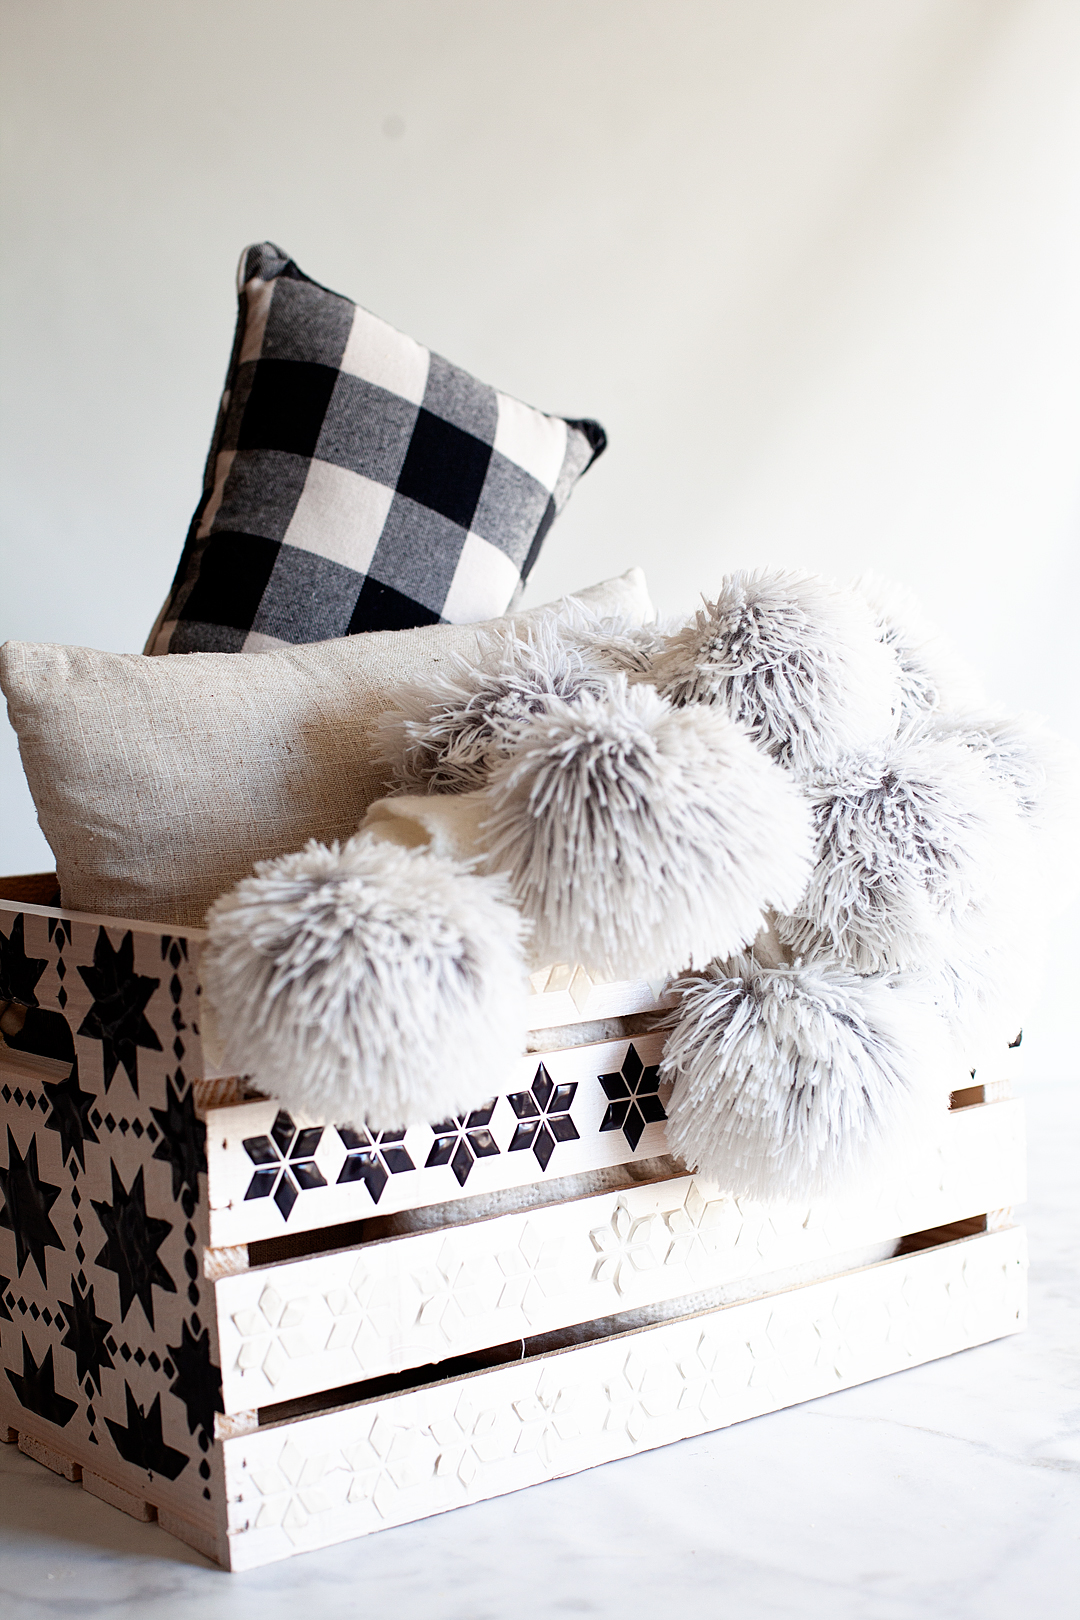
Have you guys heard of this Americana Decor Texture? This stuff is really cool. It’s basically thick paint that you apply like you are frosting a cookie. Fun! Right? What’s really cool is that is works really well with stencils and creates a fun raised effect on your surface.

I've always loved Norwegian & Scandinavian design especially when it comes to winter designs and that was my inspiration for my new Scandinavian Style Blanket Storage Box created using Americana Decor Texture & the Americana Decor Stencils from DecoArt.

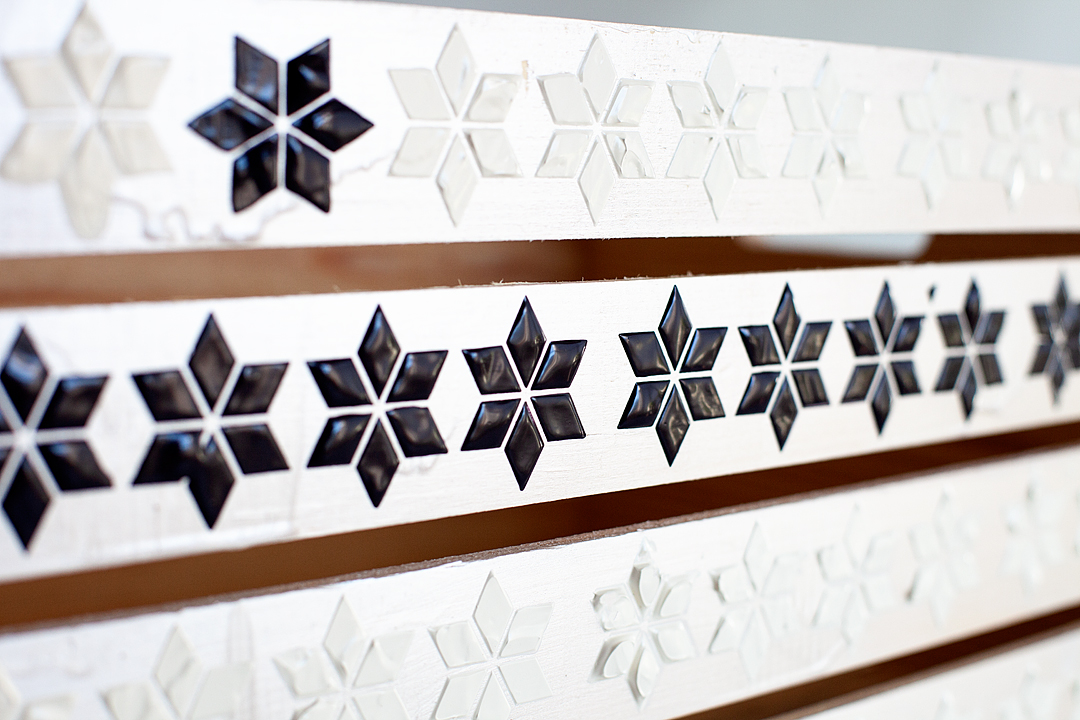
Isn’t that fun? I would have to say, I really love the way it looks. You can take something simple like a box crate and turn it into some extra special. Let me show you how to make one of your own.

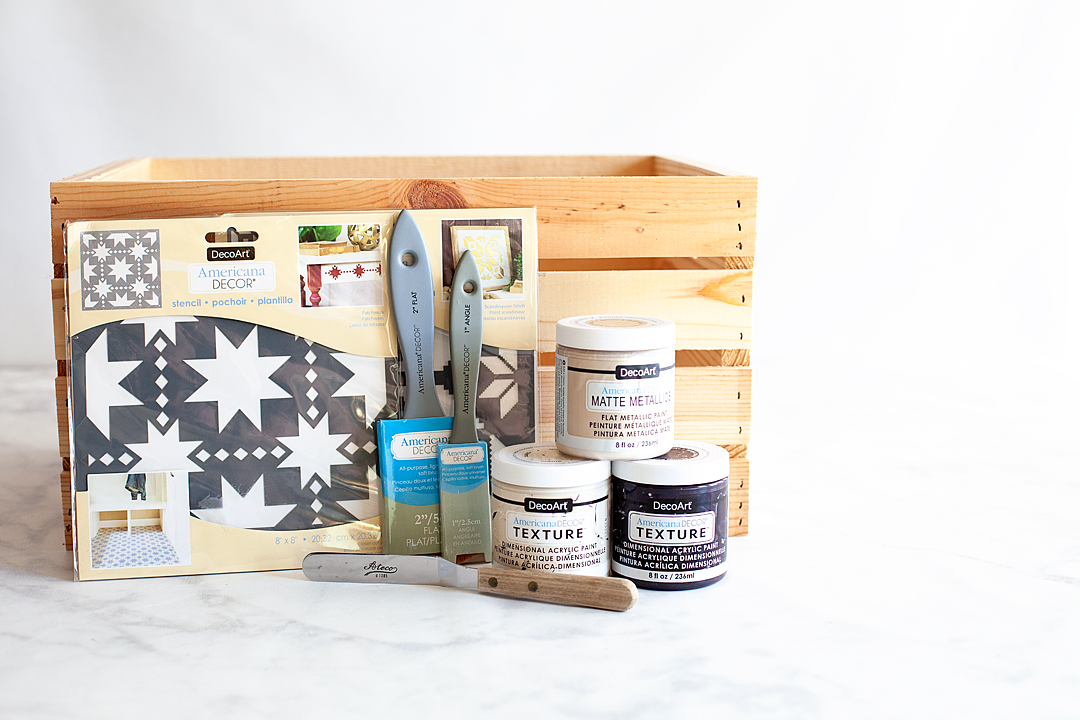
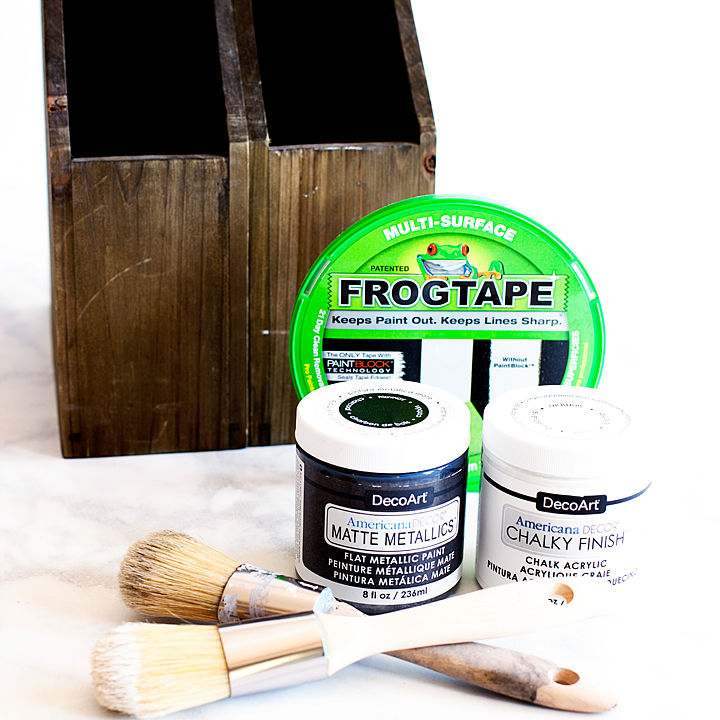
Scandinavian Style Blanket Storage Box Supply List

  • wood crate 
  • America Decor Matte Metallics – Ivory Pearl
  • paint brush
  • Americana Decor Stencils – Patchwork & Quilt Star
  • Americana Decor Texture – Cream & Deep Plum
  • paint knife or offset spatula
  • painters tape

I've always loved Norwegian & Scandinavian design especially when it comes to winter designs and that was my inspiration for my new Scandinavian Style Blanket Storage Box created using Americana Decor Texture & the Americana Decor Stencils from DecoArt.

Instructions

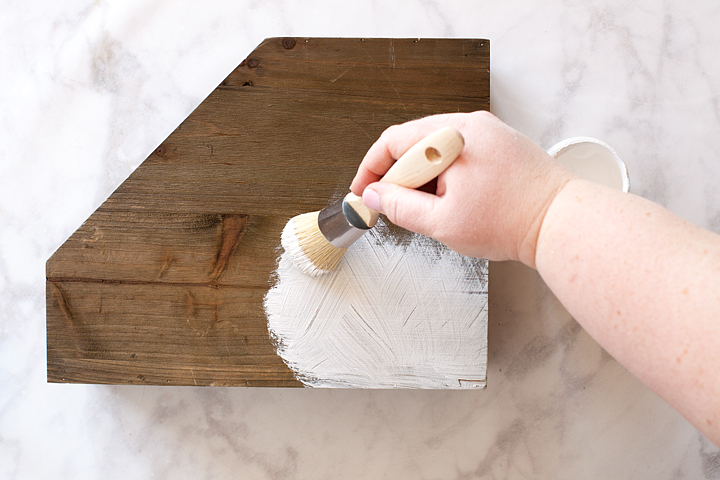
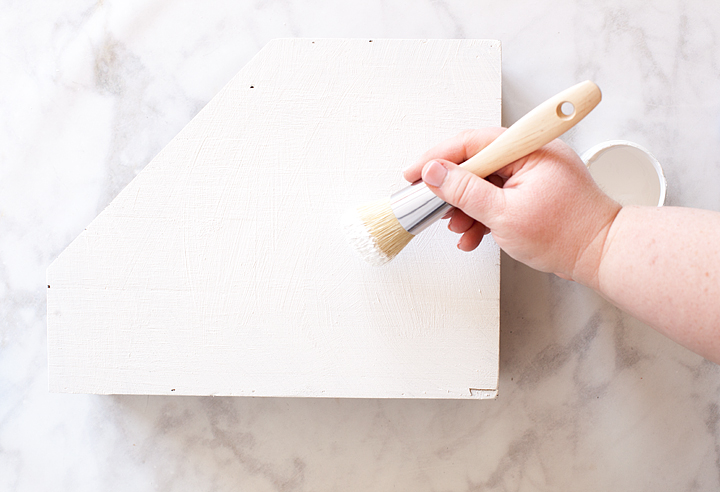
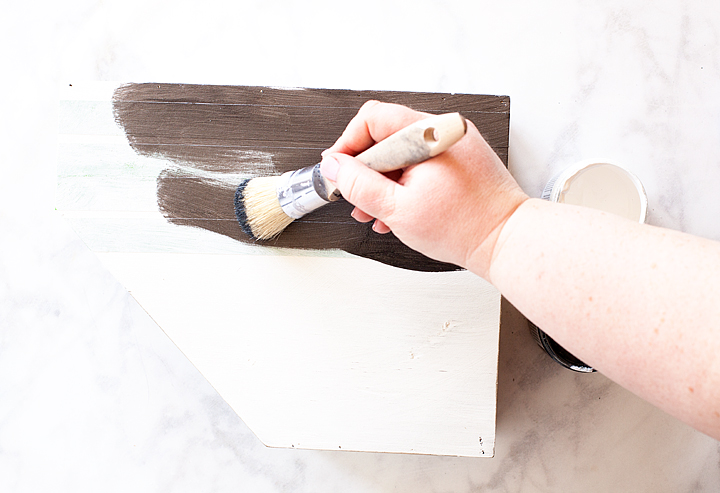
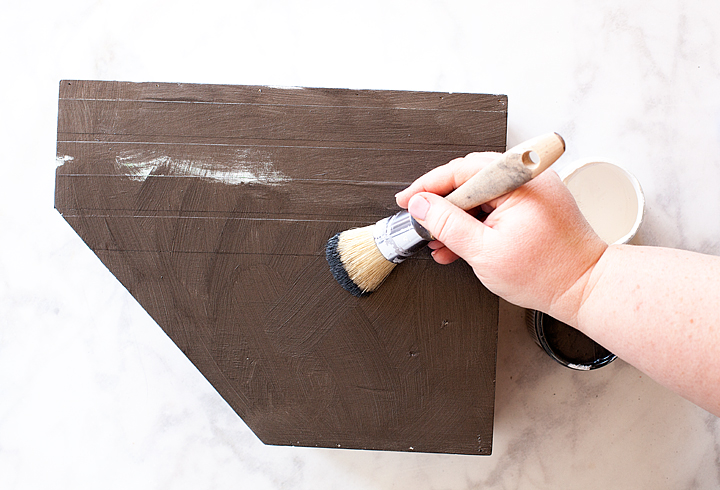
First, I painted my wood crate with the Matte Metallic paint. I loved the little extra something that this color gives to the box. The wood grain still peaks through a bit but it has this nice soft metallic sheen to it. It’s really quite nice.

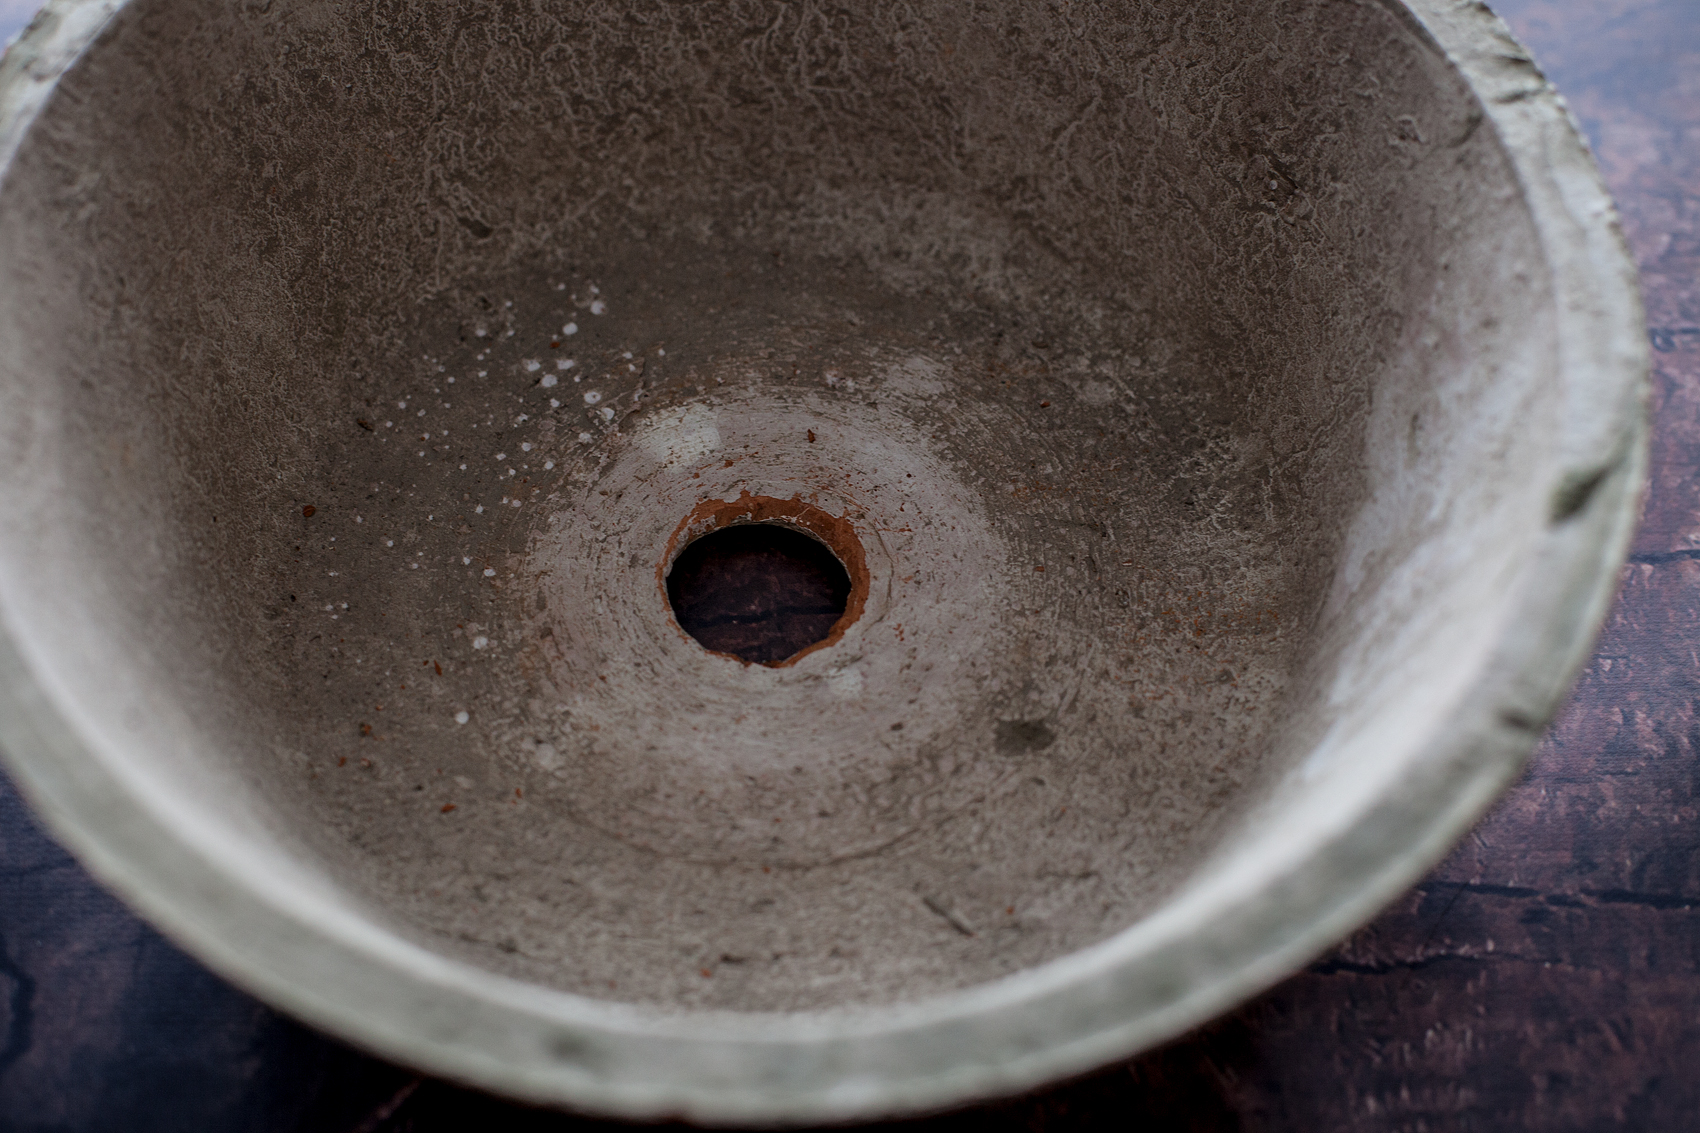
When I paint stuff like this, I use some canning jar lids to raise my piece off of my table.

You’d be amazed how handy this come in sometimes and not just for canning!

I painted on two coats and then let it dry for about an hour.

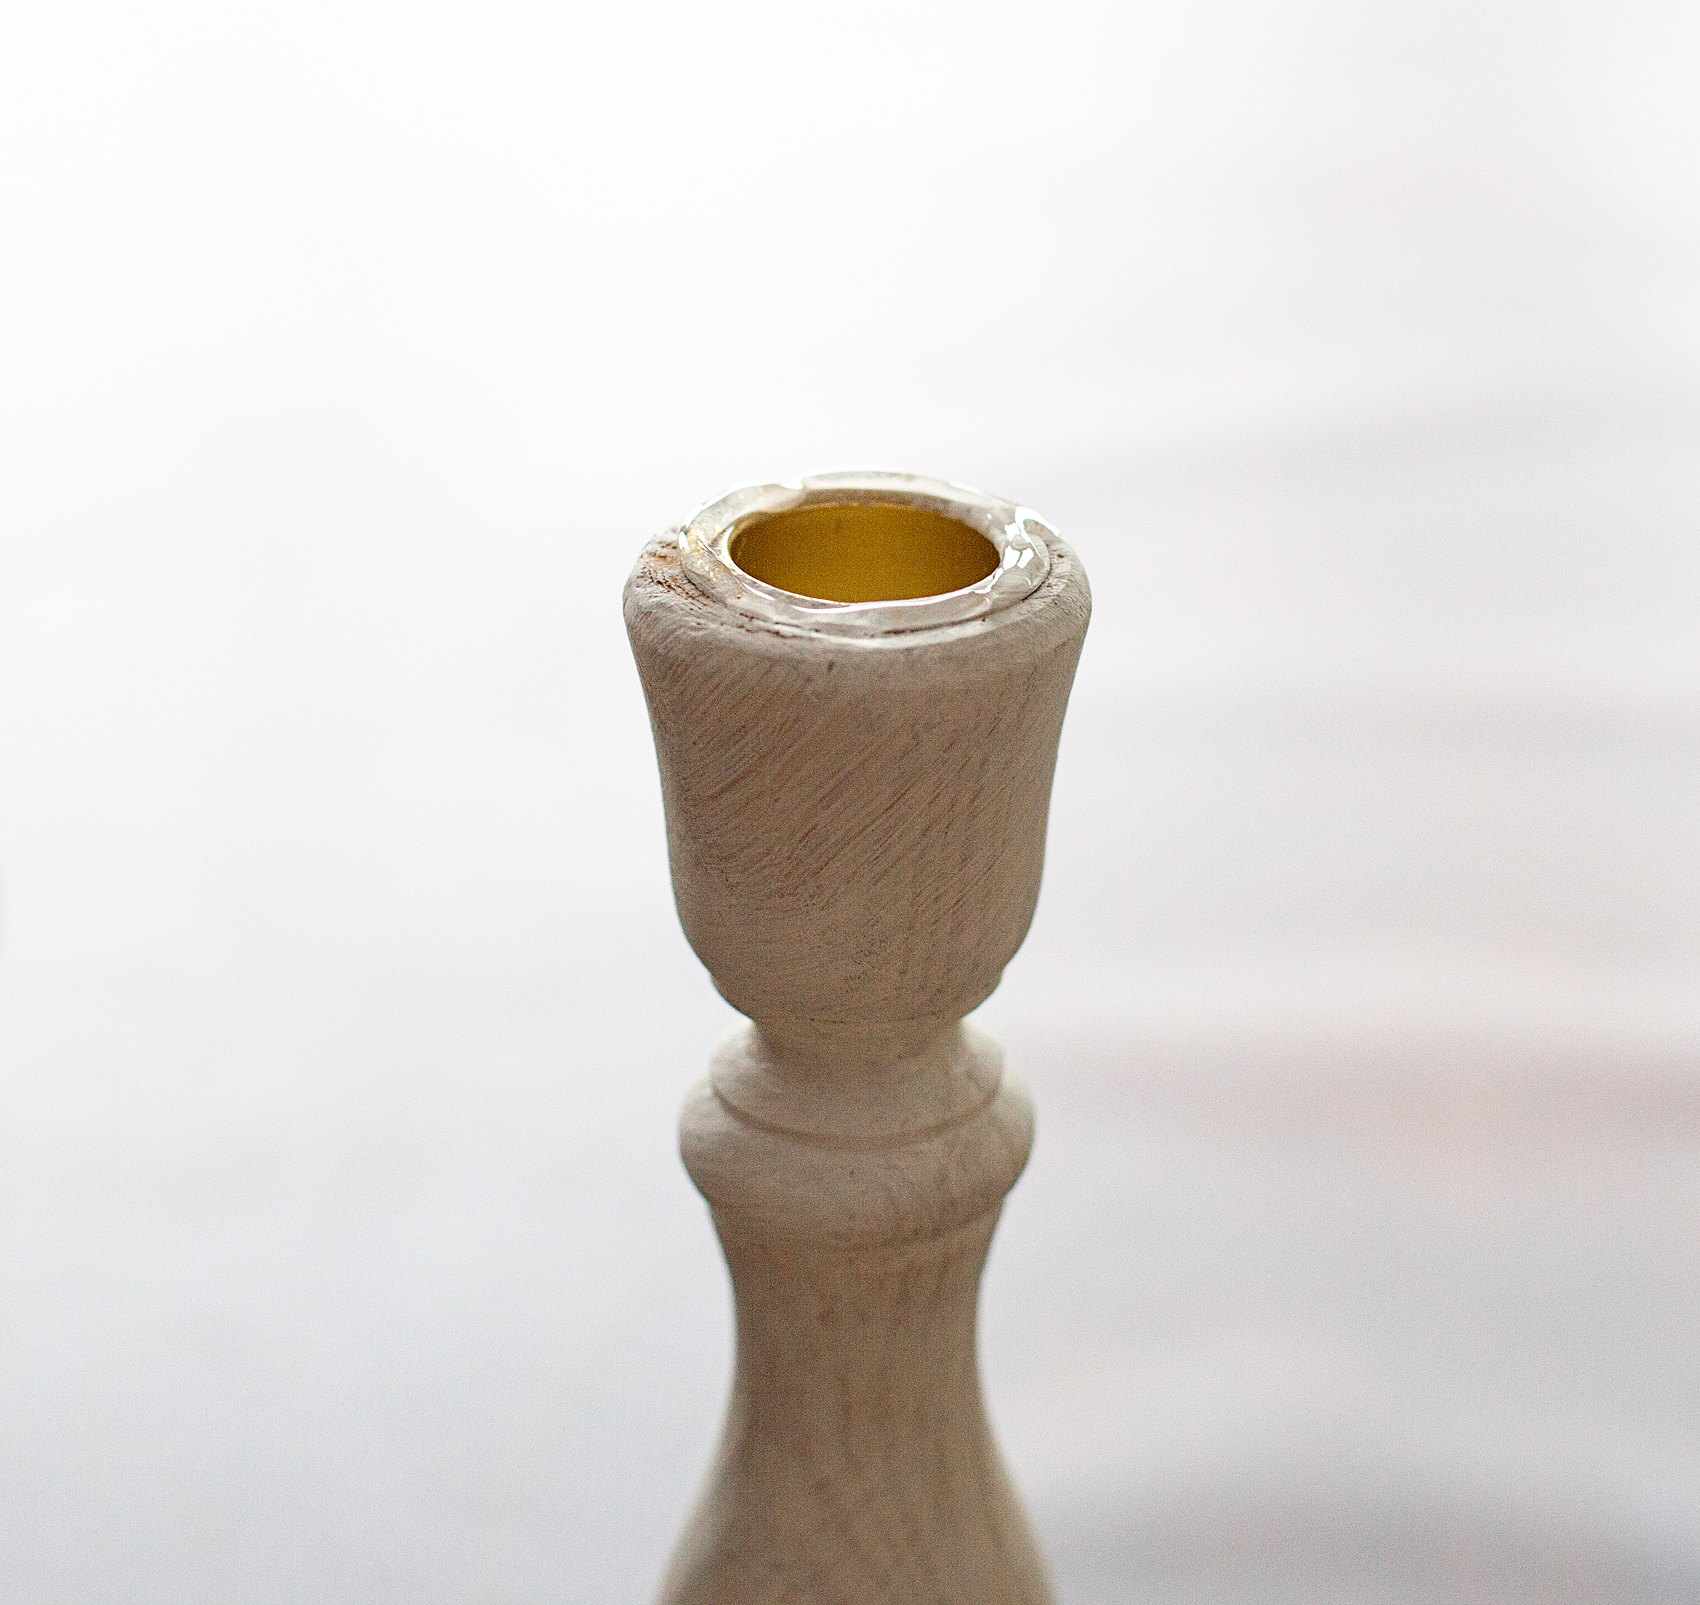
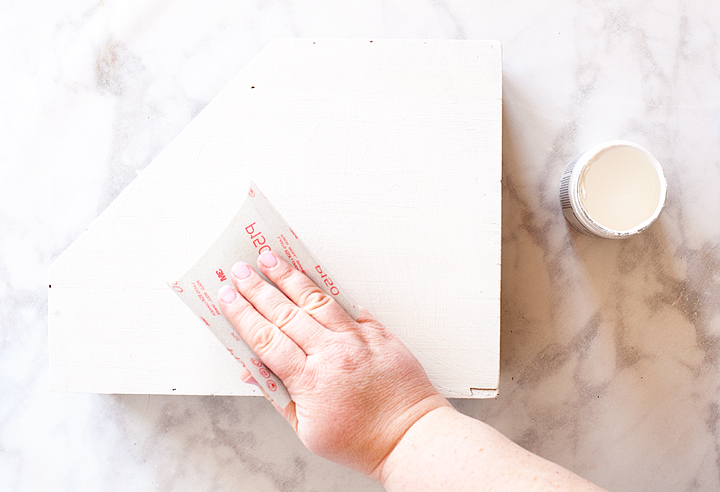
Then I tackled the fun part of the project, adding fun textured designs to the box. However, before we get started, here are a few things NOT to do. We learn from DOING and what I learned is really important when working with a high-viscosity, heavy-bodied type of paint.

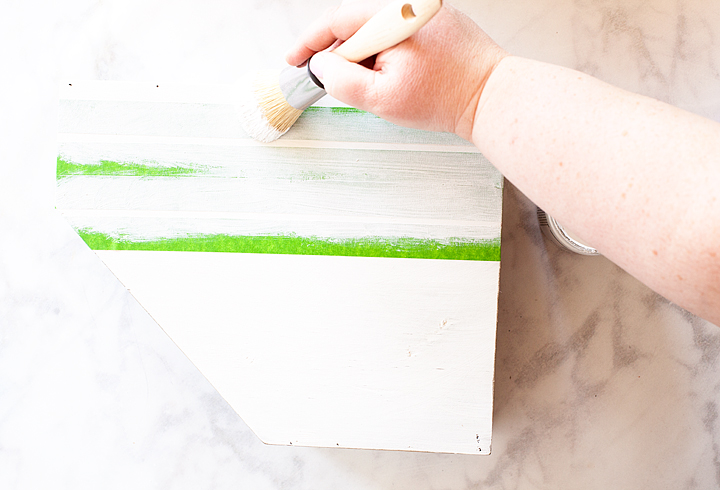
Do NOT try and apply the texture paint vertically.

You want to have the area that you are working on a flat surface facing up at you.

DO NOT press down hard when applying the Americana Decor Texture using a stencil.

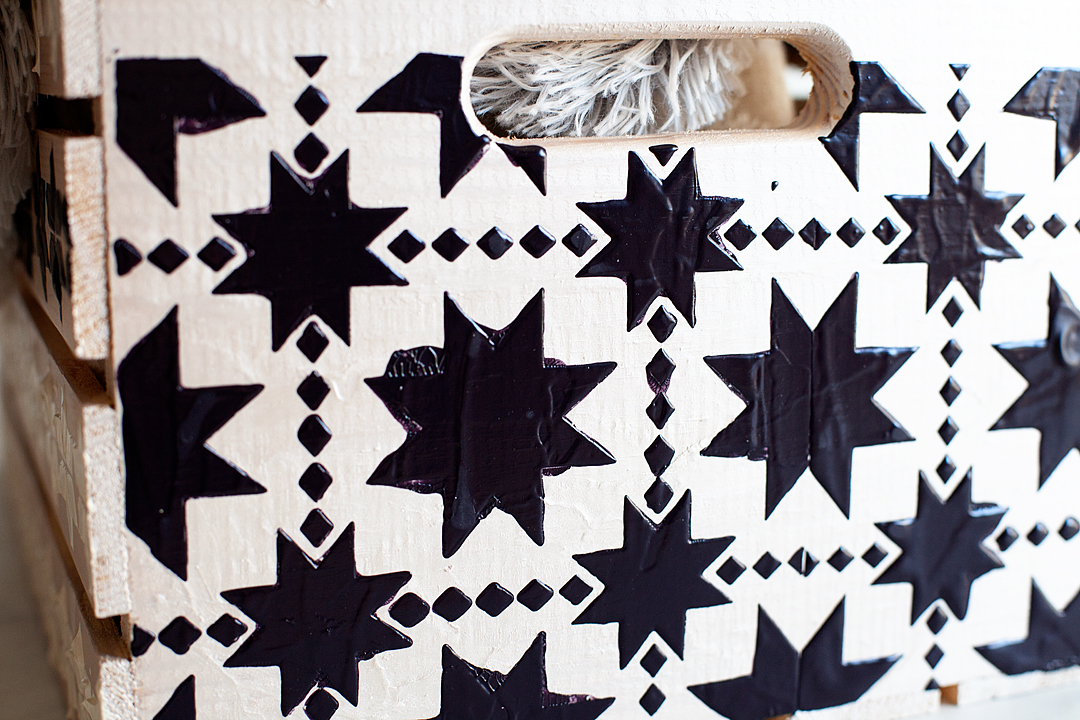
Just like with any stencil and paint project, a slower, lighter hand makes for a much better stencil experience. You don’t want your project to end up looking like my first attempt in the photo above.  Also, when working with Texture, you want to work in light short strokes like you are frosting a cookie, not like the longer strokes that you use when frosting a cake.

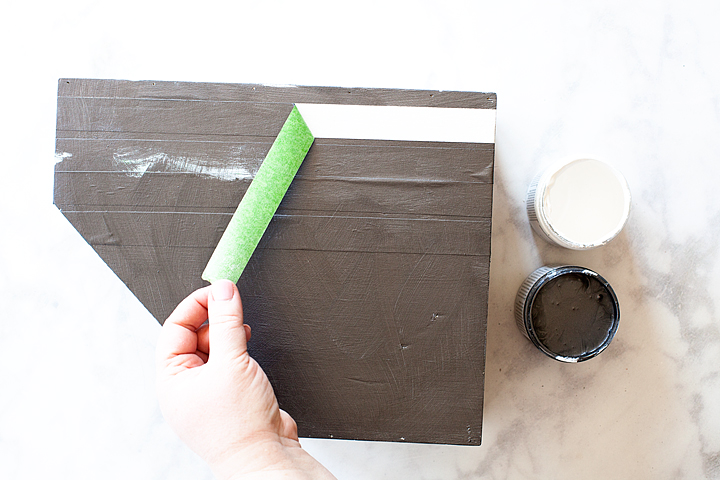
DO NOT let the Americana Decor Texture sit and dry before removing your stencil.

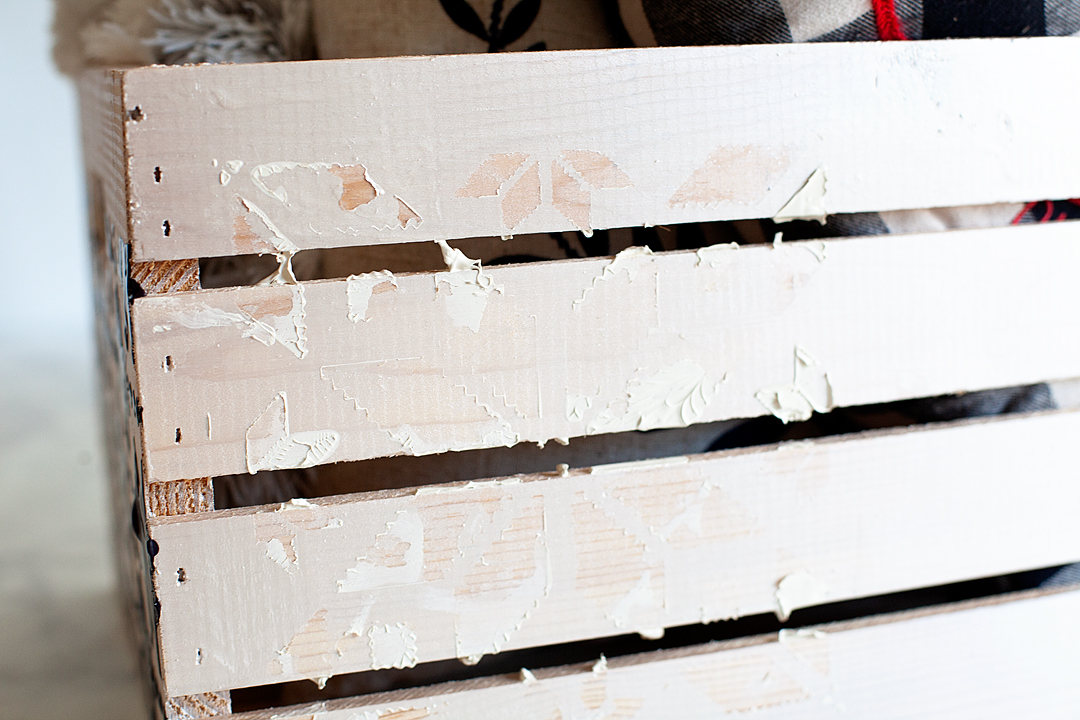
Yep, learned that the hard way. I have been stenciling for years and sometimes, depending on the type of paint, it’s better to let the paint dry a bit before you remove the stencil. So… I tested that technique out and it did not work at all. With this type of paint, you need to gently and carefully lift up your stencil as soon as you are finished applying the paint making sure not to let it slide around at all.

Now that we have those items of what “not to do” out of the way, let’s get busy with what to do!


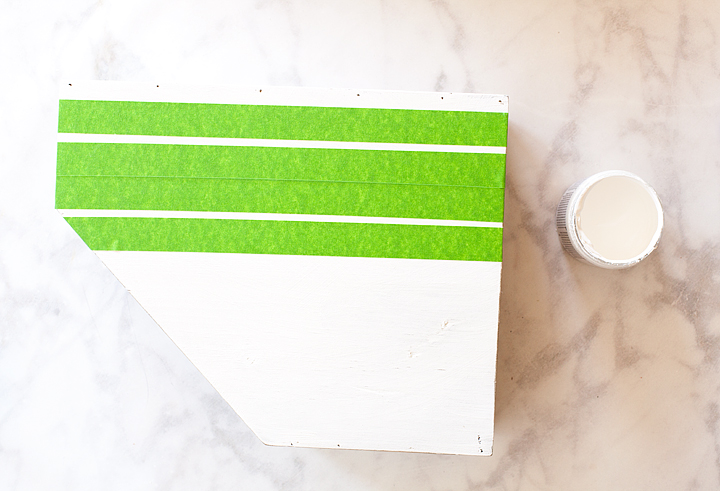
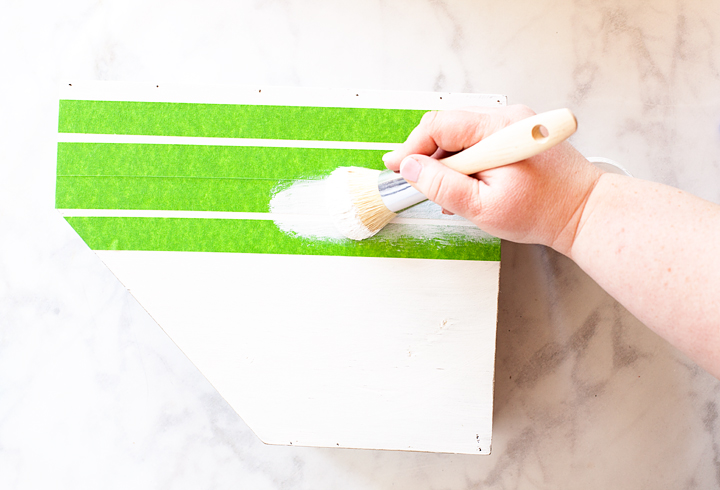
It’s a really good idea to tape down your stencil and to press down each section as you are applying the Texture paint as you go. This will help avoid the paint going underneath the stencil and creating issues. Again, use light shorter strokes like you are frosting a cookie. You can make it as thick or as thin as you would like. You can also play around with the texture, keep it smooth, add peaks, run a comb through it to create stripes or make swirls with your spatula. This stuff is super fun to play with.

Speaking of that, I would play around with it a bit before you start a project on a surface that you really care about. Test out your design and style. That way you get your method down before the real deal project.

Once you have applied the Americana Texture paint and have pulled the stencil, move onto the next section. You may find that you will need to cut your stencil so that you can continue to work and that’s totally fine. Just make sure to press down the stencil as you apply the Texture paint. Typically the weight of the paint will hold down the stencil as you apply it and because it’s so heavy bodied, unless you are pressing down and overworking, you shouldn’t have issues with the paint seeping under the stencil.

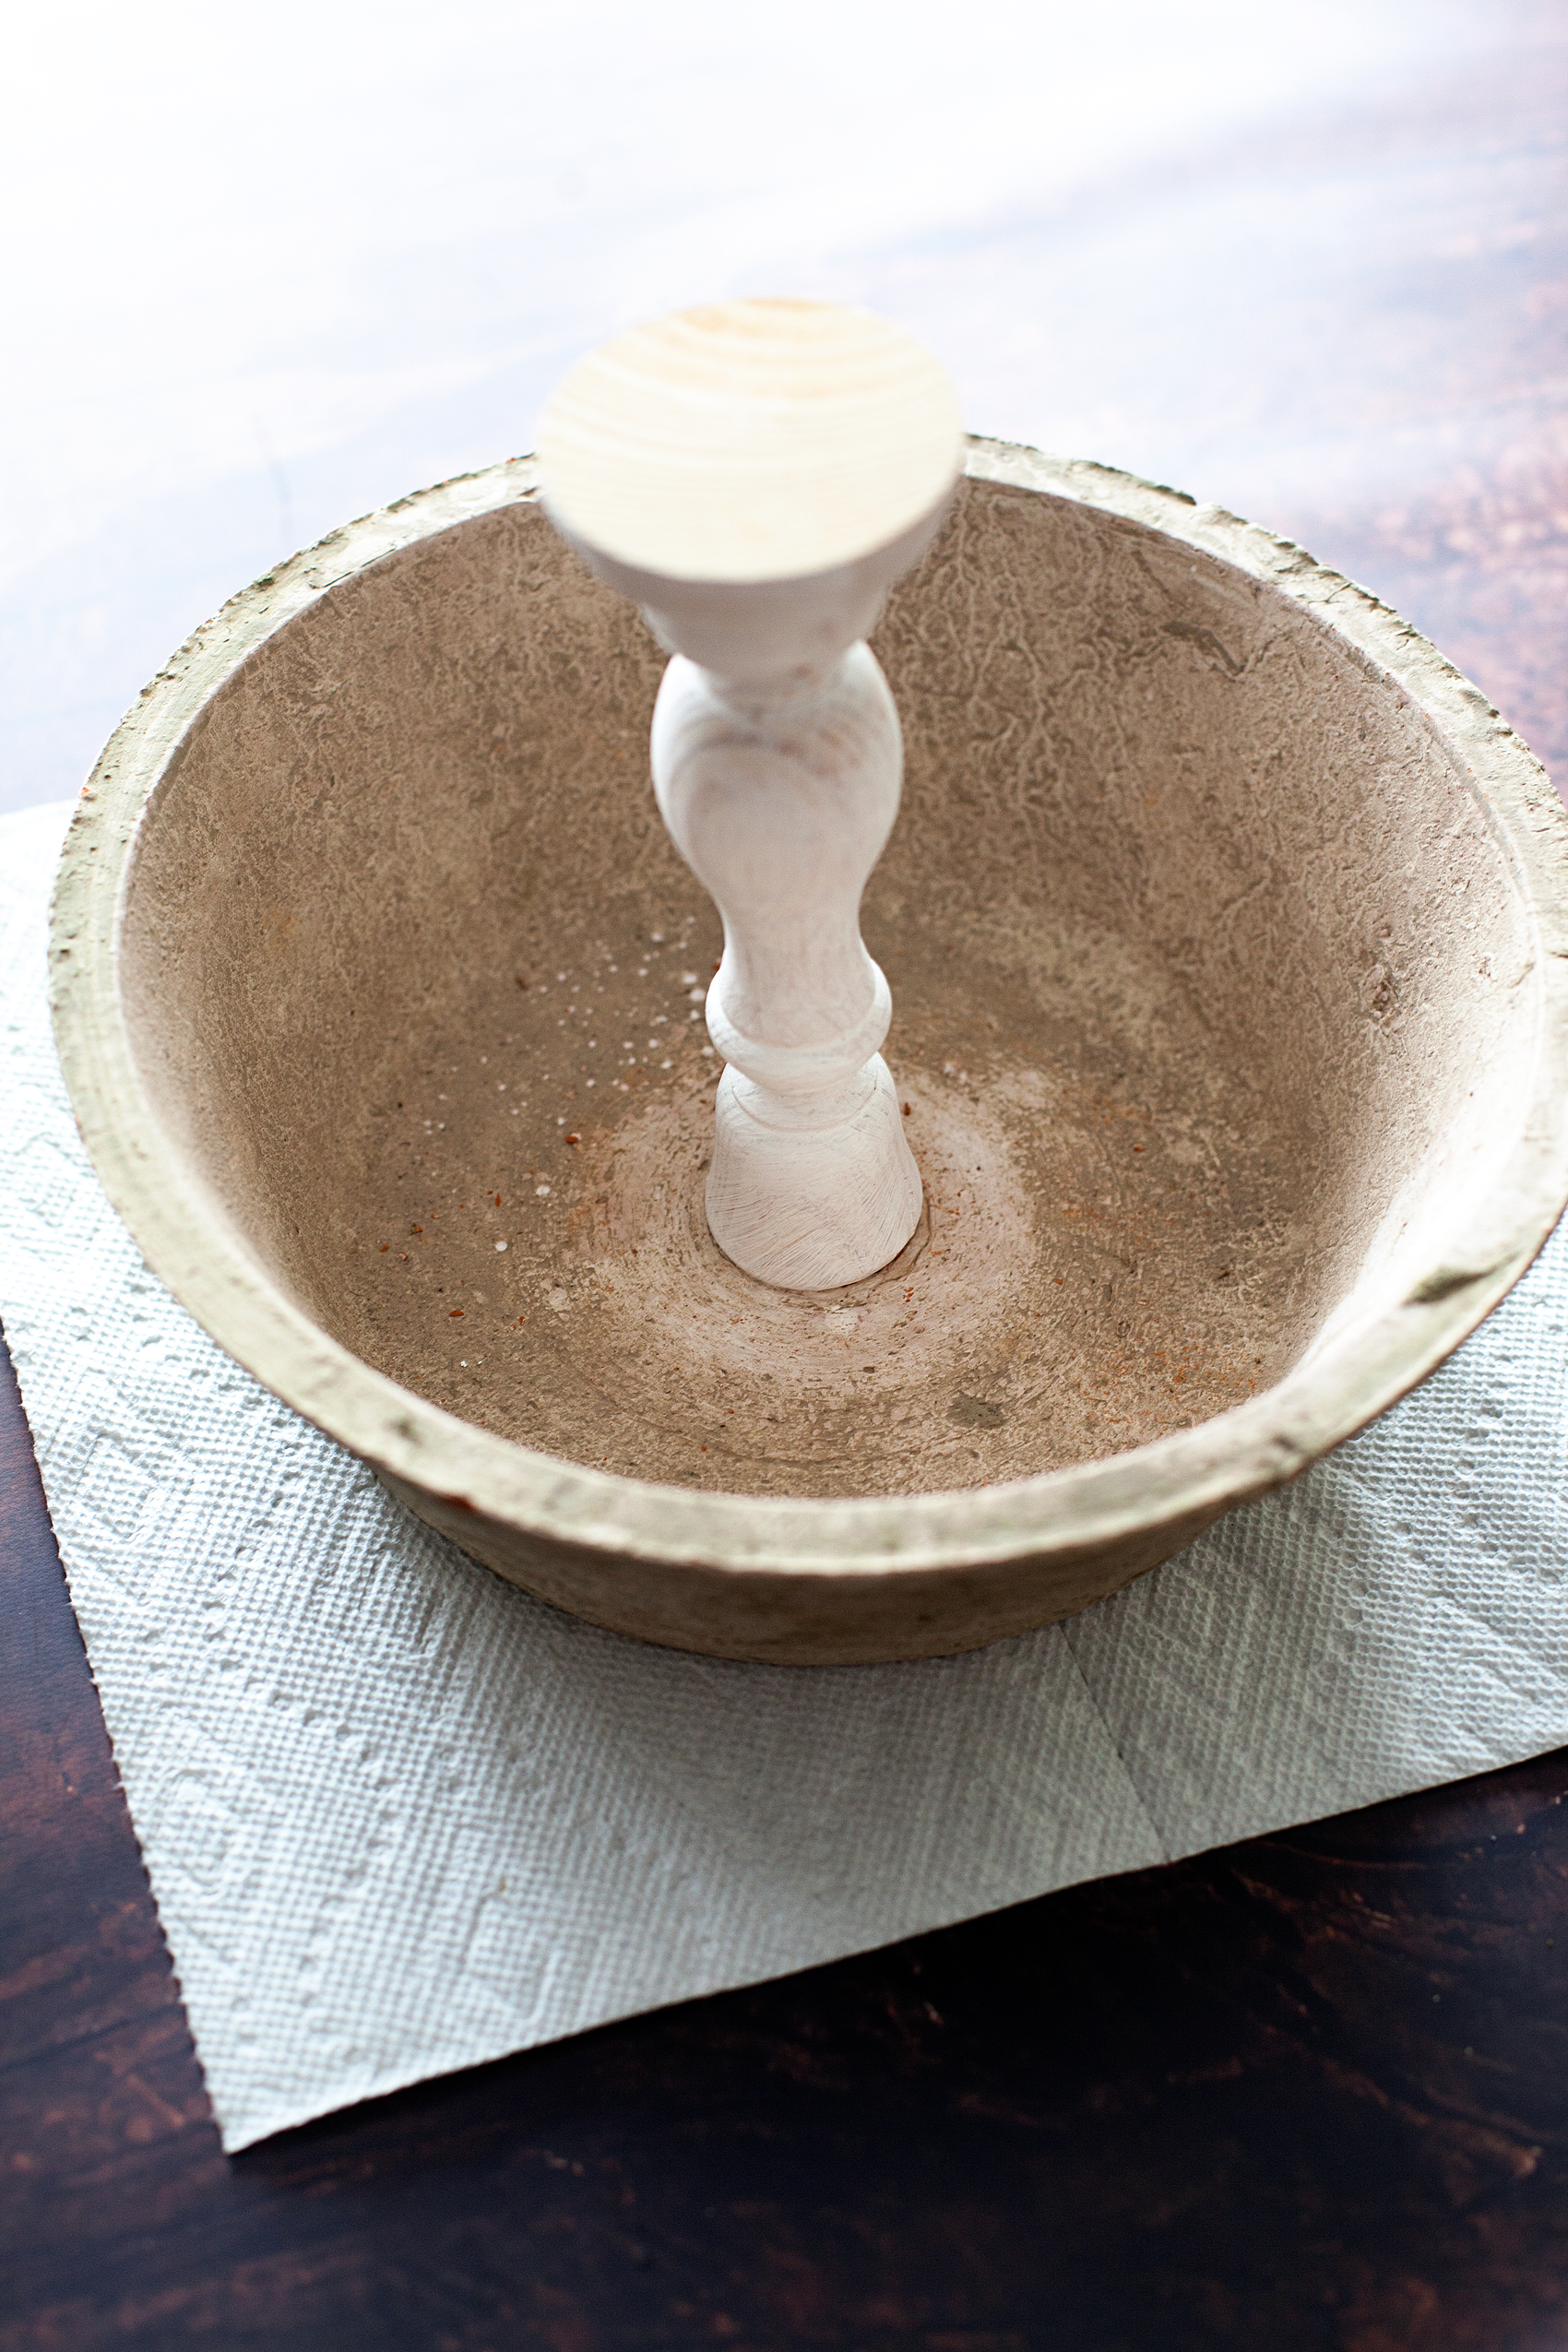
Now that you’ve finished applying the Texture paint and you’ve removed the stencil, it’s time to let it dry completely.

I set-up a fan to help speed up the process but, you really should let it sit overnight and let it dry completely.

I've always loved Norwegian & Scandinavian design especially when it comes to winter designs and that was my inspiration for my new Scandinavian Style Blanket Storage Box created using Americana Decor Texture & the Americana Decor Stencils from DecoArt.

Now you can use your new Scandinavian style blanket box to corral all of the cozy blankets when you are finished with them AND add a little style to your room!

I've always loved Norwegian & Scandinavian design especially when it comes to winter designs and that was my inspiration for my new Scandinavian Style Blanket Storage Box created using Americana Decor Texture & the Americana Decor Stencils from DecoArt.

I've always loved Norwegian & Scandinavian design especially when it comes to winter designs and that was my inspiration for my new Scandinavian Style Blanket Storage Box created using Americana Decor Texture & the Americana Decor Stencils from DecoArt.


Whimsical Neon Halloween Mantel

5 · Sep 17, 2018 · 1 Comment

When it comes to my typical style choices I typically stick with classic and timeless. However, I also have a real love of fun and whimsey that sneaks out every once in a while.  This year I’ve created a whimsical mantel using all kinds of fun finds from DecoArt, Target & Refined Design for my whimsical NEON Halloween mantel!

• This post brought to you by DecoArt •When it comes to my typical style choices I typically stick with classic and timeless. However, I also have a real love of fun and whimsey that sneaks out every once in a while.  This year I've created a whimsical mantel using all kinds of fun finds from DecoArt, Target & Refined Design for my whimsical NEON Halloween mantel!

You may not be able to tell by looking at me but, I tend like walking the line sometimes when it comes to following the rules. Nothing that would involve a felony conviction or anything, more like… When my daughter was born, I felt like she looked better in blue. She had beautiful blueberry eyes and I loved highlighting that. To this day she still is weirded out by the fact that I dressed her in blue instead of pink.

The same holds true when I decorate for holidays, sometimes I don’t really want to stick with the normally prescribed color palette. For example, we don’t really have to decorate with black and orange for Halloween, we can decorate in NEON and create a really fun, whimsical Halloween display.

Neon Halloween Mantel Supplies

With a mission in mind, I grabbed my DecoArt Americana Neon Light paints and headed to the Target Bullseye’s Playground (the former dollar spot) and grabbed some inexpensive Halloween trinkets to add to my mantel and got to work. Here’s my supply list…

    • Americana Neon Lights 2oz – Pink Explosion
    • Americana Neon Lights 2oz – Peach Punch
    • Americana Neon Lights 2oz – Green Energy
    • Americana Neon Lights 2oz – Knockout Blue
    • Americana Neon Lights 2oz – Radiant Yellow
    • foam paint brushes
    • small witches broom
  • various fabric pumpkins
  • tiny witches hat (it was a headband originally)
  • mascarade mask
  • wood beads in various sizes
  • cotton bakers twine
  • an upholstery needle
  • a set of Letters and Ledges
  • scissors
  • command stips

Instructions

With this project, I wanted to add touches of color to typical Halloween objects. Kind of like color blocking in some cases without the hard lines. I wanted it to have a free spirit air about the mantle. Remember, we are going for whimsical.

I started by painting the stems of the pumpkins green.

While those were drying, I painted the edge of the masquerade mask with the neon pink  and you can find a mask for sale on Masquerade Store.

I have a quirky llama picture that I found at Target that sits on my mantle. Her name is Poppy and I adore her!

I thought it would be fun to get her in on the action, so Poppy will be wearing the mask for Halloween.

Then I added the color block on the bottom of the pumpkins, the broom & the little witches hat.

While I was waiting for them to dry, I starting to string my wood beads to create a garland. I was inspired by this tutorial from Design Love Fest…

You have to vist Design Love Fest to learn how to make fun bead garlands like this. Click on the link above.

I decided that since I didn’t want to paint the entire bead, it would be easier to string the garlands, hang them on the fireplace and then paint them.

Worked like a charm and saved a ton of time!

Once all of the paint was dry, it was time to dress the mantel.

With the addition of the Ledges & Letters and the bats the mantel was complete!

When it comes to my typical style choices I typically stick with classic and timeless. However, I also have a real love of fun and whimsey that sneaks out every once in a while.  This year I've created a whimsical mantel using all kinds of fun finds from DecoArt, Target & Refined Design for my whimsical NEON Halloween mantel!

Now, every few days we can change-up the Halloween quote and tickle our funny bone all over again!

Disclaimer • This is a paid post with my friends at DecoArt. I am a member of the DecoArt Core Creator program and do receive payment and product to help facilitate these creative posts. However, keep in mind… I will NEVER share something I don’t truly love and use in my everyday life.

Farmhouse Decor Makeover with Americana Matte Metallic Paint

6 · Apr 24, 2018 · 1 Comment

I know that you guys are right here with me… You have some old, outdated decor pieces that really play nice with today’s trends but, you still kind of like them. You like them enough to not get rid of them but, they need a little bit love. I have several pieces like that. I’ve had some wood magazine boxes that have been sitting around collecting dust so, when DecoArt introduced their AMERICANA DECOR® MATTE METALLICS™ PAINT I knew that I had a great way to update them a bit to fit my farmhouse/industrial style a little better.

+  This project is brought to you by DecoArt +

Makeover old decor with the @decoart AMERICANA DECOR® MATTE METALLICS™ PAINT

The Paint Makes the Project

It’s really true, the paint makes the project. I was a little wary of this project because I don’t typically lean towards the metallic side of the spectrum when it comes to painting. Don’t get me wrong, I do love a little glam but, typically not in my paint projects. But, this paint is magical! It’s a MATTE METALLIC and it’s fabulous. I actually worked the paint so that it looked like a brushed metal and I love it.

I decided to use the magazine boxes as more of a decorative spot for my shelves and decided to add some white stripes along with the Matte Metallic paint for more of a farmhouse look.

Supplies for Farmhouse Decor Makeover

Makeover old decor with the @decoart AMERICANA DECOR® MATTE METALLICS™ PAINT
  • DecoArt America Decor Matte Metallics – Charcol
  • DecoArt America Decor Chalky Finish – Everlasting
  • Paint Brushes
  • Frog Tape
  • A decor piece that needs a little love, like my worn-out magazine boxes

Instructions for Matte Metallic Paint Makeover

  1. Clean your decor item.
  2. Paint your base coat. When you’re painting with the Chalky Finish you want to paint in a cross-hatch pattern which helps give the nice chalky finish.
  3. Once you’ve finished with the white Chalky Finish coat, let it dry to the touch.
  4. Lightly sand your piece to smooth out the paint surface.
  5. Apply your Frog Tape in the stripe pattern that you like.
  6. To create a perfect line, cover the edges of the tape with the base white paint.
  7. Then, using the America Decor Matte Metallic paint, cover the surface of the decor piece.
  8. Let the paint sit for a few minutes and then carefully pull the tape. It’s better to pull the tape when the paint is still slightly wet. That way you avoid possibly pulling dry paint up as well.
Now you’re all set with your new decor piece! I really like the look of the brushed metal that the Matte Metallic pant gives, it looks great! I’ve used my updated magazine boxes to store the collections of my favorite magazines that I like to keep around for inspiration. What would you like to update? For another great project idea… I’m over on the DecoArt Blog today, sharing my paint pouring project. I created a fun sign that is totally on trend for my daughters room. Come on over and see my video tutorial on how to make it! create signs out of canvas that has been transformed by paint pouring • whipperberry Disclaimer • I am a DecoArt Blogger and have received product and compensation for my time and efforts. All thoughts, ideas and opinions are my very own.    

DIY Farmhouse Tiered Bowls

7 · Jan 22, 2018 · Leave a Comment

Normally a costly buy, these farmhouse tiered bowls are a stylish storage option for either the kitchen, office or craft room. Rather than breaking the bank, you can grab a few items at Michaels to make one of your own.

+ This DIY Farmhouse Tiered Bowls post brought to you by Michaels +DIY Farmhouse Tiered Bowls are easy as pie to make thanks to @michaels. Normally a costly buy, these tiered bowls won’t break the bank and they are super easy to make. A great storage option for either the kitchen or the office! Come on over to WhipperBerry to learn how to make one for your home.

I will fully admit, I love the farmhouse trend. I’ve slowly been gathering home decor pieces that help to transform my spaces into cute little farmhouse nooks.

One piece that everyone loves right now is tiered trays or tiered bowls, you see them everywhere. I’ve looked and sometimes these gems have a hefty price tag which stinks because they are great for organizing in the home. They are handy in the office to organize office supplies, pens, pencils, scissors. You can even add in some decor to dress up your office. The same is true for the craft room. Tiered bowls are great for story craft supplies; paints, brushes, markers, your Cricut tools and so much more. In the kitchen they are super handy as well. You can use them to keep healthy fruits and vegetables on the counter so that your kiddos reach for the healthy snacks that are close at hand.In need of a set of tiered bowls for the kitchen, I thought rather than purchasing one, maybe I could make one of my own.

Of course, I ran over to Michaels to see what I could find. Their isles are packed full of great storage and organization goodies this time of year. Well, all year, but this time of year especially. The cool thing about looking for storage solutions at Michaels, you can think “outside of the box” and CREATE your own storage solution from the isles there.

DIY Farmhouse Tiered Bowls Supplies

Rustic clay pots have always been a favorite of mine. I found these beautiful clay pots in the floral section at Michaels. They have that farmhouse or even old world look that I just love and, they are large… Perfect for tiered bowls.

DIY Farmhouse Tiered Bowls are easy as pie to make thanks to @michaels. Normally a costly buy, these tiered bowls won’t break the bank and they are super easy to make. A great storage option for either the kitchen or the office! Come on over to WhipperBerry to learn how to make one for your home.

• large clay pots in the floral section at Michaels (I would provide a link however, they aren’t listed online yet)

• ArtMinds™ Wood Decorative Candle Holder, 6 3/4″

• Wood Doll Head by ArtMinds®, 2.5″

• E6000® Permanent Craft Adhesive, 2.0 oz.

• Americana® Decor™ Chalky Finish Paint, 8oz. – white

Instructions

Now, this part couldn’t get any easier. To begin, I painted the candle stick with a light coat of the chalky finish paint.

DIY Farmhouse Tiered Bowls are easy as pie to make thanks to @michaels. Normally a costly buy, these tiered bowls won’t break the bank and they are super easy to make. A great storage option for either the kitchen or the office! Come on over to WhipperBerry to learn how to make one for your home.

DIY Farmhouse Tiered Bowls are easy as pie to make thanks to @michaels. Normally a costly buy, these tiered bowls won’t break the bank and they are super easy to make. A great storage option for either the kitchen or the office! Come on over to WhipperBerry to learn how to make one for your home.

That will dry in just a few minutes. While you’re waiting for that to dry, check the center point of your bowls. The bowl on that will be on the bottom may need to be sanded down a bit in order for your candle holder to sit straight.

DIY Farmhouse Tiered Bowls are easy as pie to make thanks to @michaels. Normally a costly buy, these tiered bowls won’t break the bank and they are super easy to make. A great storage option for either the kitchen or the office! Come on over to WhipperBerry to learn how to make one for your home.

Once your candle holder is dry, add your E-600 to the top and follow the package directions for adhering it to the center of the clay pot. Keep in mind, you’re going to glue the TOP of the candle holder to the bottom bowl so that the the wider BOTTOM of the candle holder will hold-up the top bowl.

DIY Farmhouse Tiered Bowls are easy as pie to make thanks to @michaels. Normally a costly buy, these tiered bowls won’t break the bank and they are super easy to make. A great storage option for either the kitchen or the office! Come on over to WhipperBerry to learn how to make one for your home.

DIY Farmhouse Tiered Bowls are easy as pie to make thanks to @michaels. Normally a costly buy, these tiered bowls won’t break the bank and they are super easy to make. A great storage option for either the kitchen or the office! Come on over to WhipperBerry to learn how to make one for your home.

I placed a paper towel underneath to protect my surface from any glue drips. Once that is nice and secure, you can glue the wood feet i.e. doll heads, to the bottom of the bowl again, with the E-6000.

DIY Farmhouse Tiered Bowls are easy as pie to make thanks to @michaels. Normally a costly buy, these tiered bowls won’t break the bank and they are super easy to make. A great storage option for either the kitchen or the office! Come on over to WhipperBerry to learn how to make one for your home.

Let those cure according to package directions and then do the same with the top bowl.

DIY Farmhouse Tiered Bowls are easy as pie to make thanks to @michaels. Normally a costly buy, these tiered bowls won’t break the bank and they are super easy to make. A great storage option for either the kitchen or the office! Come on over to WhipperBerry to learn how to make one for your home.

Once that has properly cured, you’re all finished! You now have farmhouse tiered bowls!

I’m using mine to hold fruit in my kitchen. It fits perfect on my counter tops right under my cabinets.

DIY Farmhouse Tiered Bowls are easy as pie to make thanks to @michaels. Normally a costly buy, these tiered bowls won’t break the bank and they are super easy to make. A great storage option for either the kitchen or the office! Come on over to WhipperBerry to learn how to make one for your home.

I love the look of these pots so much, I stocked up on some smaller ones for all of my plants this spring.

What are you looking to organize? Do you need a creative storage solution? Michaels has everything you need to get organized for the new year! From washi storage to lexington carts, you can MAKE your year the most organized one yet!

What to keep this project idea close at hand? Feel free to pin the image below to your favorite DIY board so that you can find it later.

DIY Farmhouse Tiered Bowls are easy as pie to make thanks to @michaels. Normally a costly buy, these tiered bowls won’t break the bank and they are super easy to make. A great storage option for either the kitchen or the office! Come on over to WhipperBerry to learn how to make one for your home.

SaveSave

SaveSave

SaveSave

SaveSave

SaveSave

SaveSave

SaveSave

SaveSave

SaveSave

SaveSave

SaveSave

SaveSave

  • « Go to Previous Page
  • Page 1
  • Page 2
  • Page 3
  • Page 4
  • Interim pages omitted …
  • Page 9
  • Go to Next Page »

Primary Sidebar

Heather from Whipperberry
Hello... my name is Heather and I'm the creator of WhipperBerry a creative lifestyle blog packed full of great recipes and creative ideas for your home and family. I find I am happiest when I'm living a creative life and I love to share what I've been up to along the way... Come explore, my hope is that you'll leave inspired!

Footer

  • Privacy Policy
  • Crafts
  • Food
  • Gifts
  • Holidays
  • Home
  • Mom Life
  • Recipes
  • Travel

Copyright © 2026 · Seasoned Pro