Looking for creative flashcard design ideas? I think you’re going to love these! This post was originally created back in 2013 but has been updated some now. These flashcards were for my kids when they were really young but would be great for students as well. These were so much fun to make.
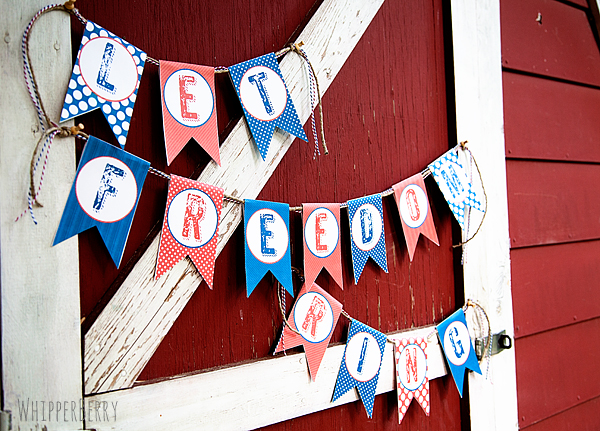
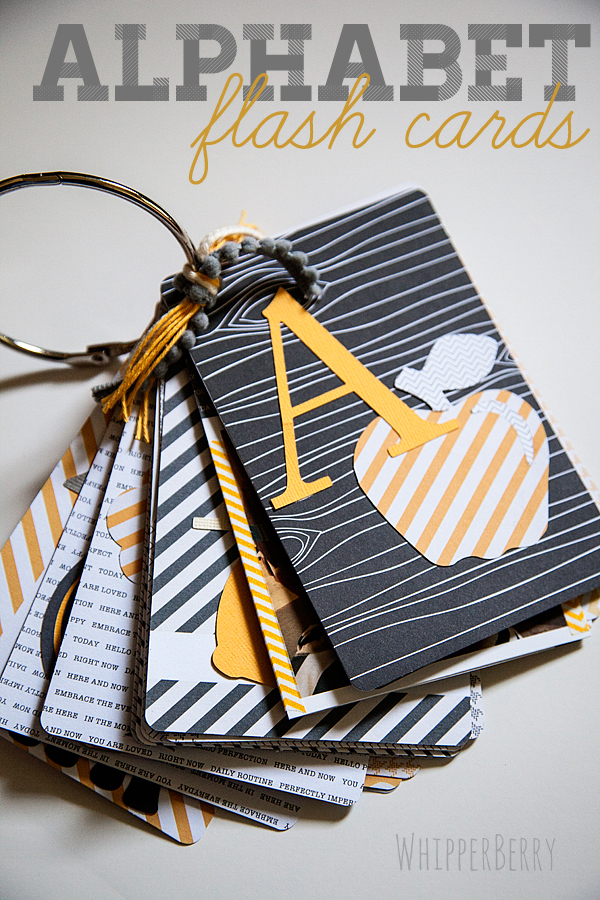
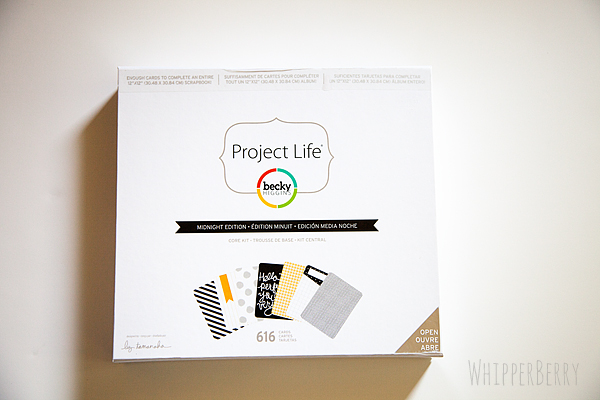
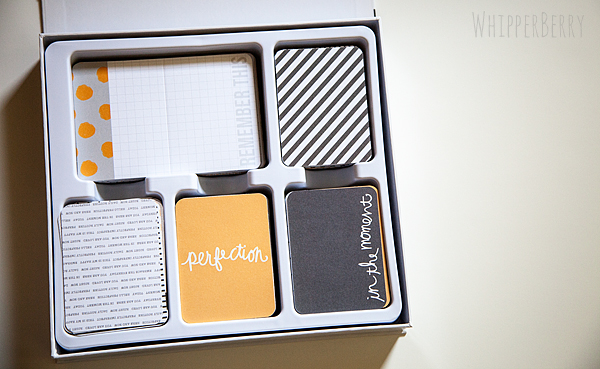
So, it’s that time… Gage is three… Time to work on mastering his letters. With the girls home for the summer, I thought this would be a great time to make some Alphabet Flash Cards for the girls to play school with. That way Gage will get excited about learning. My first thought was… Those Project Life cards are PERFECT for making flash cards. So many great colors and patterns, with a little creativity these cards can transform a stack of photos into a quick meaningful memory book but… What if you just want to craft with your Project life kit? I took some cards from my Midnight Kit and turned them into some amazing flash cards…
How to Make These Flashcards
Sometimes you have leftover cards or maybe you just want to use these amazing kits to create with, no matter… Project Life is getting easier and easier to find. The cool thing is that if you don’t have some Project Life cards on hand, you don’t need to worry! Project Life products are now available at several different retailers here in the United States, Canada, Australia, and many other countries. I found my Midnight core kit at my local Hobby Lobby here in Lincoln but you can also find them at Michaels, Craft Warehouse, Beverly’s Fabrics & Archivers. Not to mention a whole bunch of smaller craft and scrapbook supply stores. You can also find Project Life online at Two Peas in a Bucket & Scrapbooks.com.
I thought this kit would look great for some flashcards for a little boy…
I took out my Silhouette CAMEO and my trusty glue stick and went to town…
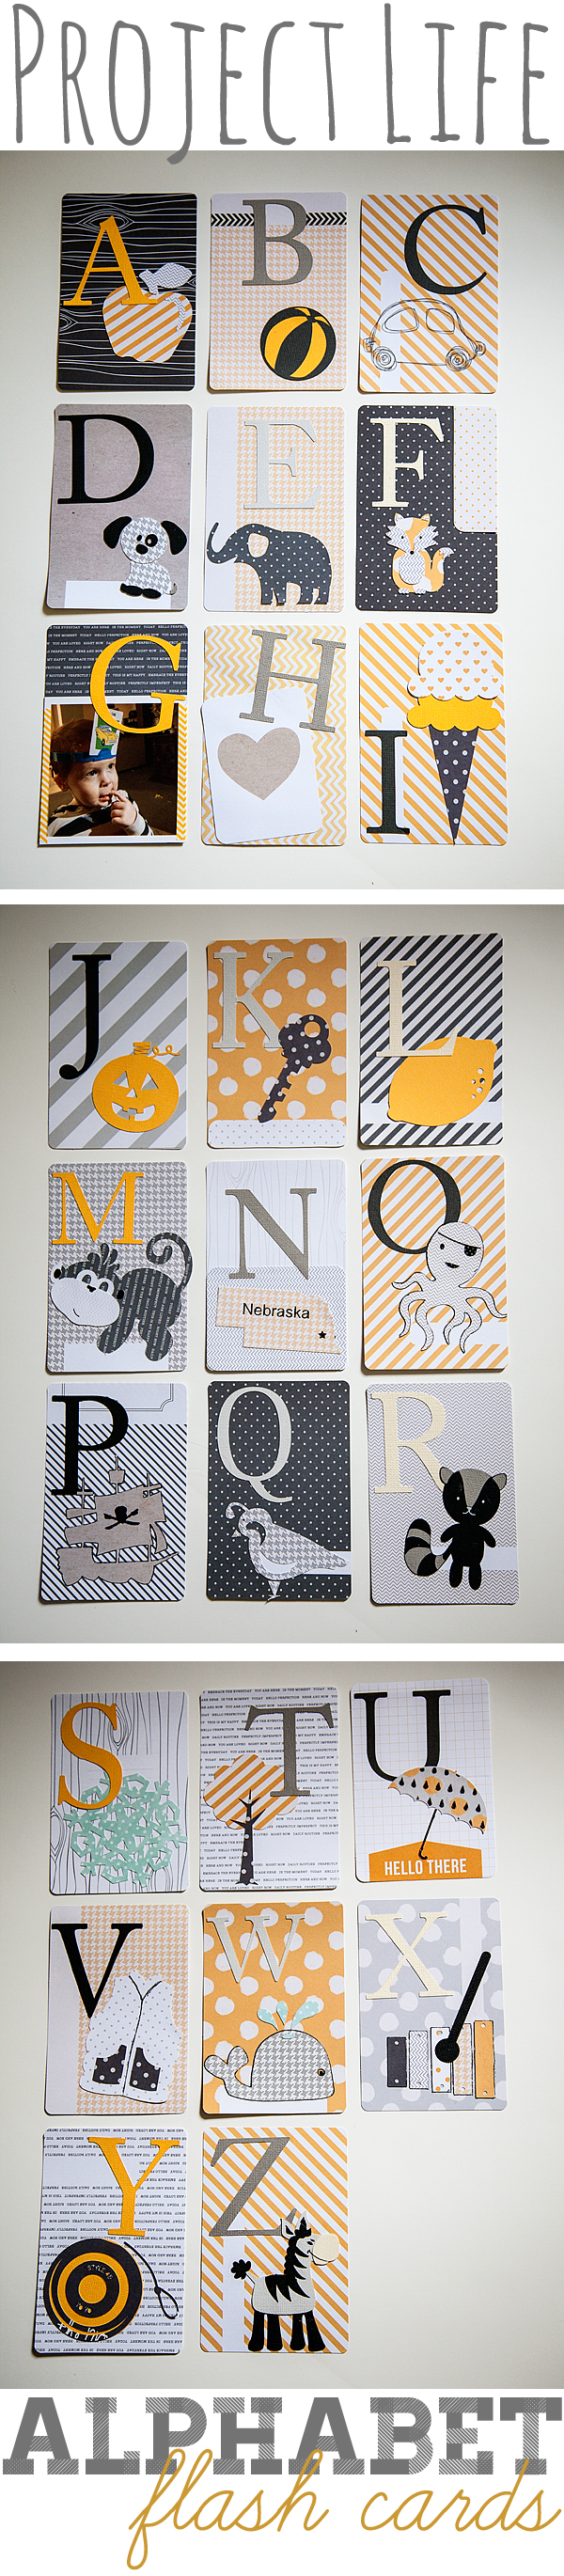
It was just so slick… I could easily coordinate the colors and patterns to create this fun set for Gage.
This is a perfect starting point for him. Next, I am going to add sight words onto the ring of cards and use the letter cards at dividers. It will be great… The girls can play school with him and help him learn his letters. Total score for the summer downtime when the girls are home and Gage is going to love it!
Other Creative Flashcard Design Ideas to Try
If you’re looking for other flashcard ideas to help out in the classroom or at home, you might like these next three. The first section of this post was how to be creative and make your own cards that look great. Below are some other Flashcards you can buy and make them look nice yourself.
These Assorted Blank Flash Cards
These assorted blank flashcards would be great for you to make your own flashcards with. The colors are nice and the texture is just right. You can get a large pack of 1,000 for a very good price.

These Thick Number and Letters Cards
These cards are great for younger students. You can play games with these cards like the jump game. You call out a letter or a number and have the students jump from one card to the next. This is a great way to introduce physical activity into learning and make the games fun for the kids. Give them a try!

What have you made with your Project Life cards? Do you only use them for your memory books or do you think outside the box?
Disclaimer // This is a post sponsored by American Crafts. I have received free products and payment for the post. However, the ideas, thoughts and opinions are my very own.