• Skip to primary navigation
  • Skip to main content
  • Skip to primary sidebar
  • Skip to footer

Whipperberry

WhipperBerry • Your Home For Creative Inspiration

  • Home
  • Recipes
    • Starters
    • Easy Weeknight Dinners
    • Main Dish
    • Salads
    • Side Dish
    • Soups & Stews
    • Desserts
    • Breakfast
    • Miscellaneous
  • Tutorials
    • Creative Crafts
    • DIY Decor
    • Fabric Crafts
    • Food How-To
    • Jewlery
    • Paint Projects
    • Paper Art
    • Party Styling
    • Photography and Graphic Design
    • Silhouette
  • Holidays
    • Easter
    • Mother’s Day
    • Father’s Day
    • 4th of July
    • Halloween
    • Thanksgiving
    • Christmas
    • Valentine’s Day
  • Gift Ideas
    • Gifts For Everyone
    • Gifts for Dad
    • Mother’s day
    • For The Girls
    • For The Kids
    • Teacher Gift Ideas
    • Christmas
  • Printables
    • Holiday
    • Gift Idea
    • LDS Primary
  • Travel
  • About
    • Terms
  • Contact
  • Nav Social Menu

    • Facebook
    • Instagram
    • Pinterest
    • RSS
    • Twitter

Paper Crafts

DIY Black and White Wall Art

0 · May 8, 2014 · 8 Comments

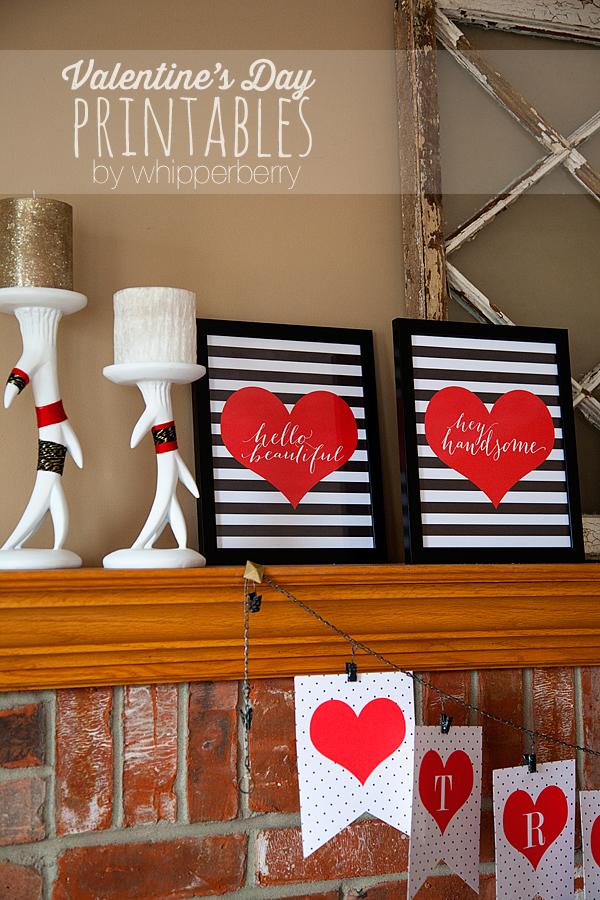
DIY Black and White Wall Art // I have always been a huge fan of black & white. I love the stunning contrast and knew that when I was ready to dress up our front room in our new house I wanted a strong black & white theme. I also LOVE typography wall art and adore the hand painted typography displays that I’ve seen all over the place.

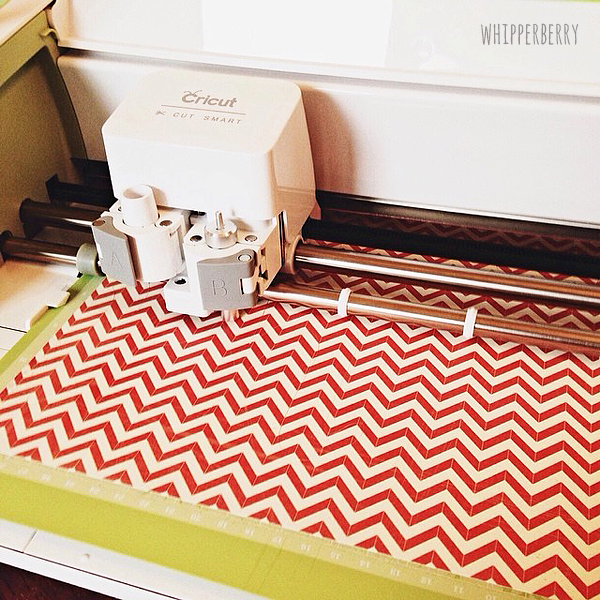
I however, CAN NOT hand paint a stick figure, let alone a beautiful hand lettered canvas… So, I did the next best thing! I busted out my Silhouette CAMEO, some black paper and a lovely large 24 x 24 canvas and went to work…

WhipperBerry-Sprint-Room-Makeover-12

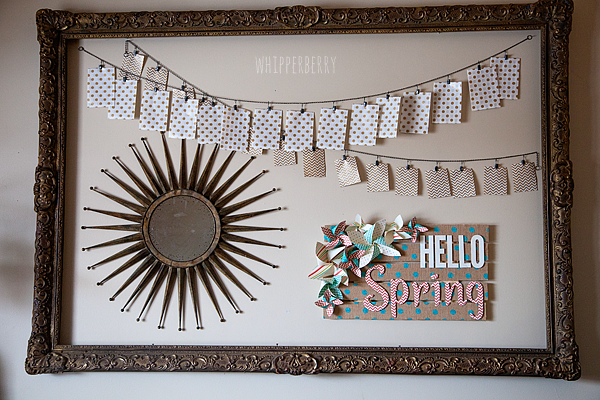
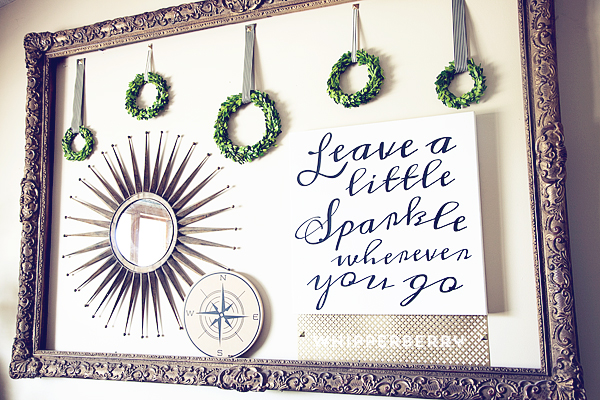
I LOVE how it turned out! It’s an element in my HUGE gold frame that is in my front room that I have redesigned for the spring/summer…

WhipperBerry-Sprint-Room-Makeover-16

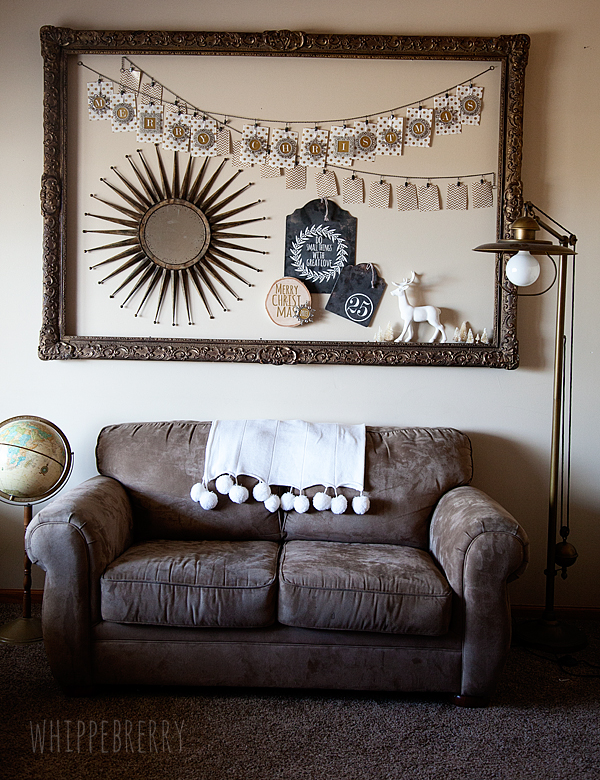
This is how it looked for Christmas this last year…

Michaels-Mini-Frames-justaddmichaels-5

The frame is HUGE and I love it, but it can be a challenge trying to find stuff to fill the space, a large canvas is perfect!

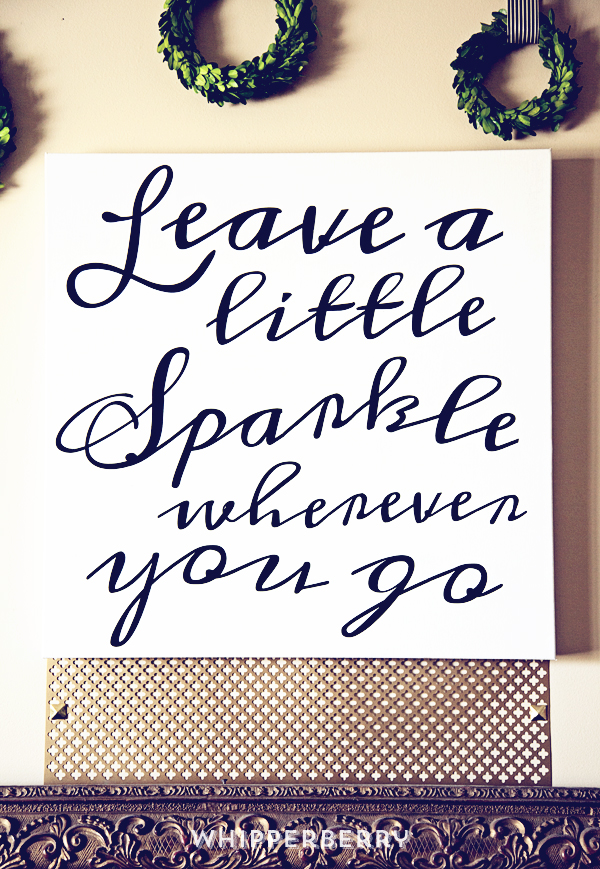
This project is really quite simple. I used the Meddon font which has an imperfect hand lettered look to design my typography art. Then I cut my saying, “Leave a little sparkle wherever you go” out of black textured card stock paper with my Silhouette CAMEO and then used Decoupage from DecoArt to affix the letters onto the canvas.

WhipperBerry-Sprint-Room-Makeover-1

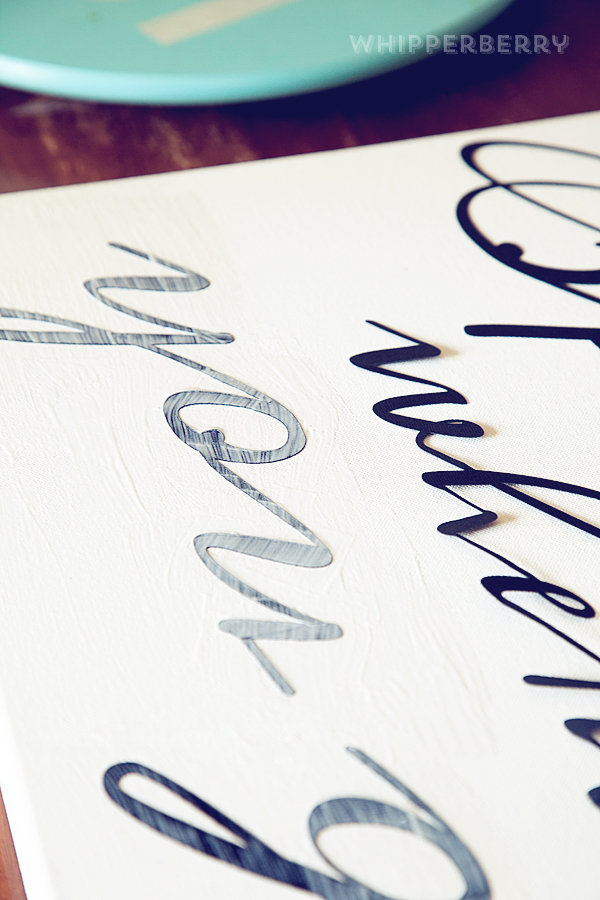
Want to know a little secret to successful decoupaging? Wet your paper that you are wanting to affix to your surface FIRST before you place it onto your surface. I had a plate with a wet paper towel sitting next to me and placed the paper words on the towel for a few seconds to get them a little damp before I placed it on the canvas. This will help with any bubbling problem you may have once you add the Decoupage.

How to make typography wall art with Silhouette CAMEO and Decoupage

  1. Cut your words out on the Silhouette CAMEO. For this size of canvas I needed a machine that could cut large elements and the CAMEO is perfect for that. I used my 12×24 mat and it was perfect. I unfortunately didn’t have 12×24 black paper so I had to piece some of the words together, but that wasn’t a big deal.
  2. Figure out the placement of your words on the canvas.
  3. Starting in small areas, one word or part of a word at a time, remove the paper word and place on a wet paper towel. Then using a foam brush, place a thin layer of Decoupage onto your canvas. Replace the paper word onto your desired spot and gently press into the Decoupage. Then carefully with a light hand, brush another layer of Decoupage onto of the paper word. Be careful not to over work the paper. Especially when using black paper on a white canvas, the Decoupage will breakdown the paper and then you will have a muddy mess instead of a clean black and white canvas.  WhipperBerry-Sprint-Room-Makeover-2
  4.  Move onto the next word until you have the entire saying affixed with the Decoupage.
  5. Make sure you cover the entire canvas with Decoupage so that the canvas will have a uniformed appearance.
  6. Let the canvas dry and then hang!

WhipperBerry-Sprint-Room-Makeover-6

 I added a sheet of decorative metal that I found at Home Depot for a little added pop under the canvas and I LOVE how it looks!

WhipperBerry-Sprint-Room-Makeover-16


So… Do you love typography art? What saying would you like to create with this simple project? Leave a comment with your saying!!

Disclaimer // This is NOT a paid post, I am however a member of the Silhouette Circle which is an affiliate program.

Easter Buddies + An Easter Pinterest Party

0 · Mar 26, 2014 · 3 Comments

// Easter Buddies with Free Printable // 

Easter-Egg-Animals-with-free-printable-2

I have decided that when it comes to candy and all around cuteness… Easter is my favorite holiday.  I mean really, Cadbury Mini Eggs, Jelly Beans, Reese’s Peanut Butter Eggs, Cadbury Creme Eggs, black jelly beans, the list could go on and on. Not to mention all of the cute basket of Easter goodies that they have available at the stores these days.

I’m a sucker for fun plastic eggs and I found this CUTE set of animal Easter eggs at Target and thought it would be perfect little goodie for my kiddos. I could add a fun curled up message along with the candy inside, add some feet to the bottom of the plastic eggs and they turn them into something extra special…

Easter-Egg-Animals-with-free-printable-4

This project is super quick and with my free printable, you can make them up in a snap! Here’s what you will need…

Supply List

  • Animal Easter Eggs
  • card stock paper
  • Elmer’s Craft Bond Foam Mounting Shapes
  • scissors
  • printer paper
  • pencil
  • candy

Instructions

First,  you will need to print the free printable sayings on just your basic printer paper…

Easter-Buddy's-Printables-from-#whipperberry

You can download the printable HERE.

Once you have that printed, you will need to use scissors or a paper cutter to cut out the strips and then curl them around a pencil…

Easter-Egg-Animals-with-free-printable-6

Next cut out some small 1- 1 1/2 inch hearts to use as the feet for your little animal eggs…

Easter-Egg-Animals-with-free-printable-13

I used my Cricut Explore, but you could easily use any cutting machine or free hand it as well.  Then you will use your Elmer’s Craft Bond foam circles to affix the feet to the egg. These little foam adhesives are PERFECT for this project.

Easter-Egg-Animals-with-free-printable-14

They have just the right amount of hold to keep those little buddies standing strait without hardly any fuss.  And just like that, you’re a rock star!

Easter-Egg-Animals-with-free-printable-9

Add some Cadbury Mini Eggs and you’re really ROCKIN’!  There you have it, this simple yet super fun Easter Buddy project…

Easter-Egg-Animals-with-free-printable-1

Easter Pinterest Party

Now that I’ve shared my fun Easter creation, some of my favorite creative friends and I are pleased to invite YOU to wow us with yours!

Easter-Pin-Party

The Easter-themed Year of Celebrations Pinterest party will be held this Sunday, March 30, and y’all are all cordially invited to join in!

Hosted by…

  • Amy from The Idea Room // Follow Amy on Pinterest
  • Amy from Positively Splendid That’s me! ;)  // Follow me on Pinterest
  • Cheryl from TidyMom // Follow Cheryl on Pinterest
  • Cindy from Skip to My Lou // Follow Cindy on Pinterest
  • Desiree from The 36th Avenue // Follow Desiree on Pinterest
  • Heather from Whipperberry // Follow Heather on Pinterest
  • Jen from Tatertots and Jello // Follow Jen on Pinterest
  • Kari Ann from Thistlewood Farms // Follow Kari Ann on Pinterest
  • Kellie from Nest of Posies // Follow Kellie on Pinterest
  • Kristi and Kelli from Lolly Jane // Follow Lolly Jane on Pinterest
  • Melissa from No. 2 Pencil // Follow Melissa on Pinterest
  • Mique from 30 Handmade Days // Follow Mique on Pinterest
  • Tauni from SNAP! // Follow Tauni on Pinterest

The monthly Year of Celebrations Pinterest Party is the place to find THE most comprehensive, inspiring Pinterest board on the block. Each and every month, we’ll be focusing on a different holiday or celebration, and this month is all about Easter!

Here are all of the details for how YOU can participate:

  • What: A Pinterest Party to celebrate all things Easter!

  • When: THIS Sunday, March 30 at 9 p.m. EST/ 8 p.m. Central/ 7 p.m. MST/ 6 p.m. PST

How you can participate:

  • Round up YOUR favorite Easter projects and recipes. Anything goes: crafts, decor, sweet treats, and more!
  • Follow the Year of Celebrations Pinterest board. 

  • When the party kicks off, tweet YOUR favorite Valentine’s Day project and/or link using the hashtag #yearofcelebrations. Helpful hint: We highly recommend putting the hashtag at the beginning of your tweet to ensure it doesn’t get cut off.
  • On Sunday, March 30, tune in at the appointed time and watch as we build a board full of amazing ideas – including yours! 
  • Be sure to follow along during the party to repin and comment on the board’s posts using the hashtag #yearofcelebrations.

We are so excited to PIN and SHARE all of your amazing projects!

See y’all there! 🙂

ONE LAST THING… I have an amazing $500 Instagram giveaway going on right now. Click HERE to check out all the info and enter to win…

instagram

Hello Spring Burlap Sign

2 · Feb 25, 2014 · 9 Comments

Spring Burlap Sign brought to you by Elmer’s Glue //  It’s almost here and I just can’t seem to get spring off my mind these days! The folks at Elmer’s challenged me to come up with a fun spring project and I was super excited to get busy working on it.  Not to long ago I attended the product launch event for the new Cricut Explore and all of the fun projects we saw at the event inspired this fun Hello Spring Sign…

Hello Spring Burlap Palette Sign from #whipperberry #elmersglue #explorecricut

 Doesn’t it just look cheery? Spring has no choice but to appear with this fun sign.

Everyone is still in love with burlap, and this new polka dot burlap that I found at Jo-Ann’s Fabrics I think is going to extend the life of the burlap trend. It is just so fun. I glued it onto a rustic palette wood board that I also found pre-made at Jo-Ann’s. Score on that one… I’ve made plenty of my own palette wood signs and it’s such a time saver to not have to build it yourself.  I topped it off with some Basic Grey Hey Girl paper, the graphic elements of the paper together with the burlap makes this sign just pop!

Now, I was super excited to try something new with one of Elmer’s glue sticks that I’ve been wanting to try. It’s their Elmer’s Xtreme School Glue Stick and it works like magic!! I would have to say I was a little skeptical, I, like many of you have been a little let down at times with the performance of glue sticks in the past. They just don’t have the chops for some projects. I thought for sure the glue stick wasn’t going to  be able to handle affixing the burlap to my palette sign, but sure enough it did. Not only that, it only took minutes rather than hours for the glue to dry and my sign was ready to work on in a snap… LOVE that! Needless to say, the Xtreme Glue Stick has won me over, it’s defiantly a case of “under promise, and OVER DELIVER.”  Here’s how I made my sign…

Hello Spring Burlap Sign Supplies

Hello-Spring-Sign-with-Elmers-Glue-#whipperberry-11

  • Elmer’s Xtreme School Glue
  • Elmer’s Glue Spots
  • Elmer’s Foam Mounting Squares & Dots
  • Basic Grey Hey Girl paper pack
  • Wood palette sign
  • 1/2 a yard of polka dot burlap
  • 10 mini brads
  • scissors
  • X-ACTO knife
  • X-ACTO self healing cutting mat
  • Cricut Explore (optional)

Hello Spring Burlap Sign Directions

Lay your palette sign on a flat surface and lay your burlap on top.

Hello-Spring-Sign-with-Elmers-Glue-#whipperberry-1

 Cut the fabric to roughly the size of the sign with about a 1 inch boarder around the board. Then center the burlap and using your Elmer’s Xtreme Glue Stick affix the burlap to the wood. I started on one slat at a time and in small 3-4 inch sections smoothing the burlap and I went along.

Hello-Spring-Sign-with-Elmers-Glue-#whipperberry-2

Wait for 15-20 minutes until the glue has completely dried. Next, you will trim your burlap. I used both an X-ACTO knife and scissors. Either one will work just fine. I did find that the scissors were a bit easier in certain places.

Hello-Spring-Sign-with-Elmers-Glue-#whipperberry-3

trimming-the-burlap

I was thrilled with how well the burlap trimmed up and my palette slats look fantastic with the addition of the burlap.

burlap-sign

Next, I cut out my pinwheels on my Cricut Explore,

cutting-pinwheels-with-my-Cricut-Explore

NOW, I know that the Cricut Explore isn’t available until March 15th, soooo… You can cut basic pinwheels using this great tutorial from First Palette.  I used Elmer’s Glue Spots to secure the pinwheels and then dressed them up with a mini brad in the center. Then I used the Elmer’s Foam Mounting Square to affix the pinwheels to the sign…

adding-the-pinwheels

Next, I cut my lettering using a couple of my favorite fonts on my Cricut Explore. The fonts are League Gothic and Suburbia. League Gothic is a pretty standard font, but Suburbia will be available in the Cricut Design Space once that is launch on February 27th.  Now, if you don’t have a Cricut or a Silhouette to cut your letters, you can always print them out from your computer and cut them out with your X-ACTO knife. That’s super slick as well. So… choose whatever font you would like for the Hello Spring and select your paper for the words.

Next, I affixed the letters to the burlap sign with my Elmer’s Foam Mounting Squares…

Hello-Spring-Sign-with-Elmers-Glue-#whipperberry-4

 I LOVE these mounting squares, they give your letters a 3D effect which just adds more dimension to the sign…

Hello-Spring-Sign-with-Elmers-Glue-#whipperberry-7

Isn’t that fun?! Once you have everything mounted to the sign, you’re finished! I added it to my giant frame in my living room to update it for the season…

Hello-Spring-Sign-with-Elmers-Glue-#whipperberry-10

Isn’t that a fun project that will brighten up any space? You can use it for any kind of saying, the polka dot burlap comes in a bunch of different colors and the skies the limit as to what you can create with that! One of my Creative team, Jenn from My Fabuless Life even used it to dress up some old folding chairs. All you need to do now is head over to JoAnn’s, stock up on supplies and get busy, you’ll have a fun new sign in just a couple of hours!

Disclaimer // I am a member of the 2014 Elmer’s Craft it Crew and received product and compensation for this post.  Please keep in mind… I will only endorse products and brands that I believe in 100% and use in my day to day life!

Trendy Black & White Valentines Day Printables FREE

24 · Jan 30, 2014 · 13 Comments

 // Valentines Day Printables FREE from WhipperBerry to help dress-up your home for the special day! // 

WhipperBerry-Valentine's-Day-Printables

I love dressing up for the holidays, but I don't like to go over the top. Valentine's Day is one of those holidays that sometimes can get a little too pink and frilly for me. Some years I'm totally into it, other's I'm not. It just depends on the year.

This year I'm into it, but I was wanting some decor that had some class, maybe a little edge to it… Not so sappy sweet. I decided that creating some printable art work was the ticket and with a few other added elements could create a fun Valentine's Day display…

WhipperBerry-Valentine's-Day-Printables-2

I'm LOVING the black & white trend these days, especially the black & white stripes. I thought it could  be a stylish backdrop to some fun love notes to display. I printed them and put them in some $3.99 frames from Target (they don't seem to have them online, but… I promise they are in the store) and then went to work creating a display to fit the mood.

WhipperBerry-Printable-Heart-Valentine's-Day-sign

Click HERE to download the image files!

I wrapped a wire floral wreath in yarn and dressed it up with some fun decorative tacks that I found at Hobby Lobby. PERFECT!! I added a smaller heart print in a decorative Nate Berkus frame from Target and it looked wonderful!

WhipperBerry-Valentine's-Day-Printables-11

Click HERE to download the 4×6 Heart Print!

​I took my favorite deer silhouette and antler candle sticks and wrapped them with yarn as well.

WhipperBerry-Valentine's-Day-Printables-5

That added a little spunk and tied the whole display together. Then I printed a fun TRUE LOVE black & white printable banner to dress-up the mantle…

WhipperBerry-Valentine's-Day-Printables-12

It turned out so cute! I just love the simple, understated polka dots with the bold stripes!

WhipperBerry-Valentine's-Day-Printables-9

WhipperBerry-True-Love-Printable-Banner

Click HERE to download the TRUE LOVE Banner!

I also have a black & white stripe alphabet that I created for Skip to My Lou earlier this month. It's super cute and it has the entire alphabet so you can create any saying you want!!

Valentine's Day Printable Banner-10A-B-Valentine-Alaphabet-Banner-from-WhipperBerry

Click HERE to download the Black & White Stripe Alphabet Banner!

All kinds of fun printable goodies! What do you have in the works for Valentine's Day? Need even more ideas? Here are some Valentine post from the archives…

WhipperBerry-Valentine's-Day-Ideas

Heart Attack Printables // Heart Crayon Valentines // Red Velvet Pancakes with Buttermilk Syrup

  • « Go to Previous Page
  • Page 1
  • Page 2
  • Page 3
  • Page 4
  • Page 5
  • Page 6
  • Interim pages omitted …
  • Page 9
  • Go to Next Page »

Primary Sidebar

Heather from Whipperberry
Hello... my name is Heather and I'm the creator of WhipperBerry a creative lifestyle blog packed full of great recipes and creative ideas for your home and family. I find I am happiest when I'm living a creative life and I love to share what I've been up to along the way... Come explore, my hope is that you'll leave inspired!

Footer

  • Privacy Policy
  • Crafts
  • Food
  • Gifts
  • Holidays
  • Home
  • Mom Life
  • Recipes
  • Travel

Copyright © 2026 · Seasoned Pro