Home dining rooms are beginning to feel less like a showroom and more like the nicest table at a favorite neighborhood eatery. That transition came quietly. It did not include a single viral furniture piece or a designer asking everyone to throw away their formal dining sets.
It snuck in through subtler decisions, such as a curving bench against the wall, a café-style round table near the kitchen, dark pendant lighting, upholstered chairs that encourage longer conversations, and mixed seating that appears to have been purchased in stages.
For many years, the dining room was expected to behave. It featured a matching table and chairs, reliable lighting, and an air of occasion that often made the place feel too formal for regular use. Families passed it more frequently than they utilized it. Guests appreciated it, but no one really settled in.
That is why the language of restaurant design is showing up inside private homes. People are not copying restaurants directly. They are borrowing the feeling of a space that invites comfort, movement, conversation, and repeated use.
Homeowners are now borrowing the emotional intelligence of restaurant designers. They desire dining areas that are intimate, adaptable, warm, and functional. They want home dining rooms that are suitable for morning coffee, schoolwork, takeaway nights, vacation dinners, wine with friends, and quiet Sunday lunches. In other words, they want the dining room to cease acting and begin living.
The End of the Untouched Dining Room
The old formal dining room had a strange problem: it was designed to be impressive, but not necessarily inviting. Everything matched. Everything had its place. The table was large enough for events that happened only a few times a year, while the everyday meals moved to the kitchen island, the sofa, or anywhere else that felt easier.
Restaurant-inspired design changes that relationship completely.
A restaurant does not have the luxury of creating a room that looks beautiful but feels stiff. Every seat has to earn its place. Every corner has to support movement, comfort, visibility, and atmosphere. When that thinking enters the home, the dining room becomes less precious and more practical.
The trend is not about literally copying a restaurant. Nobody needs a host stand near the entry or a service station beside the sideboard. The deeper idea is about designing for actual behavior. Where do people naturally gather? How long do they sit? Does the lighting in the room flatter the room after sunset? Can someone slide in easily with a plate? Does the space feel special without feeling untouchable?
That is why banquettes, benches, bistro tables, café chairs, wall seating, and layered lighting are appearing in homes that once would have chosen a traditional dining set by default.
Why Restaurant Seating Feels So Right at Home
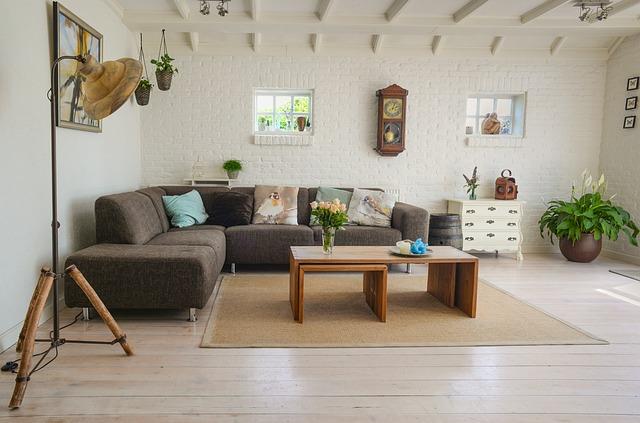
The biggest change is in the seating. Homeowners are shifting away from the strict group of six matching chairs, opting for combinations that seem more personal. One side of a bench. With upholstered chairs on the ends. Slim wood chairs at the table. A curved banquette in a corner. The effect seems familiar because restaurants have indoctrinated us to regard mixed seating as comfort rather than compromise.
The shape of the seats at a restaurant affects the mood before the first order is placed. A booth is private. Banquettes are social. A circular table is for discussion. It’s a fun, casual setup at bar height. Today, homeowners are employing those same signals for dining rooms, breakfast nooks, and open-plan kitchen areas.
This is especially helpful in smaller homes, apartments, and townhouses, where every square inch counts. A built-in bench or banquette can be placed against a wall to provide the illusion of more space while providing ample seating for guests. It also softens the area, especially when combined with cloth, leather, textured cushions, or warm wood.
And there’s a psychological reason it works, too. One of the easiest ways to make customers feel cared for is through restaurant seating. A booth surrounds the body. The backrest is curved for support. A padded bench encourages people to linger. When those nuances enter the home, dinner becomes less of a scheduled routine and more of a tiny daily ritual.
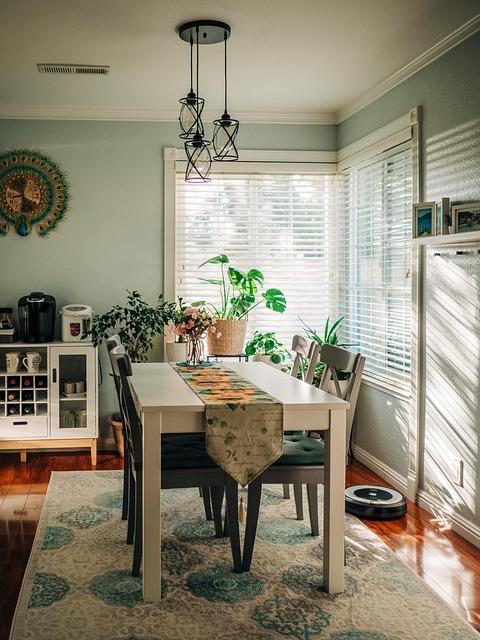
The Café Corner Becomes the New Dining Room
One of the strongest versions of this trend is the rise of the café corner. Instead of building the room around a large rectangular table, homeowners are creating smaller, more atmospheric dining zones. A round table beside a window. Two comfortable chairs under a pendant light. A bench tucked into a kitchen corner. A narrow table placed against a wall with art above it.
The effect is immediate. The room feels more intimate, more European, and more useful.
A café-style dining corner does not need much space to feel complete. In fact, part of its charm is scale. It understands that most meals are not grand events. They are breakfasts before work, quick lunches, late-night snacks, and slow conversations that happen without planning.
A few details make the look work especially well:
- A round or small rectangular table that keeps conversation close
- Upholstered, wood, or metal seating with a commercial-inspired feel
- Warm pendant lighting is placed low enough to create an atmosphere
- Wall art, mirrors, or shelving that gives the area personality
- Durable surfaces that can handle daily use without looking fragile
This is where restaurant design becomes quietly powerful. It teaches the home that a dining space need not be large to feel important. It only has to feel intentional.
Lighting Is Doing More Emotional Work
Restaurant designers know lighting better than virtually anyone. Bad lighting can make fine cuisine look flat, great furniture look cold, and a bustling space feel uncomfortable. A well-placed light may turn a plain table into a place to go.
That lesson is being learned in home dining rooms.
Layered lighting is replacing or softening bright overhead lamps. In the room, pendant lights, sconces, shaded lamps, dimmers, and warmer bulbs are becoming key. Rather than uniformly lighting the entire space, homeowners are generating pockets of warmth around the table.
That restaurant-like glow influences behavior. People are living longer. The food looks better. The conversations seem calmer. Even a weeknight supper can feel like it’s in a more thoughtful time of day.
This is important since dining rooms are no longer judged on how they look at midday. They operate in the evening, when the house is slowing down, and the room has to carry the vibe. A great chair or table might disappear in terrible lighting, but even modest pieces of furniture can look elevated when the lighting is soft, focused, and warm.
Durability Is Becoming Part of the Look
For a long time, home dining furniture leaned heavily on appearance. The question was simple: Does it match the room? Restaurant-inspired design adds a better question: can it survive the way people actually live?
That is why durable finishes, easy-clean upholstery, metal frames, solid wood, laminate tops, and commercial-style construction are finding their way into residential spaces. Homeowners are tired of furniture that looks delicate, scratches easily, stains quickly, or feels too fragile for children, pets, guests, and daily meals.
Restaurant design makes durability look stylish instead of purely practical. A metal chair can feel graphic and modern. A wood table with a sturdy base can feel grounded. A vinyl or performance-fabric seat can look polished while still being easy to wipe down. A pedestal table can improve movement in a compact room.
The home dining room is becoming less about preserving furniture and more about using it to its full potential. That is a major cultural change. People want homes that support hosting, remote work, family routines, hobbies, and casual gatherings. Dining furniture now has to carry more of that weight. It cannot only be beautiful on delivery day. It has to keep showing up.
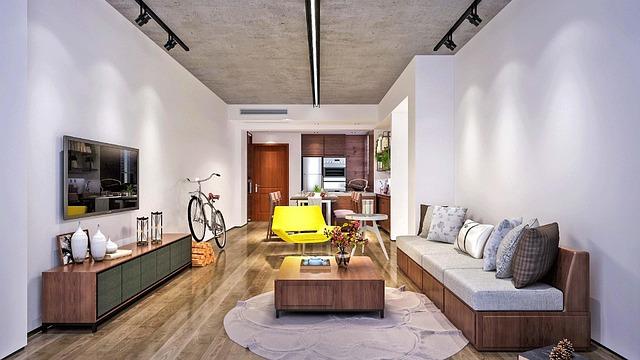
The New Dining Room Feels Collected, Not Matched
Perhaps the most charming part of this trend is its rejection of perfect matching. Restaurant-inspired homes often feel layered, as if the pieces came together over time. A vintage-style chair beside a modern table. A built-in bench with loose cushions. A sculptural pendant over a simple top. A dark wood finish paired with lighter upholstery. This collected look feels more human.
Restaurants have long used this approach to create mood. The best spaces rarely feel like every item came from one catalog page. They mix texture, height, color, material, and shape to create memory. Homes are now doing the same because people want dining rooms with character, not just coordination.
That does not mean the room should feel random. The strongest spaces still have a clear visual thread. Maybe it is a warm wood tone, a repeated metal finish, a shared color palette, or a balance between soft and structured pieces. The goal is not disorder. The goal is personality. A dining room should look like people belong there before they even sit down.
A More Useful Kind of Beauty
The restaurant design trend that is sweeping home dining rooms isn’t truly about restaurants. It is about function, comfort, and environment, finally becoming part of what homeowners find beautiful.
A space used every day has a certain kind of elegance. It transports coffee cups, dinner plates, laptops, flowers, birthday cakes, school papers, and late-night talks. It varies with the hour. It invites people in rather than instructing them to behave around the furniture.
That is why this tendency is likely to continue. It solves an actual problem. It restores the dining room’s original purpose.
The most desirable home dining rooms right now don’t feel formal, frozen, or overly adorned. They feel alive. They incorporate the comfort of a beloved café, the intimacy of a booth, the functionality of professional furnishings, and the rich light of a well-designed restaurant.
For homeowners, this could be the most important lesson. The greatest dining room is not one that is reserved for exceptional occasions. It is the one who elevates regular meals into something worth sitting down for.