Baked Pear Crisp Recipe // Hello Whipperberry Readers! Jenn here again from Clean and Scentsible. I hope you have all had a good month and, for those of you covered in all of that snow, I hope that you have managed to stay warm and cozy. Spring just can’t get here soon enough for me!
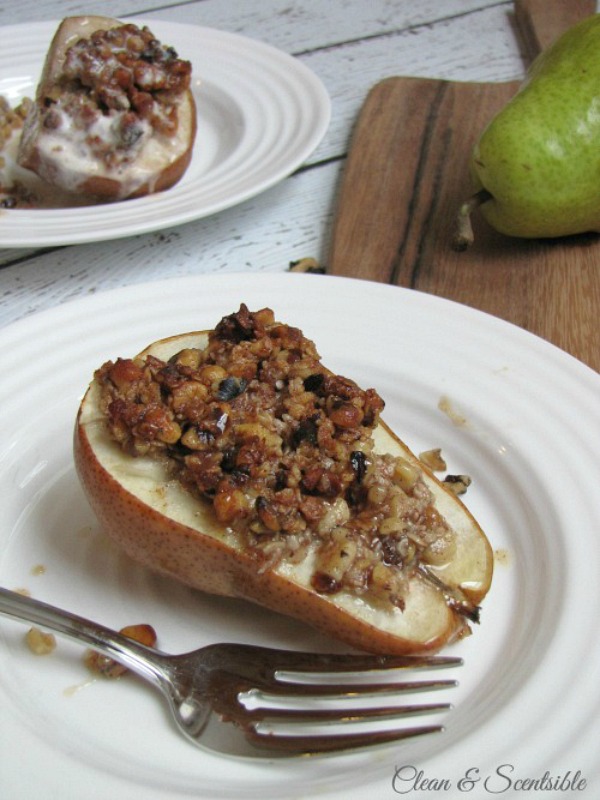
Today I wanted to share one of my new favorite treats with you – this quick and easy pear crisp. It is a great way to warm up on a cold winter’s night and is oh so tasty!
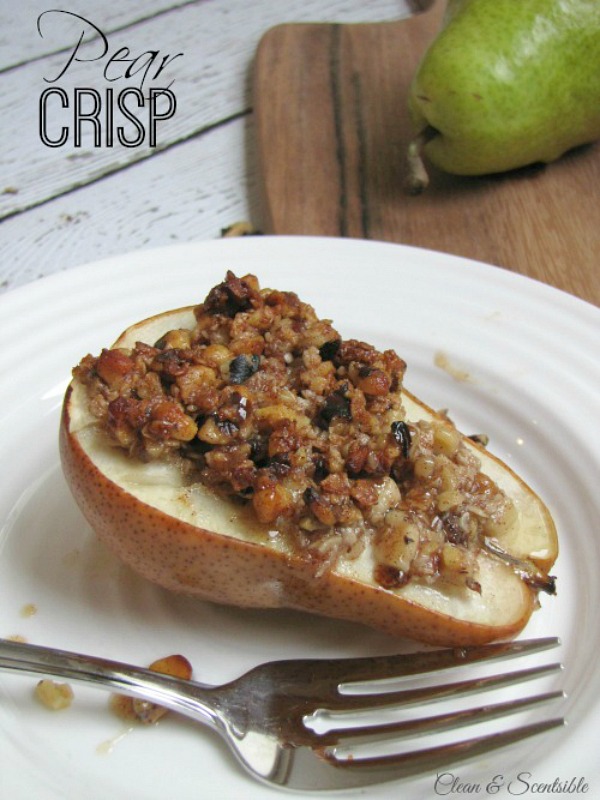
I have always been a big fan of fruit crisps and this one only takes a few minutes of prep time and has such a pretty presentation. Although this recipe can be done with apples as well, I have really been loving the pears and it provides a nice switch from the old standard.
INGREDIENTS
- 2 firm but ripe Bartlett pears {I did not peal them but you could if you prefer}
- 1/2 cup chopped pecans
- 3 tbsp. quick cooking oatmeal
- 3 tbsp. honey
- 3 tbsp. cold unsalted butter
- 1/4 tsp cinnamon
- 1/4 tsp. salt
Directions
- Preheat the oven to 375 F.
- Cut pears in half lengthwise, and use a teaspoon to scoop out the core.
- Grease bottom of a small glass or ceramic ovenproof baking dish with butter. Place the pears cut side down in the dish and bake for approximately 15 minutes.
- While the pears are baking, combine the pecans, oatmeal, honey, butter, cinnamon, and salt in a bowl using your fingers to combine.
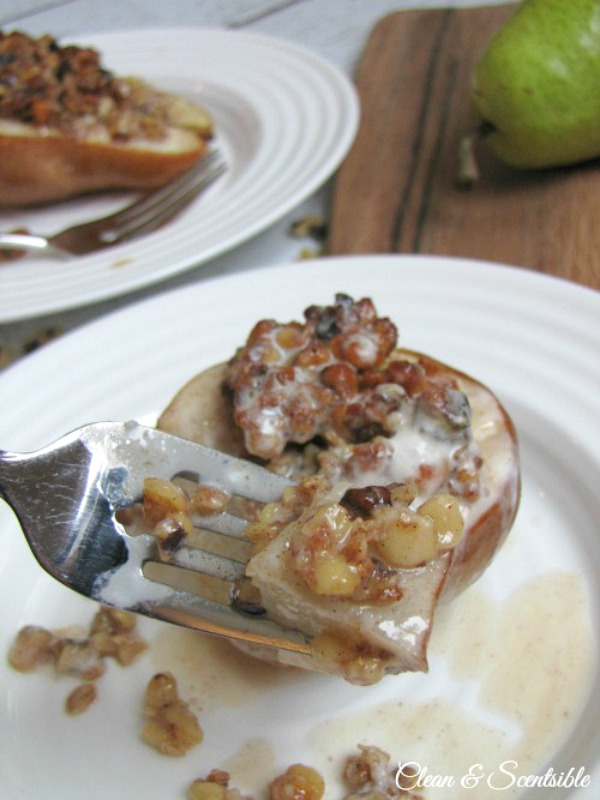
- Divide the crumble into 4 portions. Pack into each pear half and over the top. Place the pears back in the dish (this time cut side up) and bake for an additional 15-20 minutes until the crumble is browned and the pear cuts easily with a fork.
- Top with whipping cream, vanilla ice cream or Greek yogurt as desired.
They are SO tasty and relatively easy on the calories. I hope you are able to give them a try!

- 2 firm but ripe Bartlett pears {I did not peal them but you could if you prefer}
- ½ cup chopped pecans
- 3 tbsp. quick cooking oatmeal
- 3 tbsp. honey
- 3 tbsp. cold unsalted butter
- ¼ tsp cinnamon
- ¼ tsp. salt
- Preheat the oven to 375 F.
- Cut pears in half lengthwise, and use a teaspoon to scoop out the core.
- Grease bottom of a small glass or ceramic ovenproof baking dish with butter. Place the pears cut side down in the dish and bake for approximately 15 minutes.
- While the pears are baking, combine the pecans, oatmeal, honey, butter, cinnamon, and salt in a bowl using your fingers to combine.
- Divide the crumble into 4 portions. Pack into each pear half and over the top. Place the pears back in the dish (this time cut side up) and bake for an additional 15-20 minutes until the crumble is browned and the pear cuts easily with a fork.
- Top with whipping cream, vanilla ice cream or Greek yogurt as desired.
If you get a chance, I would love for you to drop by the blog and say hello! This month I have been busy cleaning and organizing our kitchen…

How to Create a Cleaning Binder {with free printables}
How to Clean and Organize Your Kitchen
Thanks so much to Heather for having me! Have a wonderful day!