• Skip to primary navigation
  • Skip to main content
  • Skip to primary sidebar
  • Skip to footer

Whipperberry

WhipperBerry • Your Home For Creative Inspiration

  • Home
  • Recipes
    • Starters
    • Easy Weeknight Dinners
    • Main Dish
    • Salads
    • Side Dish
    • Soups & Stews
    • Desserts
    • Breakfast
    • Miscellaneous
  • Tutorials
    • Creative Crafts
    • DIY Decor
    • Fabric Crafts
    • Food How-To
    • Jewlery
    • Paint Projects
    • Paper Art
    • Party Styling
    • Photography and Graphic Design
    • Silhouette
  • Holidays
    • Easter
    • Mother’s Day
    • Father’s Day
    • 4th of July
    • Halloween
    • Thanksgiving
    • Christmas
    • Valentine’s Day
  • Gift Ideas
    • Gifts For Everyone
    • Gifts for Dad
    • Mother’s day
    • For The Girls
    • For The Kids
    • Teacher Gift Ideas
    • Christmas
  • Printables
    • Holiday
    • Gift Idea
    • LDS Primary
  • Travel
  • About
    • Terms
  • Contact
  • Nav Social Menu

    • Facebook
    • Instagram
    • Pinterest
    • RSS
    • Twitter

Crafts

Dress-up Your Dinnerware with DecoArt

0 · May 15, 2013 · 11 Comments

Tired old dinnerware… Dress it up with DecoArt

Dress up your dinnerware with DecoArt

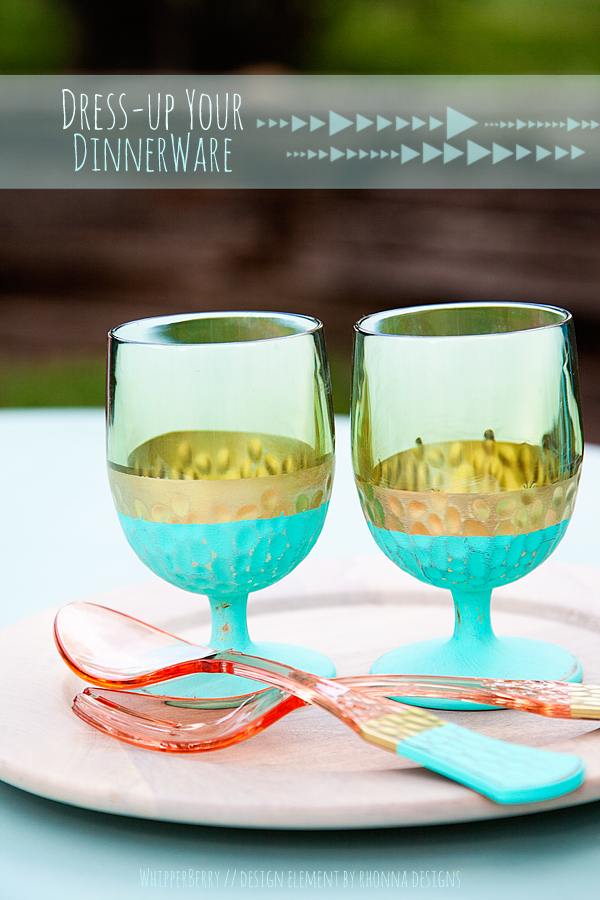
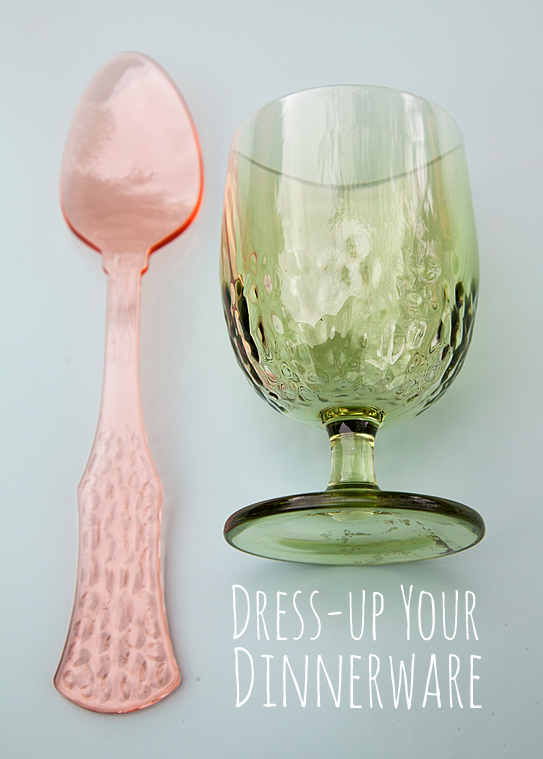
So the other day, I was on a date with my sweetheart and we were walking through Target (yes, it was a glamorous Target date) and I found these fun summer dinnerware items that had some really great texture to them. They were also on clearance, total score. I thought they would look lovely with a little hint of gold and a touch of Americana Sea Breeze…

Dress-up your dinnerware

Supplies

  • Some dinnerware that needs some dressing up.
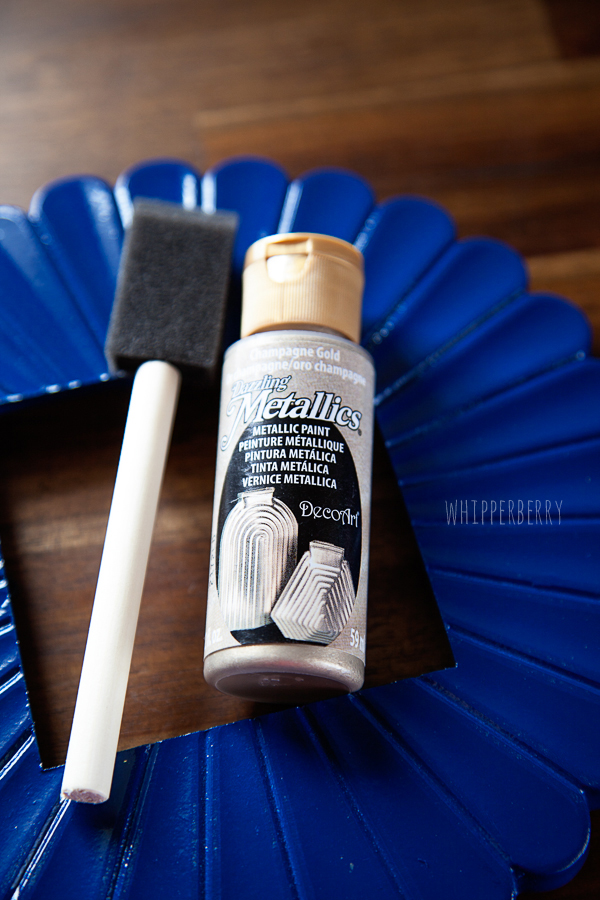
  • Gold spray paint – I used Krylon Premium Gold
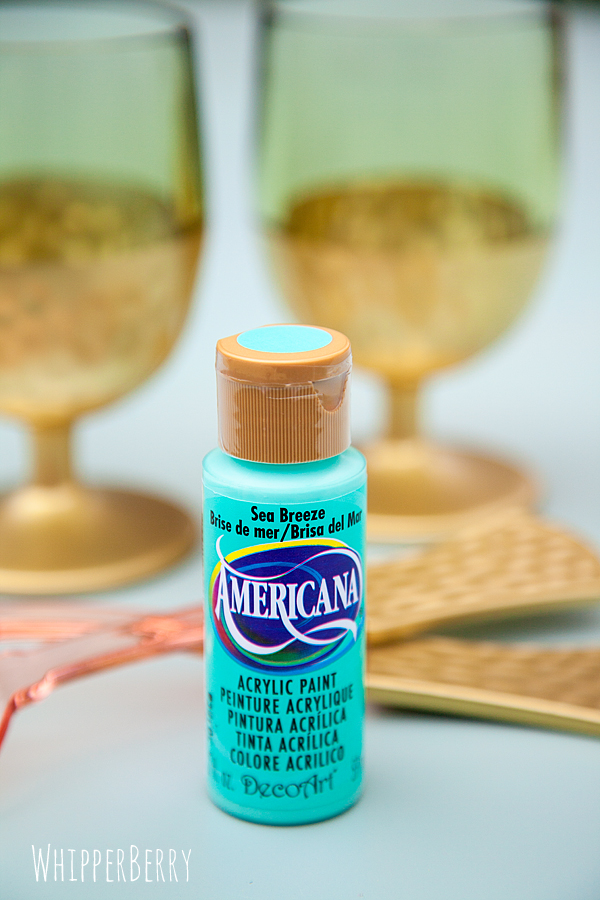
  • DecoArt Americana Acrylic – Sea Breeze ​

DecoArt Americana Sea Breeze

  • Painters Tape
  • Plastic Wrap
  • Sponge brush
  • Fine grit sand paper 

Instructions

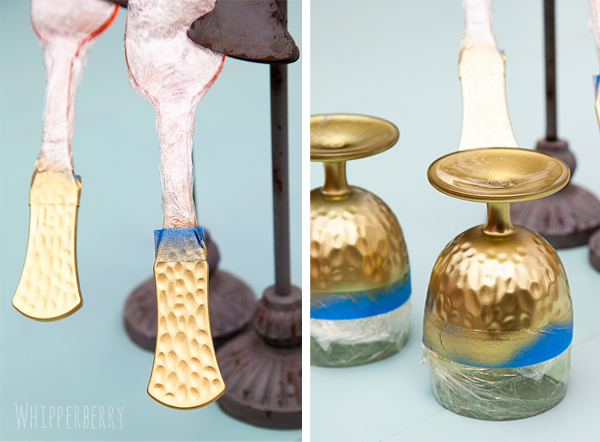
To begin, you need to mask all of the portions of your piece that you don't want painted. I only wanted to paint the handles of the salad spoons and the bottom of the goblets so I masked off a good portion of the items with plastic wrap and painters tape.

Use plastic wrap to mask your surface before painting

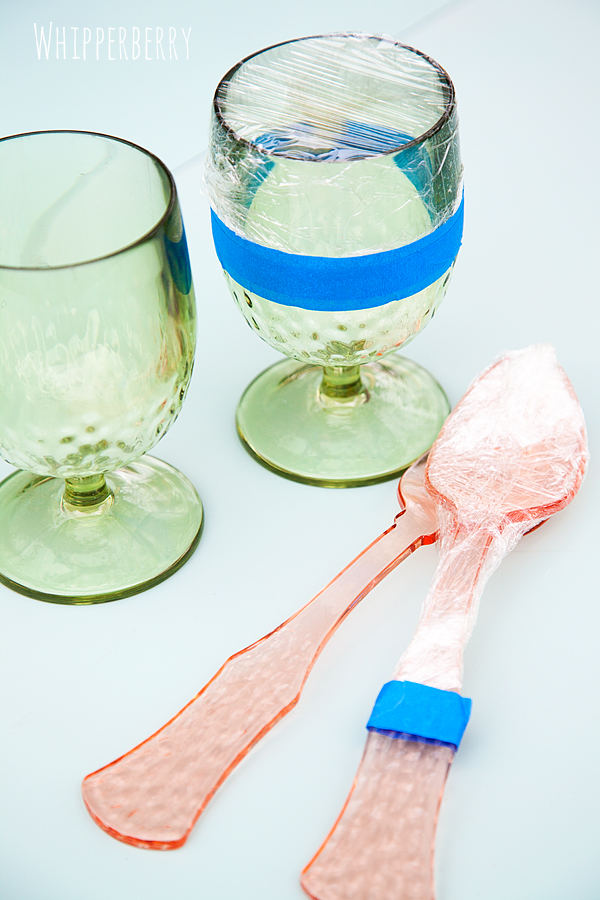
Use the painters tape to create a a clean line for the spray paint. Next, use the gold spray paint and spray paint the selected areas of your piece.

Spray with gold Krylon spray paint

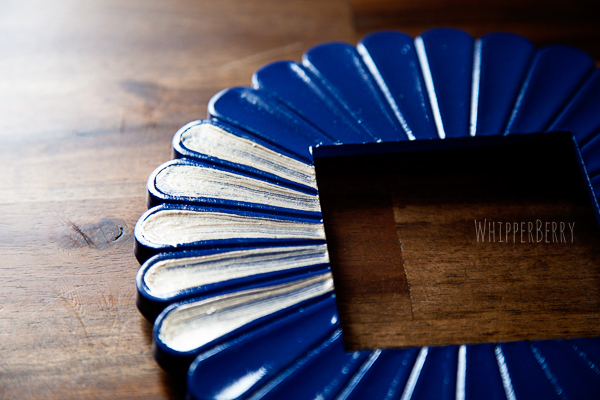
I decided to use spray paint because I didn't want any brush lines in the gold portion of the project. I wanted it to look as much like metal as possible. Once the paint was dry, I taped it off again to create another line for the Sea Breeze paint with a little of the gold peaking out. Now for this layer of paint I didn't mind the brush lines. I wanted it to be rough and look like a fine almost coppery patina.

Use painters tape to create clean lines on our cup

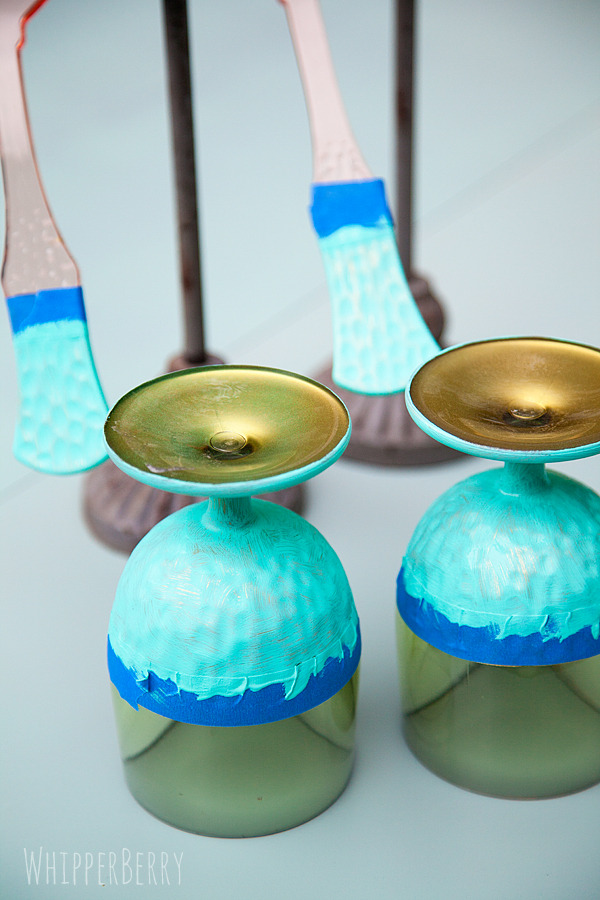
When the paint was dry I the sanded it lightly with super fine grain sand paper to show off the fabulous texture. It almost looks like aged copper. I love it!

Fun textures with DecoArt paint

It really adds a fun look to these simple and inexpensive dinnerware items. Make sure you hand wash them from this point, but they should last for quite some time and add a fun look to your summer table.

Dressed-up dinnerware with DecoArt

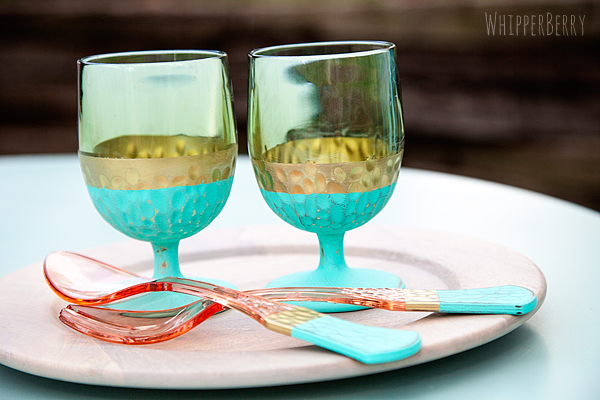
This is a fun project that you could even do with your kiddos this summer. Find some fun and inexpensive dinnerware or picnic items and let the kiddos go to town.

The Ultimate Washi Tape Giveaway

0 · May 13, 2013 · 186 Comments

Are you as OBSESSED with Washi Tape as we are? Silly question, right?!! Of course you are! I am so excited to team up with some of my favorite bloggers to bring you the Ultimate Washi Tape giveaway! We will be giving away 50, yes, FIFTY rolls of WASHI TAPE! {go ahead and do a happy dance, we'll wait here for you!} Washi tape is one of the hottest products around! You've probably seen it all over Pinterest. Well, now is your time to get your hands on 50 rolls of this coveted tape! Its the perfect way to start your collection…or if you're already a Washi Hoarder, a fantastic way to fuel your addiction!

Washi Tape Giveaway

washi tape giveaway Can you imagine having 50 rolls of adorable decorative tape to plaster all over your crafts, cards, buntings, and, umm, house? Yeah, we thought so! We know how much we love Washi Tape, so we thought we'd share the love with our favorite readers…..YOU!!

A HUGE shout out to Downtown Tape for providing the Washi Tape prize for this giveaway! Downtown Tape carries so many different patterns of washi tape, your head will spin! They have everything from; stripes to polka dots to florals to random prints. You're sure to find washi tape to fit your needs at Downtown Tape!

Meet the bloggers behind the Washi Tape Giveaway!

craftaholics Anonymous   ———————————————————————————————————– whipperberry   ———————————————————————————————————– iheartnaptime_logo   ———————————————————————————————————– eighteen25   ———————————————————————————————————– the 36th avenue ———————————————————————————————————–

The Ultimate Washi Tape Giveaway

Use the giveaway widget below to enter the giveaway…..it may take a second to load! NOTE: You only need to enter the giveaway on 1 blog. We are all using the same giveaway widget 🙂  a Rafflecopter giveaway Good luck!!   **Please note: The washi tape prints in the giveaway prize may vary from those pictured in this post.** *This promotion is in no way sponsored, endorsed or administered by, or associated with, Pinterest. We hereby release Pinterest of any liability. The giveaway sponsor, Downtown Tape, will ship the prize within 14 days of the end of the giveaway. Giveaway starts Monday, May 13th at midnight pm EST and ends Sunday, May 19th at midnight EST. Once the giveaway ends, winner will be chosen at random using Rafflecopter and contacted within 24 hours by email. This post will be updated with winners’ names once we’ve heard back from them. Winners will need to respond within 72 hours to claim their prize or another winner will be chosen. Open to U.S. residents only. Must be 18 years old or older to enter.*

Spring Wreath DIY // Vintage Vignette // Whatever Craft Weekend Part II

3 · May 2, 2013 · 12 Comments

Spring Wreath DIY // WOWZA that's quite a bit to have all in one post!! I have been working on my Spring Vignette for a little bit. Gathering treasures and such, tweaking and rearranging. I finally have a fun grouping to share with you today that's inspired by my Whatever Craft Weekend. Of course it starts with my Winter White Wreath that I will be using all year. I've used it for Christmas, The New Year, Valentine's Day and now I've updated it for Spring!

Spring Wreath from WhipperBerry

All I did was add some fancy yarn and a fabric banner to the wreath. The fabric garland was made by my friend Amy from Ameroonie Designs. I had been trying to find time to put together a fabric garland for the wreath and just hadn't found the time. Luckily, Amy was handing little fabric garlands out to her customers at the Queen Bee Market last month at SNAP and I was sooooo excited… I didn't have to worry about that element anymore! Not that they are hard to make, the issue for me would be to find my sewing machine in the sea of boxes still in my garage. We are in a temporary home right now, so there is no need to unpack everything. Thanks Amy for the rescue!! 

Now, for the full vignette. It was inspired by my Whatever Craft Weekend… Yes, I will be trying to live in that fabulous weekend for the rest of my life I think. Almost everything in the display came from that magical weekend…

Spring Vingnette from WhipperBerry

Isn't it cheerful and fun?! Part of the Whatever Craft Weekend is a fun Junking trip. Meg & Kimberlee have some amazing treasure troves that they share with all of their guest and I had a ball finding all kinds of goodies. 

Lunch at the barn Whatever Craft Weekend

Here are Ashley, Mique, Kristi, Pam and several other friends on our junking tour, Kristi is going ga gah over all the amazing wood available at this amazing junk barn!

I curated a group of fun smaller items like these…

WhipperBerry typewriter

Many of these goodies made it into my vignette… and, I even found a large item that I am head over heels in love with.

shopping at the barn whatever craft weekend

Check out that lovely, chippy bench that Ashley is testing out… yep, it came home with me!! Several friends found some amazing quilts in our antique tour. All of them just divine. I'm not sure if there is anything more fun than junking with several fun friends!

Back to my Whatever Vignette… Here are some of my little elements…

Vintage Typewriter with sign from Katy Girl Design

This typewriter was one of my favorite finds… it was only $30, a total deal! I've paired it with my sign from Katy Girl Designs. You have to run over and check out Katy's shop. Its lovely!!

Vintage Canon Camera

Next, I have a fun biscuit tin as a base for my vintage fan and Canon camera. The camera belonged to my Grandfather and I love having it out on display. It reminds me of his curiosity and love of life and it makes me happy to see it sitting there all day.

antique glass with felted foxes felt balls

I have always been in love with felted balls and have made many projects with them, but I was dying when we opened a whole package from FeltedFoxes during our craft time at Meg's.  I've made felt balls… I even have a tutorial on how to make them. They aren't easy and take quite a bit of time and effort to  make. I think I will just order them from now on from FeltedFoxes and save the time and effort! I love how they look in my emerald Depression Glass… just stunning!

Create sign from Little Branches

I LOVE my new Little Branches CREATE sign. It's just so perfect for my house. I love the colors and the gold accents! It's just so cheery!

Vintage Kodak Camera

I used  fabric in old embroidery hoops to add color and texture to the display and peppered in more cameras from my vintage camera collection.   I'm just so in love with this display. It may stay up for a few months while I soak in all the vintage goodness!

Spring Vingnette from WhipperBerry

Are you a junker? What do you like to collect?

Gold Accent Picture Frame with DecoArt Dazzling Metallics

1 · Apr 30, 2013 · 4 Comments

Gold Accented Picture Frame with DecoArt // I have fallen in LOVE with gold accents! They seem to be all the rage right now, and I am totally jumping on  the trend bandwagon. Yesterday I had the opportunity to take DecoArt’s Dazzling Metallics for a test drive while I dressed-up an old picture frame…

DecoArt Dazzling Metallics Gold Accented Frame-3

I had this old frame from Target that I had spray painted blue (another new fav) but it needed a little extra love. Recently I had added some gold accents to an old wood bowl and thought it would be fun to dress-up the frame the same way. The lovely part of this project is that it was soooo easy! You know me, nothing too challenging here. I chose DecoArts Dazzling Metallics Champagne Gold for my paint and set to work…

DecoArt Dazzling Metallics Gold Accented Frame-1

The frame has flower like petal grooves that were carved out and would act as a perfect natural place for a gold petal accent. Carefully, I filled in the grooves with the metallic paint…

DecoArt Dazzling Metallics Gold Accented Frame-2

That’s all there was to it. I filled in all the grooves and let it dry and then added a second coat. After a few hours of drying time, my new frame was ready for display!

DecoArt Dazzling Metallics Gold Accented Frame-3

I added one of my favorite Instagram photos of my sweet Emily and her friend and put it on display with my gold accented bowl. They make a perfect pair!

Do you have anything laying around the house that could use a little gold pick me up? You’ll be surprised how much it can add to a room! And if you happen to have real gold items — maybe old jewelry or décor pieces — and you’re curious how much your gold is worth, you can use this scrap gold calculator to estimate its value before upcycling or repurposing it! Check out DecoArts full line of Dazzling Metallics for all kinds of inspiration.

  • « Go to Previous Page
  • Page 1
  • Interim pages omitted …
  • Page 28
  • Page 29
  • Page 30
  • Page 31
  • Page 32
  • Interim pages omitted …
  • Page 43
  • Go to Next Page »

Primary Sidebar

Heather from Whipperberry
Hello... my name is Heather and I'm the creator of WhipperBerry a creative lifestyle blog packed full of great recipes and creative ideas for your home and family. I find I am happiest when I'm living a creative life and I love to share what I've been up to along the way... Come explore, my hope is that you'll leave inspired!

Footer

  • Privacy Policy
  • Crafts
  • Food
  • Gifts
  • Holidays
  • Home
  • Mom Life
  • Recipes
  • Travel

Copyright © 2026 · Seasoned Pro