• Skip to primary navigation
  • Skip to main content
  • Skip to primary sidebar
  • Skip to footer

Whipperberry

WhipperBerry • Your Home For Creative Inspiration

  • Home
  • Recipes
    • Starters
    • Easy Weeknight Dinners
    • Main Dish
    • Salads
    • Side Dish
    • Soups & Stews
    • Desserts
    • Breakfast
    • Miscellaneous
  • Tutorials
    • Creative Crafts
    • DIY Decor
    • Fabric Crafts
    • Food How-To
    • Jewlery
    • Paint Projects
    • Paper Art
    • Party Styling
    • Photography and Graphic Design
    • Silhouette
  • Holidays
    • Easter
    • Mother’s Day
    • Father’s Day
    • 4th of July
    • Halloween
    • Thanksgiving
    • Christmas
    • Valentine’s Day
  • Gift Ideas
    • Gifts For Everyone
    • Gifts for Dad
    • Mother’s day
    • For The Girls
    • For The Kids
    • Teacher Gift Ideas
    • Christmas
  • Printables
    • Holiday
    • Gift Idea
    • LDS Primary
  • Travel
  • About
    • Terms
  • Contact
  • Nav Social Menu

    • Facebook
    • Instagram
    • Pinterest
    • RSS
    • Twitter

Cricut

How to Make Stylish Fabric Banners with the Cricut Maker

7 · Feb 26, 2018 · Leave a Comment

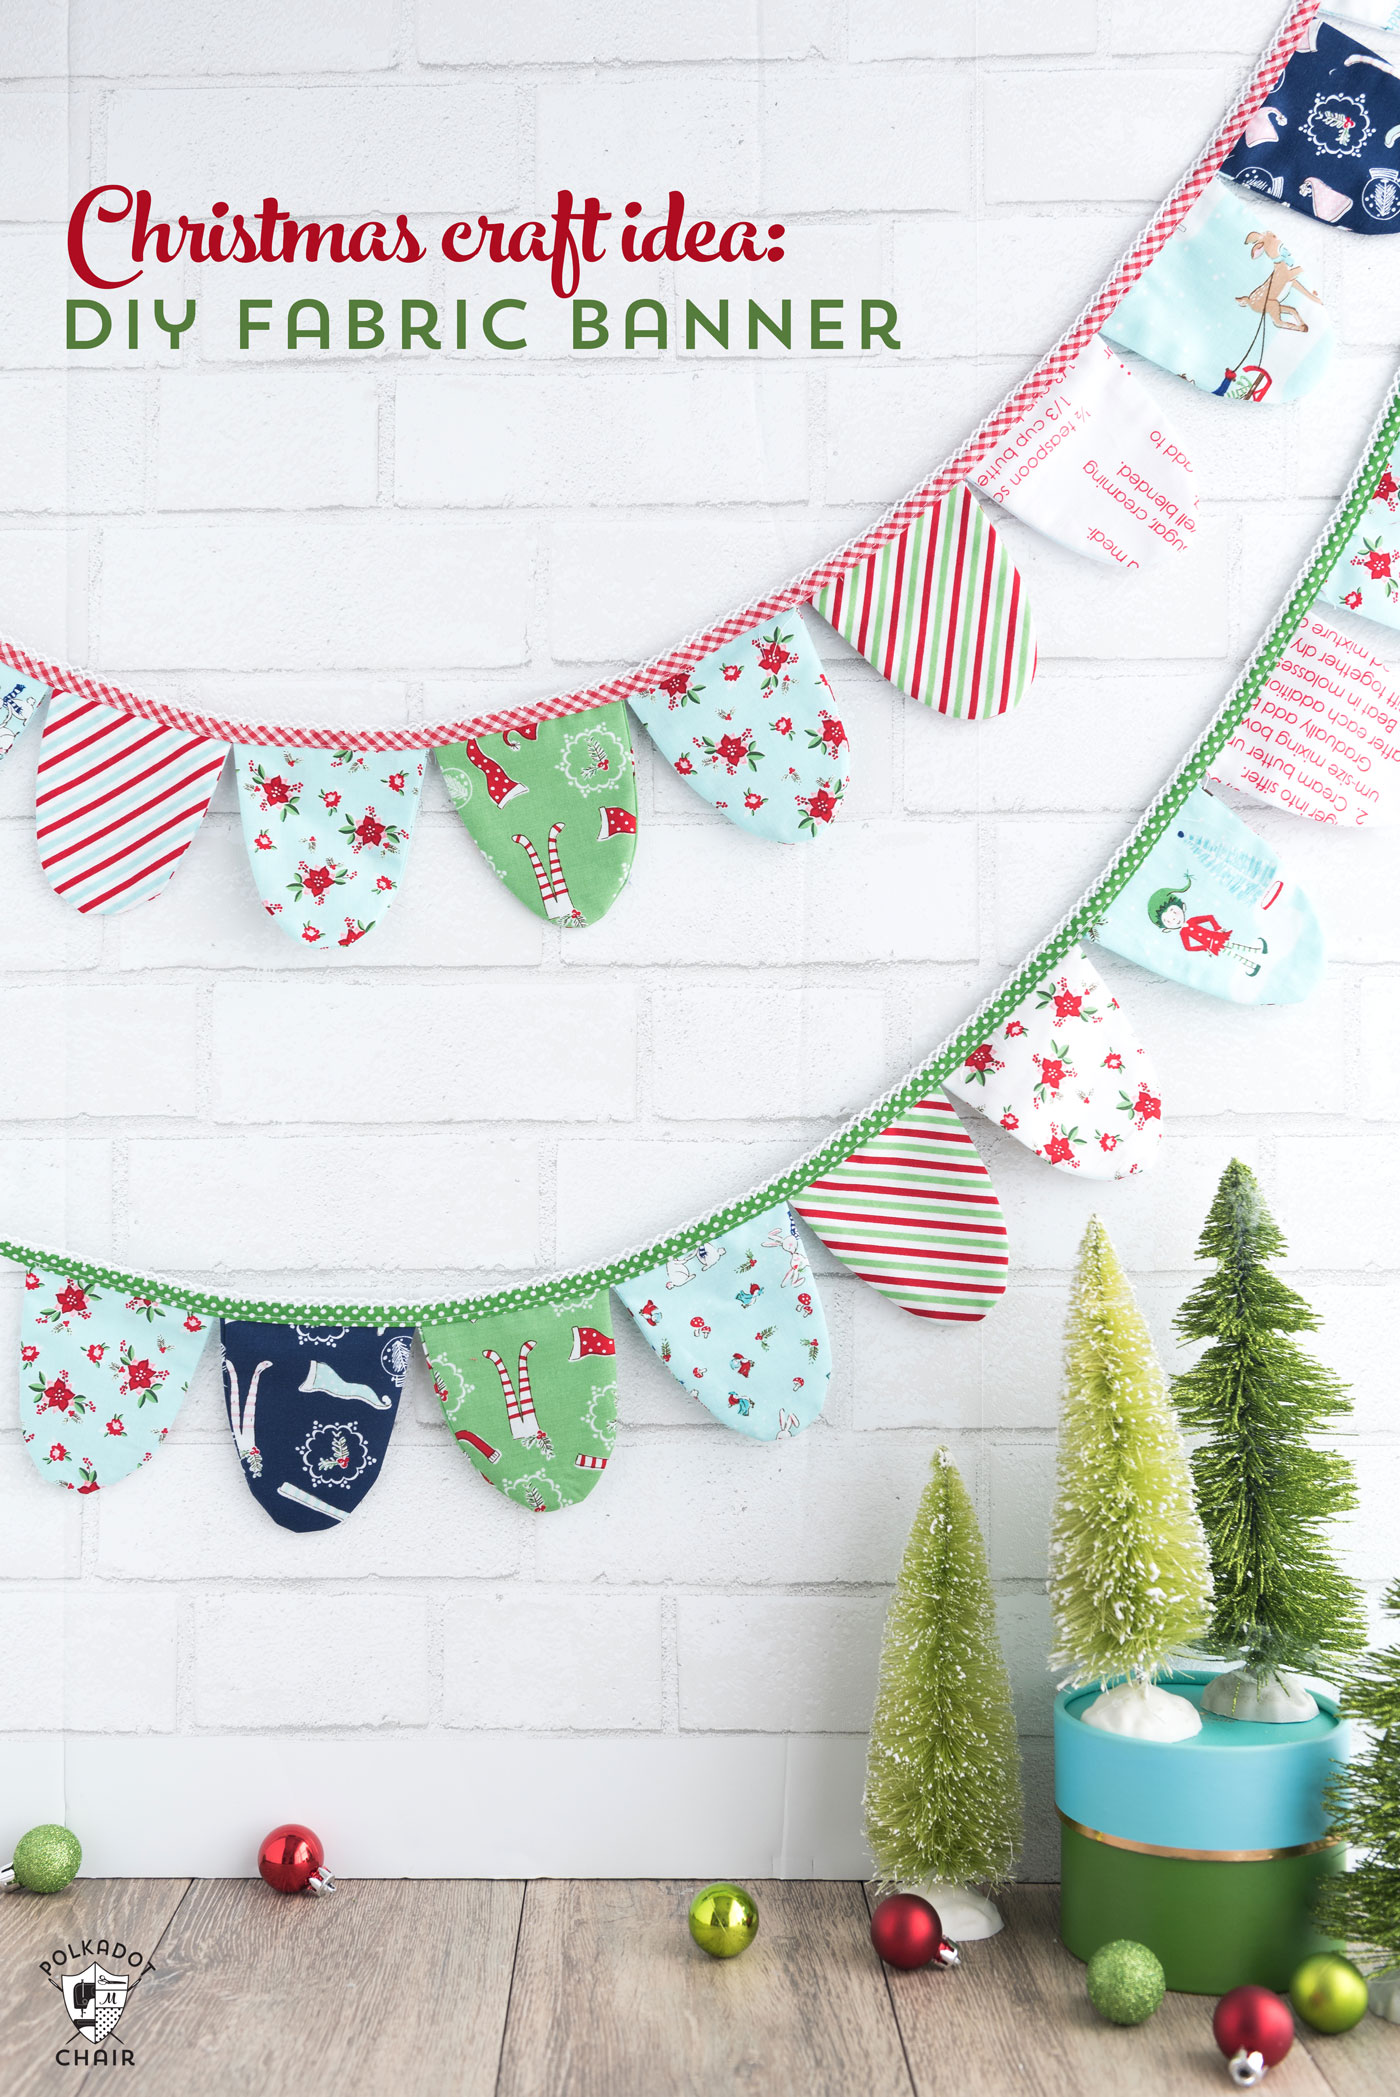
Forget the scissors & craft knife! I have a sure-fire way to create the most amazing graphic-driven fabric banners for your kiddos room or next event. NO sewing skills required! How cool are those fabric banners that are made out of felt? You know where I’m going with this! Come learn how to make graphic banners with the fabric without mind-numbing hand-cutting. If you want to see which is best, the Cricut or the Silhouette then read about that comparison here.

+ This post brought to you by the lovely folks at Cricut +
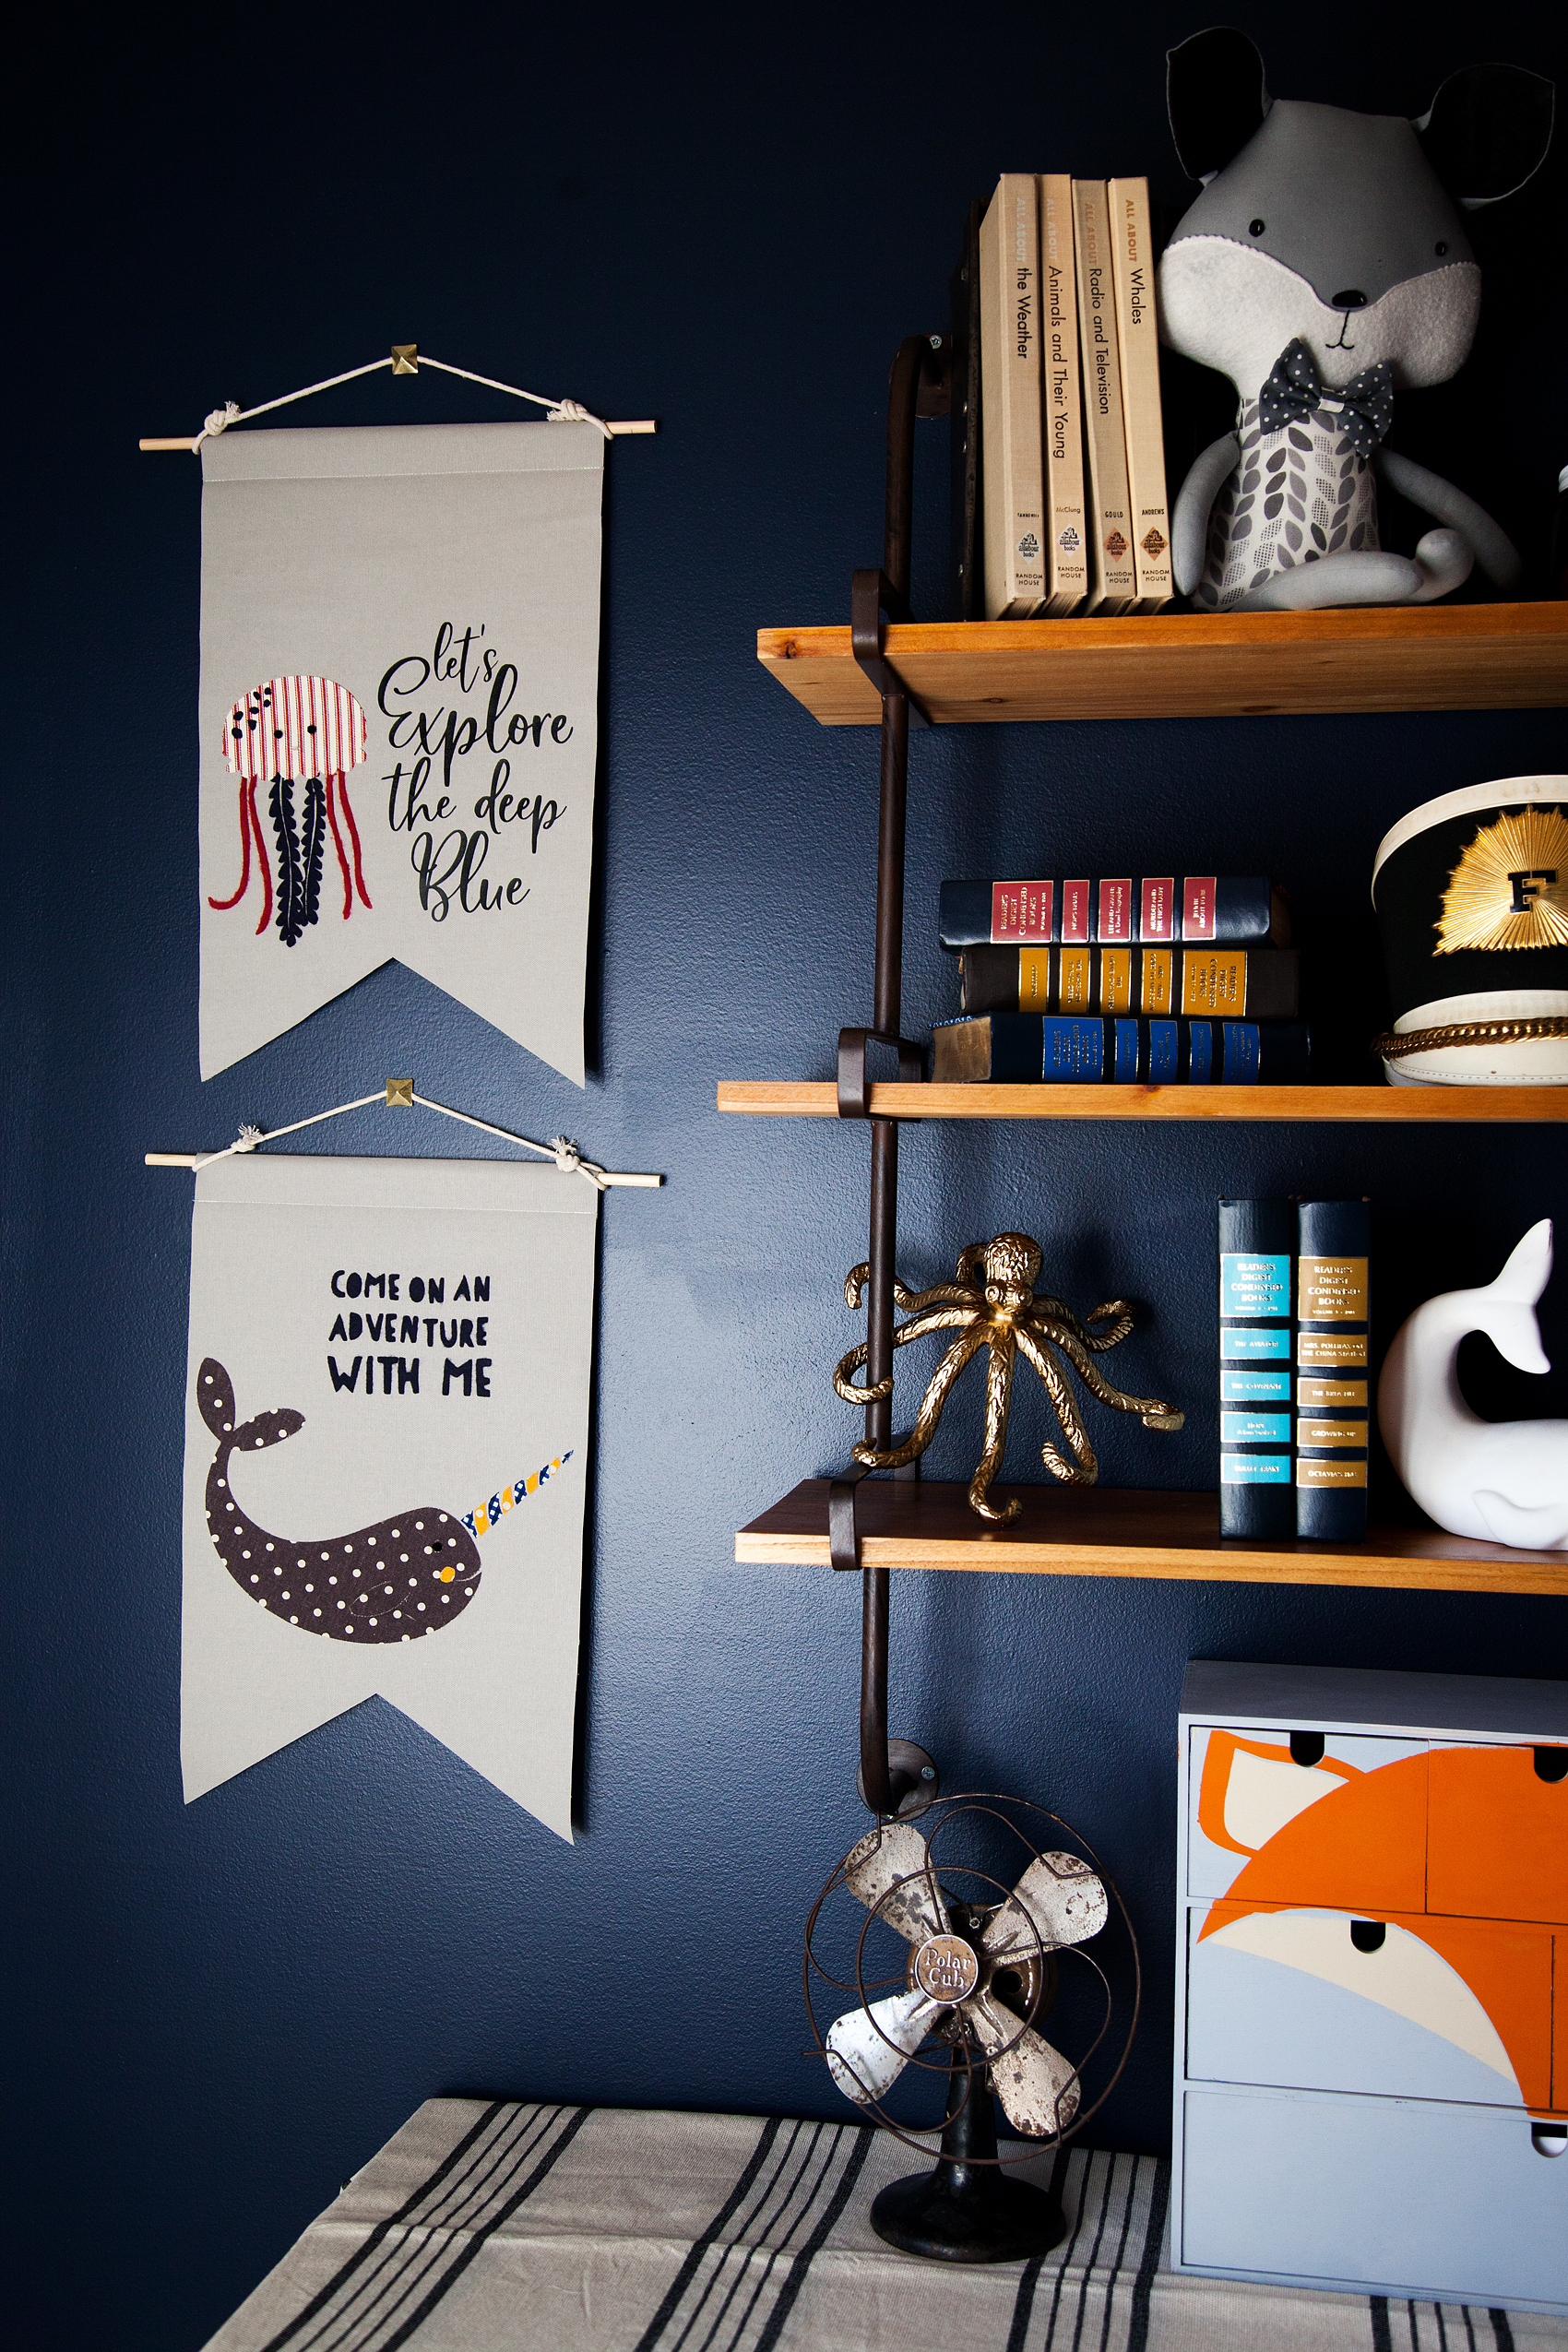
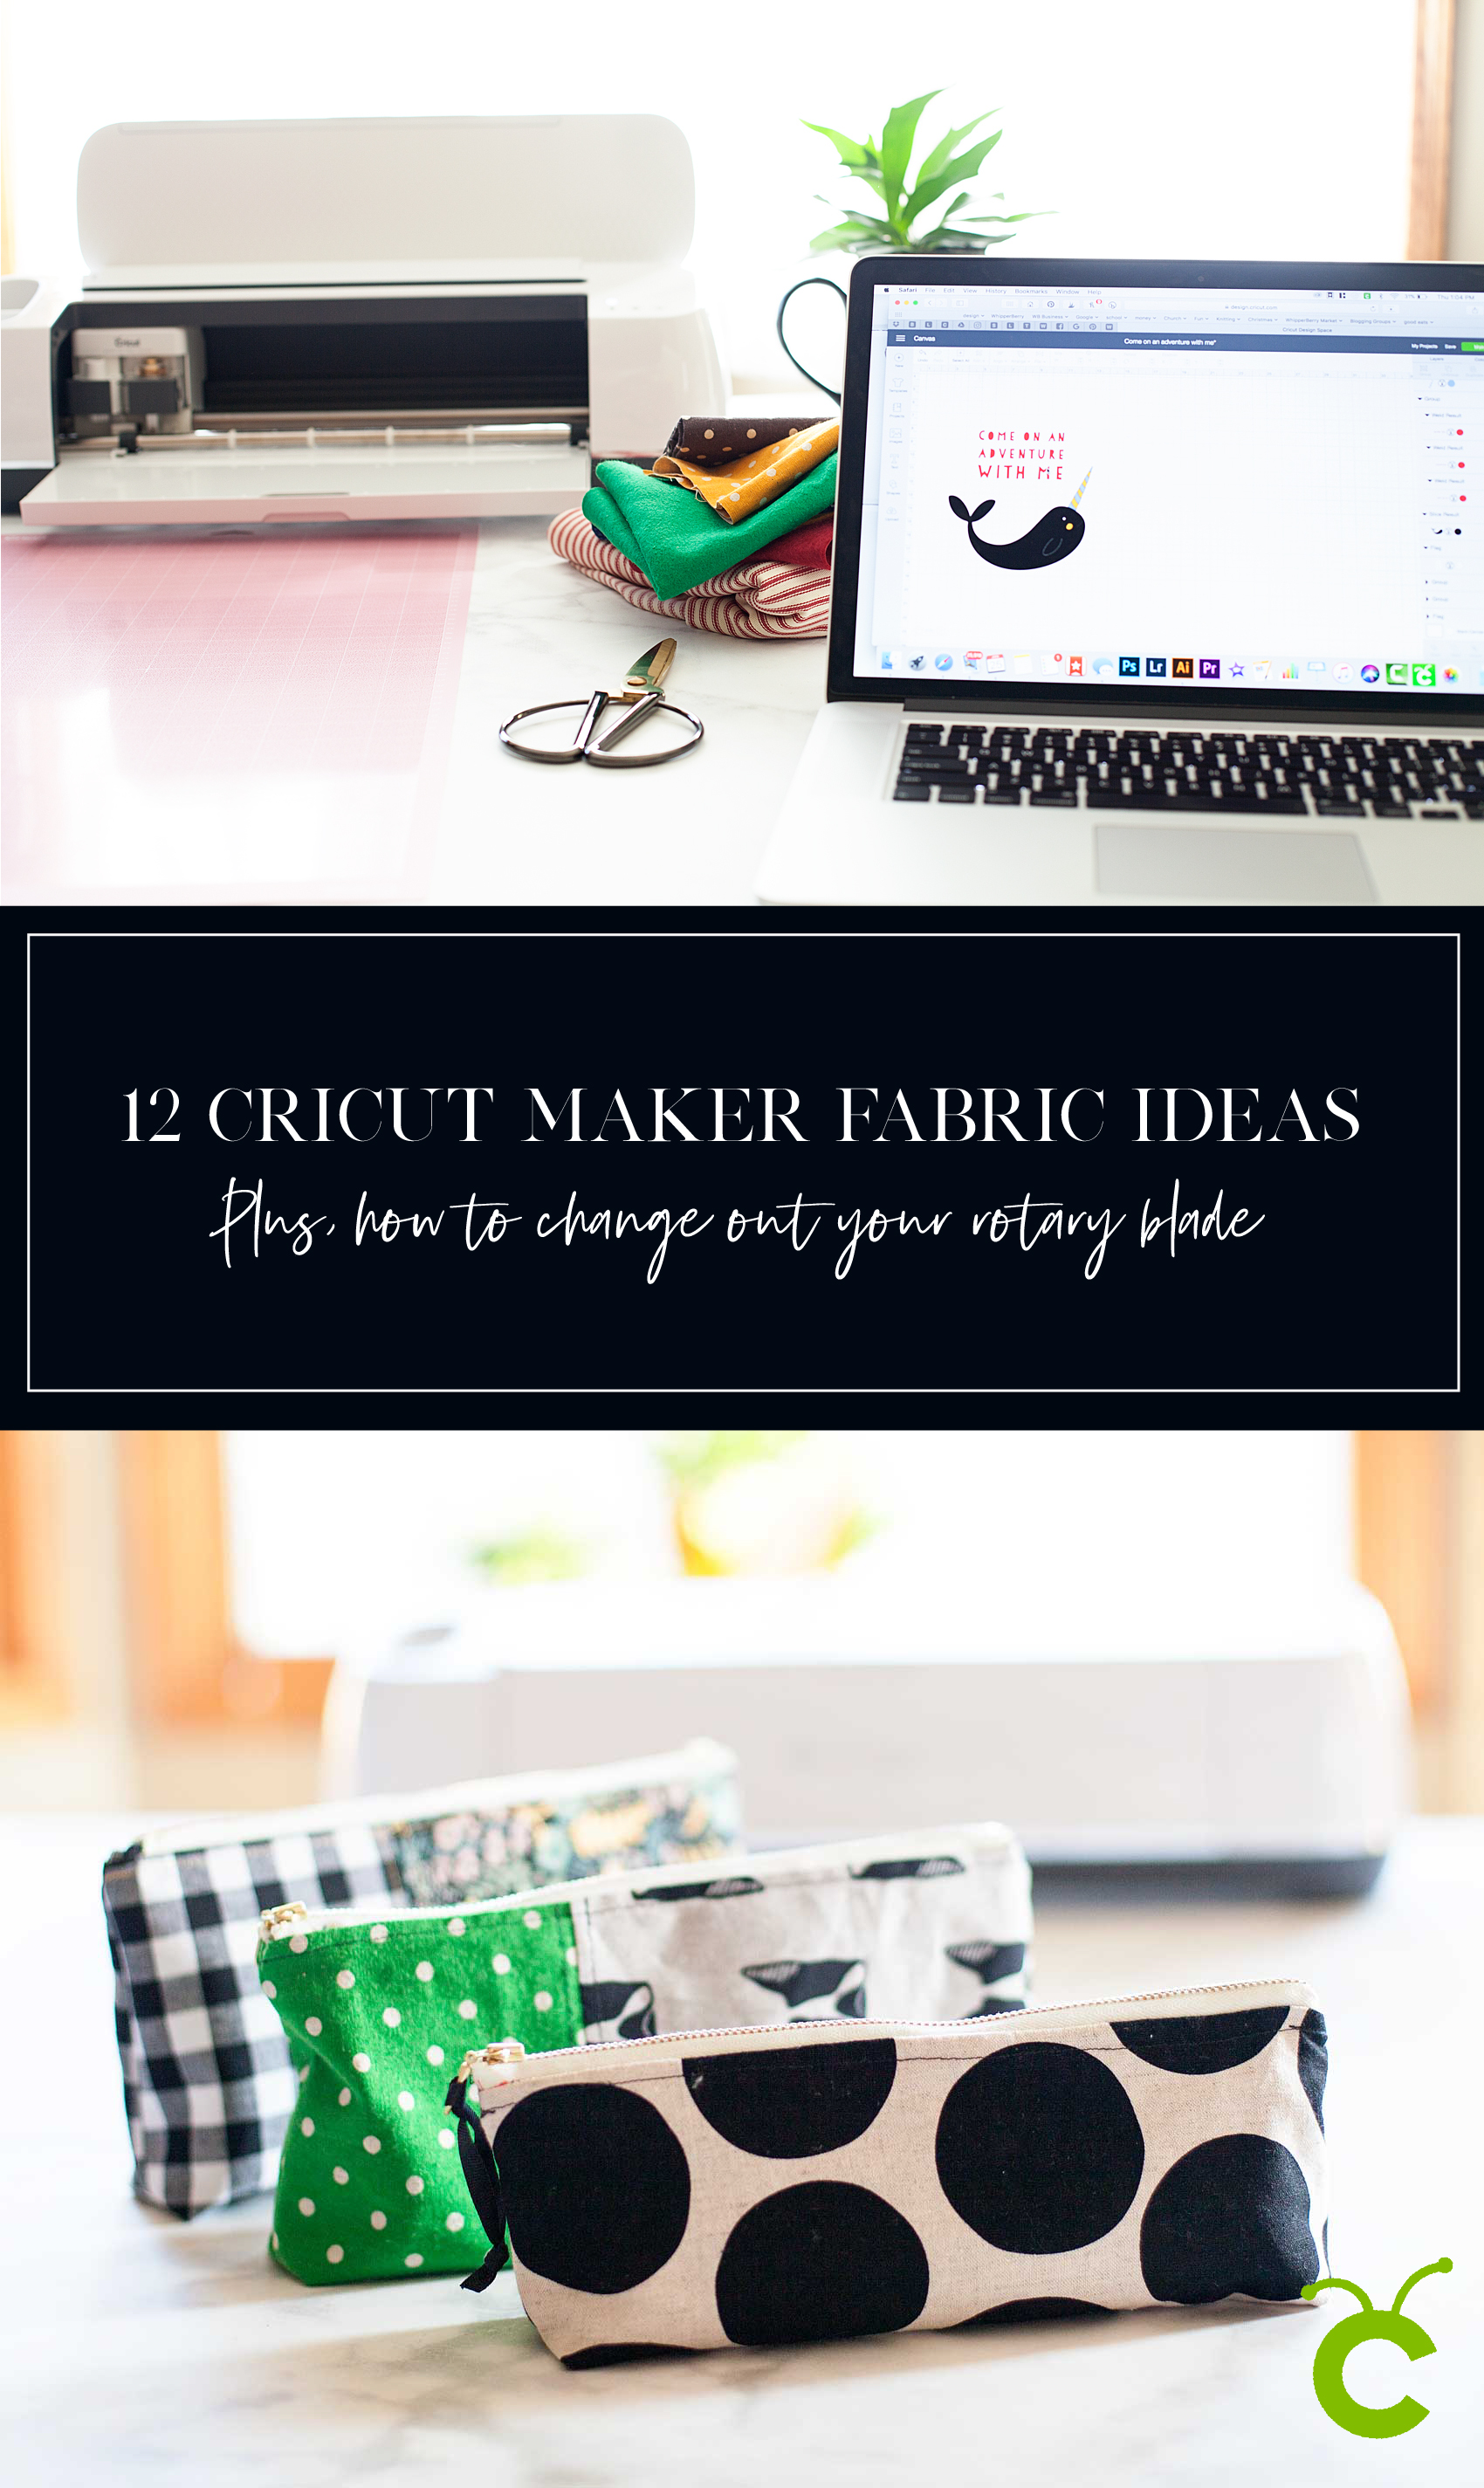
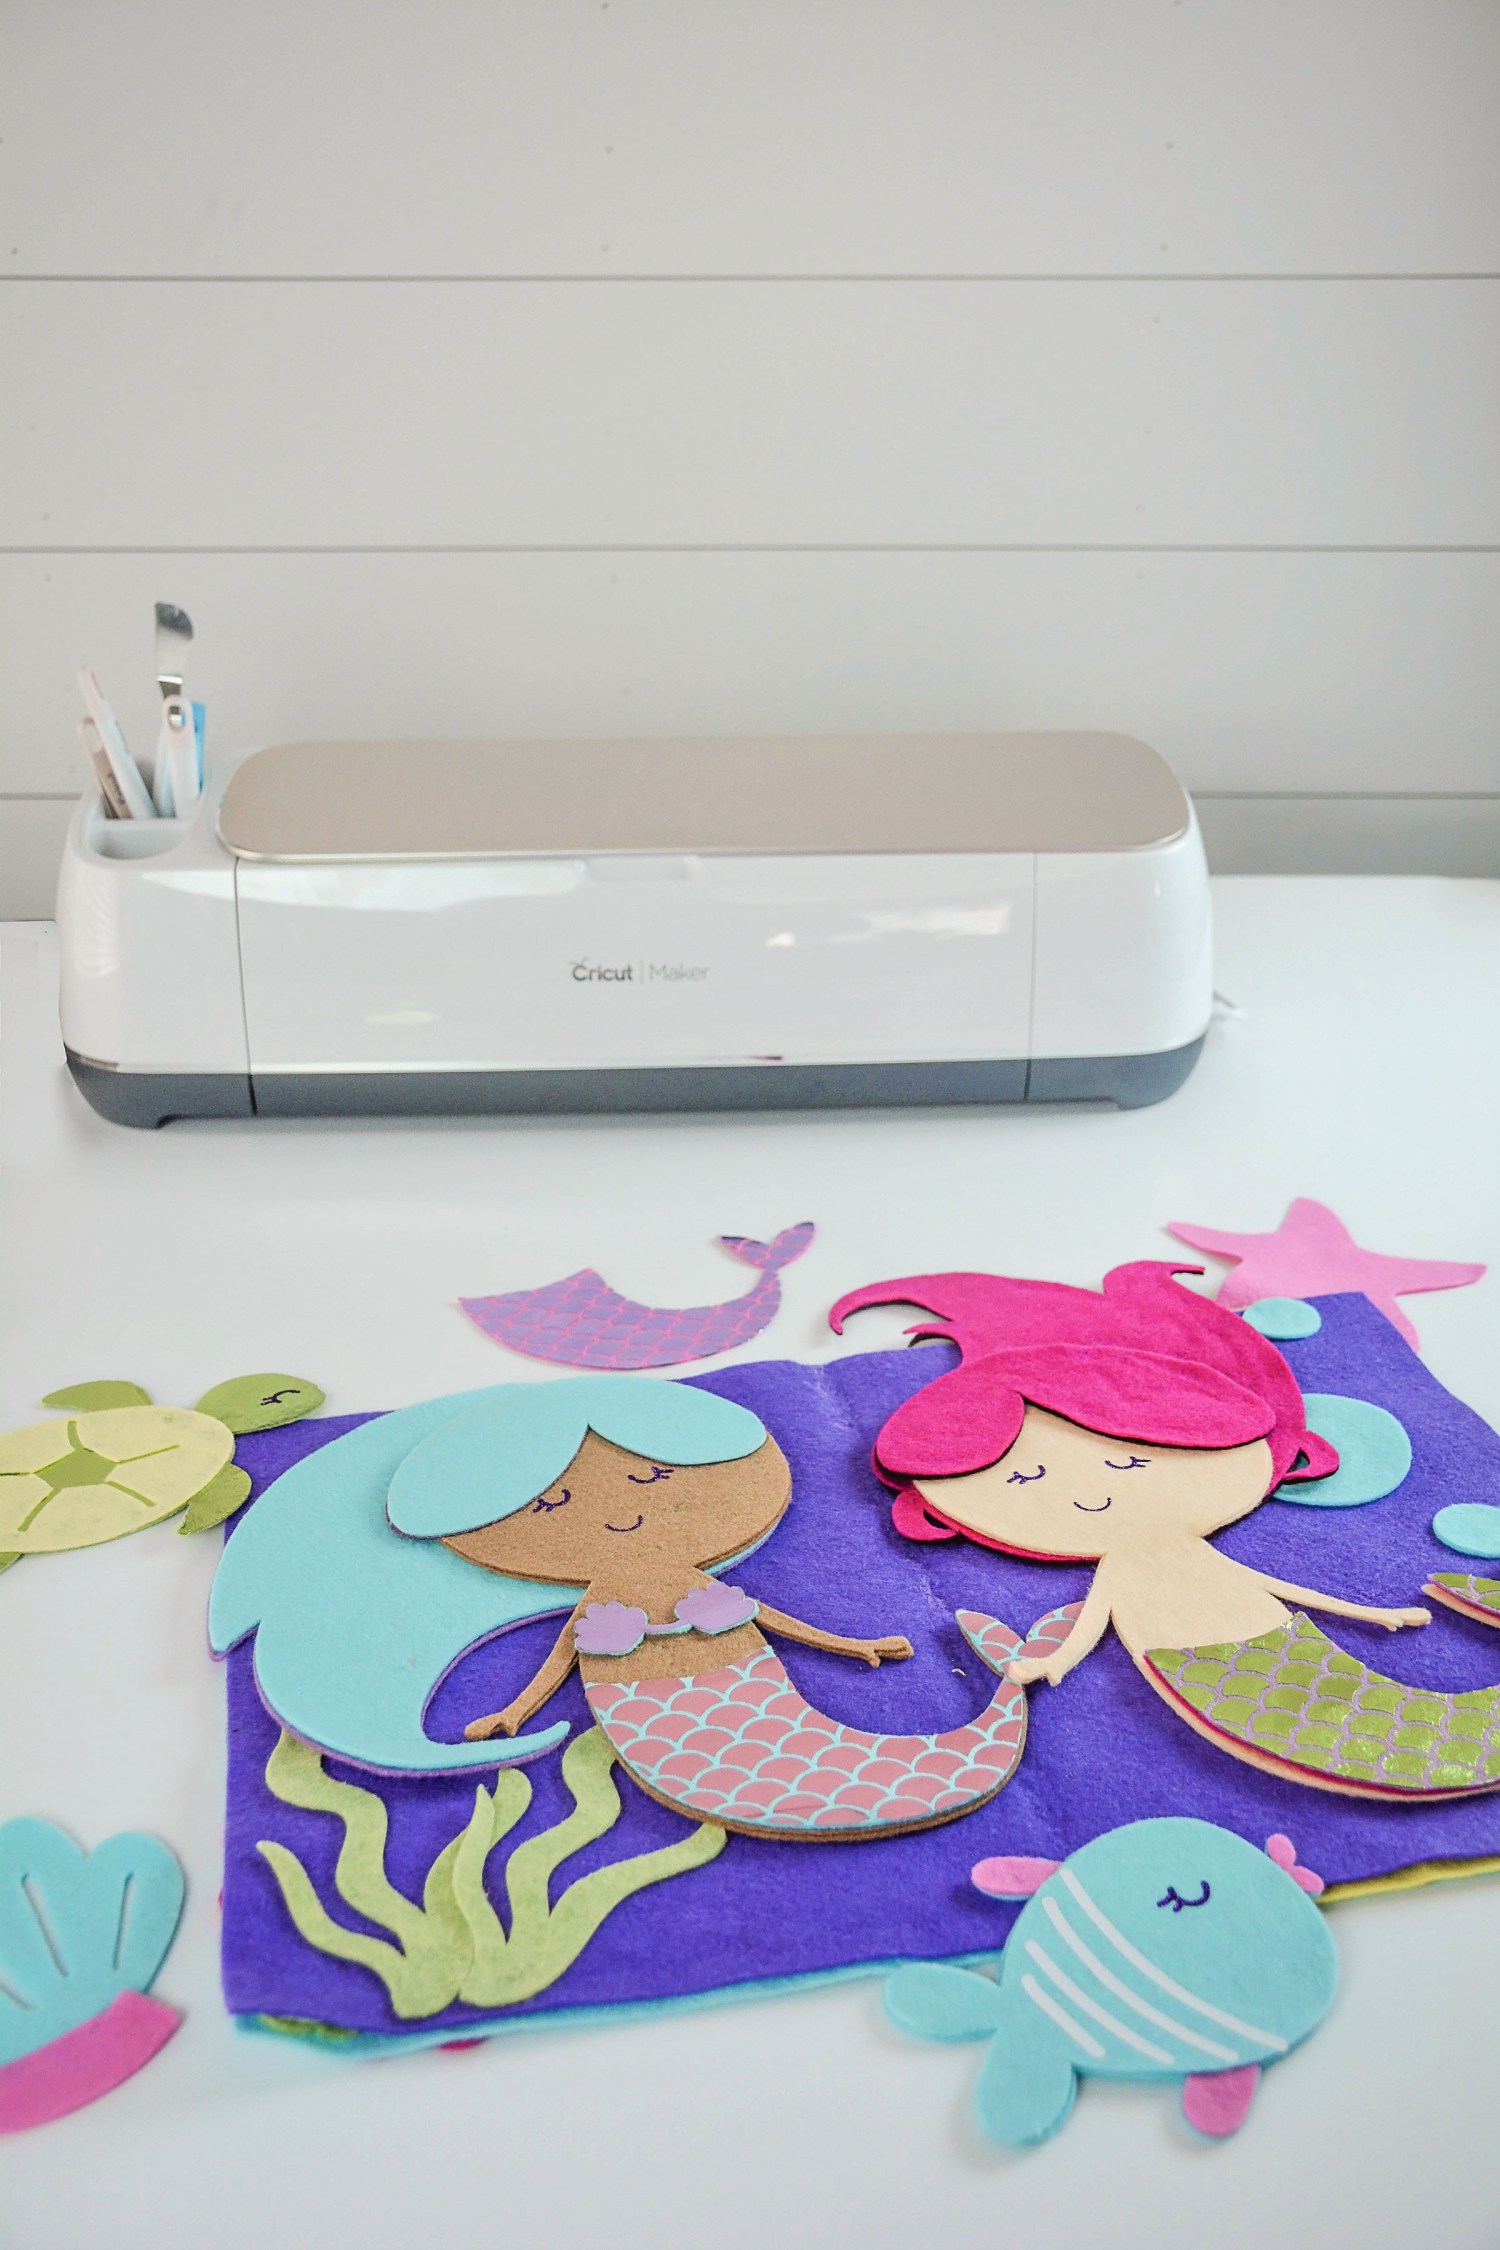
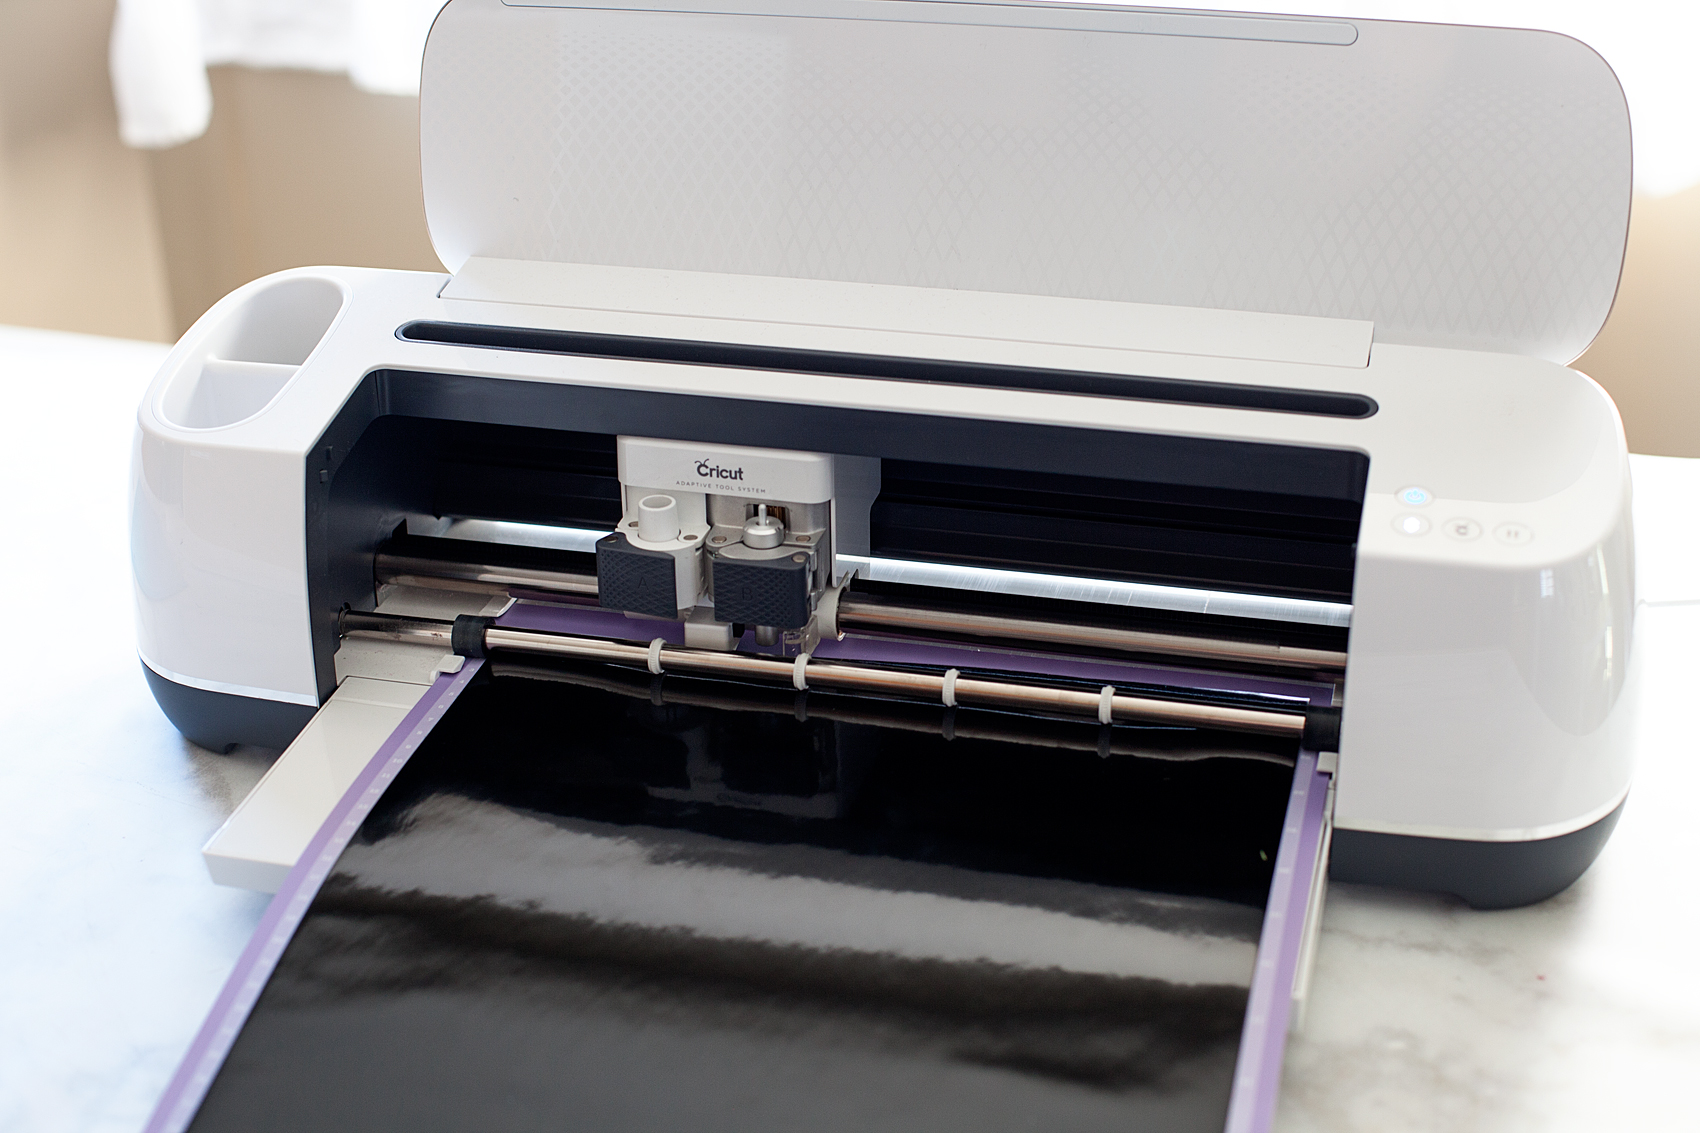
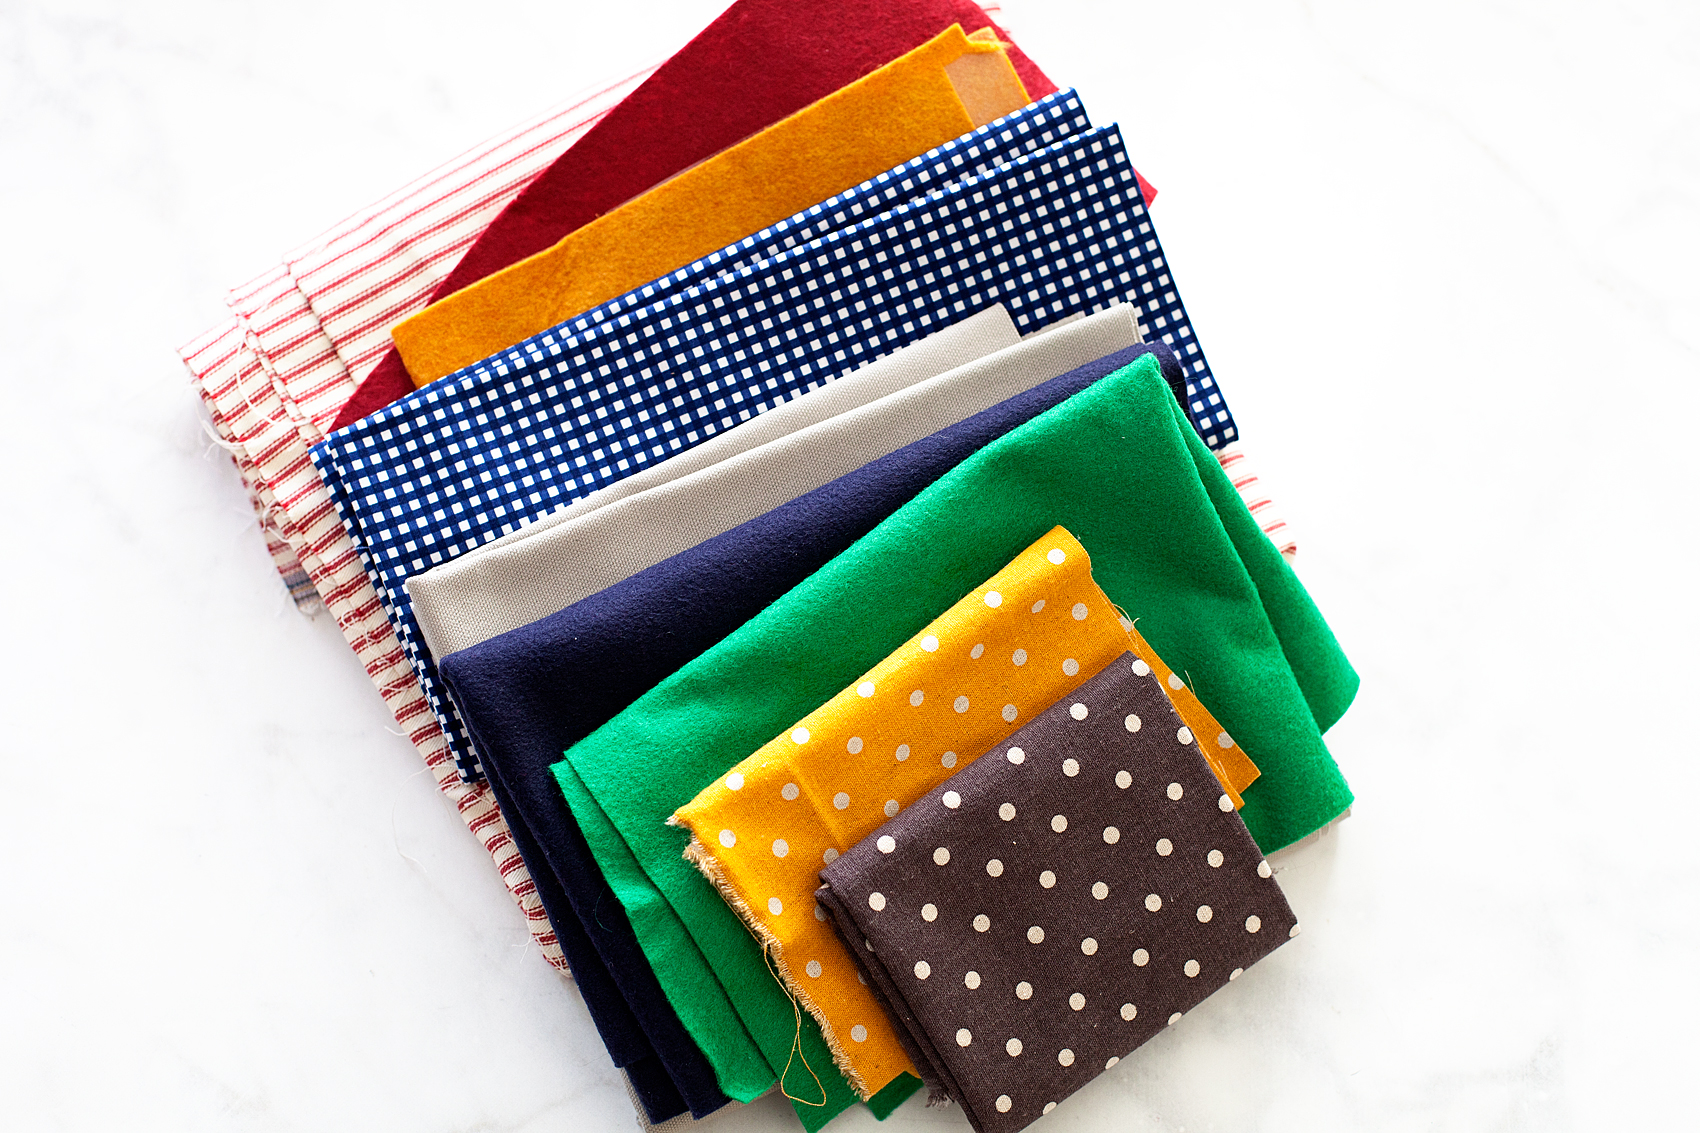
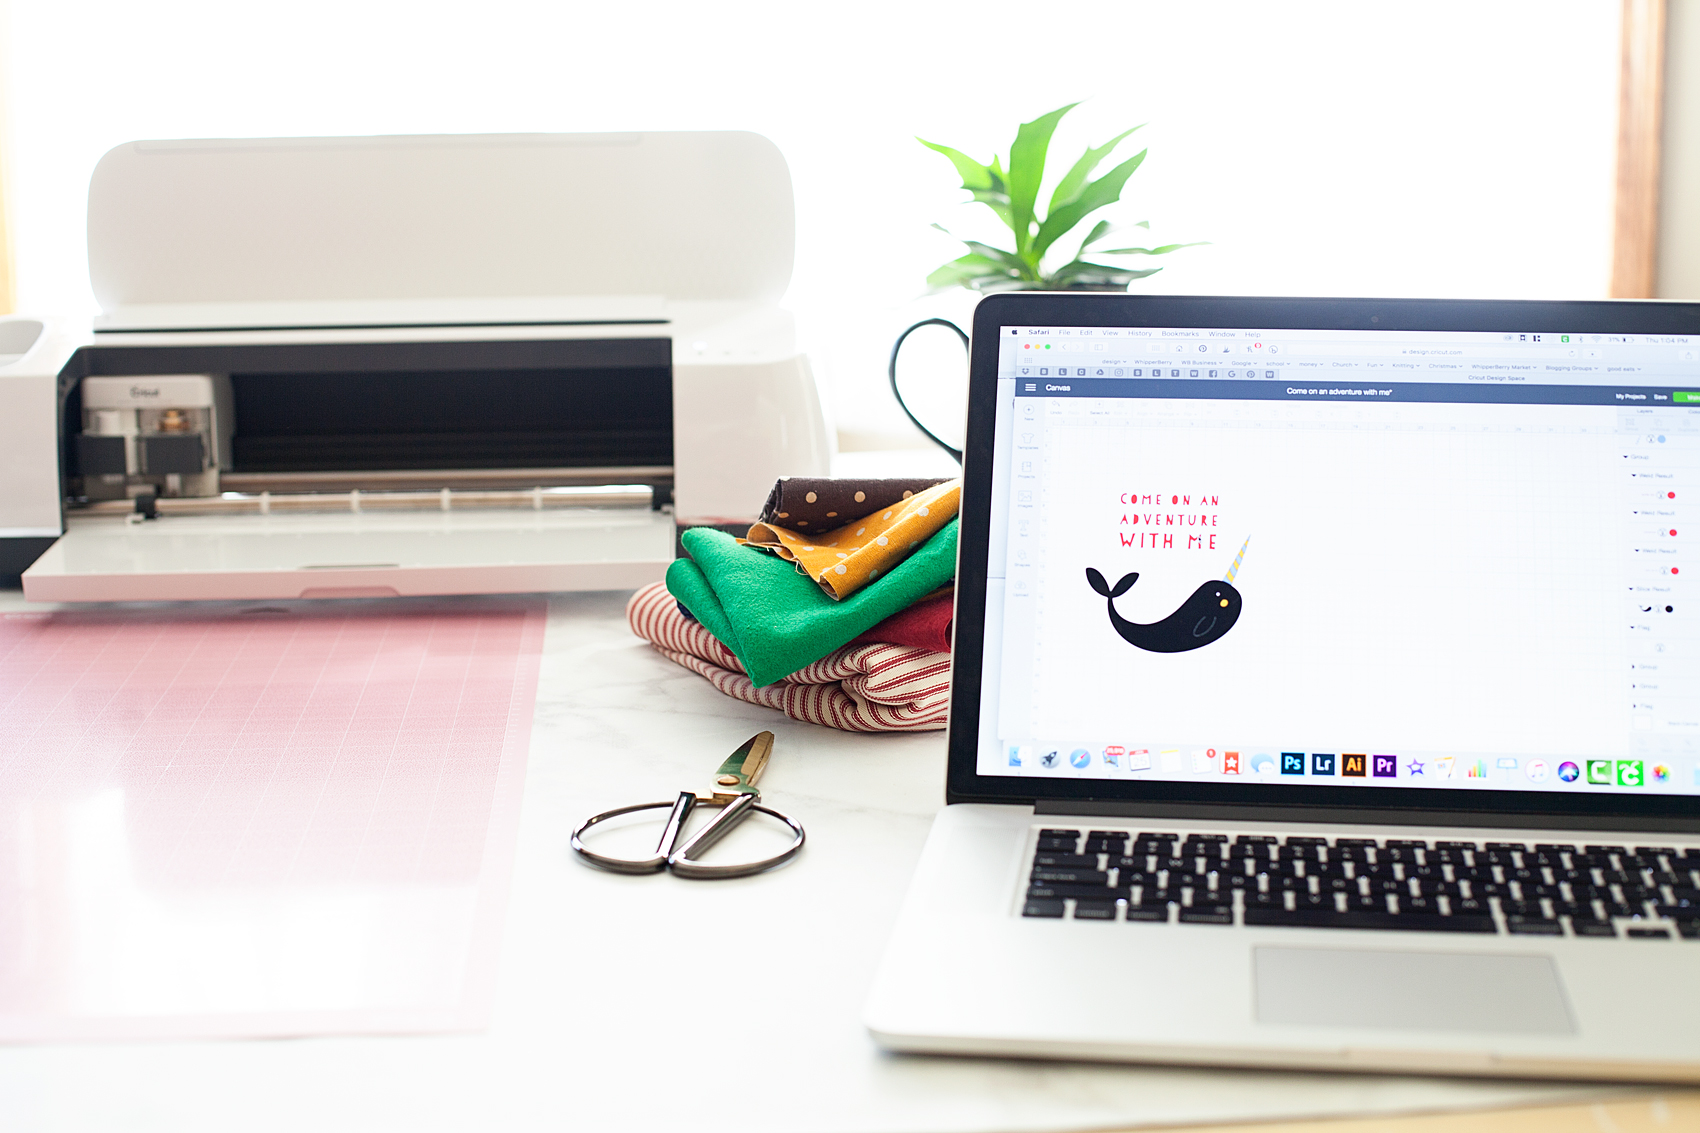
How to Create Fabric Banners • They are easy to make with the Cricut Maker and have such impact in your room or for a party. Come learn how easy they are to make at whipperBerry.

Tools of the Trade

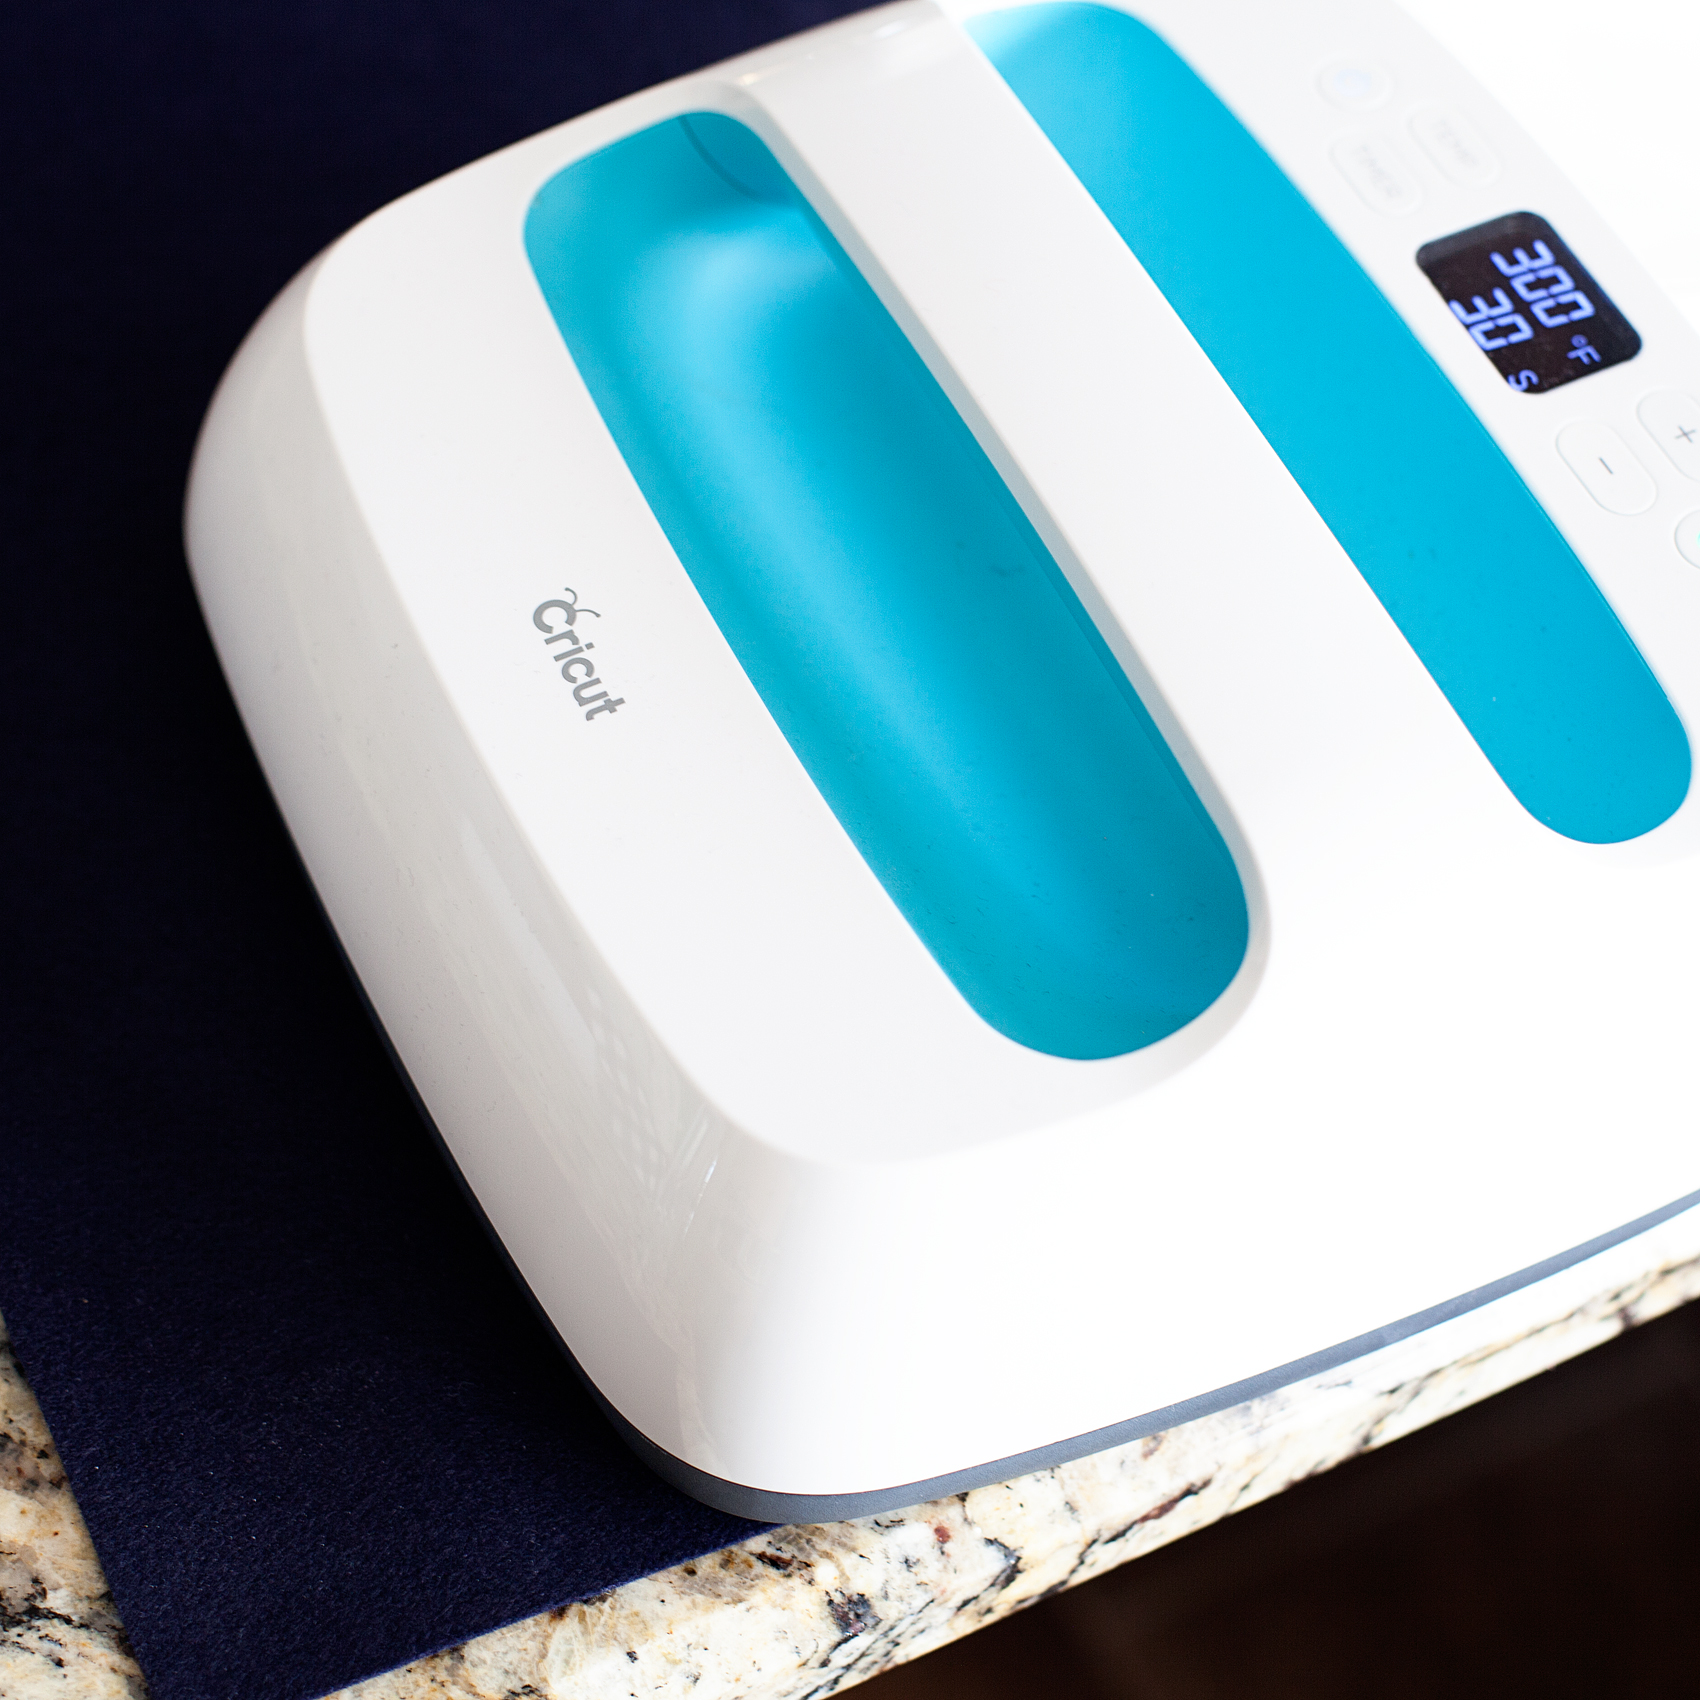
Having always been in LOVE with creating graphics, the idea of being able to design graphic driven projects out of fabric has always been a desire of mine. However, I don’t have the patience to sit with scissors or craft knifes to cut out my graphic elements. I was thrilled at the advent of the original Cricut back in the day. It revolutionized crafting, as we knew it, at the time. However, it just didn’t have the cutting chops for fabric. The new Cricut Maker is just as revolutionary as the first cartridge based Cricut in the Fabric world. It’s TOPS for sure!

Vintage Adventure Room

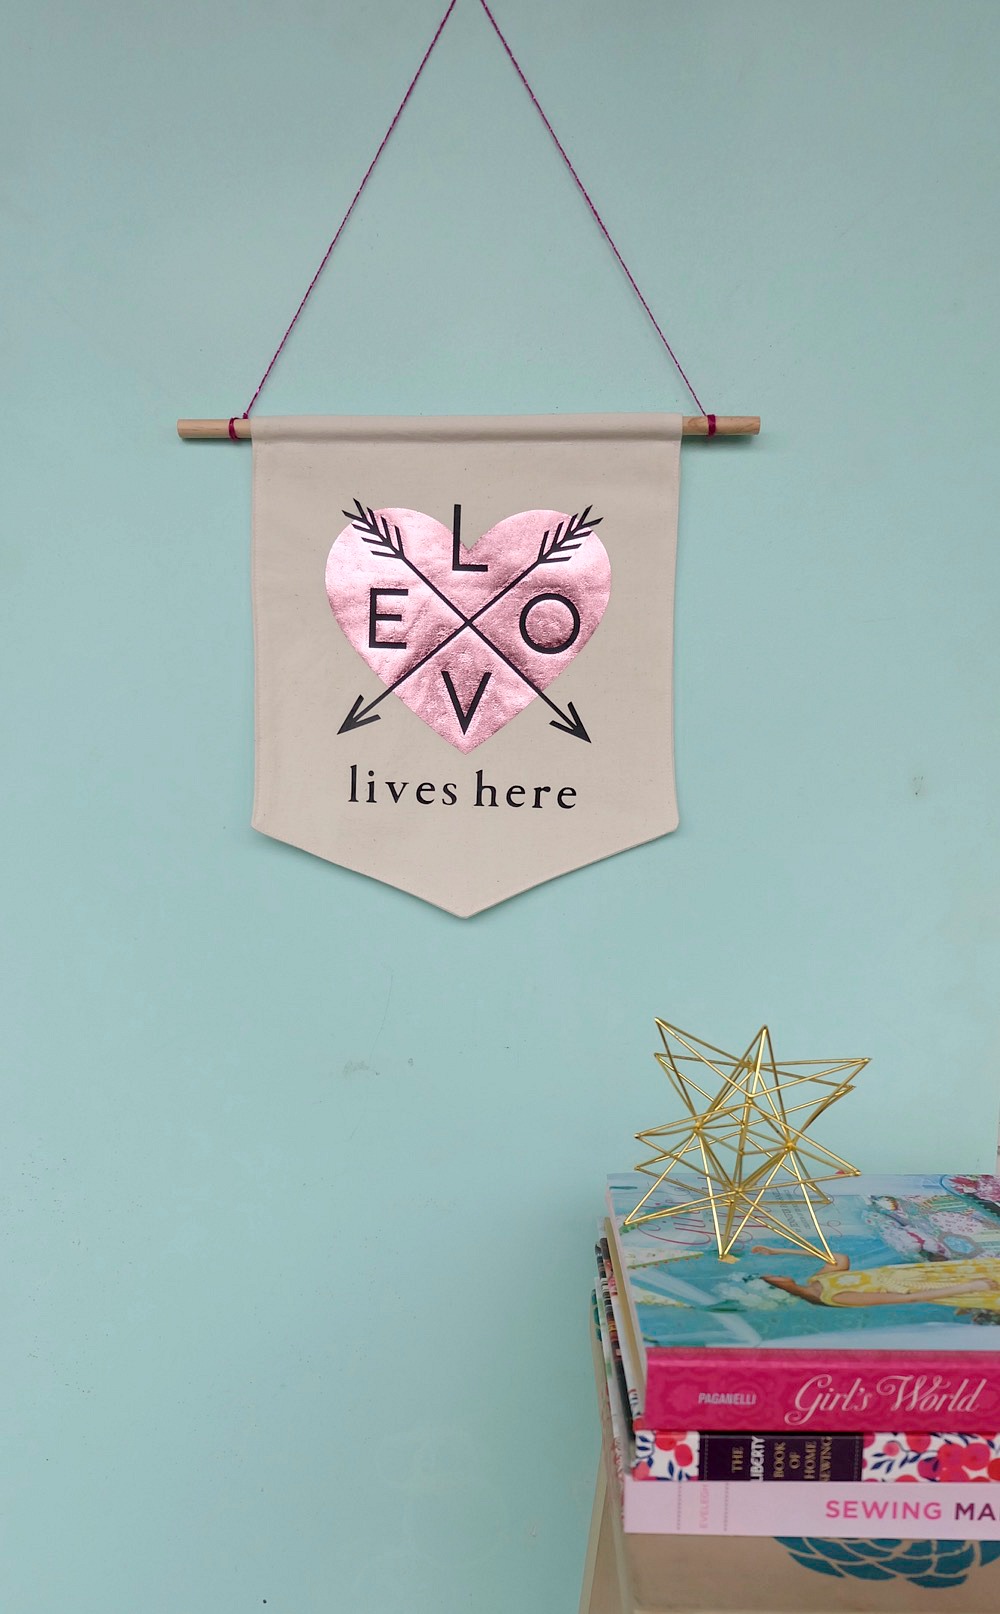
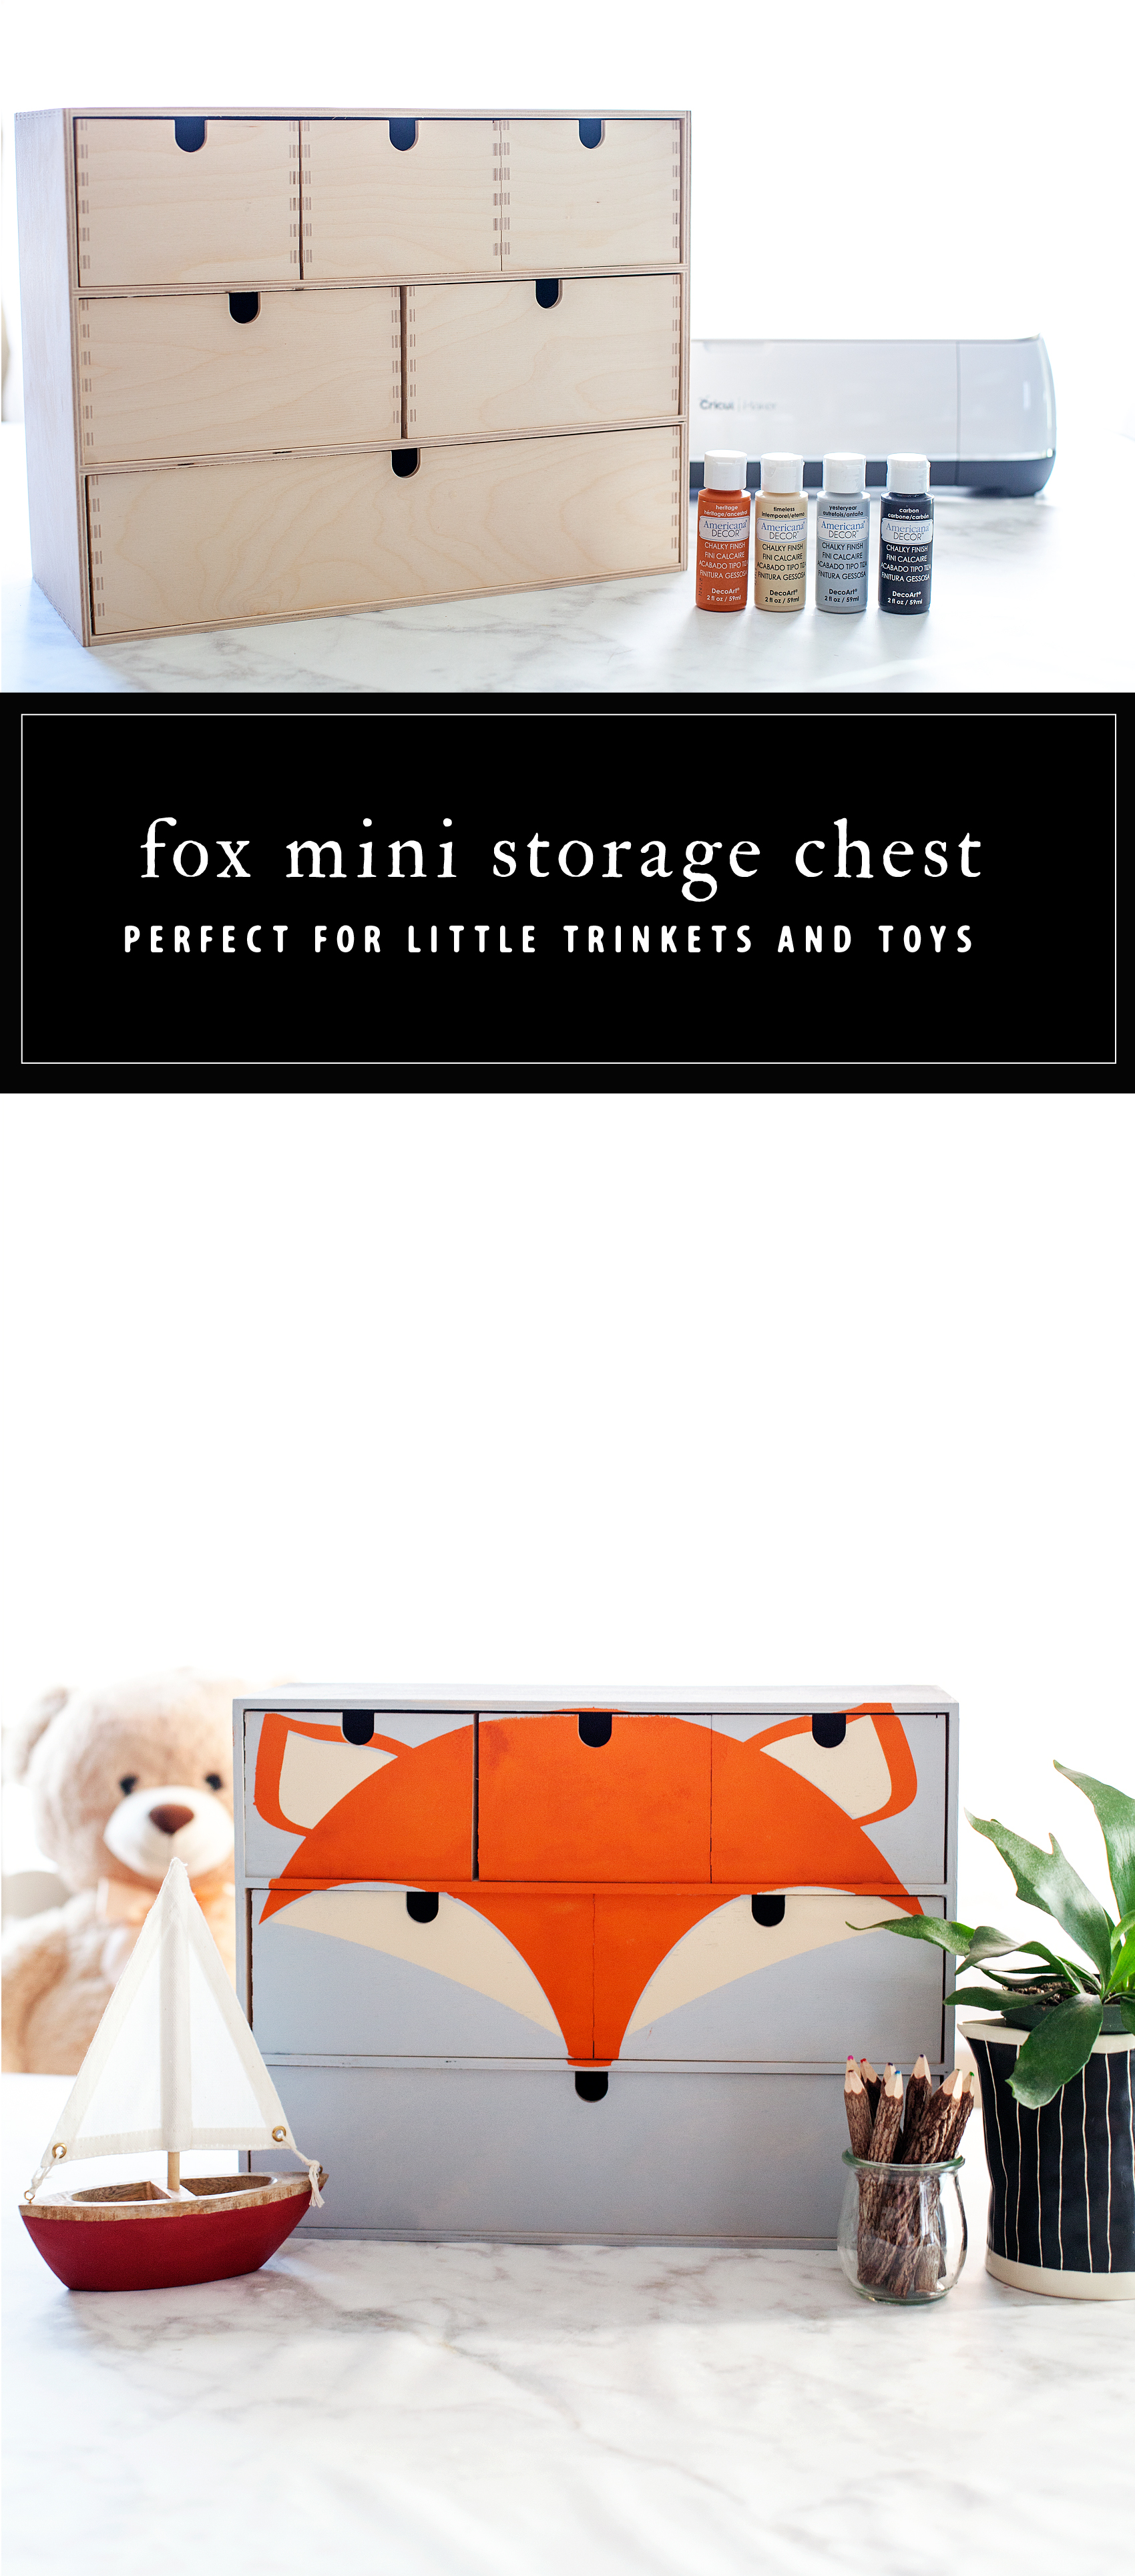
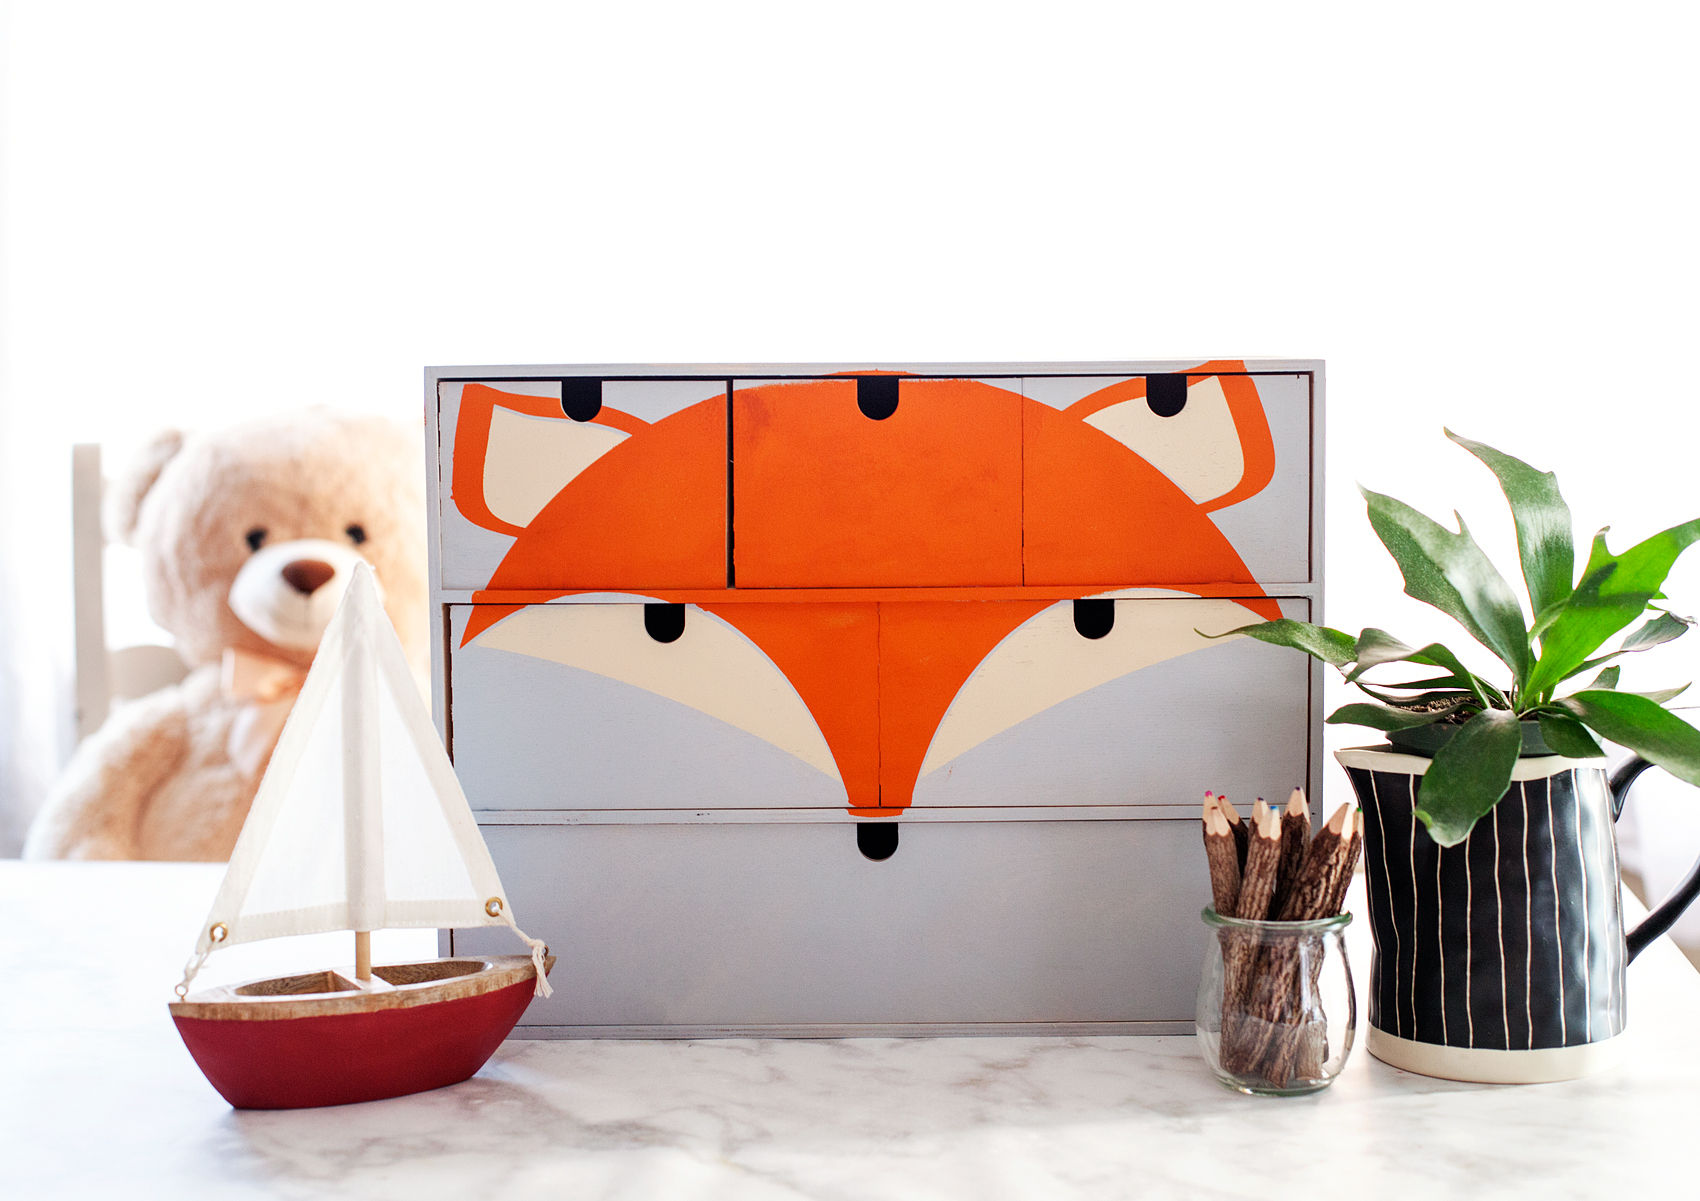
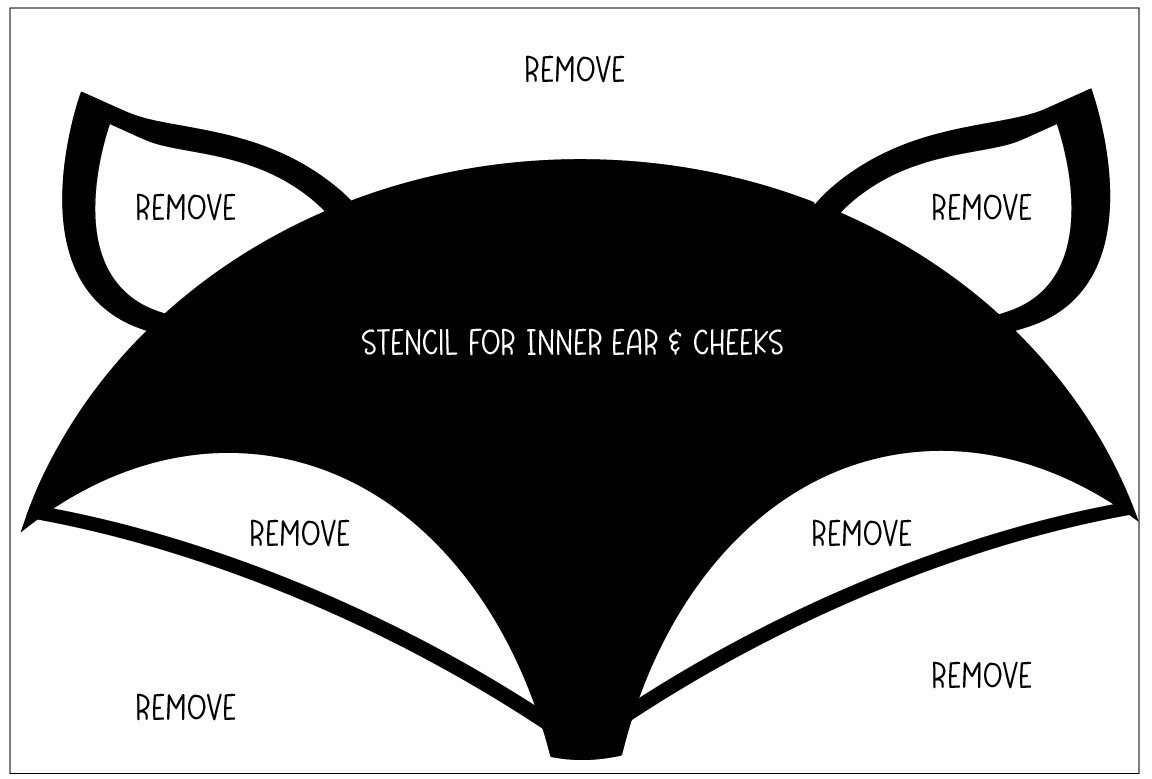
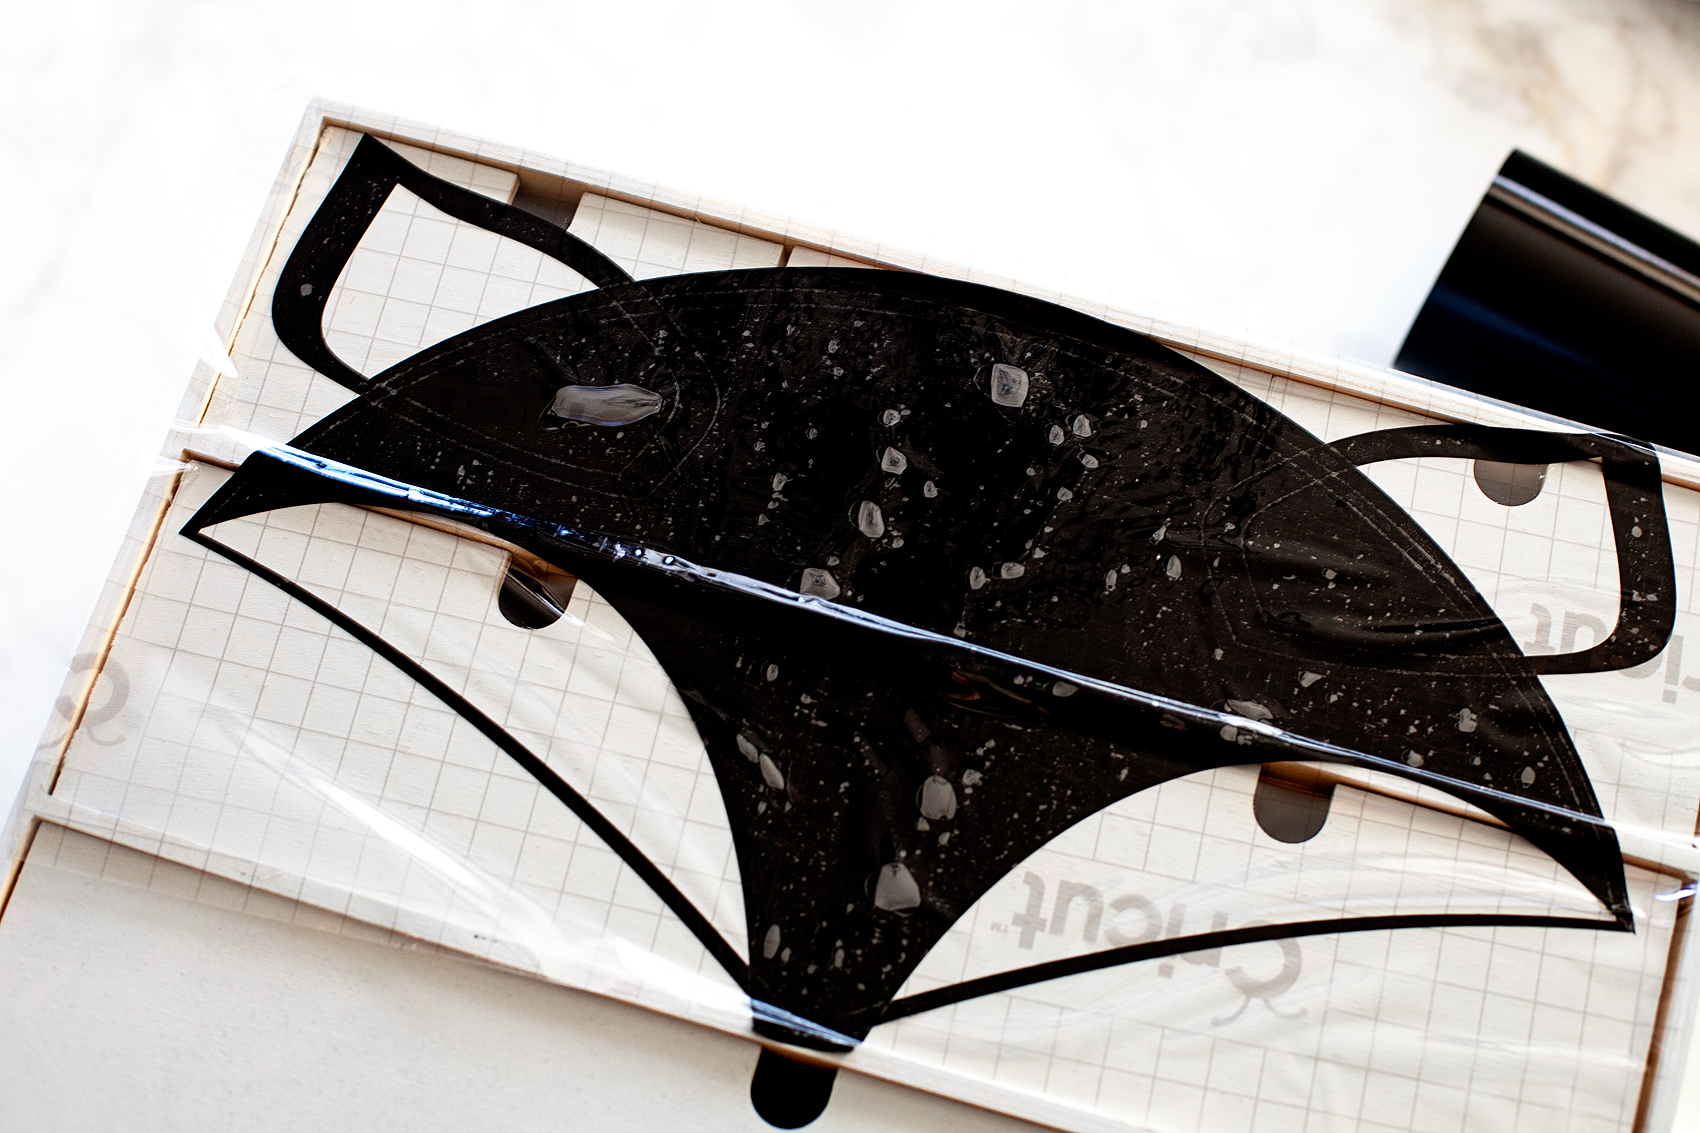
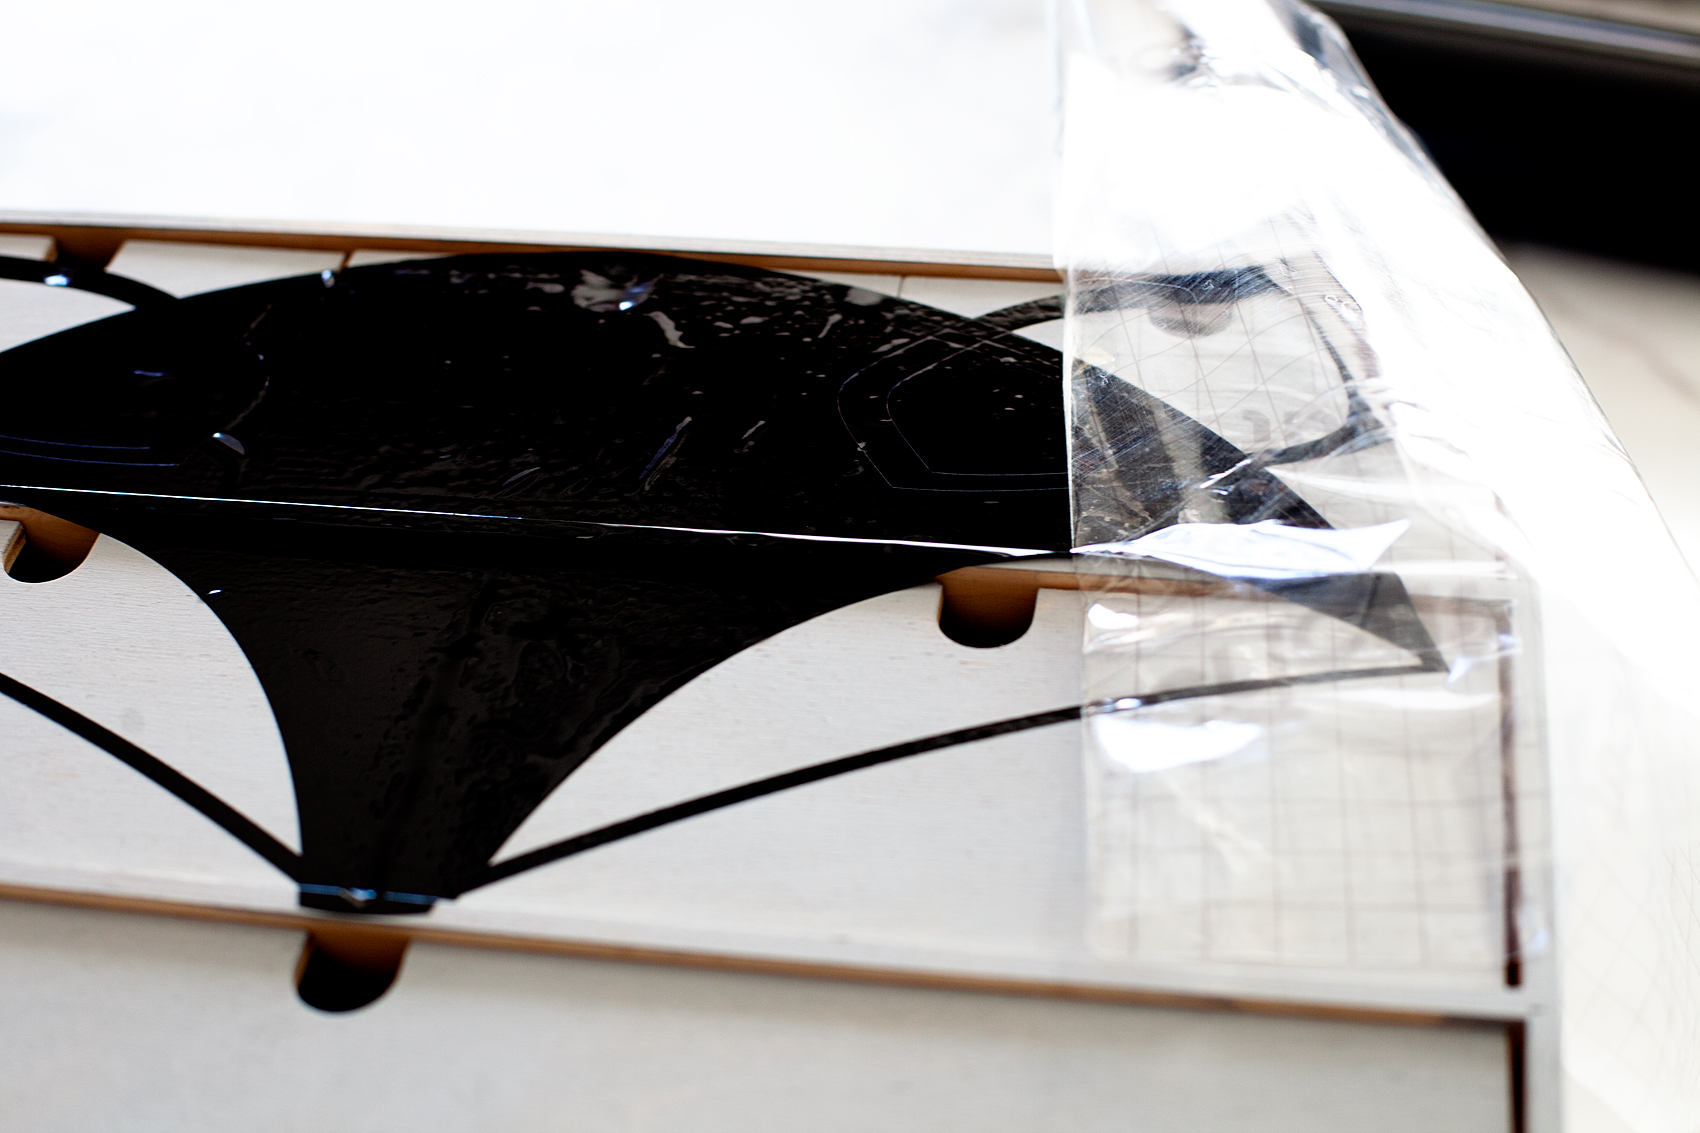
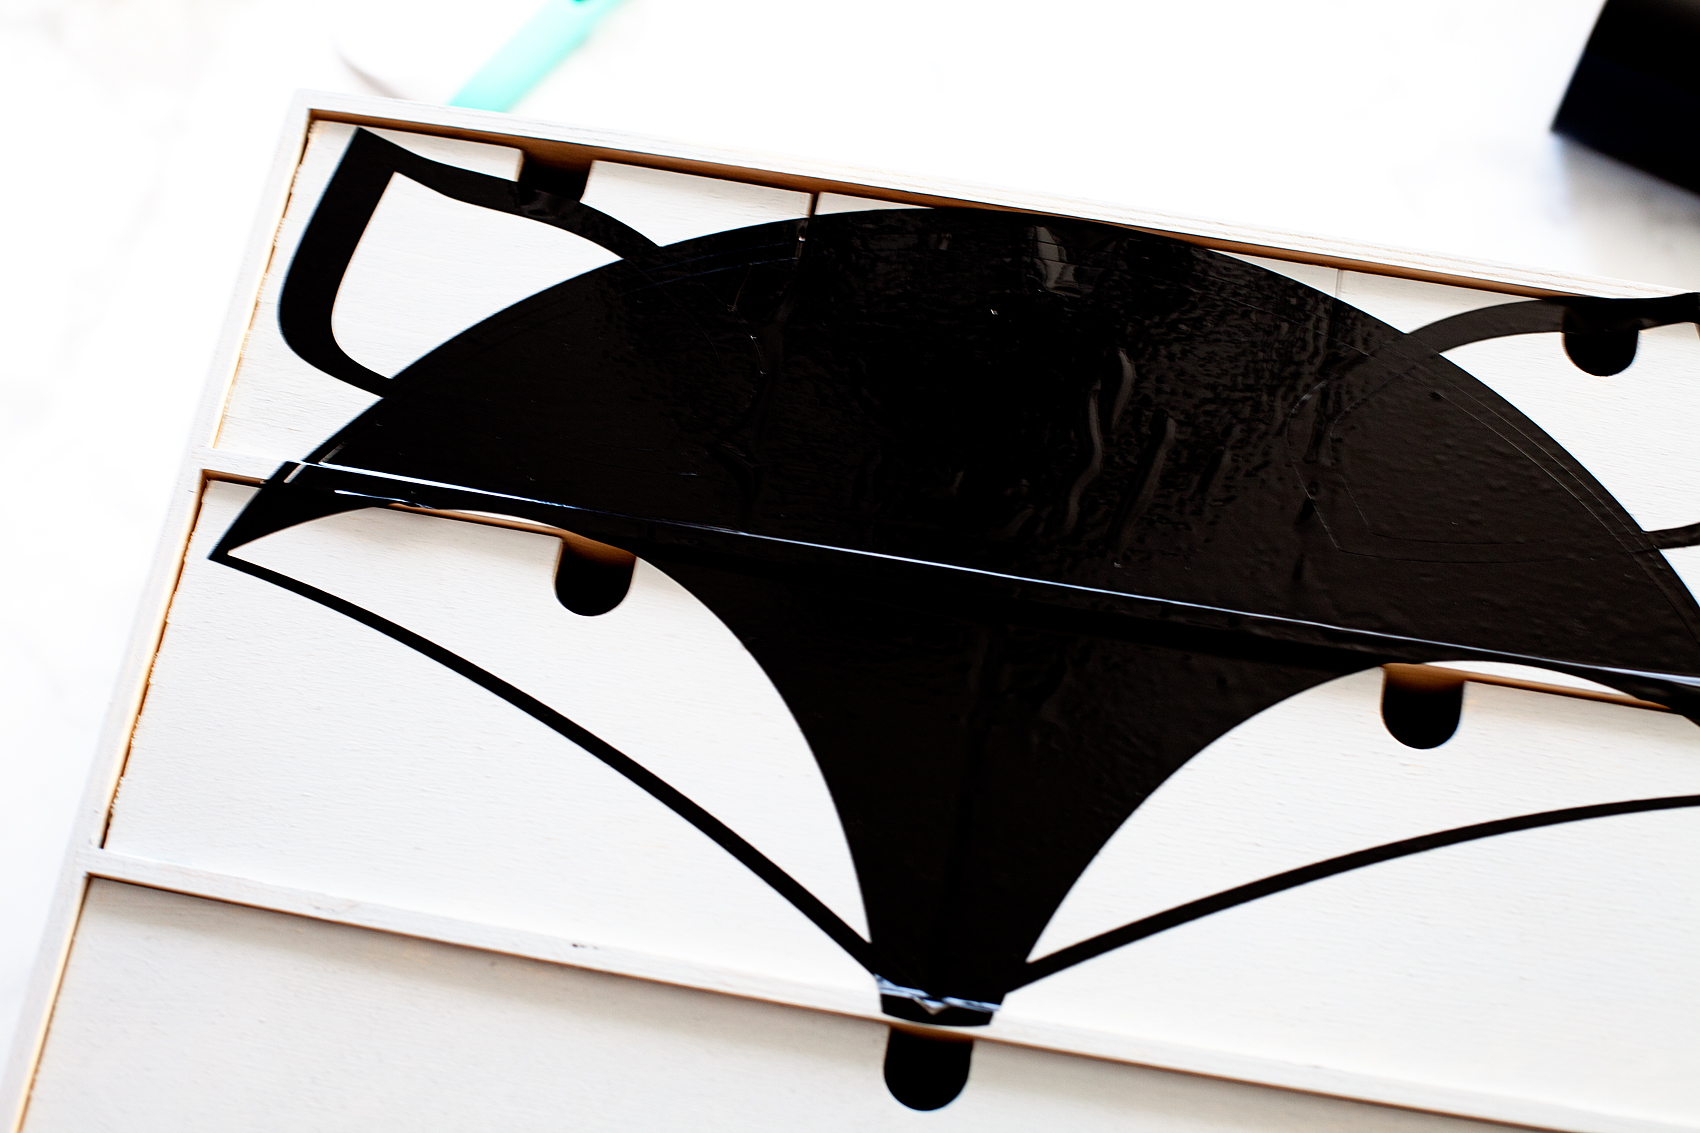
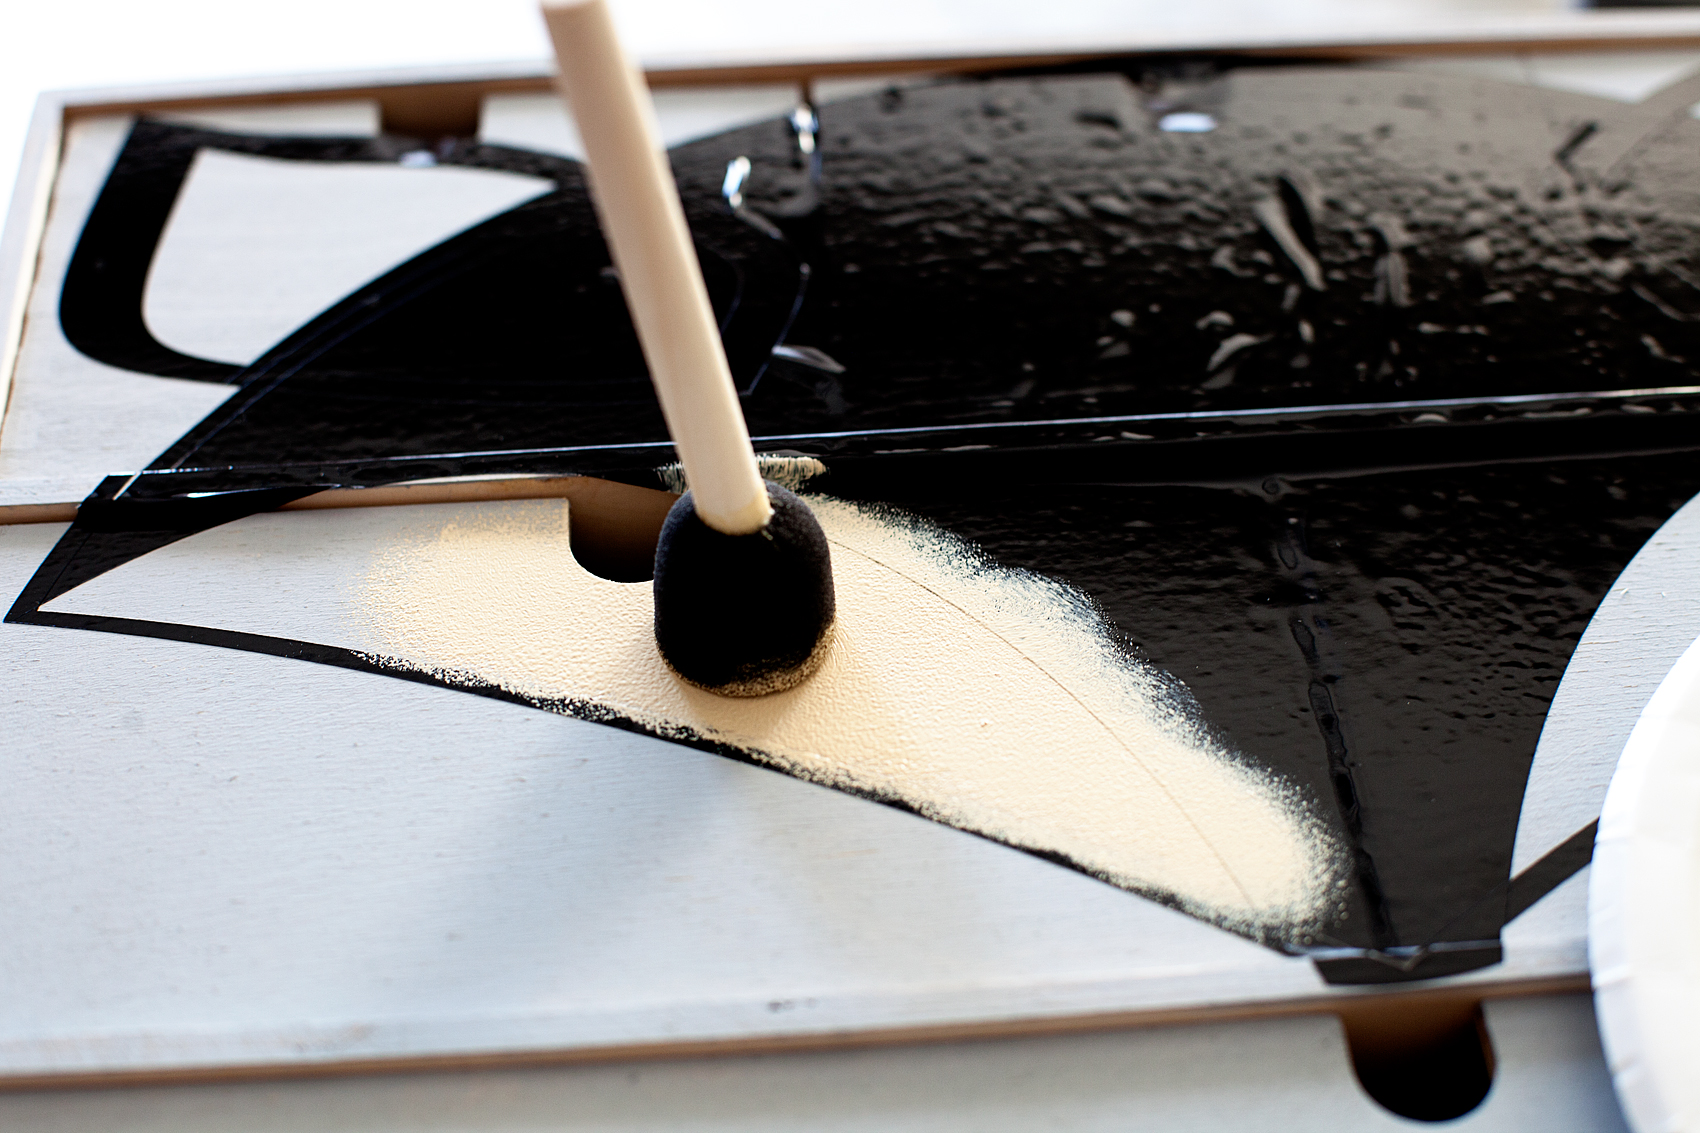
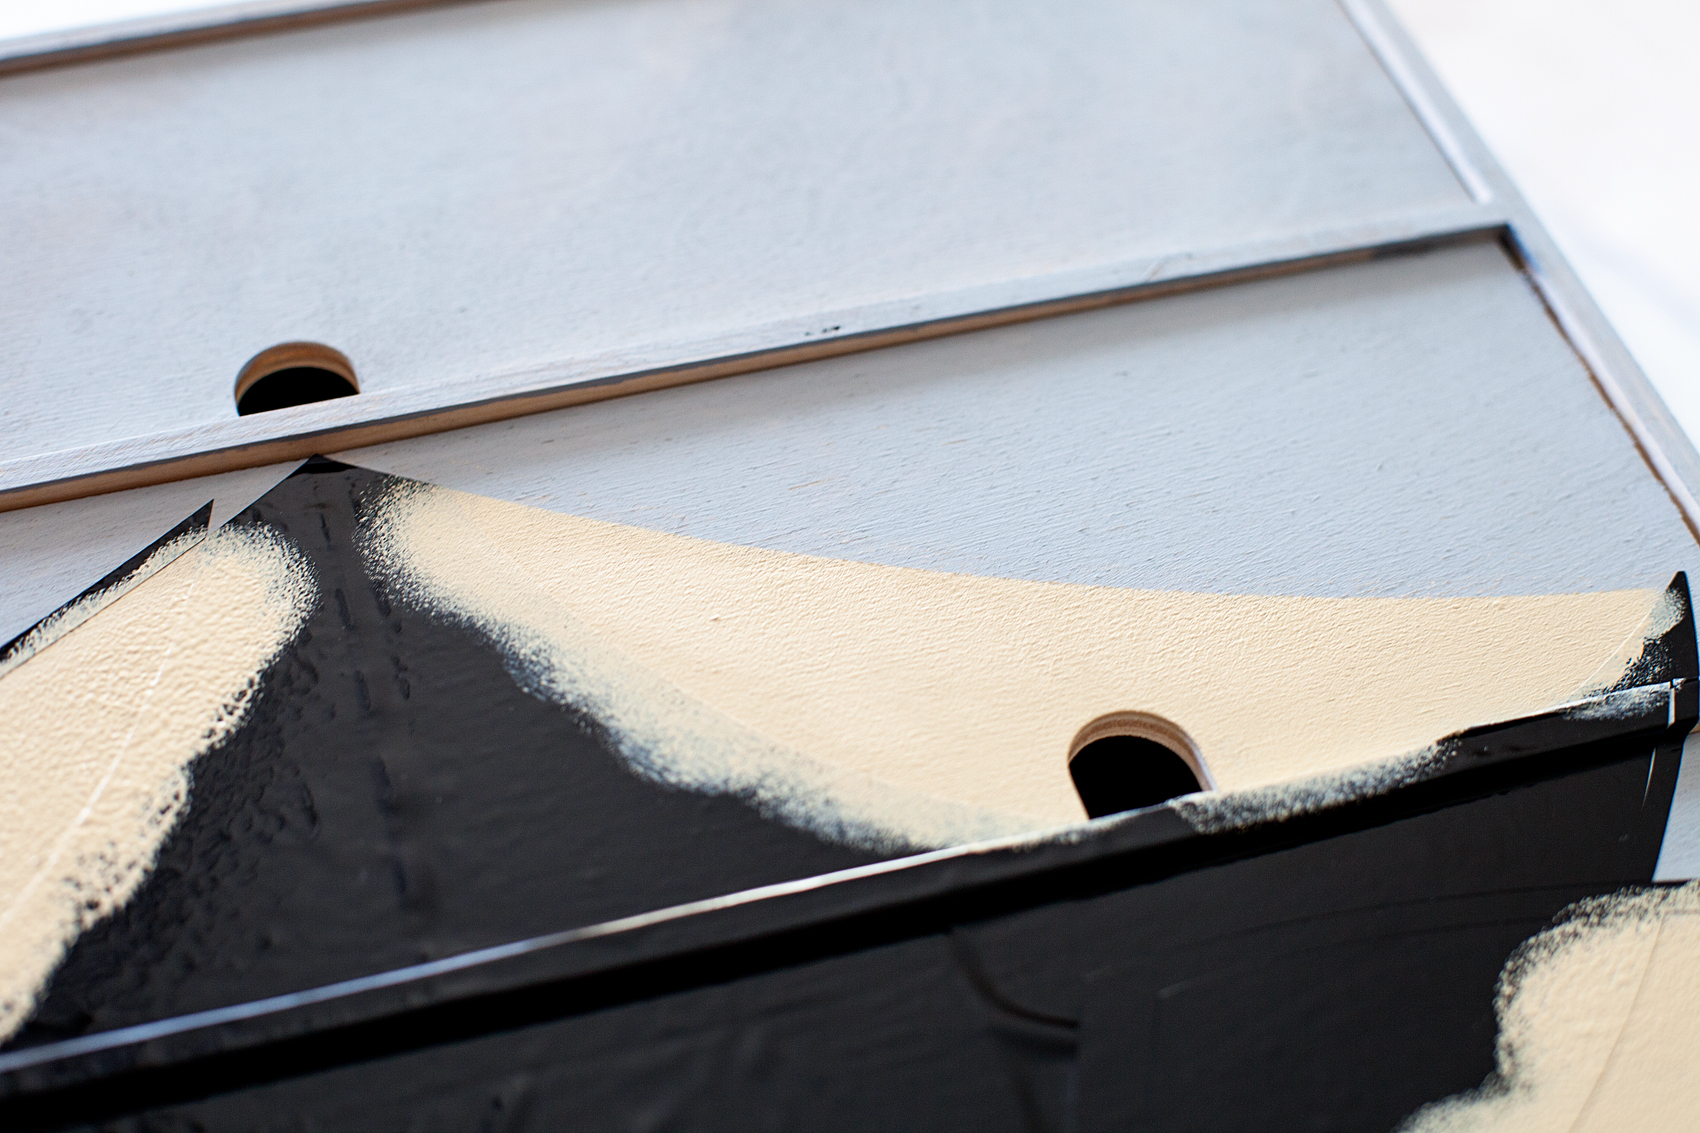
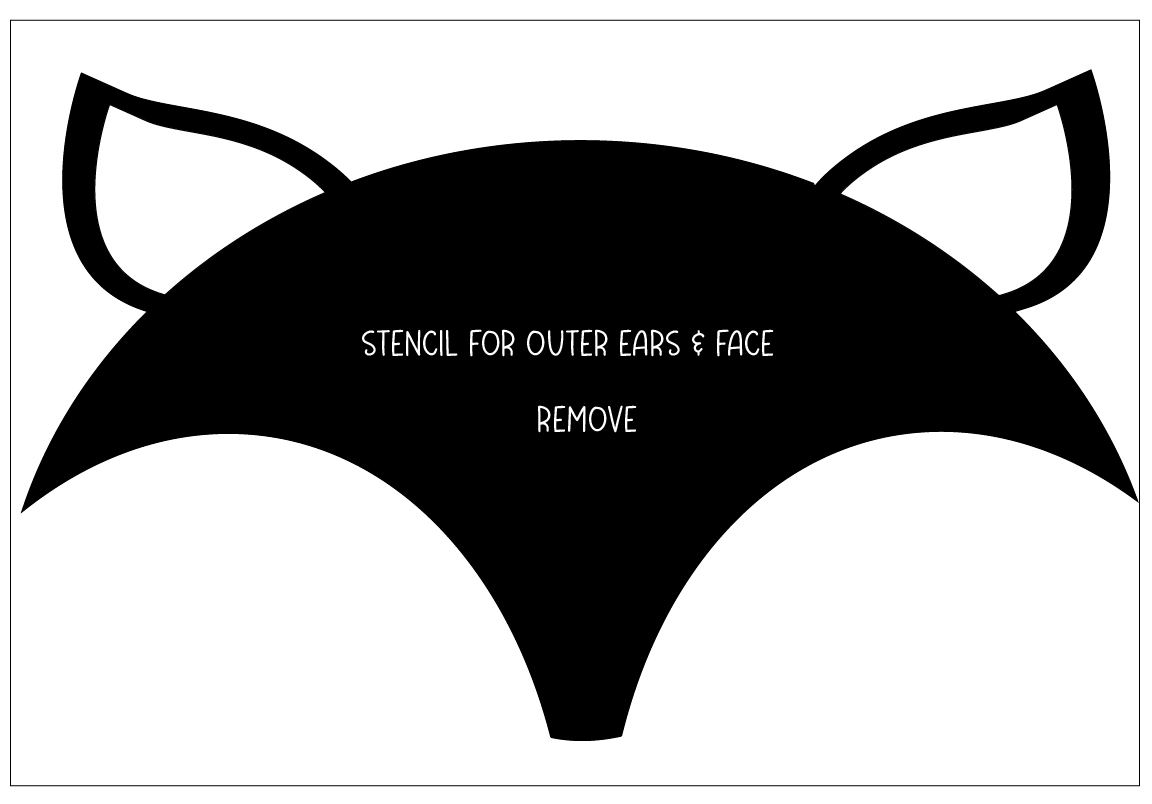
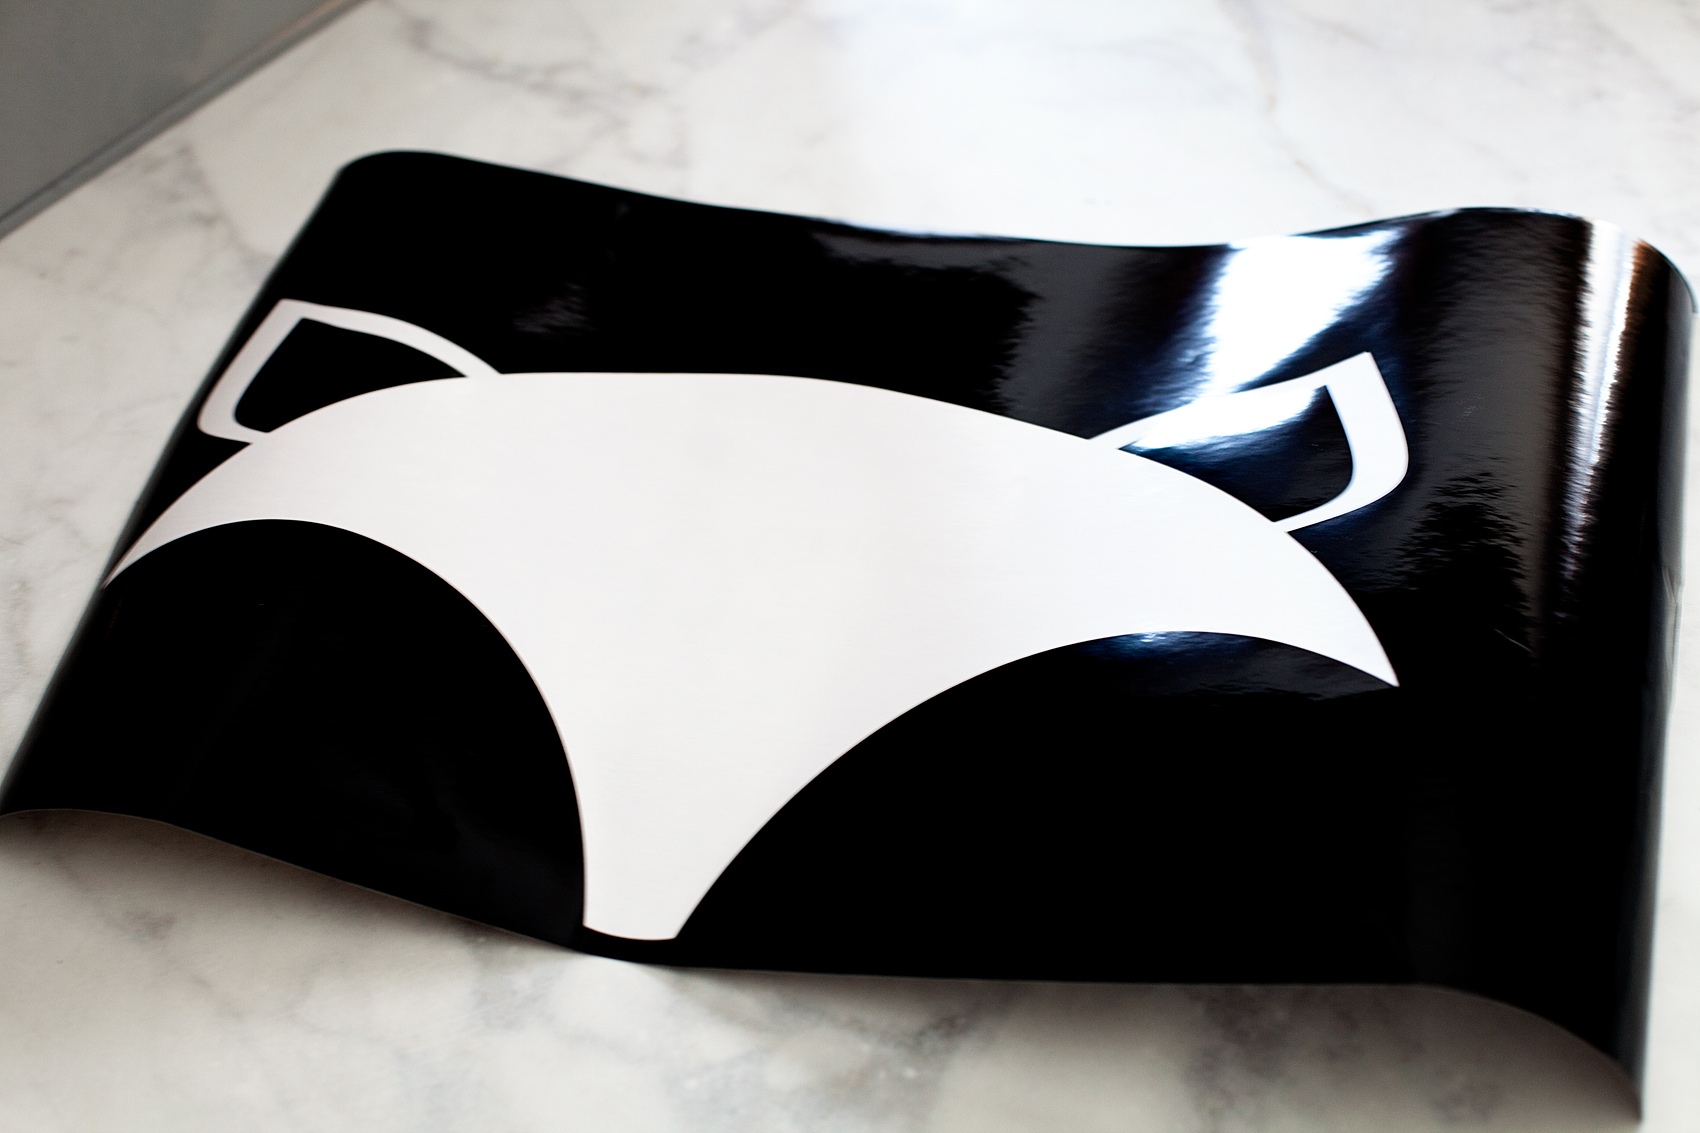
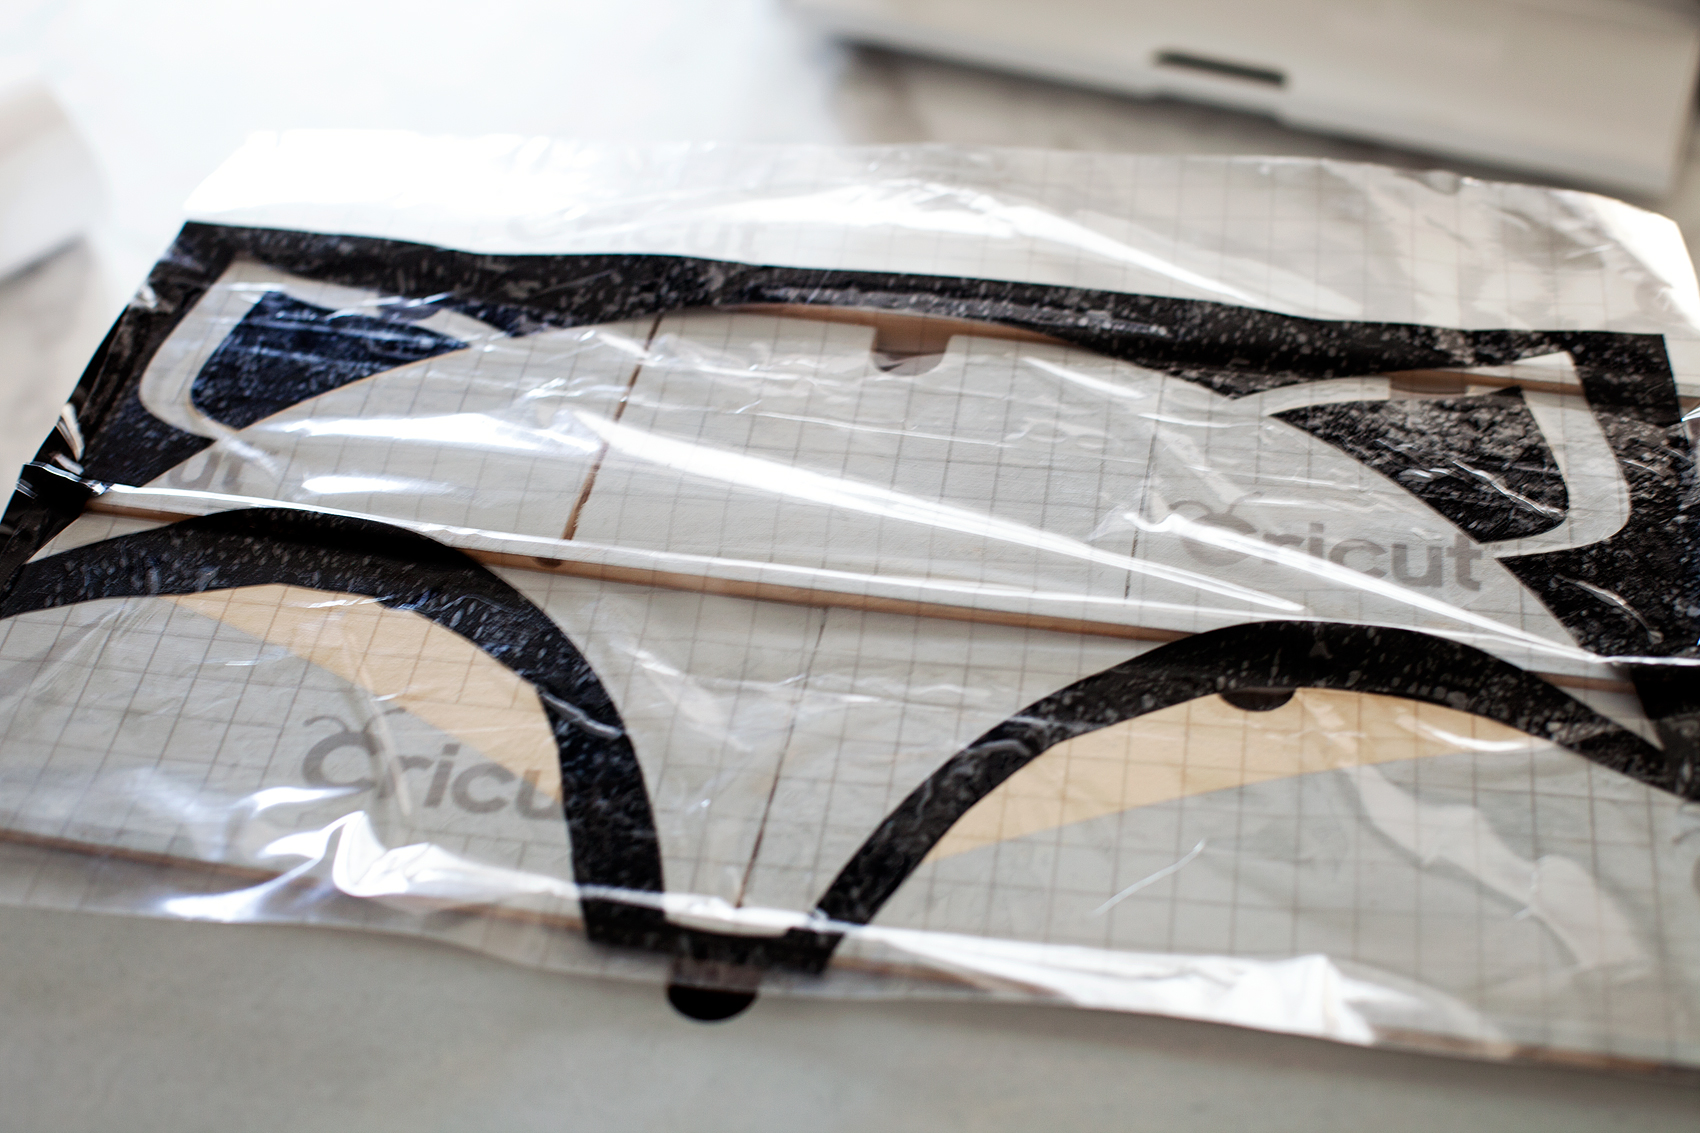
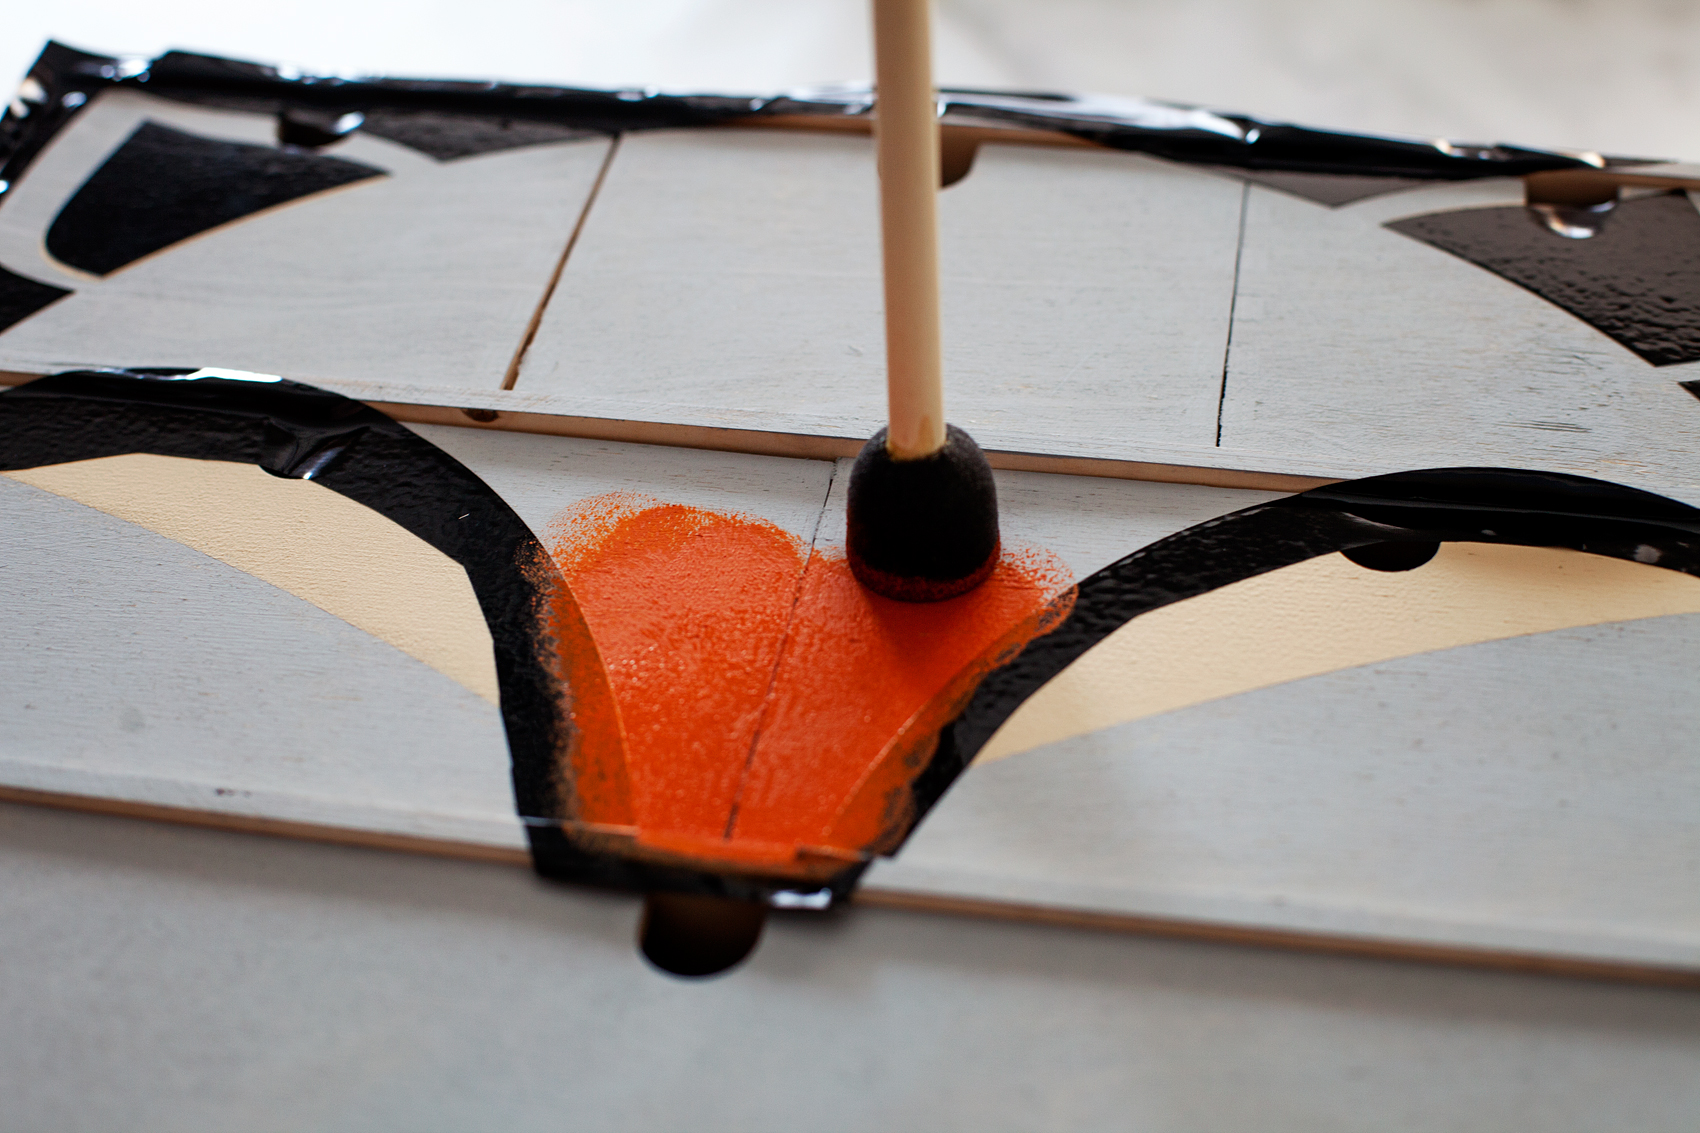
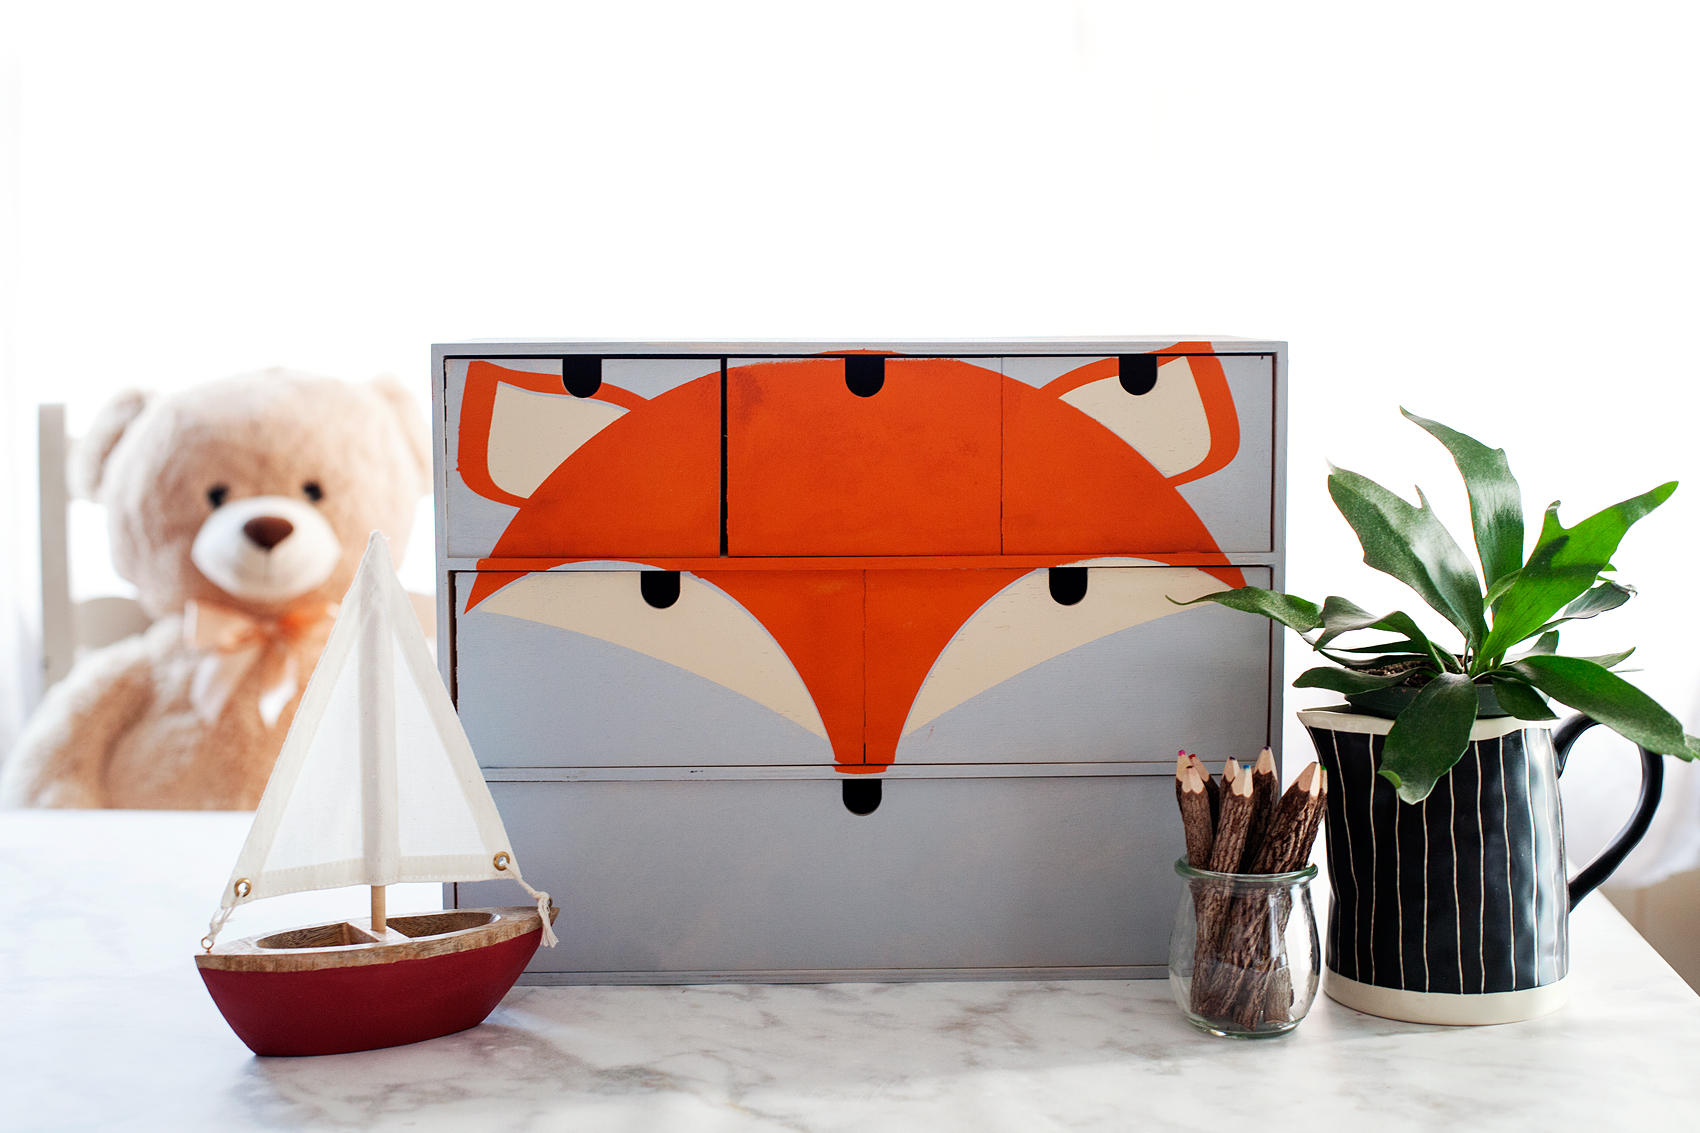
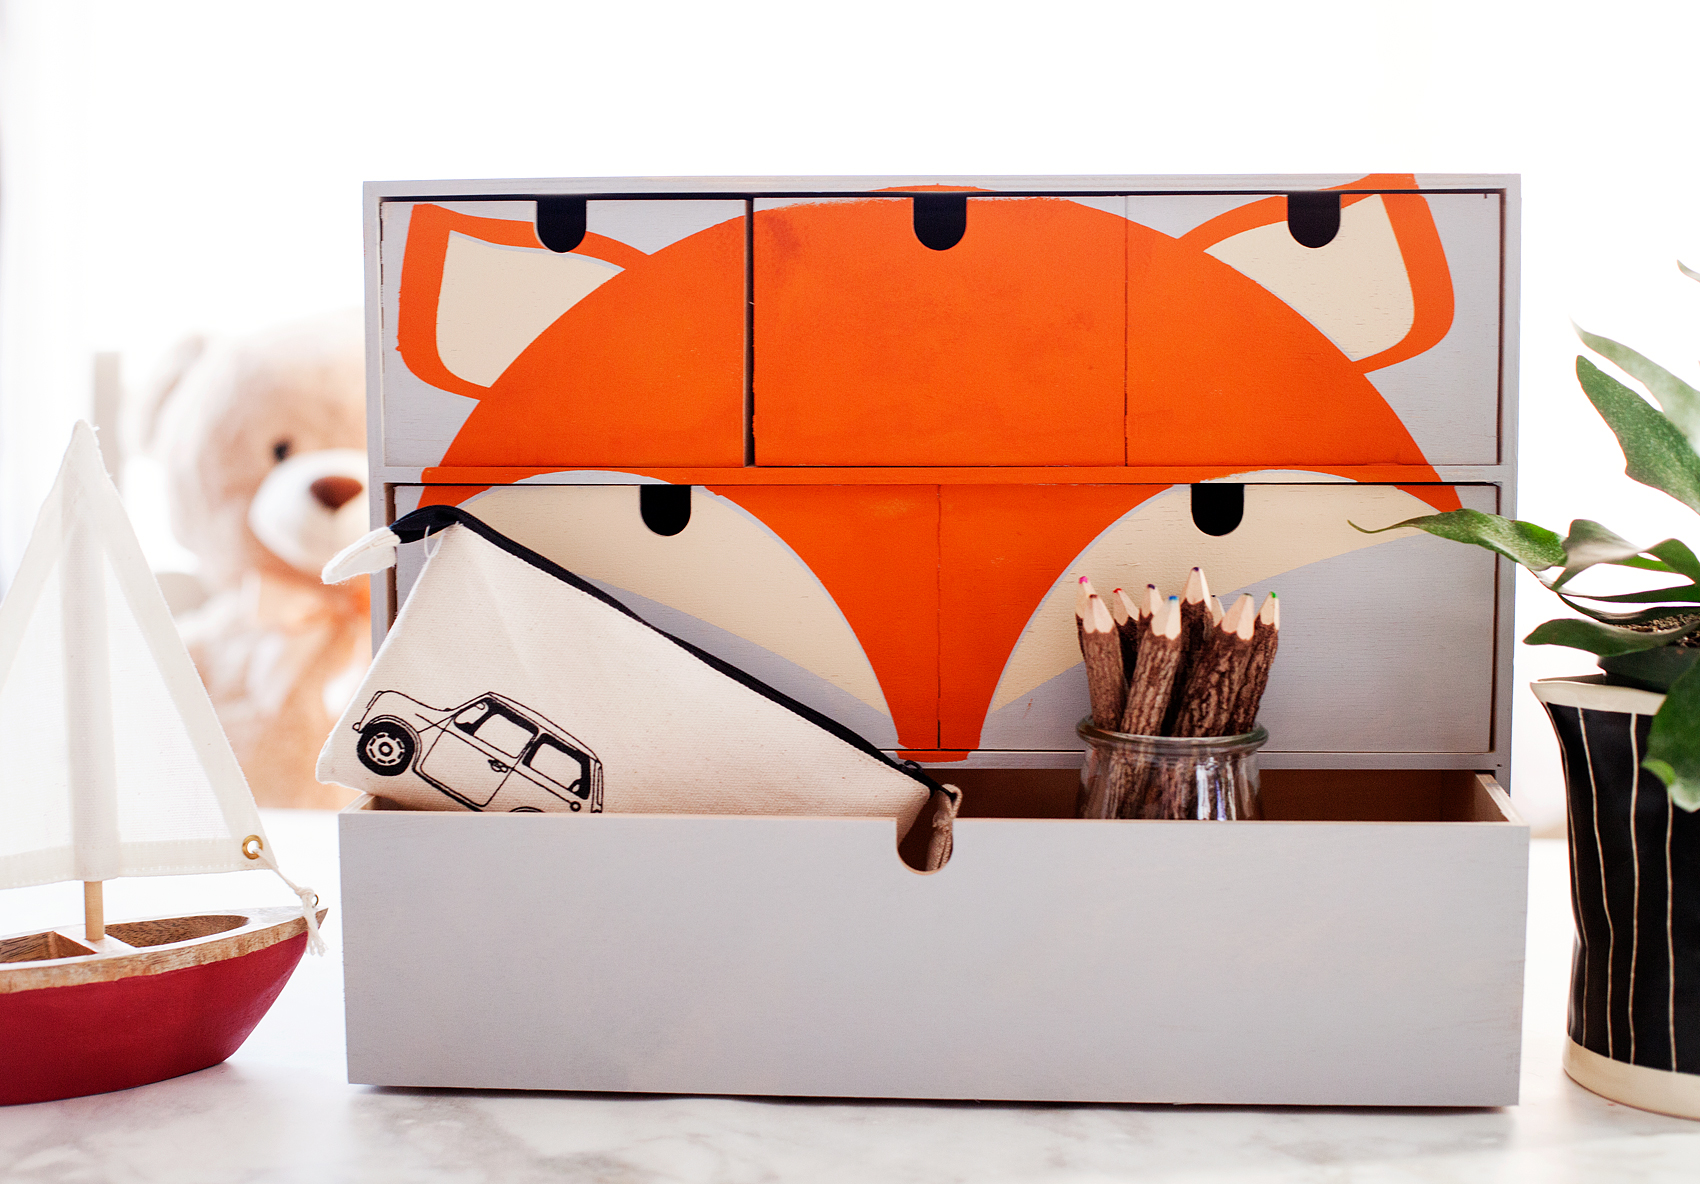
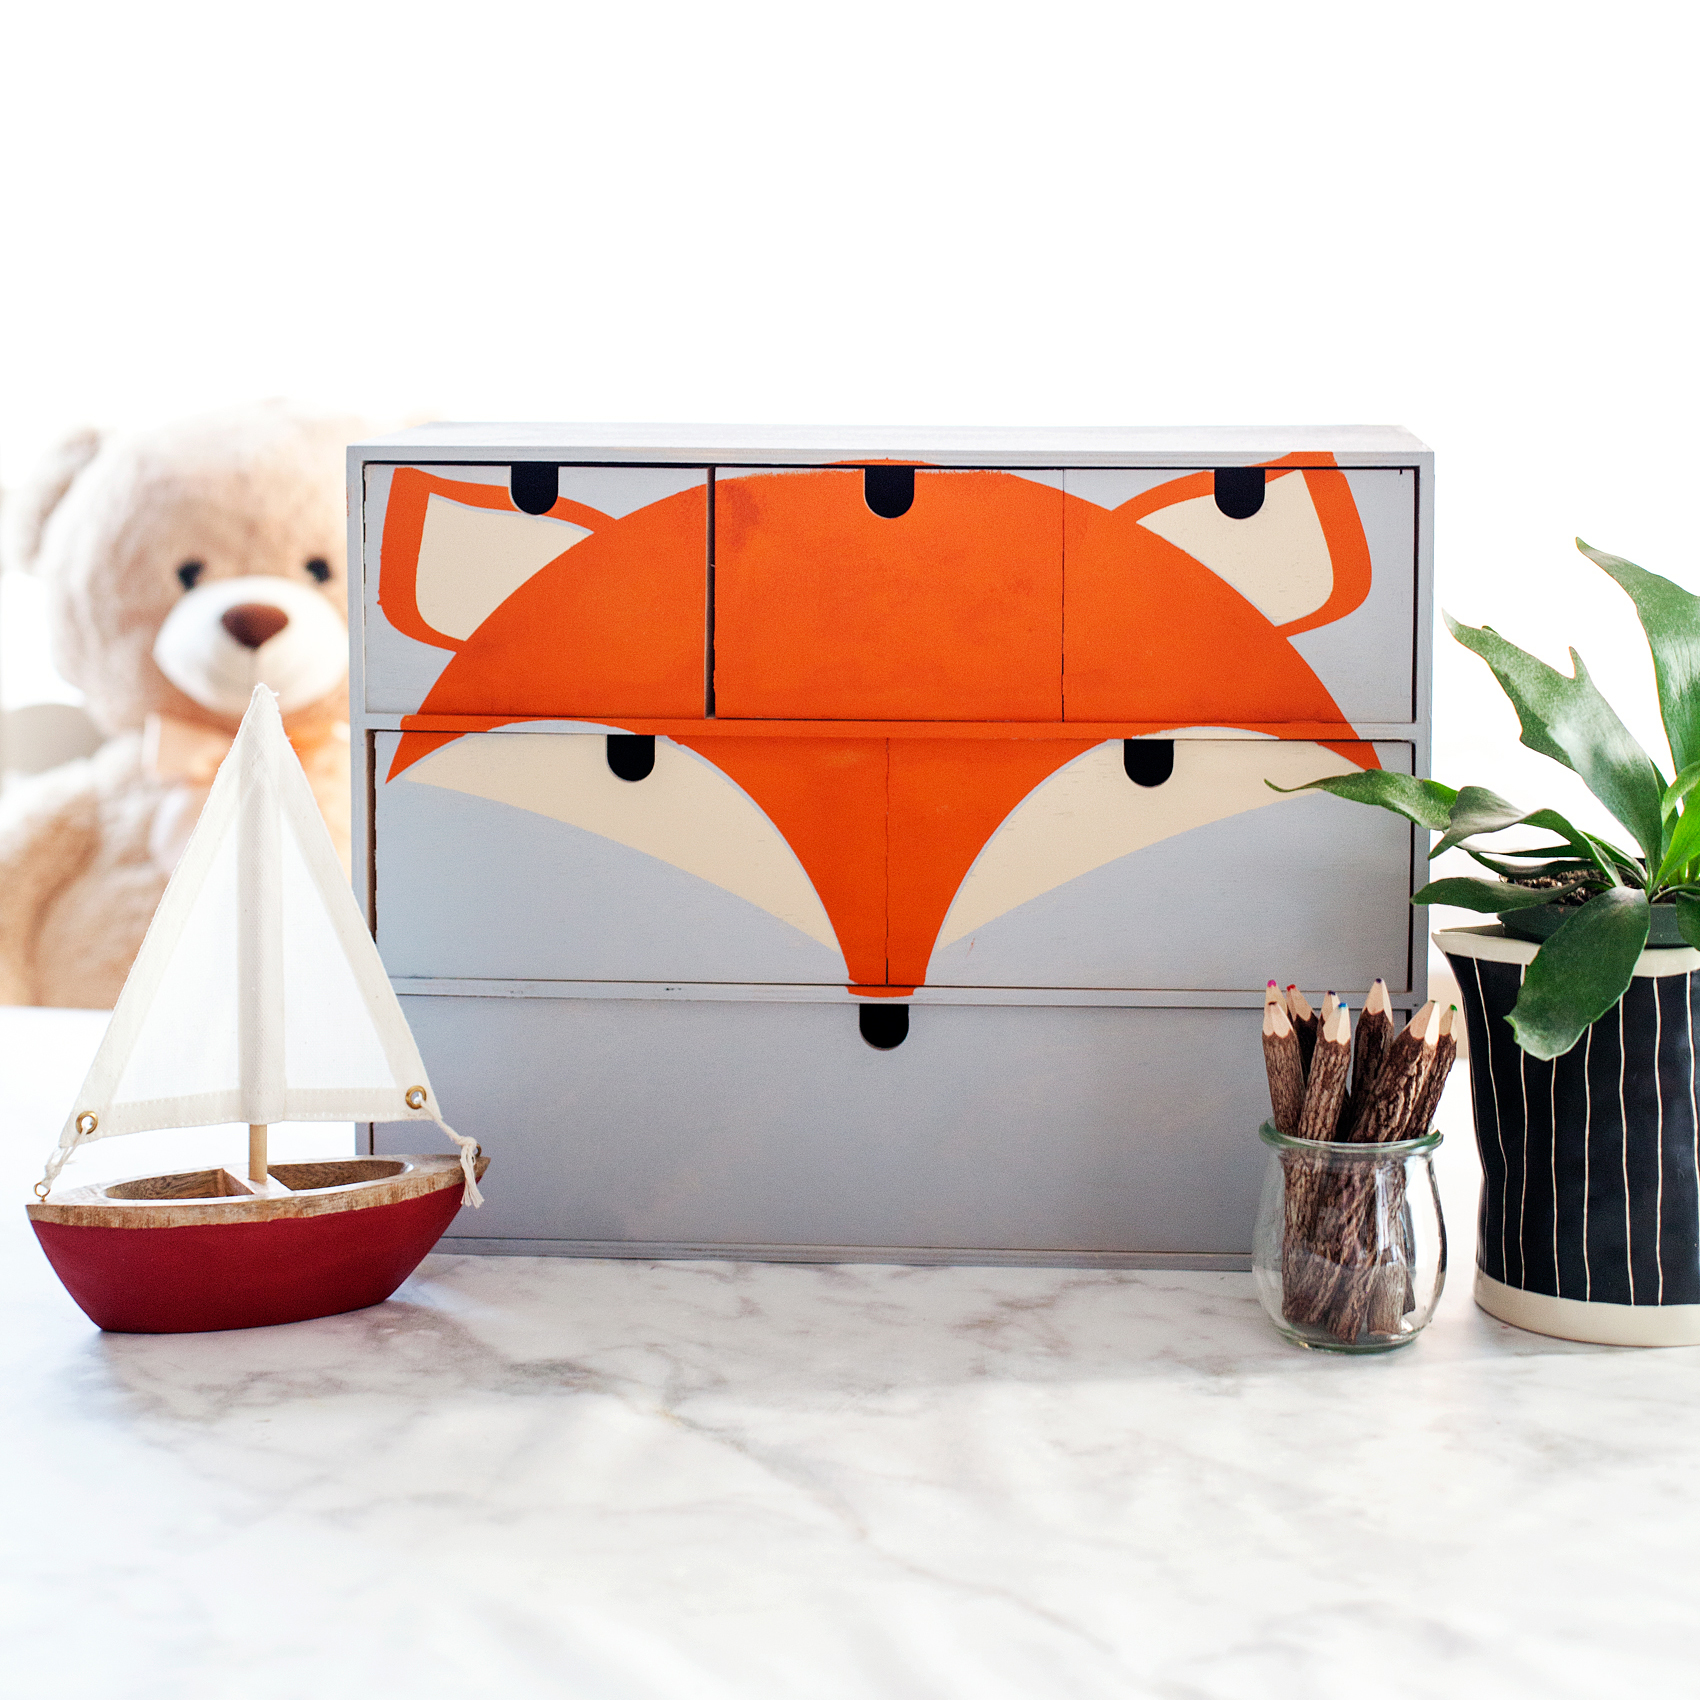
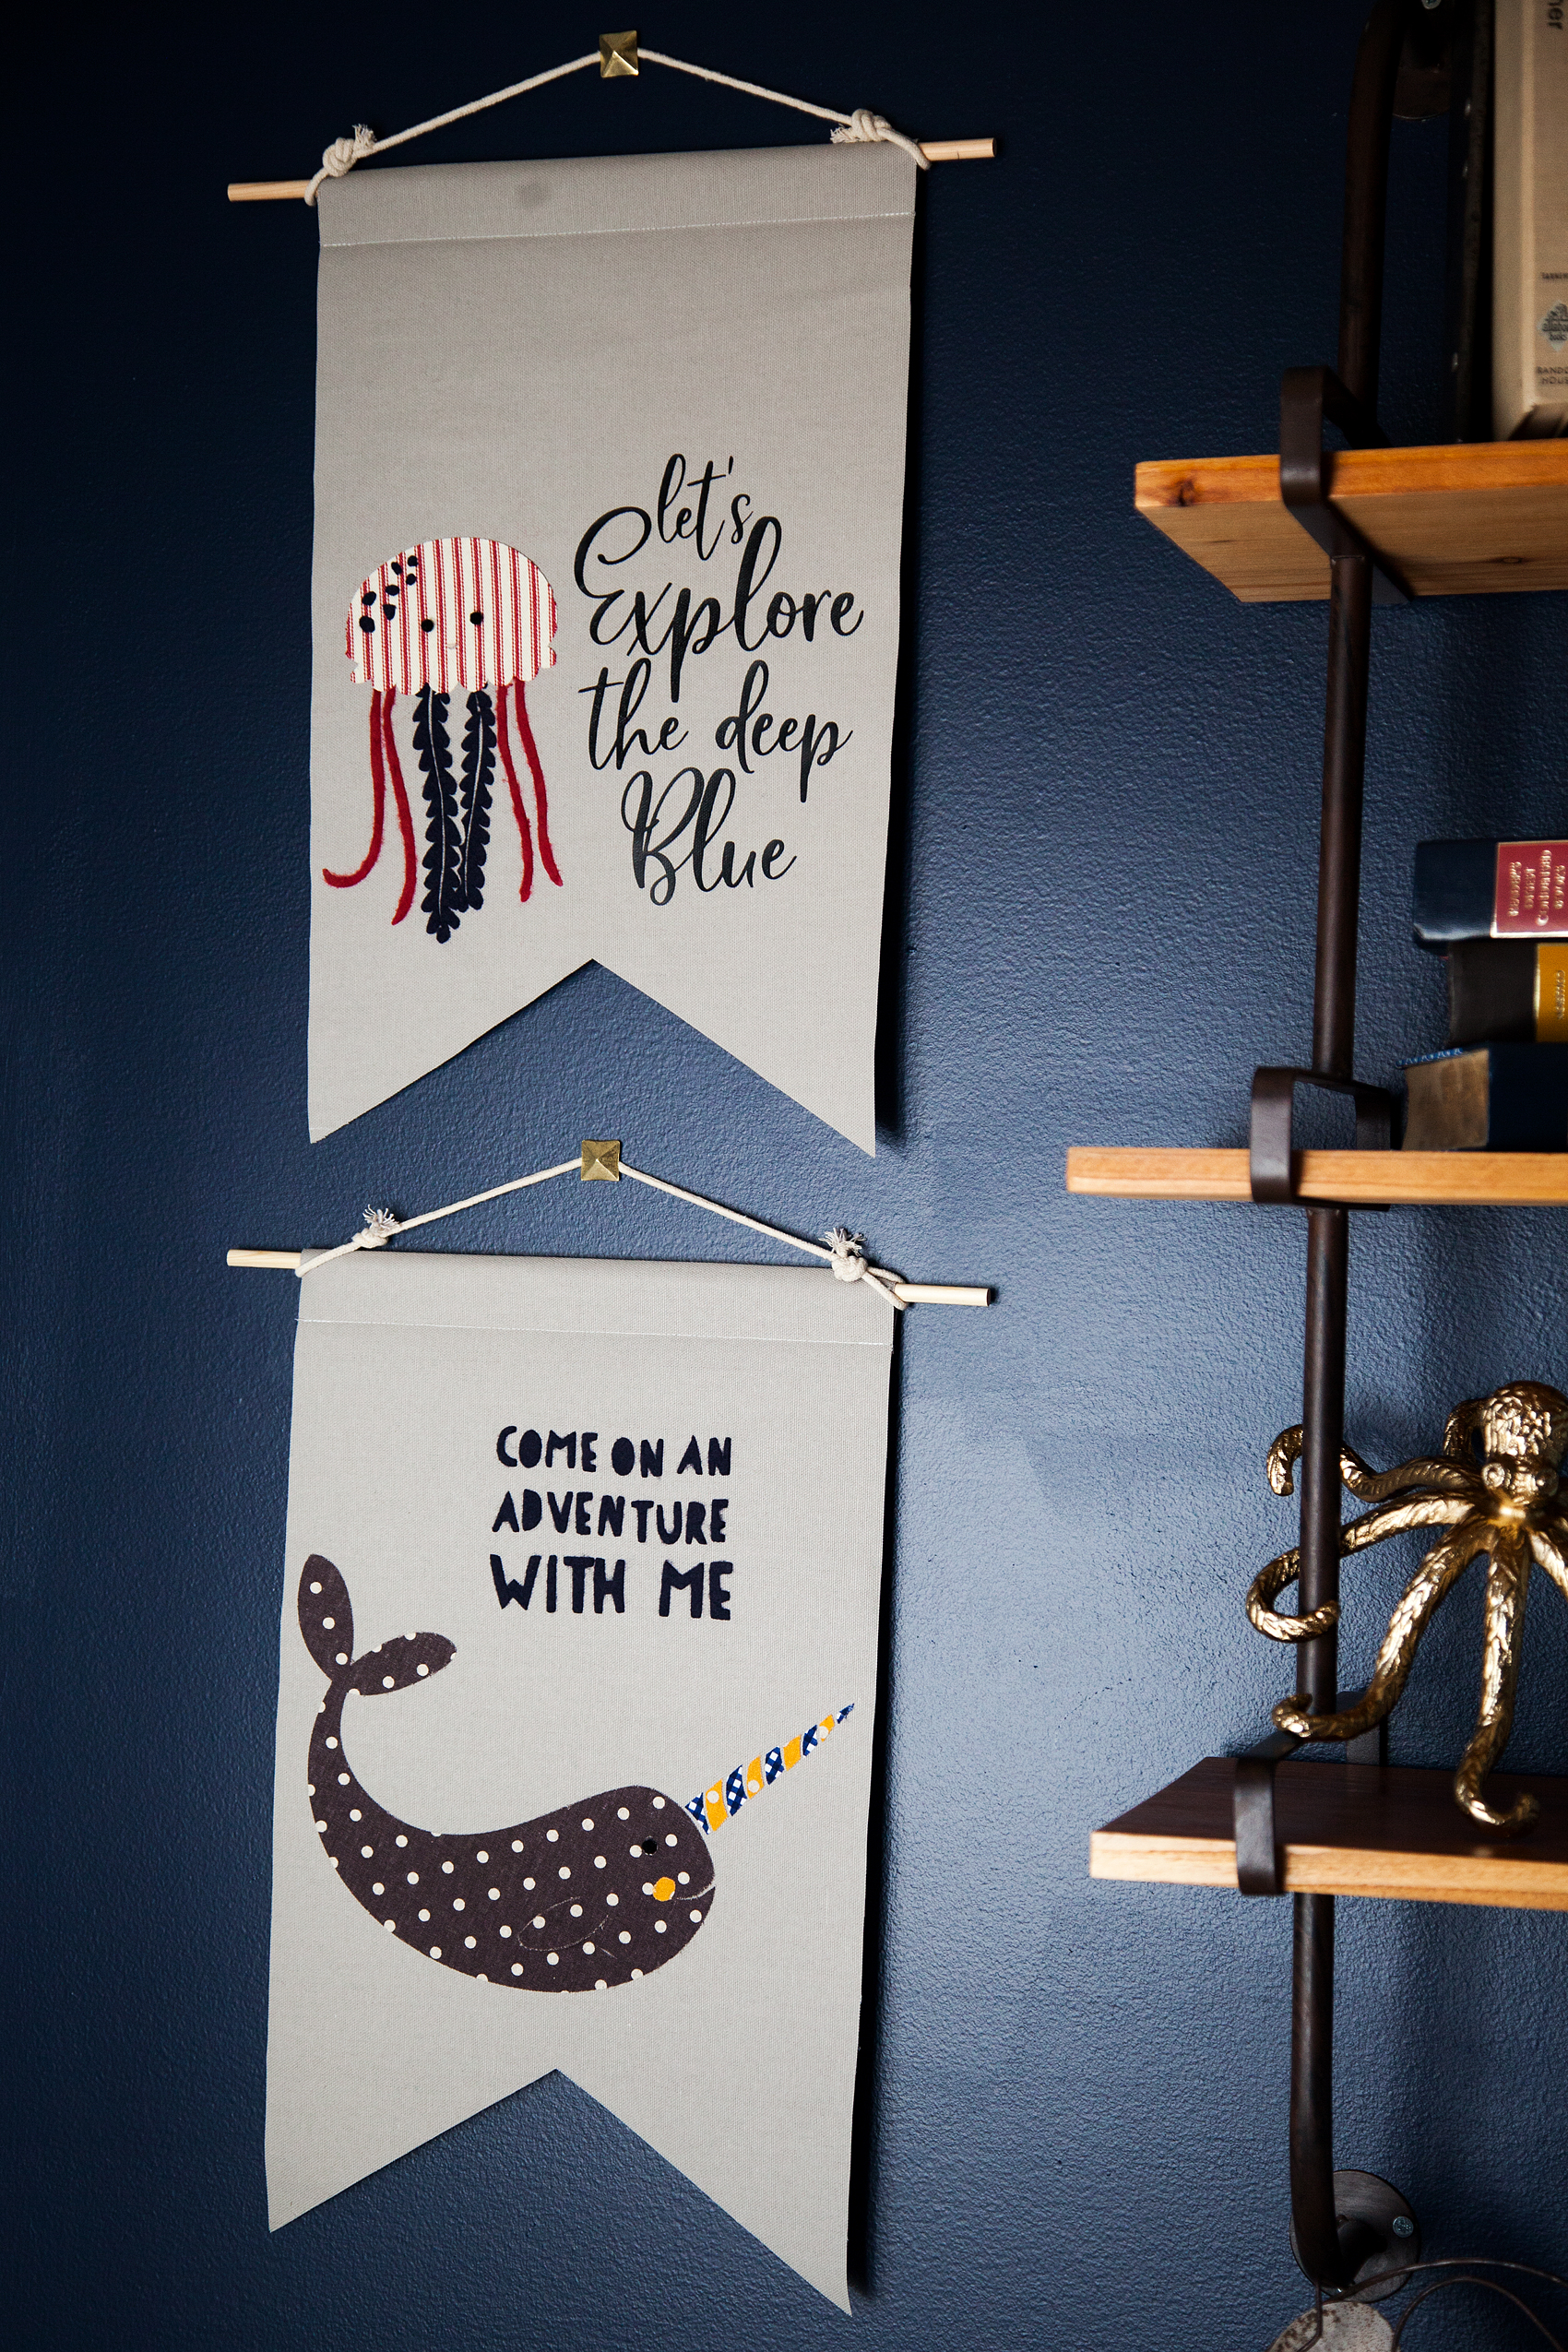
I’ve been working on a room makeover for my little guy, Gage. We created a vintage adventure room that covers everything land and sea. It’s all about adventure in this great big world of ours. I wanted to have some animals of the sea & land represented in the room. I used my Cricut Maker to make a vinyl stencil for this cute fox storage chest for his little gadgets and gizmos.

Transform a simple mini storage chest from IKEA into this cute little fox storage chest for your little ones little toys and trinkets. I used some of the @decoart chalky finish paint along with my @cricut Maker to create this fun design for my little boys room • WhipperBerry

Next, I wanted to make some sea loving creatures for some fabric banners on his wall. We LOVE Narwhals and jellyfish at our house quite a bit so, I knew I had to create something with these two ocean gems. After a little design work, I came up with these cute designs. Let's Explore the Deep Blue Banner created by WhipperBerry • A great banner idea for your little ones room.

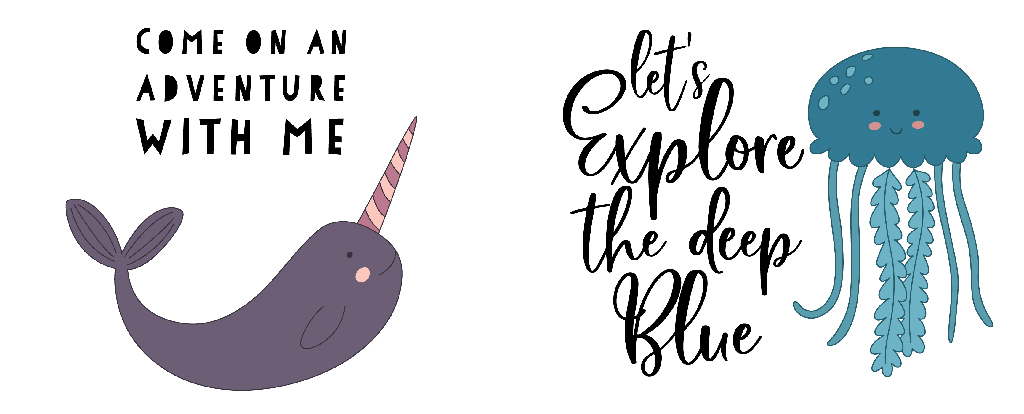
Supplies for Fabric Banners

The next trick, making these designs into fabric banners for Gage’s room. I rummaged through my fabric stash and found some colors that would go well with the room design.

Fabric Banners • Great colors for a little boys room

Here’s the rest of the supplies you will need.

  • fabric
  • Heat n’ Bond
  • Cricut Maker
  • Cricut Rotary Cutter
  • Cricut Bonded Fabric Blade
  • Cricut Fabric Cutting Mat
  • fabric glue
  • wood dowel
  • cotton rope
  • sewing machine (optional)
  • thread (optional)

How to Create Graphic Banners with Fabric • They are easy to make with the Cricut Maker and have such impact in your room or for a party. Come learn how easy they are to make at whipperBerry.

Instructions

First, you need to create your design within Cricut Design Space. You can use either the large library of fonts that they have compiled at Cricut or, use your favorite fonts on your computer. You also have access to thousands of graphics that you can use to personalize your space or dress-up your party.

How to Prepare Graphic to Cut in Cricut Design Space

When you are working with multiply colors of fabric or paper, Cricut Design Space has some brilliant features that I really like. Instead of typing them all out I thought I would create a video for you watch that teaches you exactly how to prepare your designs to cut that really makes the cutting process so much easier. Click on the image below to watch the video.
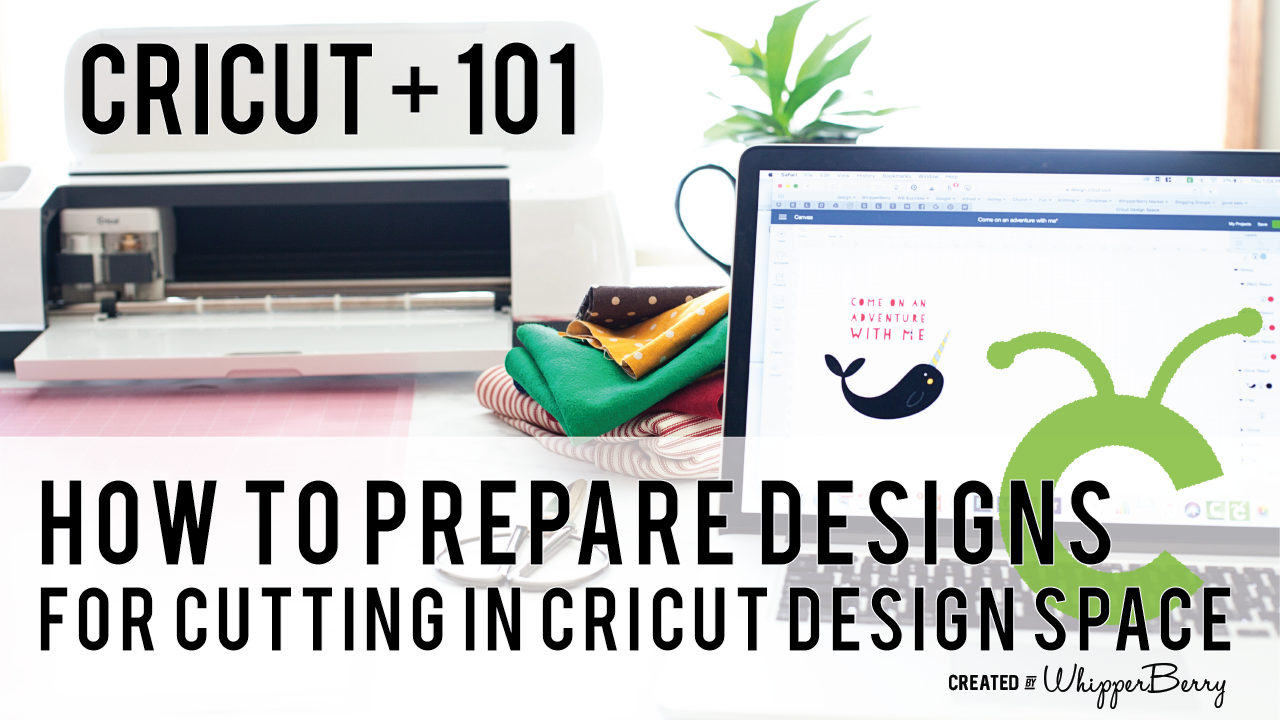
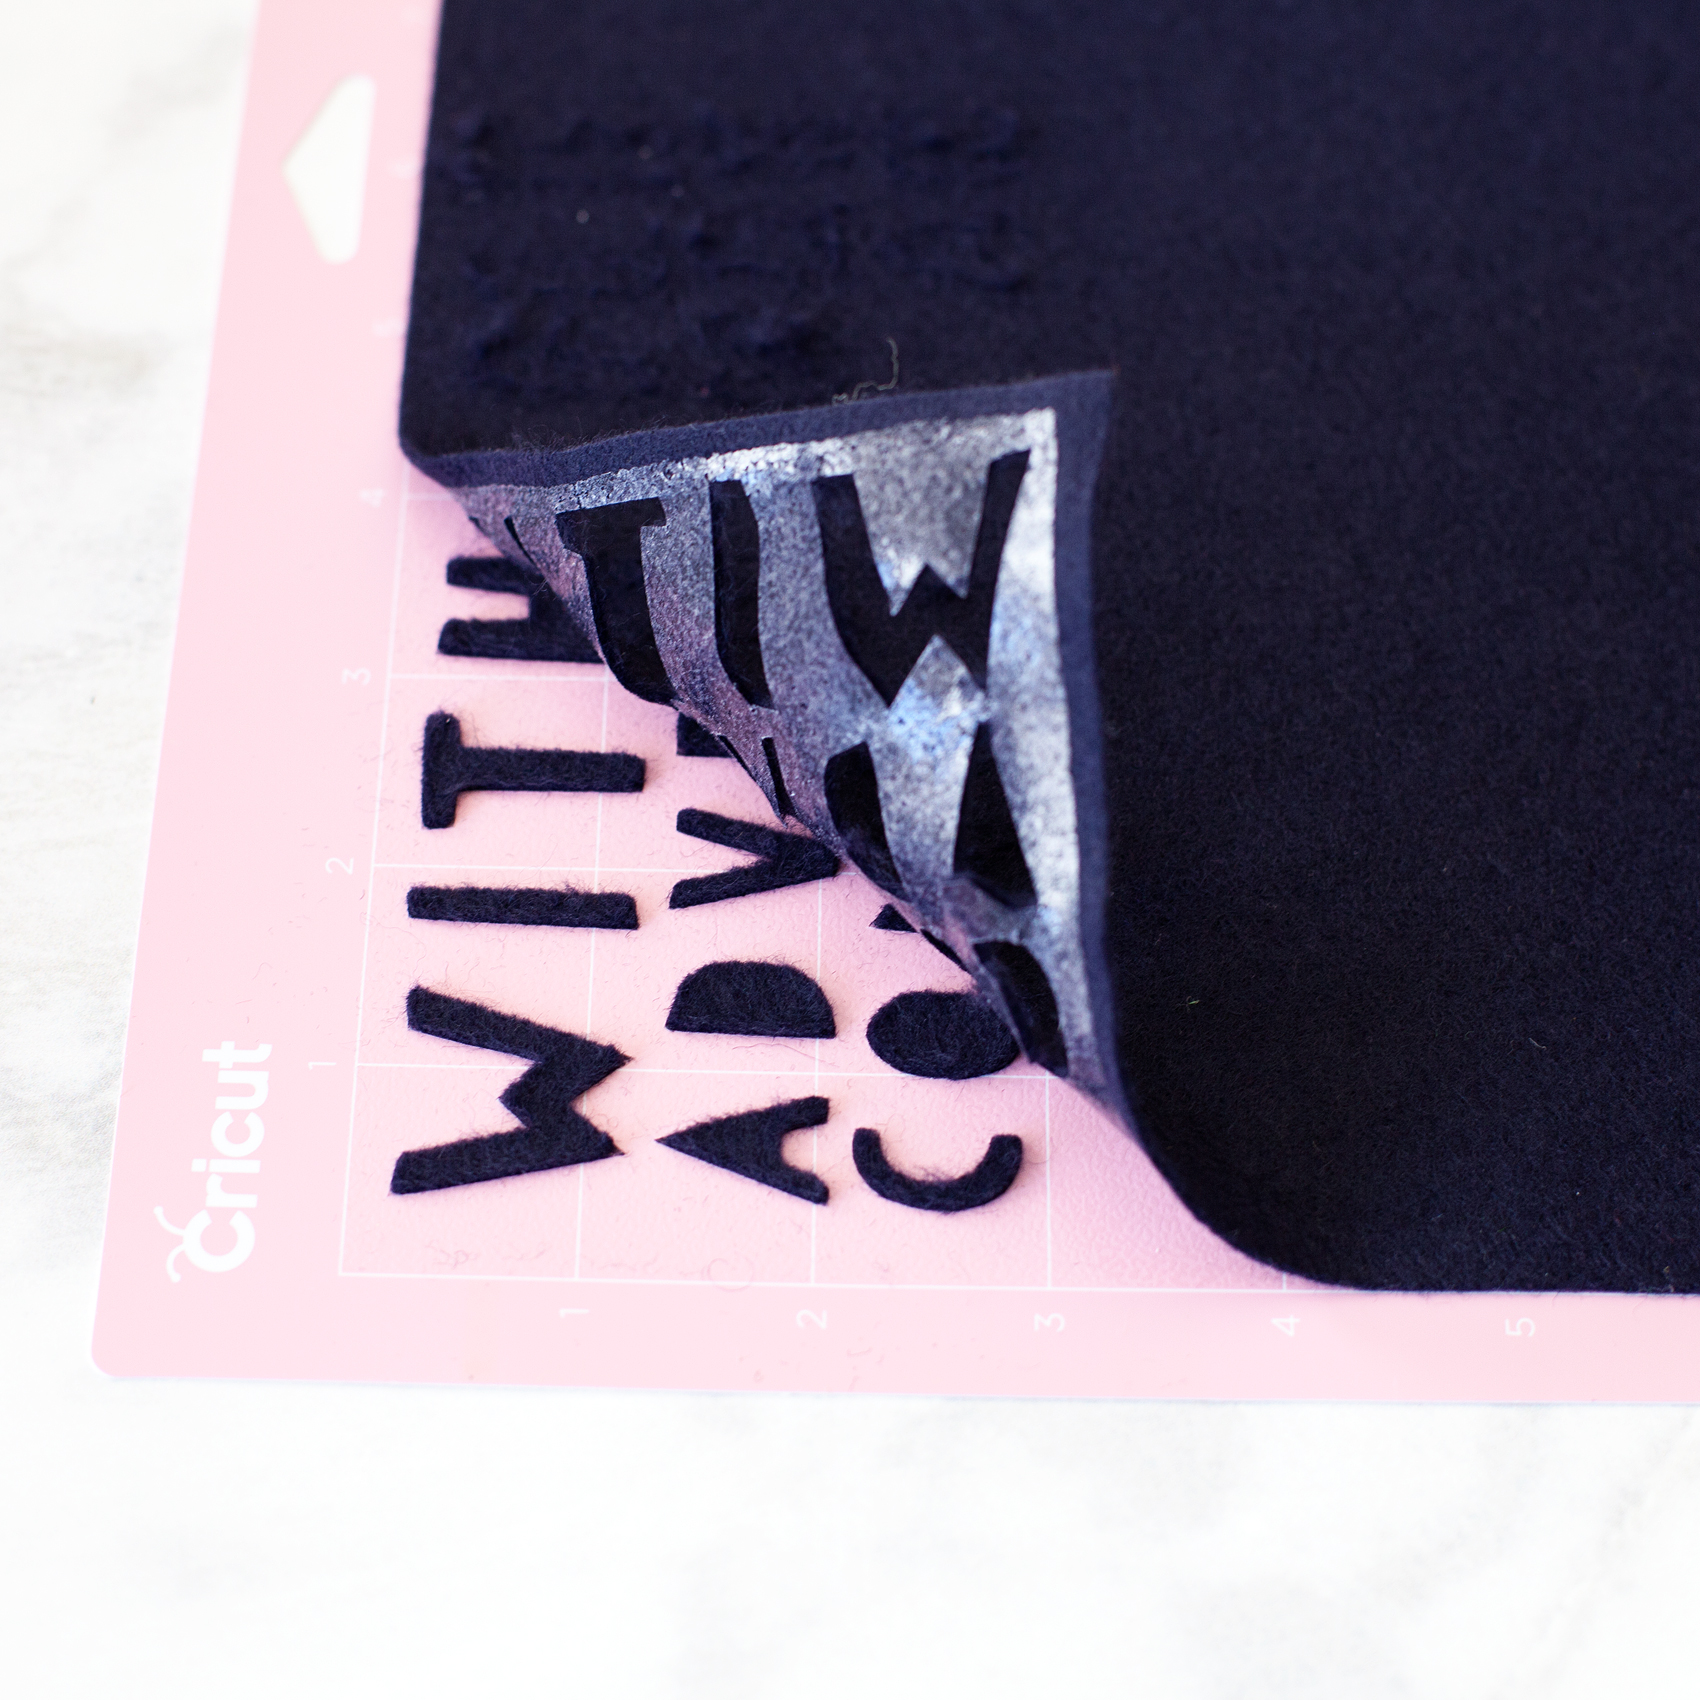
When you are working with multiply colors of fabric or paper, Cricut Design Space has some brilliant features that I really like. Instead of typing them all out I thought I would create a video for you watch that teaches you exactly how to prepare your designs to cut that really makes the cutting process so much easier.- WhipperBerry

Cutting Fabric

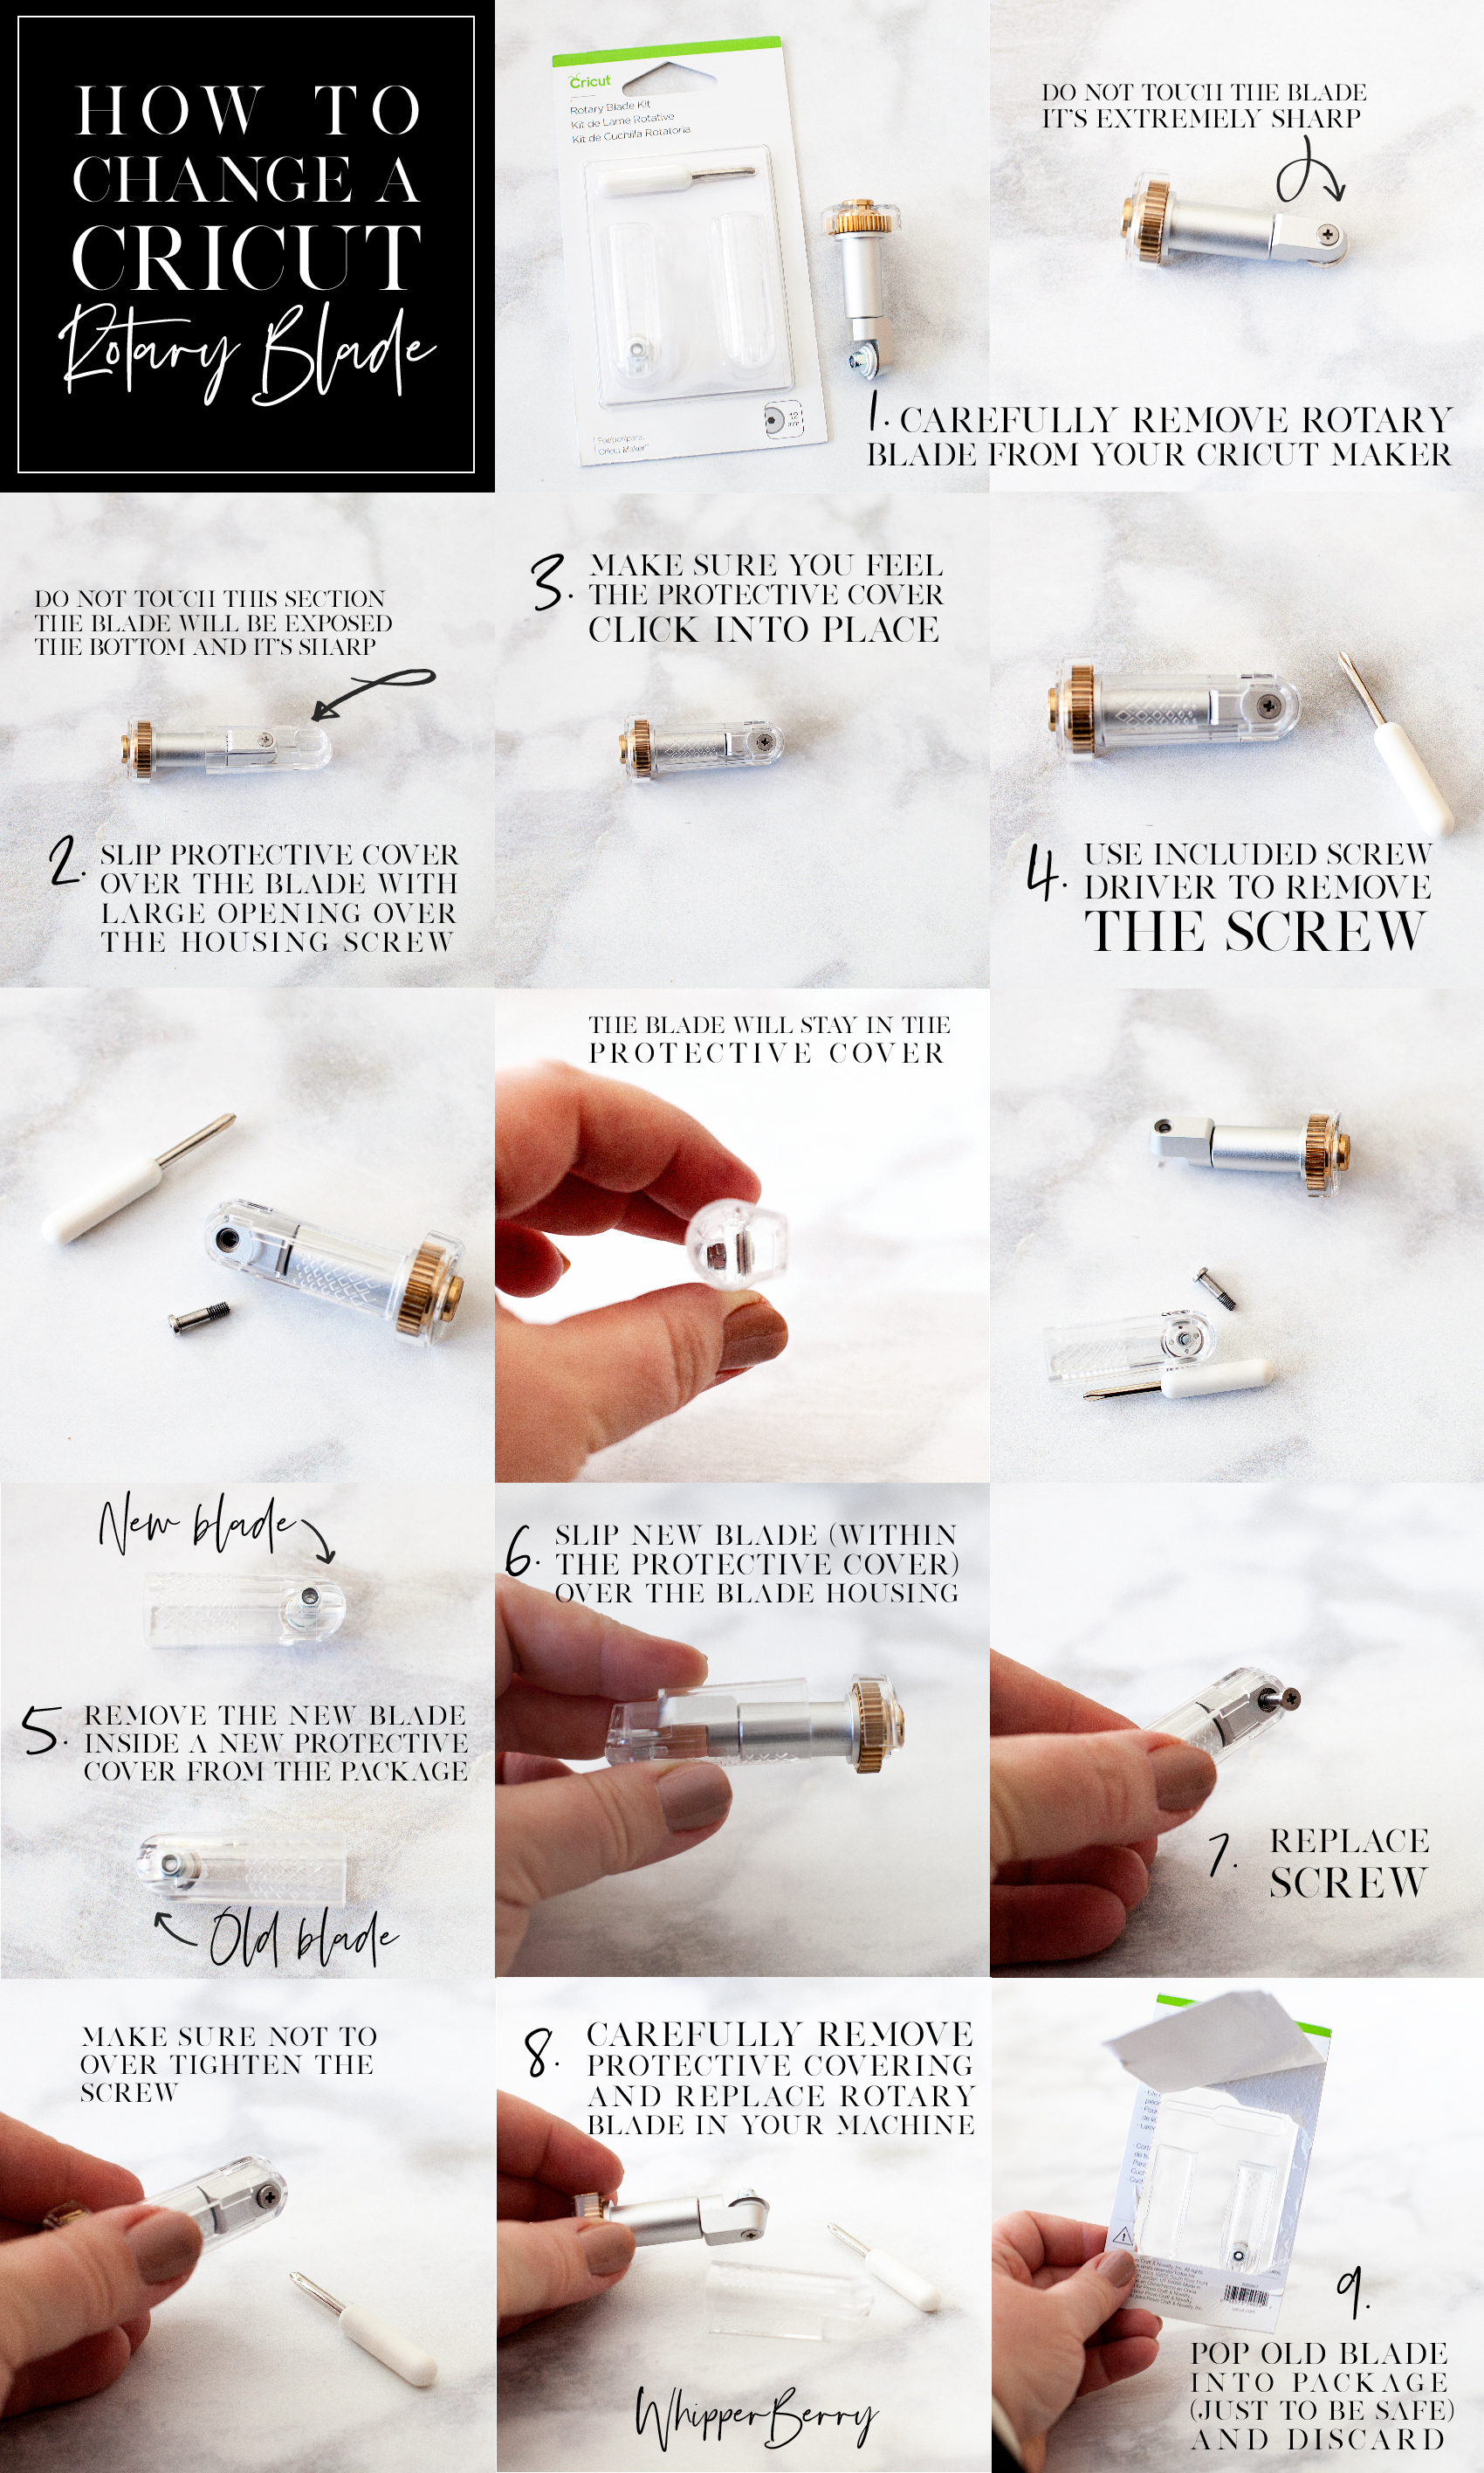
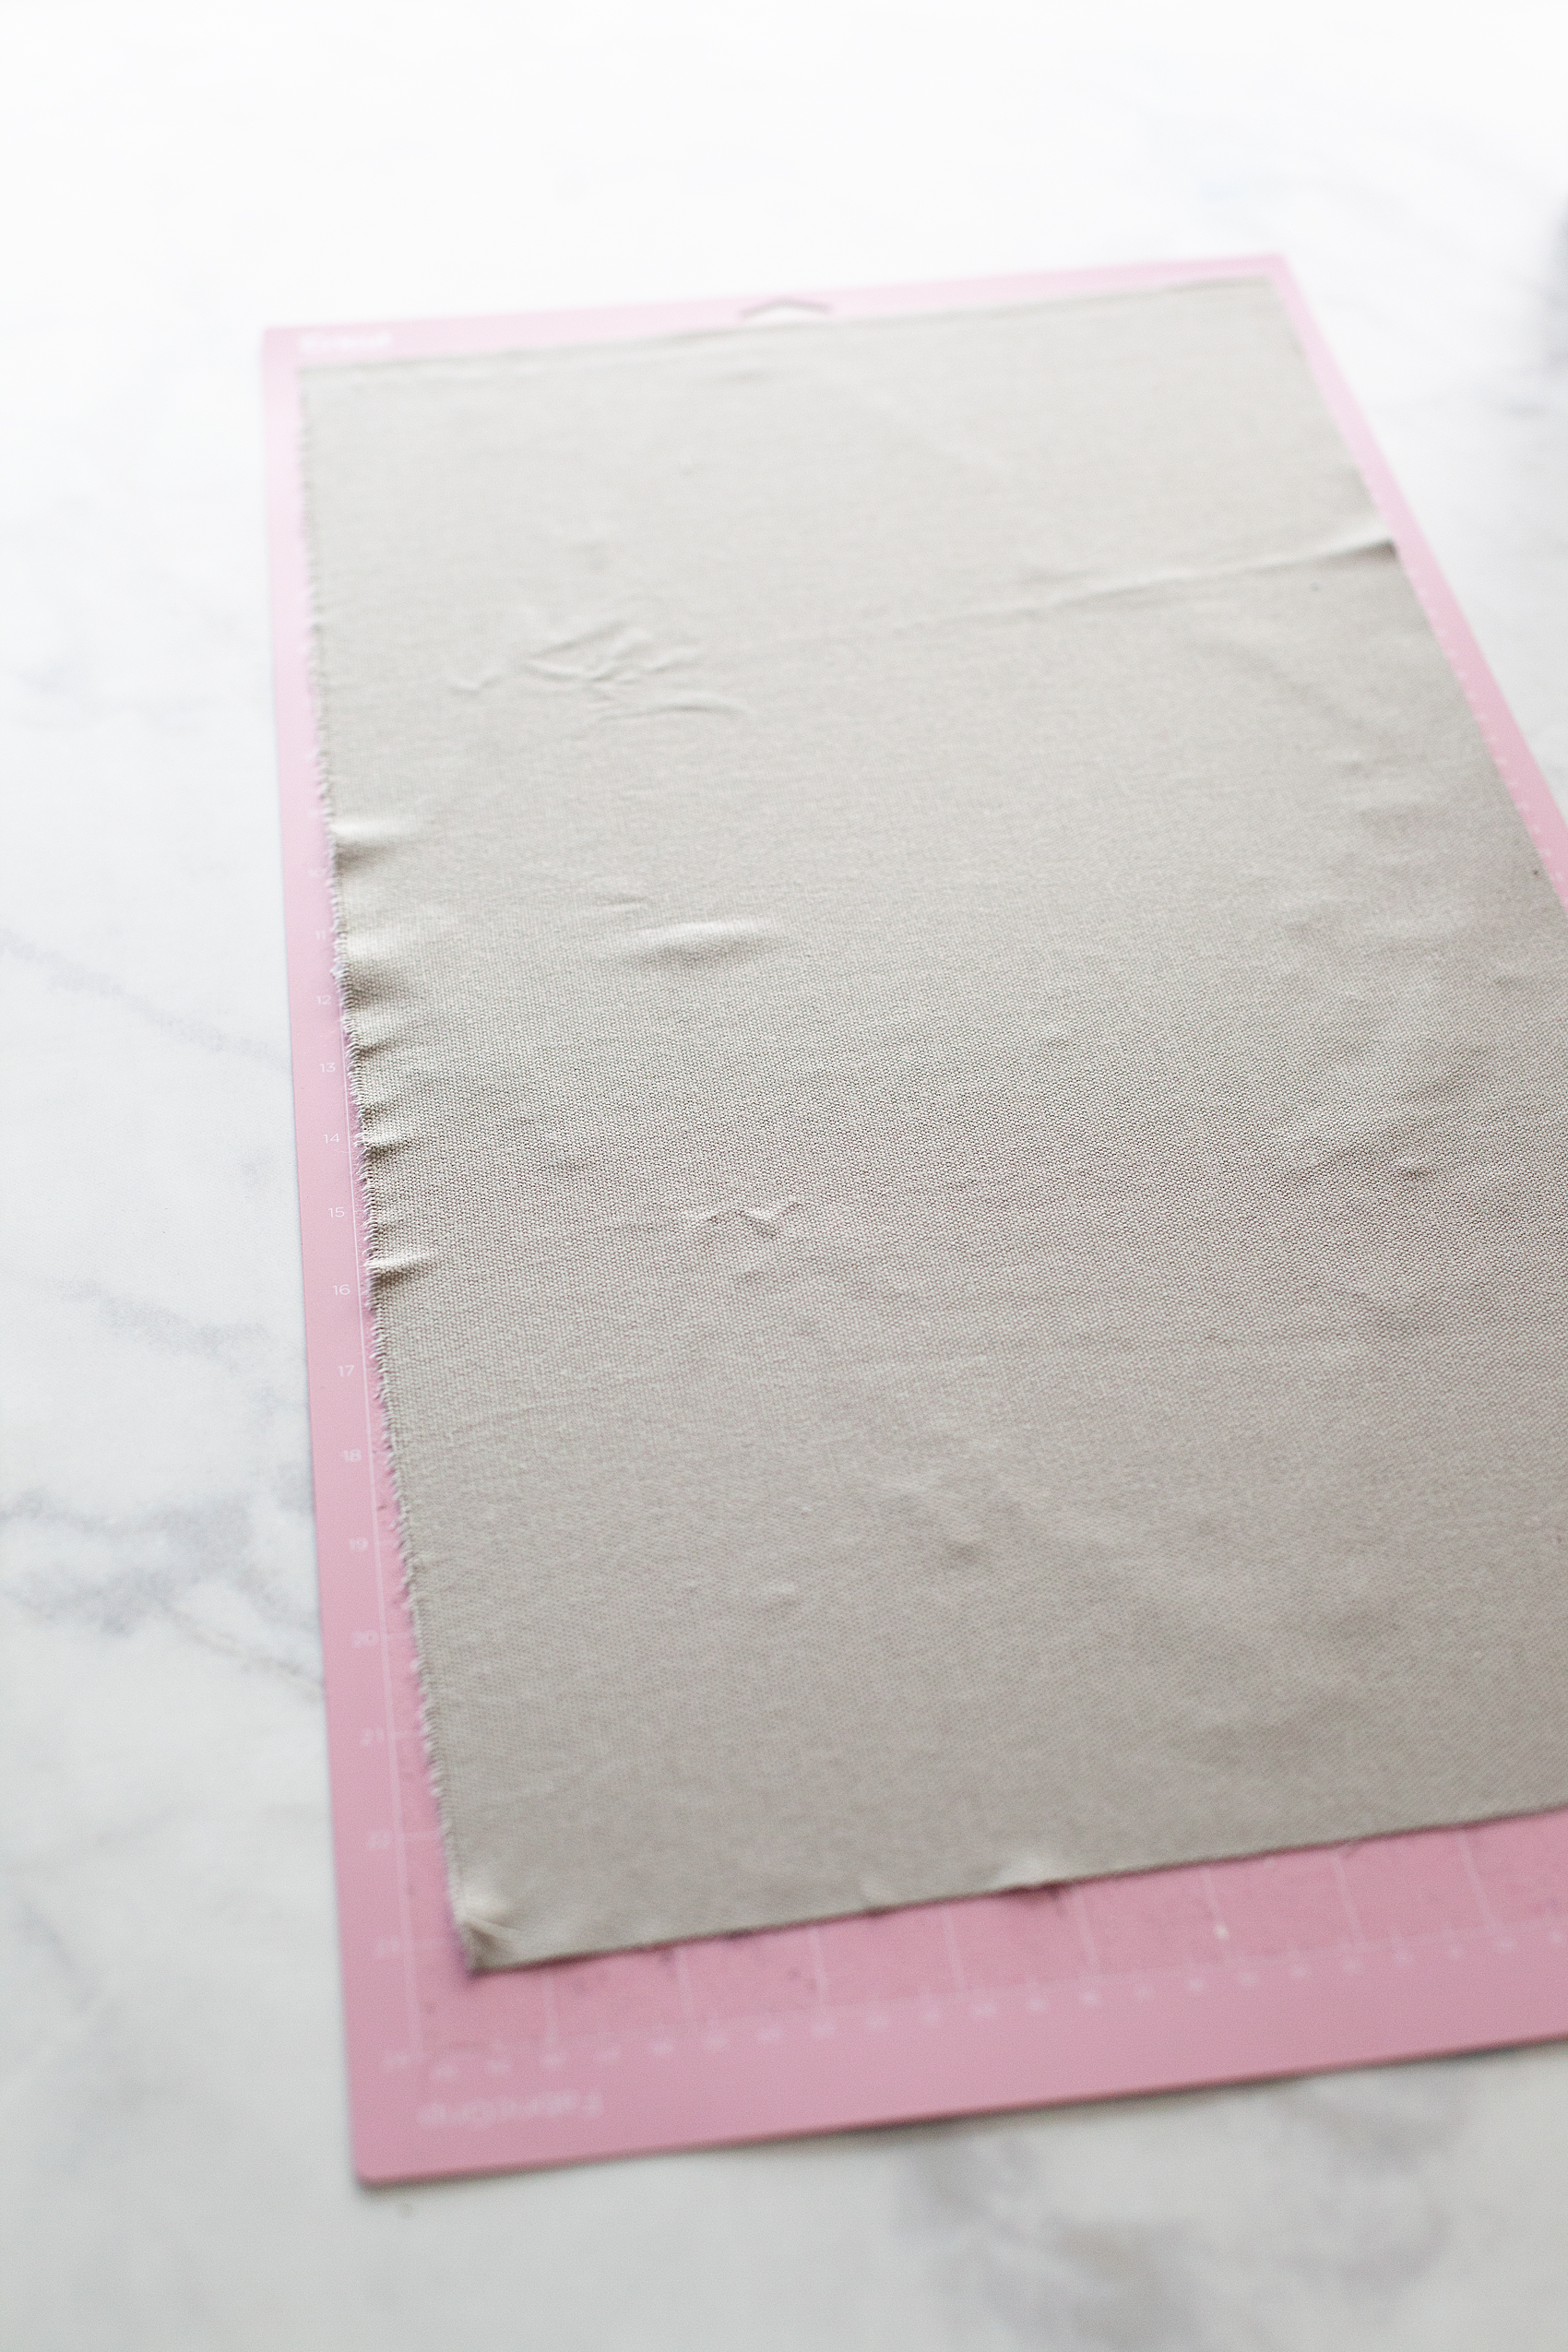
Now that your designs are ready to cut, it’s time to prepare your cutting mats. If you are cutting fabric, you need to make sure you are using the fabric cutting mat and the fabric rotary cutter. If you happen to have a rotary cutter that needs to be changed, here is a tutorial on how to do that. Cut your fabric to fit the cutting mat and place it on the mat.

PRO TIP • Don’t worry about cleaning the fabric cutting mat of all the fuzz & threads after you use it. It will work just fine with fuzz & threads. Attempting to clean the mat actually does more harm than good.

If you are planning on ironing your graphics onto the banners, you’ll want to iron-on the Heat n’Bond BEFORE you cut your fabric. (I use my Easy Press, which I LOVE!) In that case, you may want to use the Bonded Fabric Blade when cutting your fabric. I say that with a caveat, I found that the bonded felt that I used cut better with the rotary cutting blade.

Graphic Placement on Banners

Once you have all of your graphic element cut, you’re ready to place them on the banners. I like to layout my design onto the fabric banner first, to make sure I like the placement. That’s where the Cricut Weeding Tools come in real handy. I LOVE those tweezers!

Next, I use the Easy Press to warm the surface of the fabric banner and then lay down my graphics again quickly. Then, I cover them with the Iron-On Protective Sheet or a cotton dish towel if using a standard iron and press my graphics onto the banner according to the Heat n’ Bond directions.

3D Graphics on Banner

One really fun thing you can do when cutting graphics in this manner, you can add some little 3D elements to your design. I thought it would be fun to have my narwhal’s fin to pop out a bit to give him a little more character. When I was pressing the narwhal onto the banner, I placed the used backing of the Heat n’ Bond under the fin with the shiny side of the paper facing the fin. That would mean the it wouldn’t stick to the fabric or the paper.

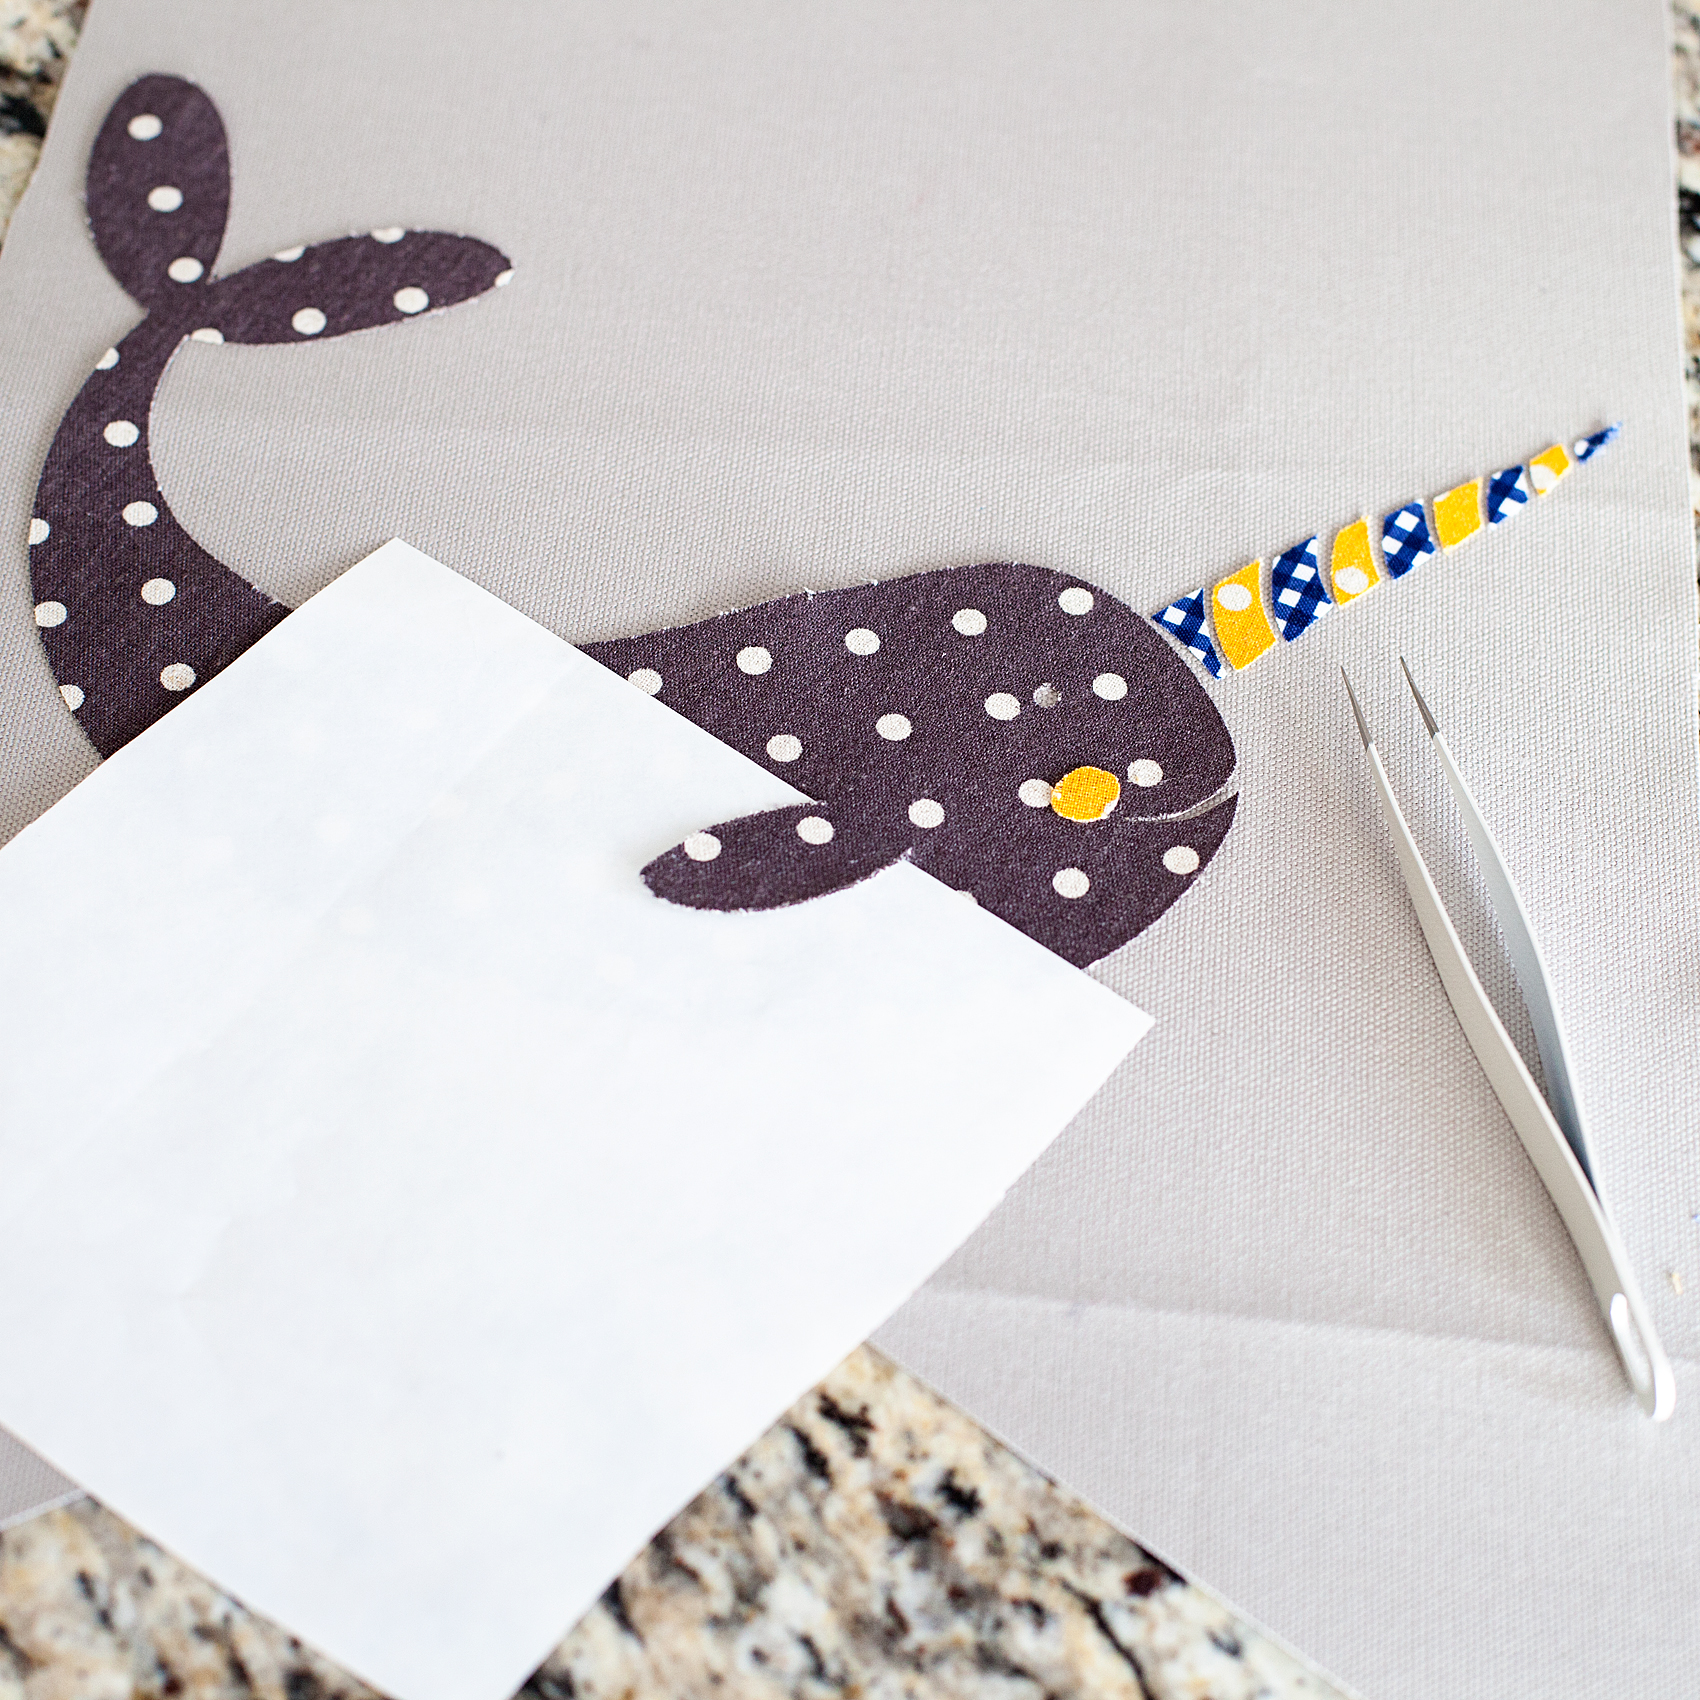
Now, his cute little fin will pop right out!

Creating Banner Hanger

Now, to hand the cute banners that you just made. You need to either sew a pocket for the dowel or use fabric glue to create create the pocket. I prefer the sewing method however, if you don’t have a sewing machine, you don’t need to run out and purchase one just for this project.

You need to fold your fabric over to create a pocket large enough to feed your dowel through.

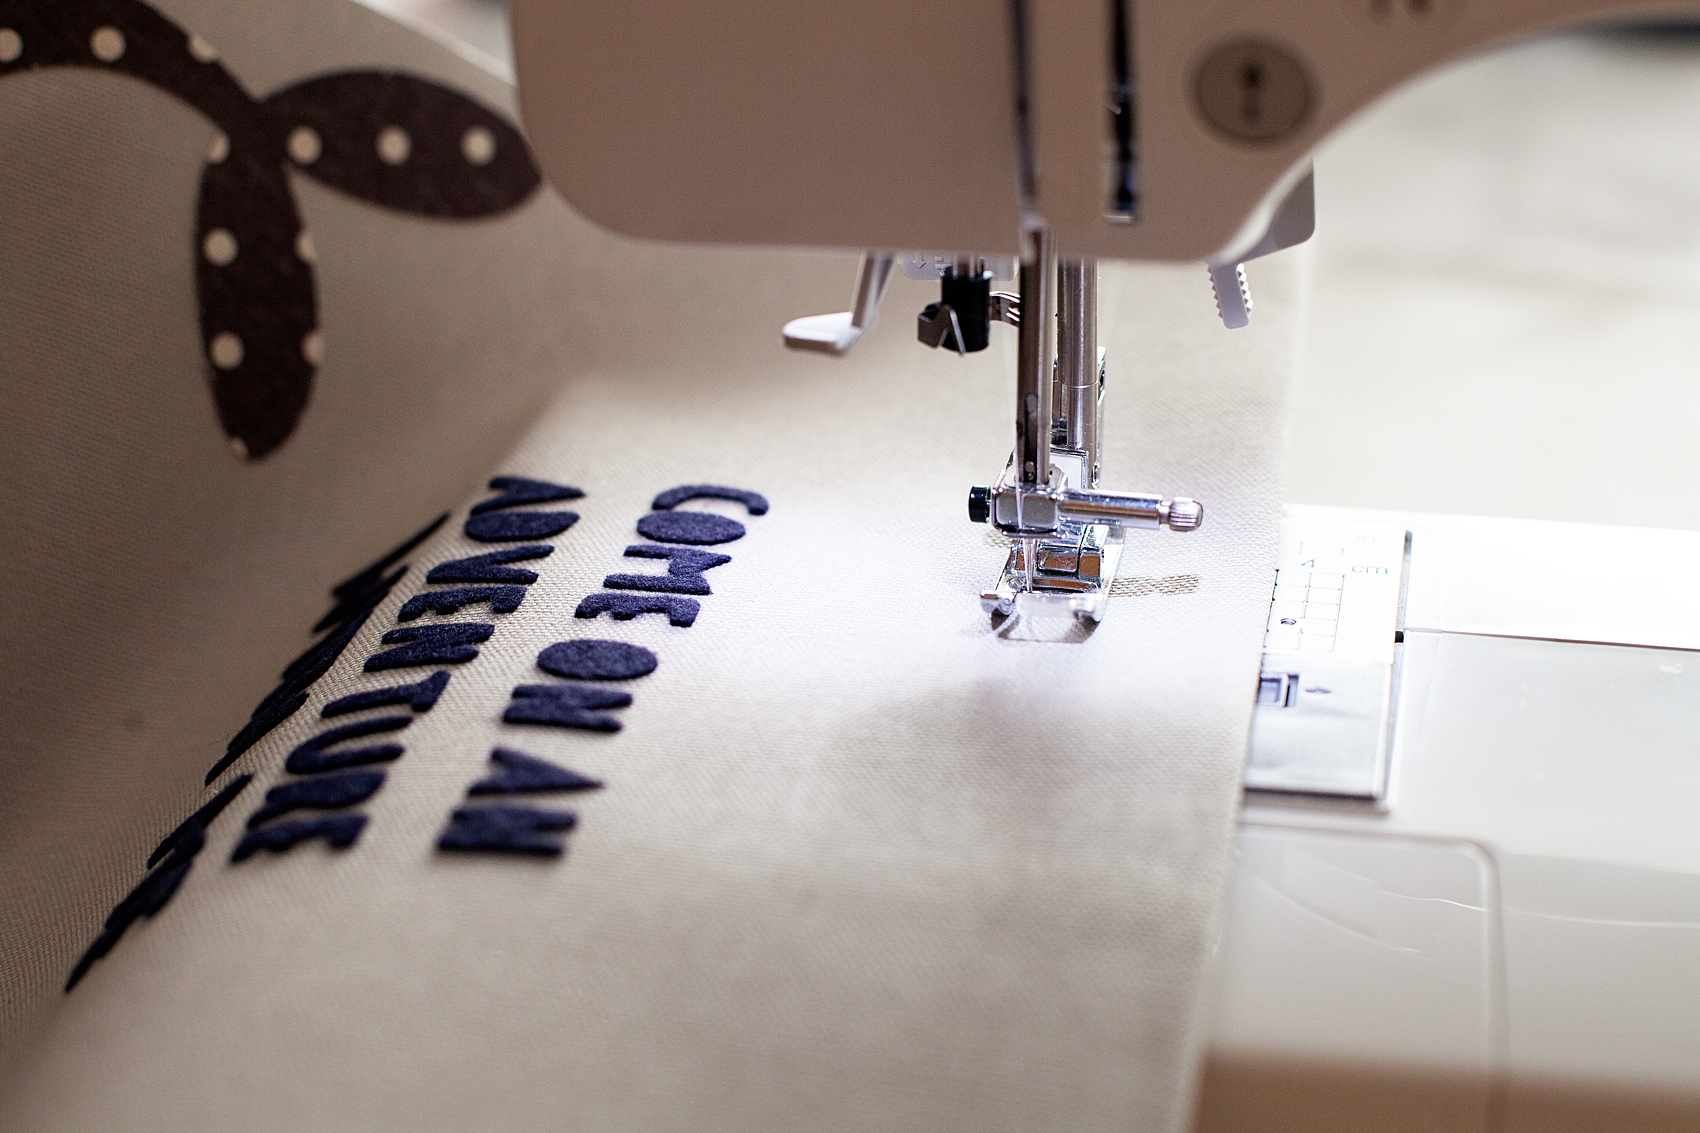
When you have the banner with the dowel ready to hang, attach the rope and hang on the wall!

How to Create Graphic Banners with Fabric • They are easy to make with the Cricut Maker and have such impact in your room or for a party. Come learn how easy they are to make at whipperBerry.

Now, I know you are going to want to save this tutorial and share it with all of your friends (wink, wink!) Here is a handy graphic to Pin…

How to Create Graphic Banners with Fabric • They are easy to make with the Cricut Maker and have such impact in your room or for a party. Come learn how easy they are to make at whipperBerry.

SaveSave

SaveSave

SaveSave

SaveSaveSaveSave

This is a sponsored conversation written by me on behalf of Cricut. The opinions and text are all mine.

SaveSave

SaveSave

SaveSave

SaveSave

SaveSave

SaveSave

From Carpool to Care Packages • Hunger-Aid Survival Kits

64 · Jan 29, 2018 · Leave a Comment

This post has been sponsored by Nature Valley. All thoughts and opinions are my own.

With four kiddos that range in age from 7 to 20, I’ve been running carpool FOREVER it seems. One thing that never changes, no matter the age of the child, they ALWAYS arrive hungry! Even when they are far away in college, they are constantly fighting those hangries. I have found that from carpool to care packages, my go to products are always Nature Valley. Whenever I am at  Walmart, I always stock-up on our favorite hunger fighting snacks to add to our camping supplies, Hunger-Aid Carpool Snack Bin or, to include in a Hunger-Aid College Survival Box.Having four kiddos; One in College, High School, Middle & Elementary, school pick-up is a long drawn out process. Keeping the car stocked with Nature Valley products, as well as extra school supplies "just in case,” is fabulous idea. For my college student, Nature Valley products are perfect for care packages along with other great items from @Walmart to stock-up their dorm rooms. From Care Packages to Car Pool these Hunger-Aid survival kits are the BEST! • Created by WhipperBerry


I remember the first time I had a Nature Valley Granola Bar when I was a kid. It was at Girl Scout Camp and I remember biting into this crunchy granola bar and loving the flavor and especially the crunch. For years, it was my go to granola treat when I was in the mood for crunch time. I felt like I was getting an extra special treat because they always had TWO bars in each package. That’s a big deal when you’re young or even when you’re a poor college student. Over the years, I’ve watched their brand grow to include many more snacking options that, as a Mom, I love sharing with my kiddos.

Taking Care of the HANGRIES • The Hunger-Aid Carpool Snack Bin

Having four kiddos; one in college, high school, middle & elementary, school pick-up is a long drawn out process. Keeping the car stocked with Nature Valley  products, as well as extra school supplies “just in case,” is fabulous way to let your children know that you truly care about their success.

I’m loving the NEW Nature Valley Layered Granola Nut Bars & Soft-Baked Filled Squares. They are perfect for either, before school on one of those hectic mornings or after to take care of those hungry tummies. They are so scrumptious and the carpool kiddos love them. I’ve created a Hunger-Aid Carpool Snack Bin that I keep in my car so that my children are never left with a case of the hangries before or after school.

Having four kiddos; One in College, High School, Middle & Elementary, school pick-up is a long drawn out process. Keeping the car stocked with Nature Valley products, as well as extra school supplies "just in case,” is fabulous idea. For my college student, Nature Valley products are perfect for care packages along with other great items from @Walmart to stock-up their dorm rooms. From Care Packages to Car Pool these Hunger-Aid survival kits are the BEST! • Created by WhipperBerry

I created this fun design for the bin based off of the vintage Band-Aid tins that our mothers, grandmothers or even great grand mothers always had around when we needed a little tender loving care after getting into a scrape. I thought it was perfect for the snack bin for the family car. You’ll be able to download the file for yourself below.

Shopping List for the Carpool Snack Bin

I’m always running to Walmart to grab all kinds of things because it’s a one stop shop packed with all the things I need – especially for this snack bin. This is what I put together for the carpool snack bin to keep in the car.

Having four kiddos; One in College, High School, Middle & Elementary, school pick-up is a long drawn out process. Keeping the car stocked with Nature Valley products, as well as extra school supplies "just in case,” is fabulous idea. For my college student, Nature Valley products are perfect for care packages along with other great items from @Walmart to stock-up their dorm rooms. From Care Packages to Car Pool these Hunger-Aid survival kits are the BEST! • Created by WhipperBerry


  • 130 oz Acrylic Latch Jar, Clear
  • Nature Valley Peanut Butter Chocolate Layered Granola Nut Bars(also available in Almond Butter Chocolate!)
    Layered Granola Nut Bars
  • Nature Valley Honey Peanut Butter Soft-Baked Filled Squares (available in Cocoa Peanut Butter too for your chocolate-loving-kiddos)
  • Sam’s Choice 100% Natural Spring Water
  • A package of #2 pencils
  • A Nail File
  • A fun and colorful vinyl decal used to create labeling for the bin

To start, I grabbed one of my favorite clear buckets at Walmart. I use these for all kinds of stuff. Storage for little bits and bobs, a travel container when taking meals to friends homes, pantry storage… The list goes on and on.

For this purpose, I grabbed some vinyl decal materials and created a cute label for the bin because, you know, that’s how I am.

Having four kiddos; One in College, High School, Middle & Elementary, school pick-up is a long drawn out process. Keeping the car stocked with Nature Valley products, as well as extra school supplies "just in case,” is fabulous idea. For my college student, Nature Valley products are perfect for care packages along with other great items from @Walmart to stock-up their dorm rooms. From Care Packages to Car Pool these Hunger-Aid survival kits are the BEST! • Created by WhipperBerry

You can download the SVG files to use HERE. If you’re new to creating with vinyl, I can also show you how to apply vinyl or import and use a SVG file.

I applied the vinyl to the bucket…

Having four kiddos; One in College, High School, Middle & Elementary, school pick-up is a long drawn out process. Keeping the car stocked with Nature Valley products, as well as extra school supplies "just in case,” is fabulous idea. For my college student, Nature Valley products are perfect for care packages along with other great items from @Walmart to stock-up their dorm rooms. From Care Packages to Car Pool these Hunger-Aid survival kits are the BEST! • Created by WhipperBerry

Then filled it with my loot! The car will now be stocked-up with Nature Valley hunger fighters, water, extra pencils & nail files for those teenage girls emergencies.

 Having four kiddos; One in College, High School, Middle & Elementary, school pick-up is a long drawn out process. Keeping the car stocked with Nature Valley products, as well as extra school supplies "just in case,” is fabulous idea. For my college student, Nature Valley products are perfect for care packages along with other great items from @Walmart to stock-up their dorm rooms. From Care Packages to Car Pool these Hunger-Aid survival kits are the BEST! • Created by WhipperBerry

As soon as the kiddos jump in the car, they know exactly where to go to get a little something to help them get over those after school hangries.

Stocking-up the Dorm Room • The Hunger-Aid College Survival Box

For my college student, Nature Valley products are perfect for care packages paired along with other great items from Walmart to stock-up their dorm rooms. Here are some ideas to include in your care package.

Having four kiddos; One in College, High School, Middle & Elementary, school pick-up is a long drawn out process. Keeping the car stocked with Nature Valley products, as well as extra school supplies "just in case,” is fabulous idea. For my college student, Nature Valley products are perfect for care packages along with other great items from @Walmart to stock-up their dorm rooms. From Care Packages to Car Pool these Hunger-Aid survival kits are the BEST! • Created by WhipperBerry

  • shipping box from Walmart
  • Nature Valley Peanut Butter Chocolate Layered Granola Nut Bars
  • Nature Valley Soft-Baked Honey Peanut Butter Filled Squares
  • A pack of #2 pencils (for those pesky Scantrons)
  • ball point pens
  • fuzzy socks
  •  Equate Makeup Remover Cleansing Face Wipes
  • Nail Files
  • A fun and colorful vinyl decal used to create labeling for the bin
  • ribbon
  • tissue paper
  • clear packing tape

To start, line your shipping box with tissue paper and start with your bottom layer of goodies first. Fuzzy socks and every girls favorite make-up wipes.

Having four kiddos; One in College, High School, Middle & Elementary, school pick-up is a long drawn out process. Keeping the car stocked with Nature Valley products, as well as extra school supplies "just in case,” is fabulous idea. For my college student, Nature Valley products are perfect for care packages along with other great items from @Walmart to stock-up their dorm rooms. From Care Packages to Car Pool these Hunger-Aid survival kits are the BEST! • Created by WhipperBerry

Having four kiddos; One in College, High School, Middle & Elementary, school pick-up is a long drawn out process. Keeping the car stocked with Nature Valley products, as well as extra school supplies "just in case,” is fabulous idea. For my college student, Nature Valley products are perfect for care packages along with other great items from @Walmart to stock-up their dorm rooms. From Care Packages to Car Pool these Hunger-Aid survival kits are the BEST! • Created by WhipperBerry

Having four kiddos; One in College, High School, Middle & Elementary, school pick-up is a long drawn out process. Keeping the car stocked with Nature Valley products, as well as extra school supplies "just in case,” is fabulous idea. For my college student, Nature Valley products are perfect for care packages along with other great items from @Walmart to stock-up their dorm rooms. From Care Packages to Car Pool these Hunger-Aid survival kits are the BEST! • Created by WhipperBerry

Then the good stuff! Load up the box with Nature Valley treats.

Having four kiddos; One in College, High School, Middle & Elementary, school pick-up is a long drawn out process. Keeping the car stocked with Nature Valley products, as well as extra school supplies "just in case,” is fabulous idea. For my college student, Nature Valley products are perfect for care packages along with other great items from @Walmart to stock-up their dorm rooms. From Care Packages to Car Pool these Hunger-Aid survival kits are the BEST! • Created by WhipperBerry

I gathered the pencils and pens and secured them with a rubber band, then tied them with a pretty ribbon. It’s always those extra, classy touches take your care package from simple to special. I closed up the box and then added the vinyl to the box.

Having four kiddos; One in College, High School, Middle & Elementary, school pick-up is a long drawn out process. Keeping the car stocked with Nature Valley products, as well as extra school supplies "just in case,” is fabulous idea. For my college student, Nature Valley products are perfect for care packages along with other great items from @Walmart to stock-up their dorm rooms. From Care Packages to Car Pool these Hunger-Aid survival kits are the BEST! • Created by WhipperBerry

I can’t wait to send this off to my favorite college student!

Having four kiddos; One in College, High School, Middle & Elementary, school pick-up is a long drawn out process. Keeping the car stocked with Nature Valley products, as well as extra school supplies "just in case,” is fabulous idea. For my college student, Nature Valley products are perfect for care packages along with other great items from @Walmart to stock-up their dorm rooms. From Care Packages to Car Pool these Hunger-Aid survival kits are the BEST! • Created by WhipperBerry

From Care Packages to Car Pool, these Hunger-Aid survival kits are the BEST! What are your favorite ways to show your family that you adore them? What are their favorite Nature Valley hunger fighters? Which new flavor of Nature Valley bars are you most excited to try next? What kind of Hunger-Aid bin should we make next? Maybe one for the office or teachers lounge? Let me know what you think!

+ Disclaimer • This is a Nature Valley sponsored post. All thoughts, ideas and opinions are my very own +

SaveSave

SaveSave

SaveSave

SaveSave

SaveSave

SaveSave

SaveSave

SaveSave

SaveSave

12 Cricut Maker Projects + How to Replace a Cricut Maker Rotary Blade

39 · Jan 26, 2018 · Leave a Comment

I LOVE, LOVE, LOVE my Cricut Maker! I’m especially loving creating more with fabric these days. I’m always looking for more Cricut Maker project inspiration & ideas on how to take care of my machine. For example every Cricut Maker user, there comes a time when you will need to change out your rotary blade. This is something that is relatively new to the Cricut world and is super easy to do following the proper instructions. If you are new to creating with Cricut, the Cricut Maker Rotary Blade is the magical blade that cuts fabric when using the Cricut Maker machine! With its gliding, rolling action, it cuts virtually any fabric quickly and accurately – without backing material. It’s pretty fabulous! After you’ve cut to your heart’s content, you will eventually have to change out your blade, here’s a tutorial for how to replace a Cricut Rotary Blade. And, if you’re not sure if a Cricut or a Silhouette is right for you then make sure to read that article first. Ok so, down for the tutorial.12 Cricut Maker Fabric Projects PLUS + For every Cricut Maker user, there comes a time when you will need to change out your rotary blade. This is something that is relatively new to the Cricut world, and is super easy to do following the proper instructions. 

Below is a quick Pinable graphic that you can save so that you can reference it later on how to change your Cricut rotary blade. You can even print a PDF version of it HERE if you’d like.

For every Cricut Maker user, there comes a time when you will need to change out your rotary blade. This is something that is relatively new to the Cricut world, and is super easy to do following the proper instructions. 

How to Change a Cricut Rotary Blade

Before you begin, you need to make sure you remember you are working with a VERY SHARP blade and to be safe while working with it at all times.

  1. Carefully remove rotary blade from your Cricut Maker.
  2. Slip protective cover, from the Rotary Blade Kit over the blade with the large opening over the housing screw. View graphic to view safety warning.
  3. Make sure you feel the protective cover click into place.
  4. Use provided screw driver to remove the screw from the housing. View graphic for step-by-step photo instructions. Keep in mind,  the blade is meant to stay within the protective cover. This is a great feature created by Cricut to protect their Cricut family of users. I think it’s genius!
  5. Remove the new blade, already in a new protective cover, from the package.
  6. Place over your housing like before.
  7. Using the provided screw driver, replace the screw making sure not to over tighten.
  8. Carefully remove protective covering and replace rotary blade in your machine.
  9. Just to be safe, I place my old blade, still in the protective cover, back into the packaging before I toss it in the trash.

That’s it, you’re ready to rock’n roll again. Looking for some inspiration on what to make with this fabulous new cutting tool? Here are some that might get your creative juices flowing…

Cricut Maker Fabric Project Inspiration

Everyone loves thoughtful homemade gifts and this stylish zipper pouch is the perfect gift to whip-up in a fews hours to give as a fabulous Christmas gift this year + you can take the guess work out of cutting the pattern with the Cricut Maker! Come on over and learn how to make one of your own on WhipperBerry.

Zipper Pouch + created by ME, WhipperBerry

Scallop leather clutch created with Cricut Maker • See Kate Sew

Scalloped Leather Clutch + See Kate Sew

Knot Headband created with Cricut Maker • Coral + Co

Knot Headband + Coral & Co

Baby Quilt with Cricut Maker • See Lindsay

Baby Quilt + See Lindsay

Love Banner created with Cricut Maker • Hello Creative Family

Love Lives Here BannerLove Lives Here Banner + Hello Creative Family

How to Sew Fabric Baskets with the Cricut Maker • Polkadot Chair

How to Sew Fabric Baskets + PolkaDot Chair

Fabric Alphabet for Cricut Maker •  Amber Simmons

Fabric Alphabet + Amber Simmons

Mermaid Book created with Cricut Maker + Sweet Red Poppy

Mermaid Book + Sweet Red Poppy

Cricut Maker Tooth Fairy Monster created by The Idea Room

Tooth Fairy Monster + The Idea Room

Fabric Banner created with Cricut Maker •  PolkaDot Chair

Fabric Banner + PolkaDot Chair

DIY Wallet created with Cricut Maker •  Hello Creative Family

The Essentials Wallet + Hello Creative Family

SaveSave

SaveSave

This is a sponsored conversation written by me on behalf of Cricut. The opinions and text are all mine.

Fox Storage Chest • DecoArt IKEA Moppe Challenge

18 · Jan 2, 2018 · 4 Comments

You guys, I’m so excited for today’s post! If you’ve been following along on my Instagram Stories, you’ll know that I’m in the process of making over my little guys room. I’m getting so close to being finished and I can’t wait to share what we’ve been working on. Today, I’m sharing one of the fun elements that we will be putting in his room to dress it up. It’s a cute Fox Storage Chest for all of his little trinkets and toys. You know all of the little bits and pieces that little boys tend to collect. The timing couldn’t be more perfect, DecoArt gave all of their bloggers a challenge for January. The challenge was to make over a mini storage chest from IKEA. The IKEA Moppe to be exact. It turned out so cute and I can’t wait to tell you all about it.

+ This post brought to you by DecoArt +Transform a simple mini storage chest from IKEA into this cute little fox storage chest for your little ones little toys and trinkets. I used some of the @decoart chalky finish paint along with my @cricut Maker to create this fun design for my little boys room • WhipperBerry

The Challenge

DecoArt sent out a challenge a little while back to transform this simple wood storage chest from IKEA any way that we would like. It may sound crazy but, I struggled coming up with a concept for the design. There were so many directions I could go; farmhouse, industrial, buffalo check, stripes… So many different ways I could take the design. This little chest sat in my craft room for weeks and I couldn’t figure out what I wanted to do. For some reason, the word challenge puts so much pressure on me and I freeze. Finally, I decided that before I could decide on a design, I needed to figure out what I wanted to do with the storage chest when I was finished. I am in the process of making over my little boys room and I decided this would be the perfect place for him to store his little things.

With that MAJOR decision made, I placed the storage chest on the table and looked at it for awhile. Again, paralyzed by all of the different directions I could go. Finally, you’re going to think I’m crazy, I was looking at the piece and all of a sudden, I saw a face looking back at me. A cute little fox face and that’s when I knew what I needed to do.

Transform a simple mini storage chest from IKEA into this cute little fox storage chest for your little ones little toys and trinkets. I used some of the @decoart chalky finish paint along with my @cricut Maker to create this fun design for my little boys room • WhipperBerry

I set to work designing my fox and preparing it to cut on my Cricut Maker. As we have discussed before, I really have zero talent when it comes to freehand painting but, with the help of my Cricut, I can create some great stencils. I may not be able to freehand paint but, I have mad stenciling skills!

Supplies

I realize that this is a rather specific project but really, This stencil and the concept can work on all kinds of furniture or signs. So, don’t get discouraged if you don’t live close to an IKEA. You can find something that this will look super cute on. Here are the basic supplies.

  • Mini Storage Chest – We used the Moppe from IKEA
  • Americana Decor Chalky Finish Paint – colors; Yesteryear, Heritage & Timeless
  • foam stencil brush
  • small foam brush
  • Cricut machine
  • download my fox SVG file
  • vinyl
  • transfer tape

Instructions

The first thing you’ll want to do is paint your base coat of the Americana Decor Chalky Finish Paint in the Yesteryear color. The reason why I selected the Chalky finish is that I prefer the matte look rather than a satin or enamel type paint. Plus, I think it’s a little more forgiving.

Transform a simple mini storage chest from IKEA into this cute little fox storage chest for your little ones little toys and trinkets. I used some of the @decoart chalky finish paint along with my @cricut Maker to create this fun design for my little boys room • WhipperBerry

Transform a simple mini storage chest from IKEA into this cute little fox storage chest for your little ones little toys and trinkets. I used some of the @decoart chalky finish paint along with my @cricut Maker to create this fun design for my little boys room • WhipperBerry

Since this piece is raw wood, it really soaked up the paint and it dried super fast (which I LOVE!) This whole project, once I had the design finished, only took about an hour.

The Fox Stencil

While I was waiting for the base coat to dry, I cut the first part of my fox stencil, you can download that HERE.

Transform a simple mini storage chest from IKEA into this cute little fox storage chest for your little ones little toys and trinkets. I used some of the @decoart chalky finish paint along with my @cricut Maker to create this fun design for my little boys room • WhipperBerry

Because I was using two different colors for the fox, I had to create two different stencils. One for the inner part of the ears and cheeks, the second for the outer ears and face. Below, you will see how to weed the vinyl once you’ve cut the design.

Transform a simple mini storage chest from IKEA into this cute little fox storage chest for your little ones little toys and trinkets. I used some of the @decoart chalky finish paint along with my @cricut Maker to create this fun design for my little boys room • WhipperBerry

Painting

I really don’t think the order matters but, just in case, I stenciled the inner ears and cheeks first.

Transform a simple mini storage chest from IKEA into this cute little fox storage chest for your little ones little toys and trinkets. I used some of the @decoart chalky finish paint along with my @cricut Maker to create this fun design for my little boys room • WhipperBerry

Once I weeded the excess vinyl, I covered the design with transfer tape to transfer the image onto the storage chest.

Transform a simple mini storage chest from IKEA into this cute little fox storage chest for your little ones little toys and trinkets. I used some of the @decoart chalky finish paint along with my @cricut Maker to create this fun design for my little boys room • WhipperBerry

I used my scraper tool to press the vinyl down especially on the ridges of the chest. Then I carefully removed the transfer tape. Take your time here and move slowly if needed.

Transform a simple mini storage chest from IKEA into this cute little fox storage chest for your little ones little toys and trinkets. I used some of the @decoart chalky finish paint along with my @cricut Maker to create this fun design for my little boys room • WhipperBerry

Transform a simple mini storage chest from IKEA into this cute little fox storage chest for your little ones little toys and trinkets. I used some of the @decoart chalky finish paint along with my @cricut Maker to create this fun design for my little boys room • WhipperBerry

Using your finger go around the edges of the areas that you will be painting and make sure you have a good seal with the vinyl. With the Timeless color, I used a foam stencil brush to get started. With a light amount of paint on my brush, using a gentle up and down motion, I painted the inner ears and cheeks.

Transform a simple mini storage chest from IKEA into this cute little fox storage chest for your little ones little toys and trinkets. I used some of the @decoart chalky finish paint along with my @cricut Maker to create this fun design for my little boys room • WhipperBerry

Transform a simple mini storage chest from IKEA into this cute little fox storage chest for your little ones little toys and trinkets. I used some of the @decoart chalky finish paint along with my @cricut Maker to create this fun design for my little boys room • WhipperBerry

Once you’ve finished painting those sections, carefully remove the vinyl. I typically don’t really wait for the paint to completely dry, you just need to be careful when lifting and removing the vinyl so that you don’t mess up the paint.  If you’ve been careful and not used too much paint or pressure, you’ll have a beautiful line.

Transform a simple mini storage chest from IKEA into this cute little fox storage chest for your little ones little toys and trinkets. I used some of the @decoart chalky finish paint along with my @cricut Maker to create this fun design for my little boys room • WhipperBerry

Now, you’ll need the 2nd section of your stencil weeded like the image below.

Transform a simple mini storage chest from IKEA into this cute little fox storage chest for your little ones little toys and trinkets. I used some of the @decoart chalky finish paint along with my @cricut Maker to create this fun design for my little boys room • WhipperBerry

Transform a simple mini storage chest from IKEA into this cute little fox storage chest for your little ones little toys and trinkets. I used some of the @decoart chalky finish paint along with my @cricut Maker to create this fun design for my little boys room • WhipperBerry

Like before, use the transfer tape to place the stencil carefully on the storage chest. You’ll need to line-up the ears and cheeks but, with the Cricut clear transfer tape that’s not hard at all.

Transform a simple mini storage chest from IKEA into this cute little fox storage chest for your little ones little toys and trinkets. I used some of the @decoart chalky finish paint along with my @cricut Maker to create this fun design for my little boys room • WhipperBerry

Repeat the same painting technique with the Heritage color for the outer ear and face of the fox.

https://shop.cricut.com/en_us/cutting-materials/vinyl/transfer-paper/new-cricut-reg-transfer-tape.html

When you’re finished with that, remove the vinyl and let the paint fully dry. That will really only take 10 minutes or so. (That’s another reason why I love the chalky finish paint.)

You’re finished!

Transform a simple mini storage chest from IKEA into this cute little fox storage chest for your little ones little toys and trinkets. I used some of the @decoart chalky finish paint along with my @cricut Maker to create this fun design for my little boys room • WhipperBerry

How cute is that for a little guys room? You could even add some cute girly eyelashes and it would look super cute in a girls room as well. I just LOVE it!!

Transform a simple mini storage chest from IKEA into this cute little fox storage chest for your little ones little toys and trinkets. I used some of the @decoart chalky finish paint along with my @cricut Maker to create this fun design for my little boys room • WhipperBerry

Now, Gage will have the perfect spot for his little things. If you had a chance to do the mini storage chest challenge, what would you like to create? How would you like to use it? What DecoArt products would you use?

Disclaimer • I am a DecoArt Blogger and have received product and compensation for my time and efforts. All thoughts, ideas, and opinions are my very own.

  • « Go to Previous Page
  • Page 1
  • Interim pages omitted …
  • Page 4
  • Page 5
  • Page 6
  • Page 7
  • Page 8
  • Interim pages omitted …
  • Page 11
  • Go to Next Page »

Primary Sidebar

Heather from Whipperberry
Hello... my name is Heather and I'm the creator of WhipperBerry a creative lifestyle blog packed full of great recipes and creative ideas for your home and family. I find I am happiest when I'm living a creative life and I love to share what I've been up to along the way... Come explore, my hope is that you'll leave inspired!

Footer

  • Privacy Policy
  • Crafts
  • Food
  • Gifts
  • Holidays
  • Home
  • Mom Life
  • Recipes
  • Travel

Copyright © 2026 · Seasoned Pro