• Skip to primary navigation
  • Skip to main content
  • Skip to primary sidebar
  • Skip to footer

Whipperberry

WhipperBerry • Your Home For Creative Inspiration

  • Home
  • Recipes
    • Starters
    • Easy Weeknight Dinners
    • Main Dish
    • Salads
    • Side Dish
    • Soups & Stews
    • Desserts
    • Breakfast
    • Miscellaneous
  • Tutorials
    • Creative Crafts
    • DIY Decor
    • Fabric Crafts
    • Food How-To
    • Jewlery
    • Paint Projects
    • Paper Art
    • Party Styling
    • Photography and Graphic Design
    • Silhouette
  • Holidays
    • Easter
    • Mother’s Day
    • Father’s Day
    • 4th of July
    • Halloween
    • Thanksgiving
    • Christmas
    • Valentine’s Day
  • Gift Ideas
    • Gifts For Everyone
    • Gifts for Dad
    • Mother’s day
    • For The Girls
    • For The Kids
    • Teacher Gift Ideas
    • Christmas
  • Printables
    • Holiday
    • Gift Idea
    • LDS Primary
  • Travel
  • About
    • Terms
  • Contact
  • Nav Social Menu

    • Facebook
    • Instagram
    • Pinterest
    • RSS
    • Twitter

DecoArt

Striped Straw Jar with DecoArt Glass Paint Markers and Diet Coke

0 · Aug 14, 2013 · 5 Comments

This post brought to you by DecoArt Glass Paint // For the 2nd time in 10 months we are MOVING!! Needless to say, I am excited to finally be in a home that fits our family better, but the idea of packing up and moving again is not very appealing AT ALL! We knew this move was going to happen soon, so we didn't unpack a ton, so this move should be easier than last time. 

One thing I did learn last time, is that you need to create a system that really works for you. A system that is productive, smart and provides yourself and your helpers with LOTS of rewards. For me, one of my favorite treats is a Diet Coke. I just LOVE the stuff! I would drink it like water if I could get away with it. I love the flavor, I love the bubbles and quite frankly there are times when there is nothing better on this planet than a good, cold Diet Coke. Because of that, it is a great motivating treat for me. More than almost any little treat. If I know that a Diet Coke is at the end of the chore, my git-up, gets a going. 

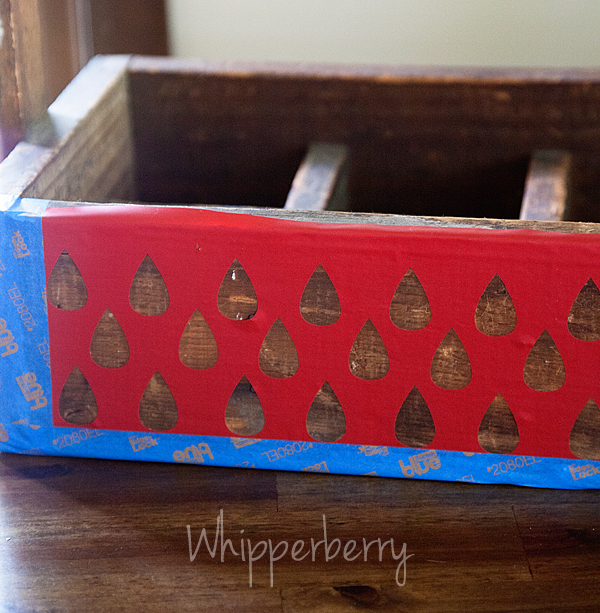
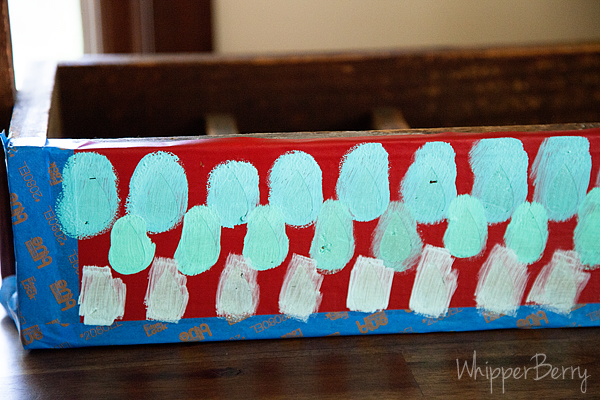
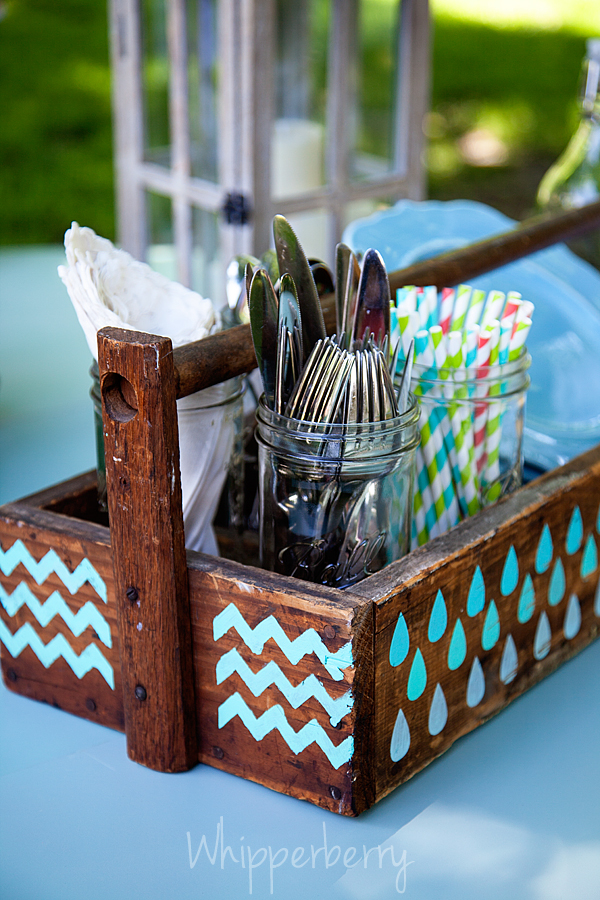
That's why for this move I created a Diet Coke Station with a few fun little items to dress-up the station to motivate myself and all of my helpers during the drudgery of packing…

Diet Coke drink station from WhipperBerry

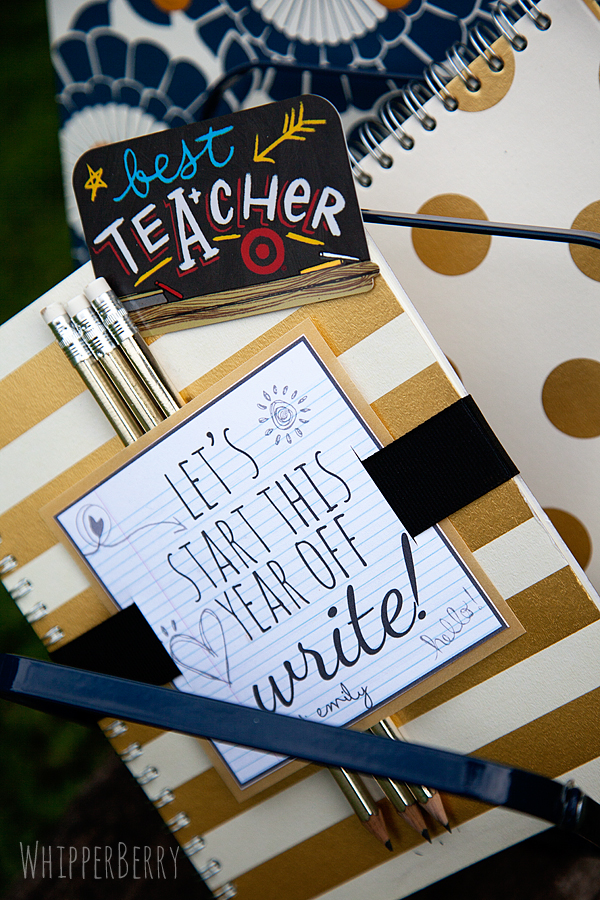
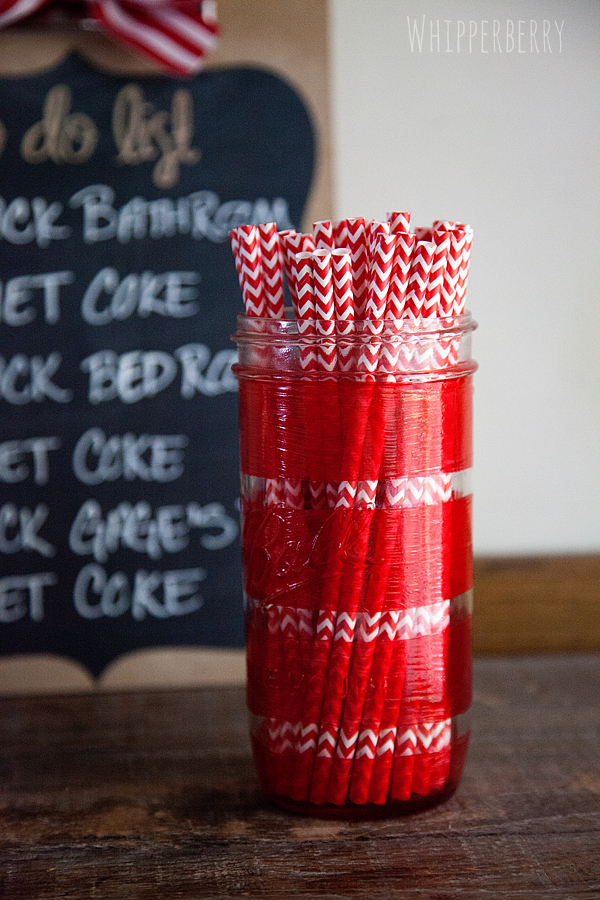
I used my handy chalkboard clipboard and then dressed-up a Ball jar with some red stripes for my straw jar with DecoArt Glass Paint Markers and then set-out to move mountains. The striped jar was super simple to make, here is what you will need to do…

Supplies for the Striped Straw Jar

  • Ball wide mouths 1 1/2 pt. jar
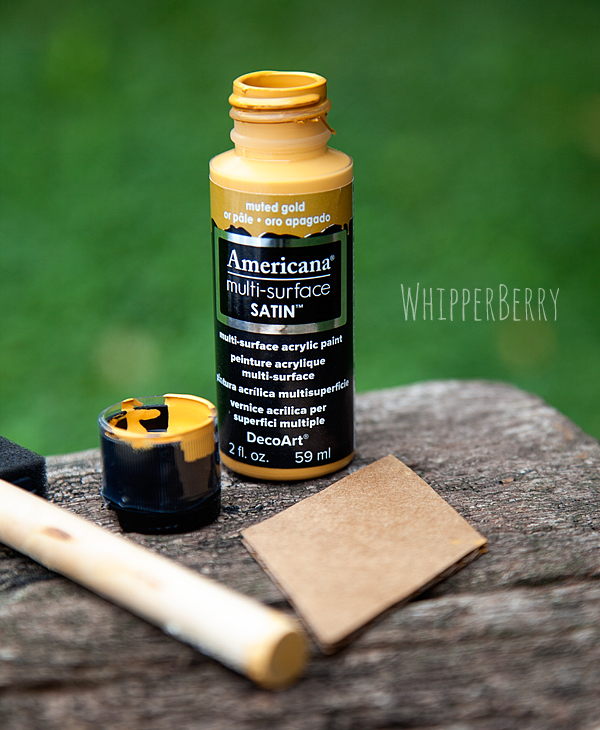
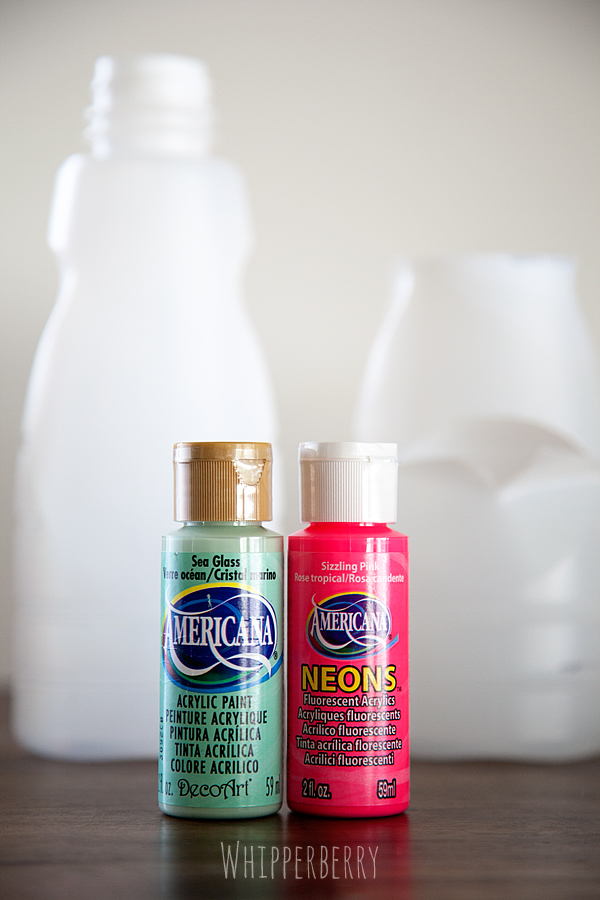
  • DecoArt Glass Paint Markers – Americana Glass Paints are available at Michaels, JoAnn Fabric and Craft Stores, Pat Catan's Craft Centers, A.C. Moore, Beverly's, and other fine craft retailers. Click HERE for more information on Americana Glass Paints.
  • Tape – I used a thin washi tape but any type of washi or painters tape will do.

​Instructions for Striped Straw Jar

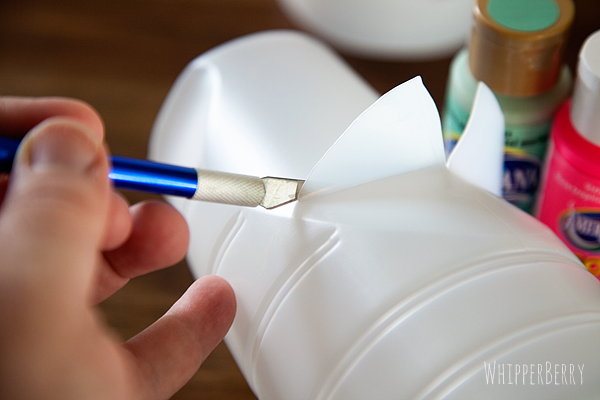
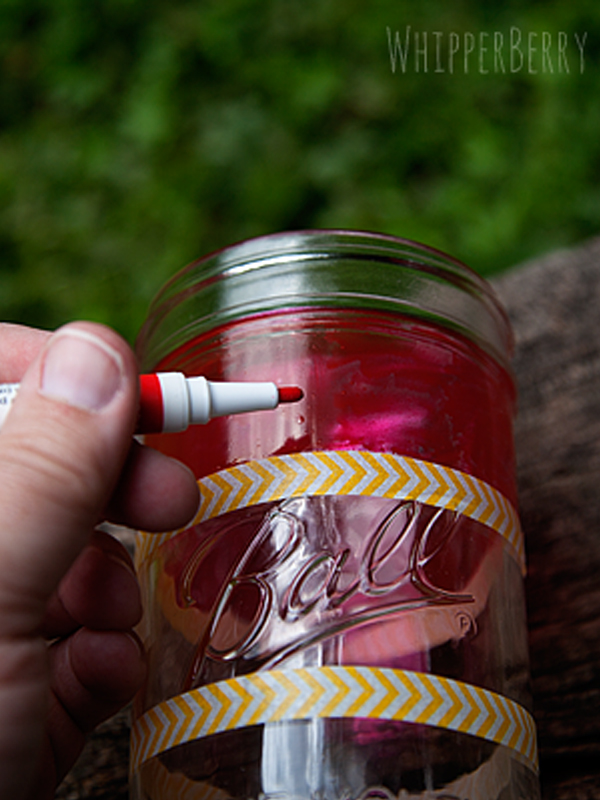
Before you begin, you need to prepare your glass jar by cleaning it with alcohol and let dry. Then apply the tape to the jar to create your desired stripe look…

Use tape to create stripes on your mason jar

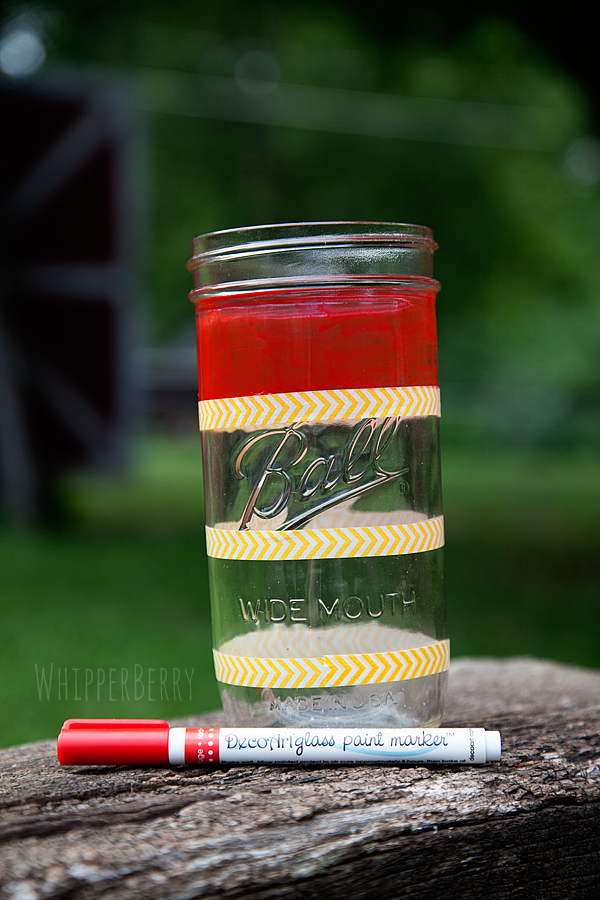
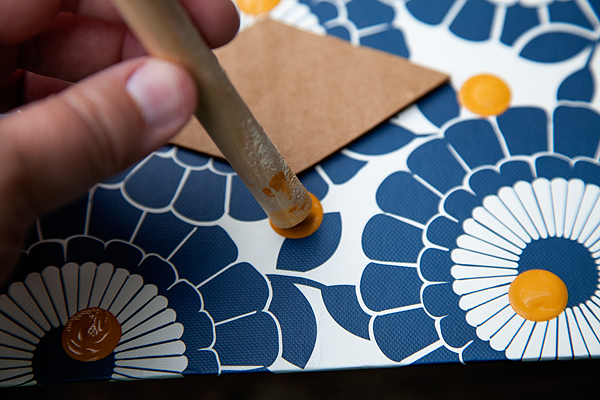
I wanted nice thick stripes but you may like a different style, so don't tie yourself down to my look. Next, the super easy part… Color on your paint using the DecoArt Glass Paint Markers. No mess, no fuss, they are perfect for this kind of project!! 

how to paint stripes on a mason jar with DecoArt Glass Paint Markers

Carefully remove the tape once you are finished and let dry for a few hours. Add your stylish straws to the jar (I found mine though Pick Your Plum) and voilá… Grabbing a Diet Coke has just been kicked up a few notches!

DecoArt Glass Paint Markers

Looking for a great deal on Glass Paint? DecoArt has a rebate just for you guys!!

gloss-rebate_zps9f635690
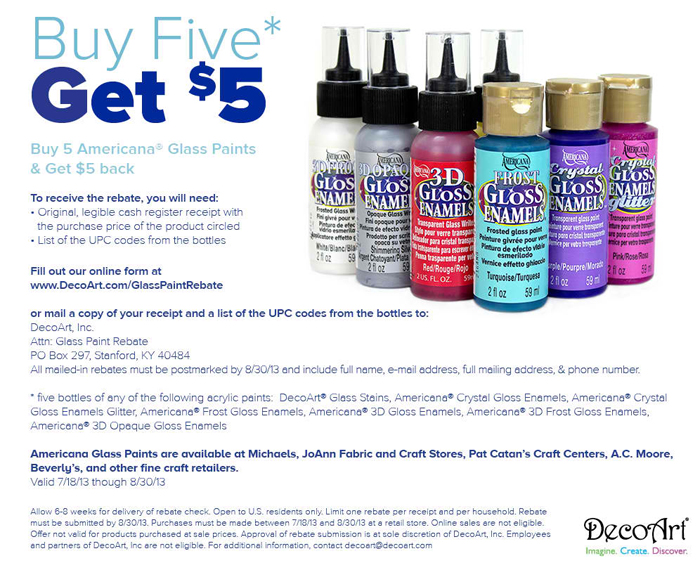
// Click on image to find full rebate offer // 

Looking for some more inspiration? We have a whole slew of talented bloggers who have also come up with some fun DecoArt Glass Paint projects. Click through to find all kinds of Glass Paint love…

Disclaimer // I am part of the DecoArt Core Bloggers and have received payment for this post along with free product. I am also a Brand Ambassador for Diet Coke and have received free product. However, all thoughts, ideas and opinions are my very own!

DIY Polka Dot Notebook for Back to School

2 · Jul 31, 2013 · 10 Comments

This post brought to you by DecoArt // Back to school is right around the corner for my kiddos and it's time to start working on dressing up our school supplies. I am Target's biggest fan and have been since birth, so… A few trips to Target  is a must before school starts. I've been loving the Greenroom line of school supplies and found a fun notebook that I thought would look extra special with some gold polka dots!

Poka Dot Notebook for Back to School with DecoArt and WhipperBerry

Doesn't it look extra special now? This is a perfect project for your kiddos to create some fun notebooks for themselves or to create a fun teacher gift for their new teacher. It's super easy, here is what you will need…

Polka Dot Notebook Supplies

  • Find a fun notebook.

Beautiful Notebook from Target #targetstyle #backtoschool #teachergift #backtoschoolfashion

  • Select a coordinating paint color from the full line of DecoArt paints. I used Americana Multi-Surface Satin in Muted Gold. These paints are available at Michaels, Hobby Lobby, A.C Moore and other fine craft retailers.
  • Large Foam Paint Brush.
  • Cardboard diamond that I cut out myself.

Polka Dot Notebook Supplies #backtoschool #teachergift #backtoschoolfashion

Polka Dot Notebook Instructions

  1. Open up your notebook and lay as flat as possible on a protected table.
  2. Use your paint cap a your paint supply, this way you don't have to create any waste. Just pour little bits of paint in the cap and when you are finished, just rinse it out, dry completely and replace on the paint bottle. 
  3. Take your large foam paint brush and dip the tip of the handle into the paint lid and load with a small amount of paint. Then using your cardboard diamond as a guide (a trick I learned from one of my contributors Haley from Life is Sweet) carefully place your polka dots.Use the bottom of a large foam brush for your dots
  4. Let dry over night to ensure that the paint has completely dried. My polka dots were pretty thick so that couldn't see the notebook through the paint so it took a bit for it to dry.

perfect gold dots #decoartpaint #backtoschool

Like I said before, this would be fun for your kiddos or for a teacher gift for the first day of school. 

Teacher Gifts with DecoArt and WhipperBerry #backtoschool #teachergifts

On August 14th I will be sharing this fun printable tag with the Printable Club that you can use to create a super fun teacher gift for your kiddos new teacher.

Teacher Gift #backtoschool #teachergift

Pair your polka dot notebook with a coordinating spiral notebook, some fun pencils and a Target gift card and you'll have one happy teacher!!

Disclaimer // This post brought to you by DecoArt. I am a member of the DecoArt Core Blogger Team and did receive product and payment for this post. However, all thoughts, ideas and opinions are my very own!

Hanging Succulent Garden with International Delight

7 · Jul 10, 2013 · 28 Comments

This post brought to you by International Delight // I have to admit… I love my sweet drinks. There is nothing better than starting the day with a cup of iced Choffy or my favorite herbal tea with a splash of  International Delight creamer. Currently MY ID is the Cold Stone Sweet Cream… YUM!!!  Or, if I’m in a bolder mood, the Caramel Macchiato.

With this being part of my morning routine, I tend to go through a bit of creamer and therefore, I have quite a few bottles that are destined for the trash.  Recently, International Delight issued a challenge… Make something out of my used bottles. I really thought that was kind of a fun idea. Well… to be completely honest, I was a little befuddled. Using old containers as a craft muse hasn’t really been part of my M.O. when it comes to creating for WhipperBerry.  I had to step back and think for a bit and then inspiration hit! I could make a hanging succulent garden with a few of the ID bottles and it would look fantastic.

hanging succulent garden with International Delights #whatsyourid

I can’t even tell you how tickled I was when I finished this project. Not only that but I came up with a few more that I may try. I mean seriously, what can you really do with an old plastic bottle? Who knew that it could be the perfect vehicle for such a fun idea. It’s so simple, here is how you can make a hanging succulent garden of your very own…

transform your International Delights Creamer container into a hanging succulent garden

I used the large International Delight Bottle, removed the label and the lid and cut the top portion off with a craft knife.

Use a craft knife to create your garden container

Next, I cut openings into the side of the bottle as a fun way to add more succulents into my little garden container.

Dress-up your succulent container with DecoArt Americana Acrylic Paint

I used DecoArt Americana acrylic craft paint to add color to the plant containers. I used Sea Glass, and Sizzling Pink from the Neon Collection. The design was a little free form. I added some little stripes and some splashes of color on each container leaving some open areas to add more contrast.

succulent containers

Then, I added some small succulents that I found at Lowes with some pea gravel and soil designed for succulents. I even layered the soil and pea gravel to add a fun effect in the container that you see above, on the right. Once you have everything painted and planted then you have to decide… Will you leave them as is… or hang them?

I think they look great either way, and they add a fun pop of color to any room. Here is how they would look dressing up a table…

succulent garden with international delights #whatsyourid

… Or, you can carefully poke some holes in the side and add some black and gold twine from Knot & Bow and hang them for a totally different look.

hanging succulent garden with International Delights #whatsyourid

Isn’t it FUN?!

So, what’s YOUR ID? What would you make out of your empty ID bottles? Does your flavor inspire your creation?

Come follow the all the fun and share your ID with International Delight on any of their social media platforms…

Find ID on Facebook here: https://www.facebook.com/InternationalDelight

Find ID on Twitter here: https://twitter.com/indelight

Find ID on Pinterest here: https://pinterest.com/indelight/

Find ID on Instagram here: https://instagram.com/indelight

Find ID on YouTube here: https://www.youtube.com/indelightchannel

What’s Your ID? International Delight is looking for their most passionate flavor fans. Put your ID on the map to enter to win a Magical Trip, play games and discover more unexpected delight. Share your ID flavor at https://whatsyourid.com.

This is a sponsored conversation written by me on behalf of International Delight. The opinions and text are all mine.

Picnic Caddy

2 · Jun 17, 2013 · 6 Comments

This post brought to you by DecoArt // I am always keeping my eyes peeled for fun items that I can dress-up with a little paint. Fun little finds that have some character, but with a little zip of color make them the star of the show! I found this great "Junk Shop" here in Lincoln called Simply Bungalow and it's  FULL of all kinds of goodies. Heidi and her Mom do a fabulous job of curating a wonderful shop and I have fallen in love with it. The other day I stopped in a found a rustic caddy that I thought would make a fabulous picnic caddy…

WhipperBerry's Picnic Caddy

Isn't it fun how a little paint can really add some pizzaz to an item? The contrast between the wood and the ombre paint is just lovely.  It's going to be perfect to carry out our plates and utensils outside into our backyard oasis this summer.  You can make one for your table as well.

Keep an eye out for a great wood caddy. This one was made with old reclaimed wood, but you can find newer ones and stain them the color that you like, it's super easy.

wood caddy from simply bungalow in lincolcn

If you're handy you can even make one of your own. Ana White has a great reclaimed wood caddy with all the plans, that would be perfect for this project.

Supplies

  • Wood caddy
  • DecoArt Americana Acrylic Craft Paint – I used Whispering Turquoise, Sea Breeze and Bahama Blue

Select three colors to create your ombre effect

  • Some type of graphic stencil – You can find all kinds of stencils at any of the craft stores out there or you can make your own out of vinyl with your Silhouette or Cricut craft cutting machines. I made mine with my Silhouette CAMEO using the 12×24 cutting mat. It was perfect for making the large stencil that I needed.
  • Painters tape
  • Sponge brush

Instructions

Clean and dry your wood before you apply your stencil. This just makes sure any dirt or dust is removed before you try and paint. Apply your stencil to the wood if you are using vinyl, or tape any other type of stencil onto your surface.

use a vinyl stencil to create your pattern for the picnic caddy

I even added an edge of painters tape around the vinyl just to make sure I didn't have any over paint issues. 

Next, I started at the top and added one color of paint (Bahama Blue) on the top row, the second color (Sea Breeze) on the middle row and the third (Whispering Turquoise) on the bottom row. This creates a subtle ombre effect.

Carefully dab paint onto the surface

Let that dry for just a few minutes and then carefully remove the stencil. Let it completely dry and then turn and start your next section. I used a chevron stencil for the sides and the raindrop stencil for the front and back of the caddy. I distressed it just a bit to have it look a little more rustic and then I was finished! Isn't it cute?

dressed-up picnic caddy from whipperberry

My kiddos love to load it up and take it out to our picnic table outside to get things set for our breakfast, lunch or dinner…

My kiddos enjoying the new picnic caddy

You won't need a center piece anymore!  You'll have a beautiful and functional caddy for your table. No ones needs to know how easy it is to make!!

Disclaimer // I am a member of DecoArt's Core Blogger group and received free product along with compensation for this post. However, all thoughts, ideas and opinions are my very own!


  • « Go to Previous Page
  • Page 1
  • Interim pages omitted …
  • Page 4
  • Page 5
  • Page 6
  • Page 7
  • Go to Next Page »

Primary Sidebar

Heather from Whipperberry
Hello... my name is Heather and I'm the creator of WhipperBerry a creative lifestyle blog packed full of great recipes and creative ideas for your home and family. I find I am happiest when I'm living a creative life and I love to share what I've been up to along the way... Come explore, my hope is that you'll leave inspired!

Footer

  • Privacy Policy
  • Crafts
  • Food
  • Gifts
  • Holidays
  • Home
  • Mom Life
  • Recipes
  • Travel

Copyright © 2026 · Seasoned Pro