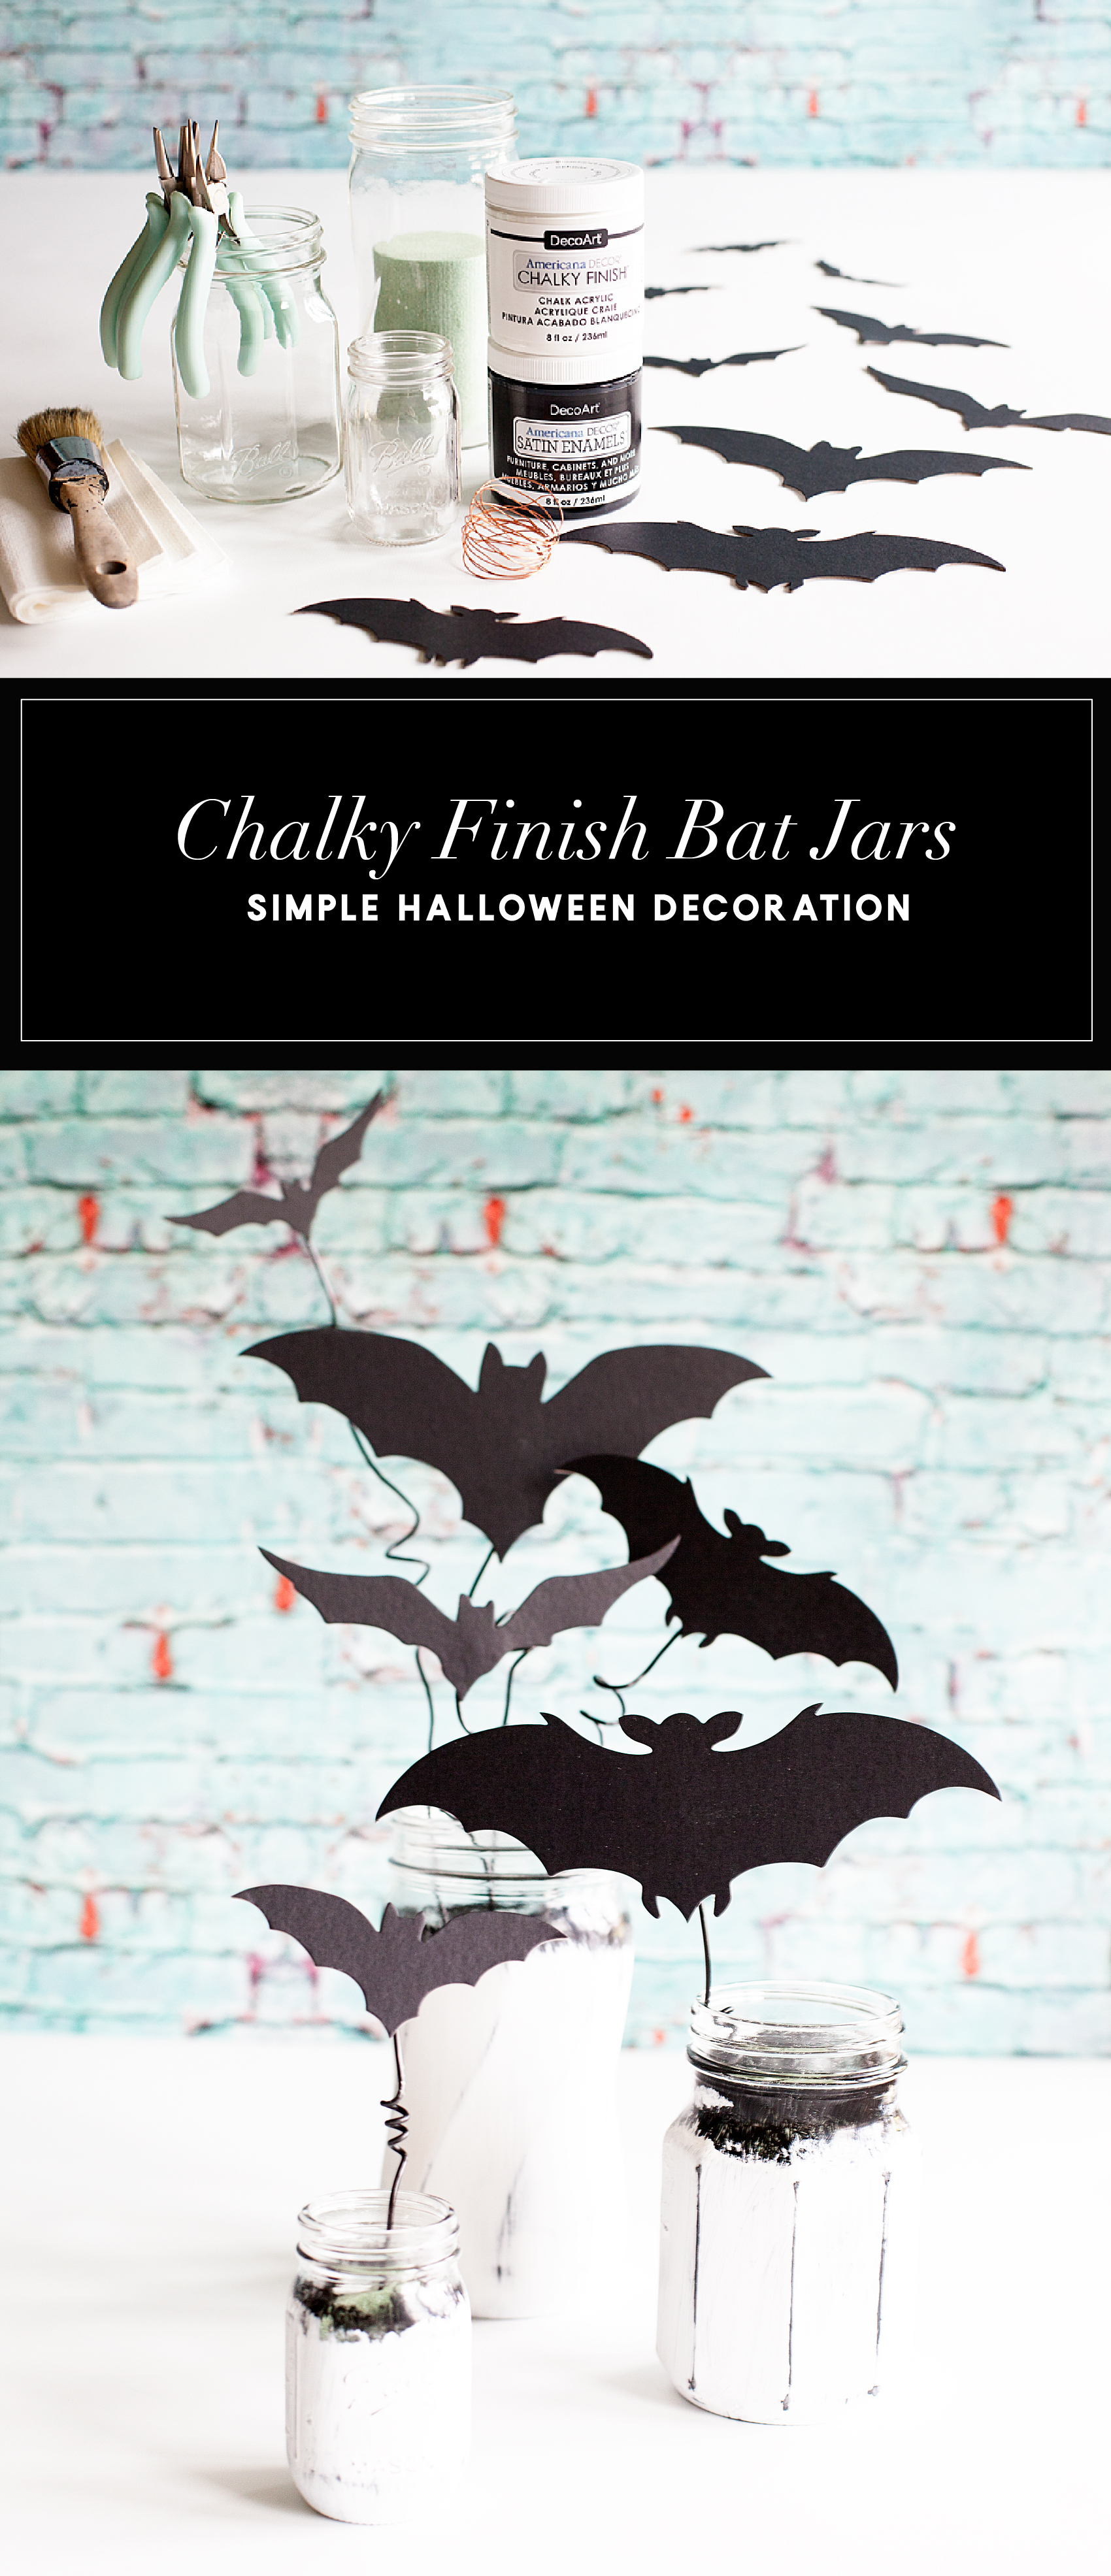
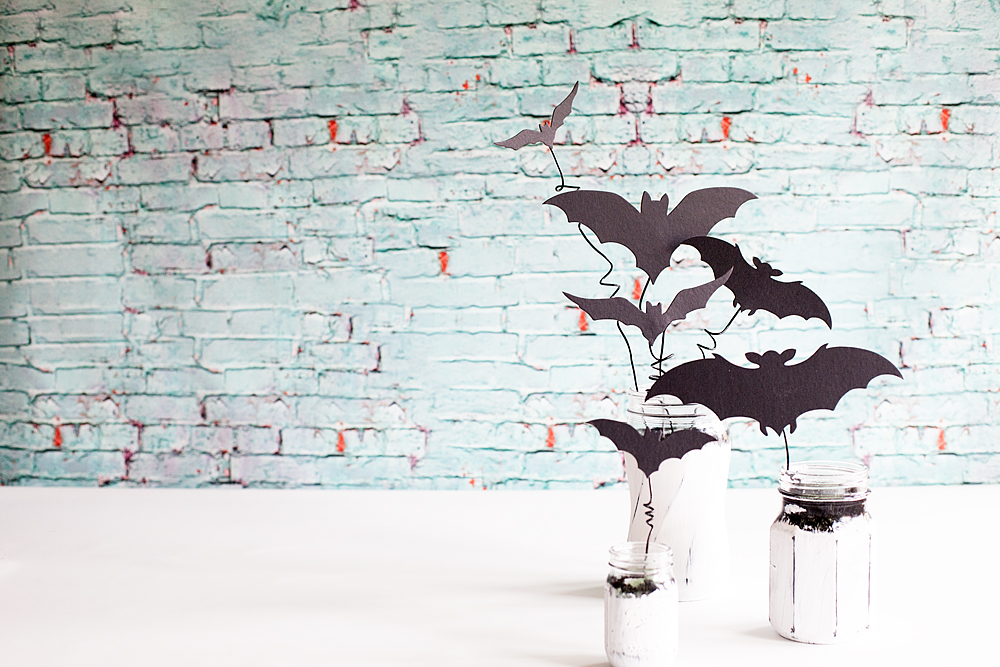
Chalky Finish Halloween Bat Jars • Have fun creating spooky Halloween decor with these Americana Decor Chalky Finish Ball Jars filled with creepy bats. Decorate your mantle or use them as a table centerpiece. Either way, they will add some stylish fun to your Halloween decoration game.
+ This post is brought to you by the amazing folks at DecoArt +
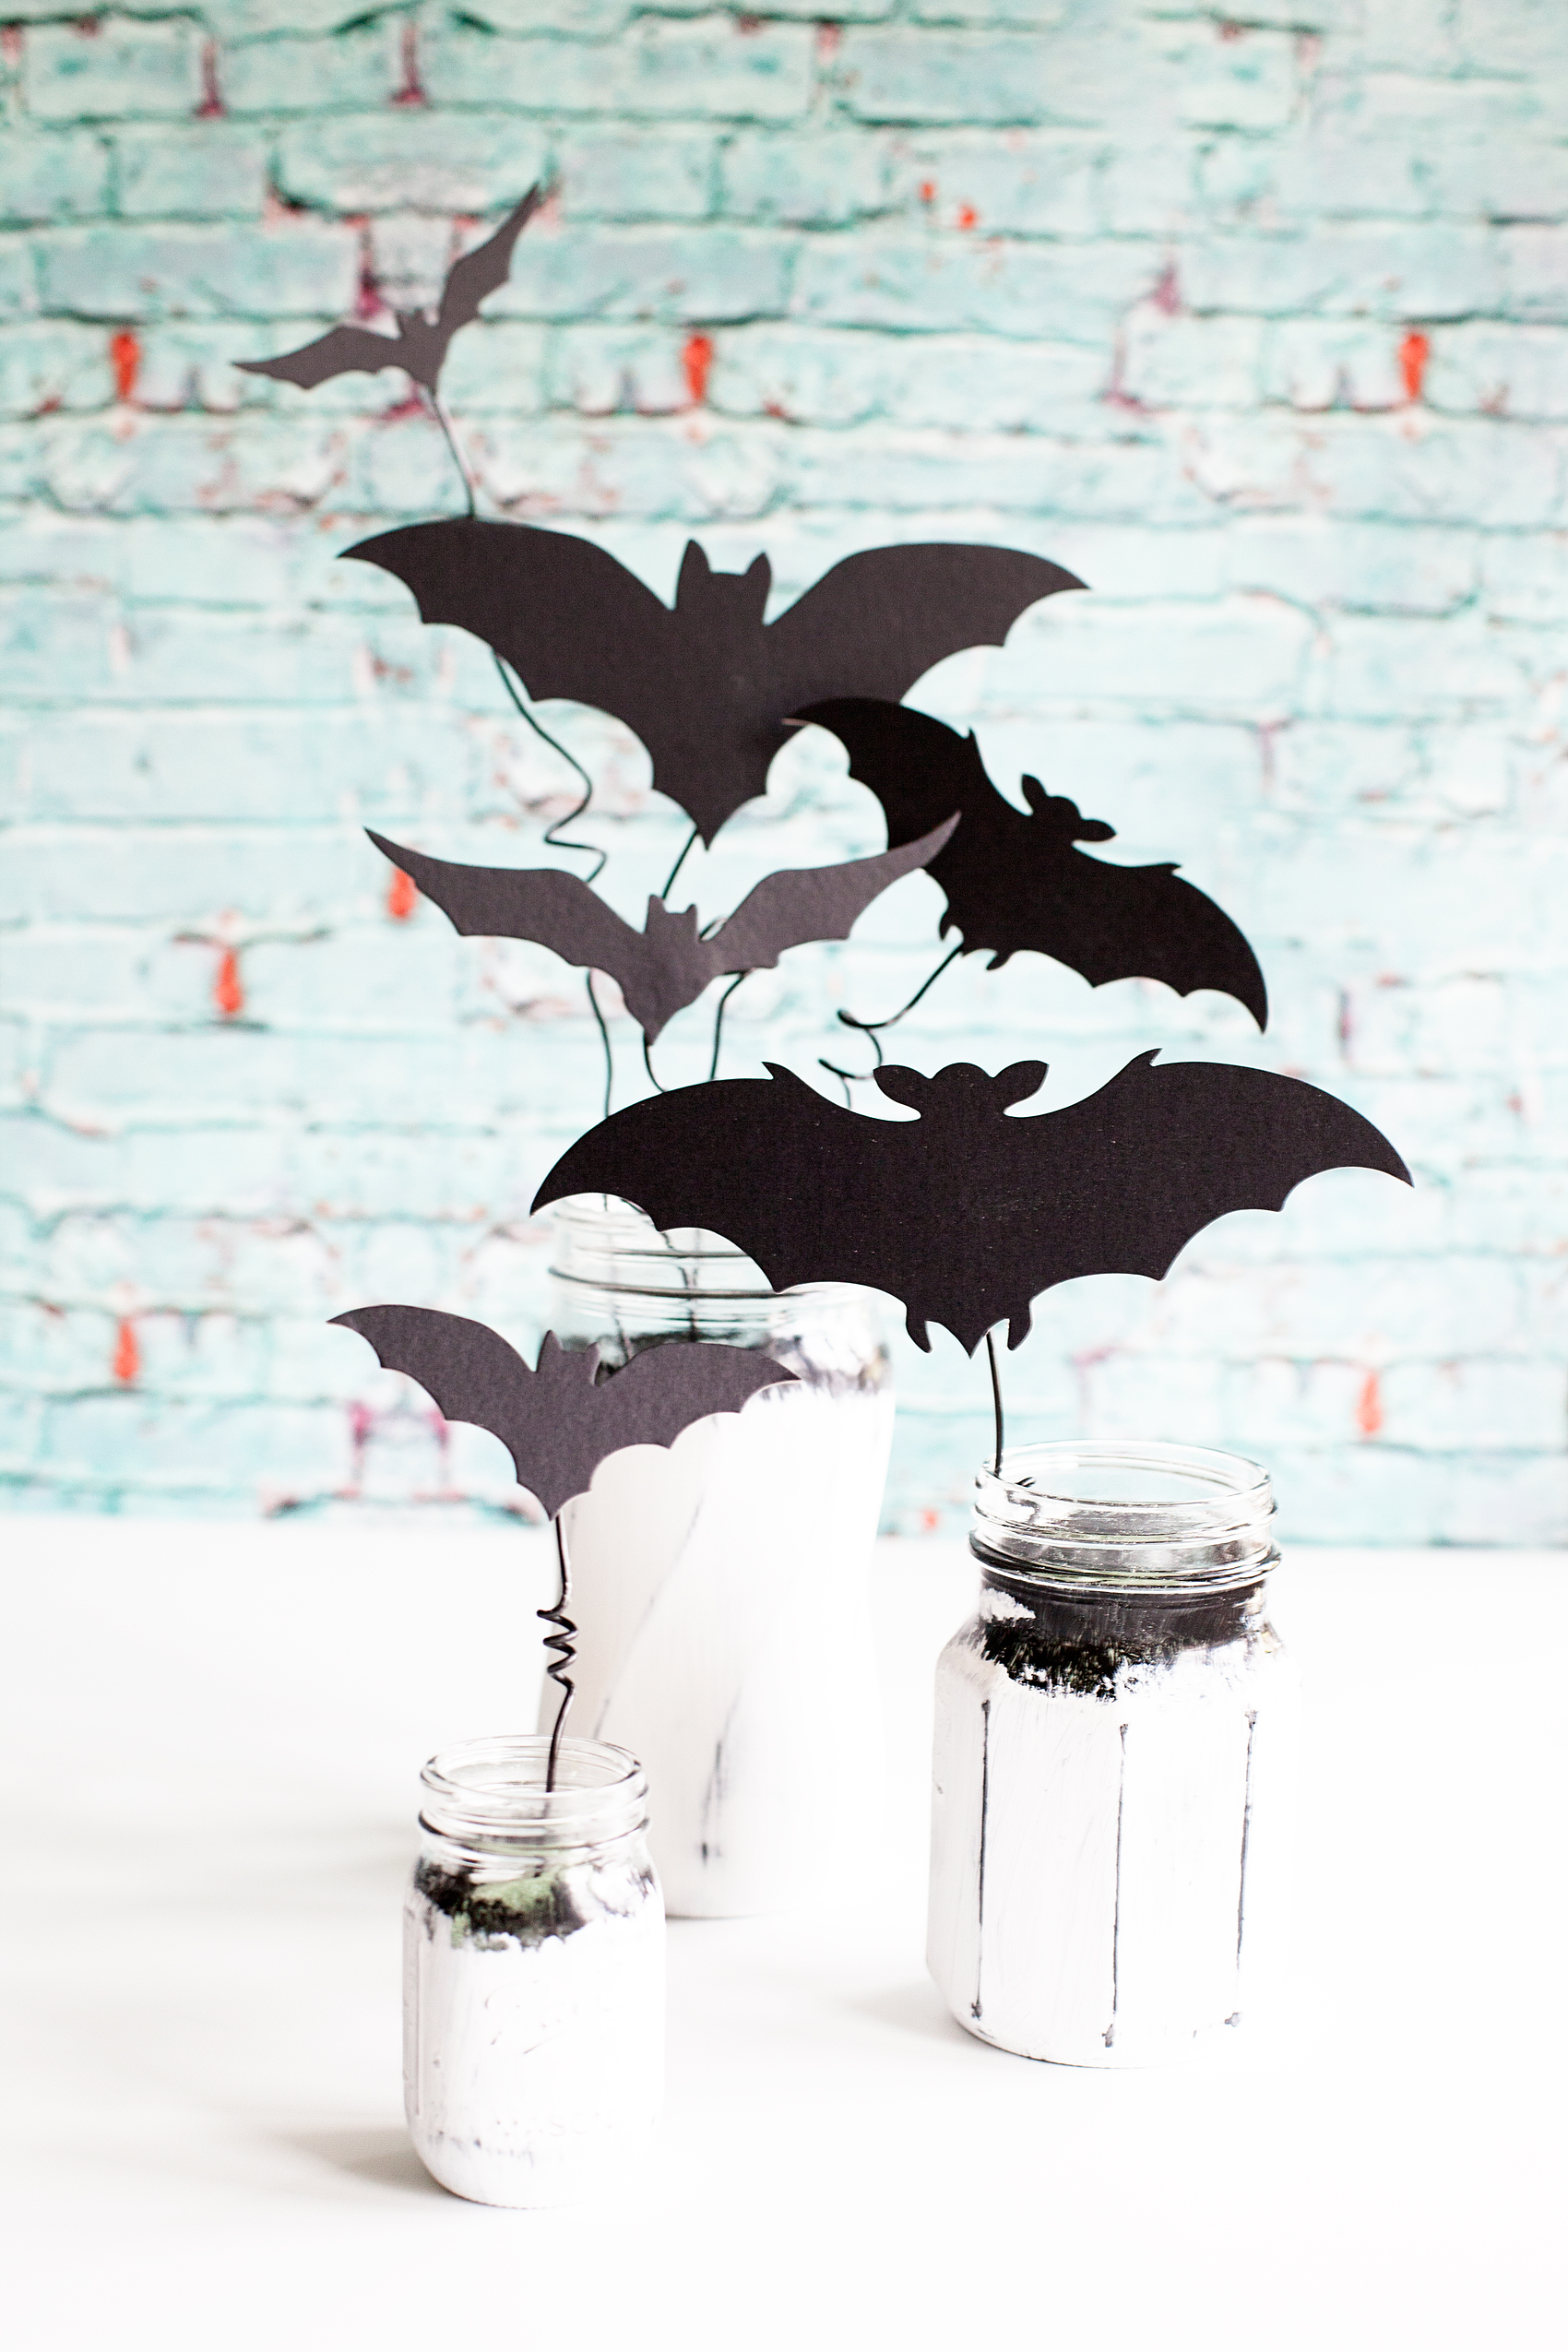
I LOVE, love, love creating simple and, (strange as it may seem,) elegant Halloween decor. I’ve said it before, I don’t really go for the macabre but, I do love a good bat or six flying around the room. This year I thought it would be fun to use two of my favorites and create spooky mantle decor OR a centerpiece for our Halloween gatherings.
Not All Jars are Created Equal • What Jars Are Fun to Use
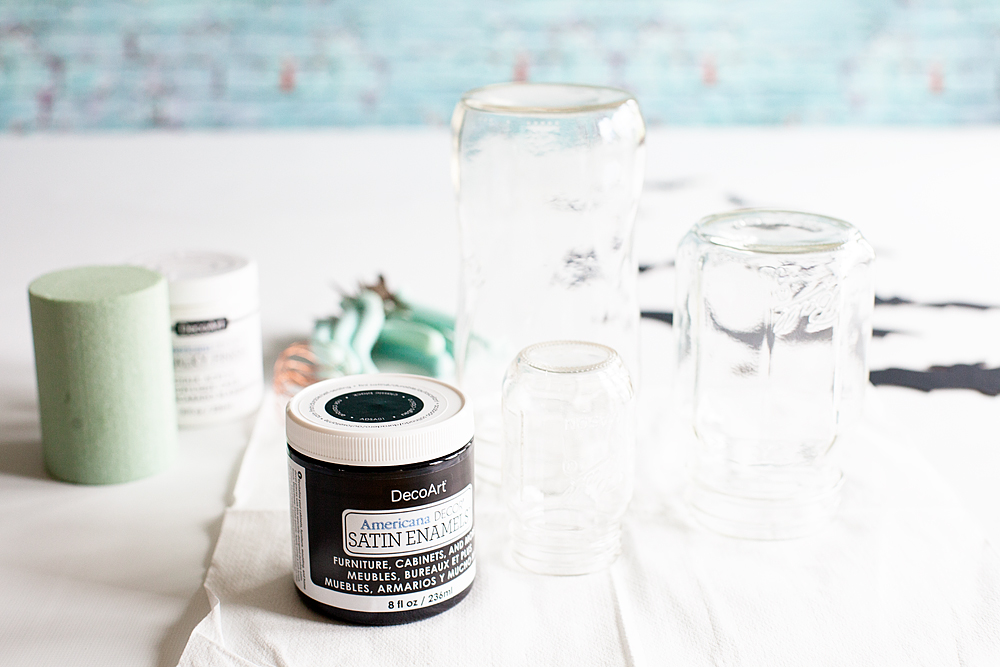
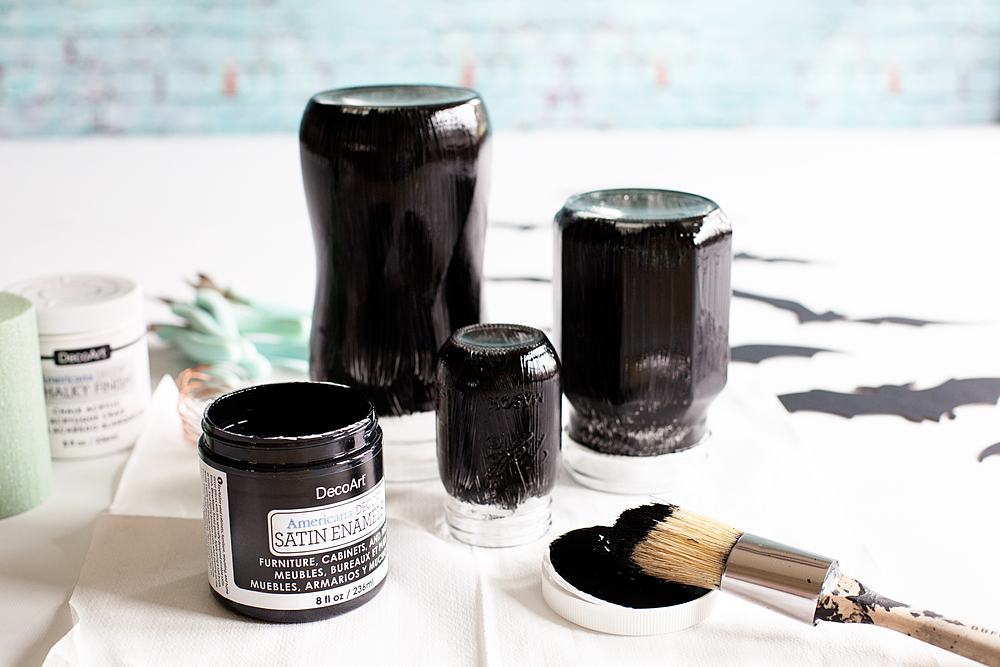
We’ve all seen those classic chalk painted jars used for everything under the sun. They are great but, they can be even better when you use the NEW Ball jars that have a little flair to them. The have a new Spiral Jar, a Giving Jar and a little Mini Ball Jar. All three of these jars have something fun to add to the chalk paint jar scene. The Spiral jar has great spiral lines with a somewhat hour glass shape, PERFECT for a chalky finish. The giving jar has great lines and, can we swoon over the cute mini mason jar! That would be perfect for a place card at a Halloween dinner party.
The Benefits of Chalky Finish Paint vs. Typical Acrylic Paint
These fun new jars are a match made in Heaven when it comes to the DecoArt Americana Decor Chalky Finish paint. The two main benefits to using chalk type paint for this application is:
- Dry time– Chalk or mineral type paint has a super speedy dry time which is fabulous when you are wanting to a quick project. Whether big or small, furniture or jars, you want to move quickly and not have to sit around literally watching the paint dry.
- Manipulatable – With a chalk based paint like the Americana Decor Chalky Finish paint, once the paint is dry, that’s when the magic happens. You can use sand paper or even a wet cloth to play with the paint giving it a nice worn look. With typically acrylic paint you wouldn’t be able to do that. It would just become a sticky mess. The paint would gum up in your sand paper and the result wouldn’t be consistent. And really, chalk painted projects are far more interesting than just your basic flat paint job. They have character!
Supplies Needed for the Halloween Bat Jars
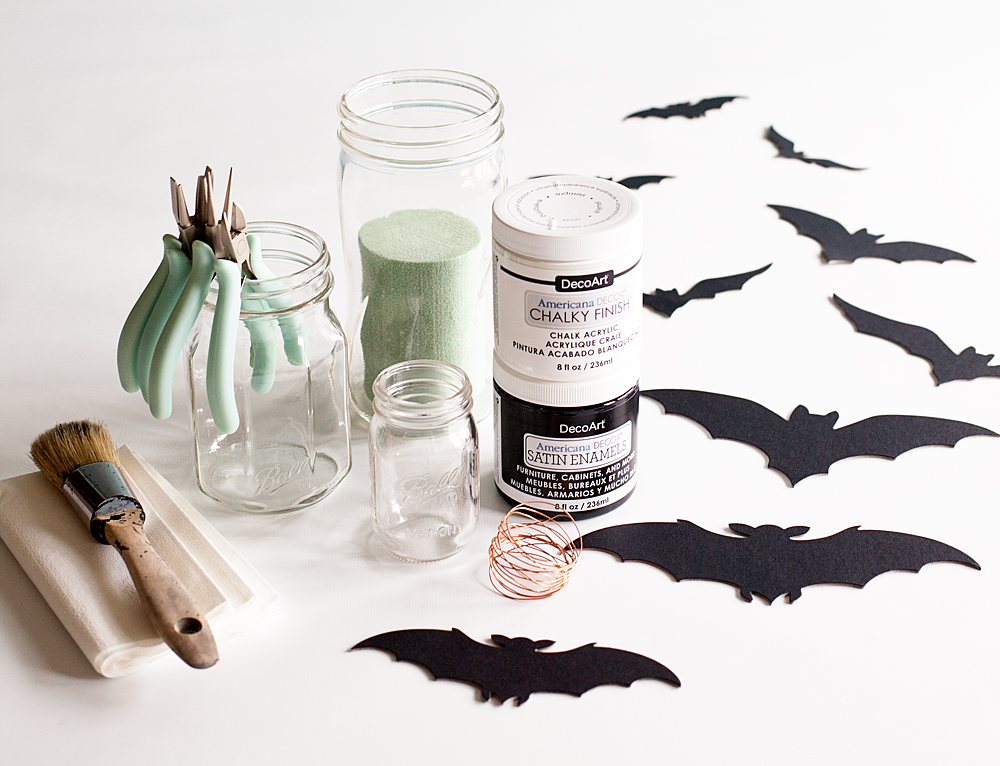
- Ball Jars- Spiral, Giving Jar & Mini Jar –
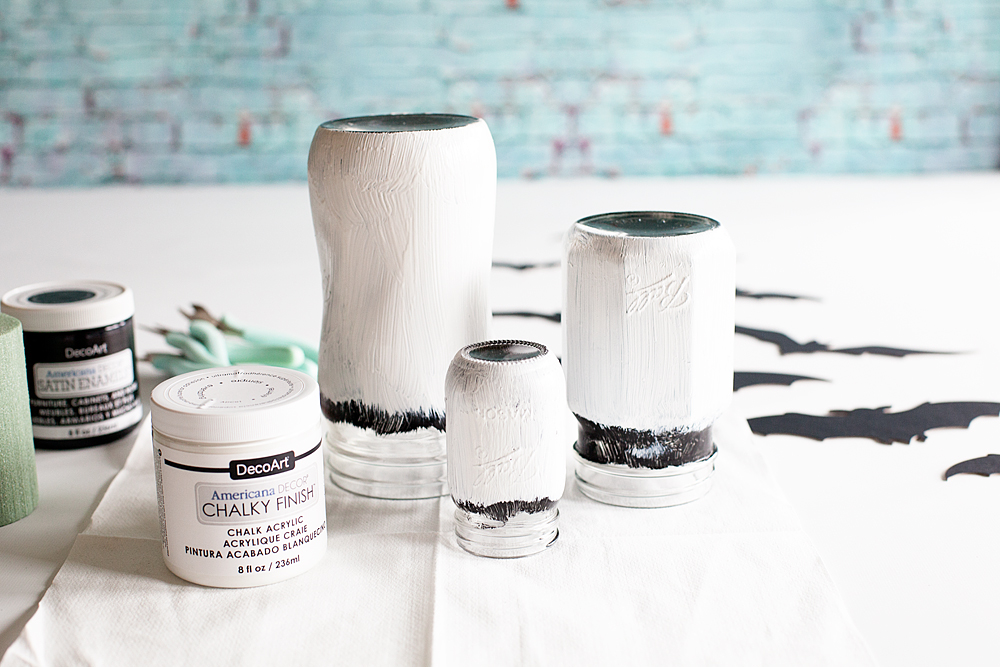
- DecoArt Americana Decor Chalky Finish Paint – Everlasting
- DecoArt Americana Decor Satin Enamels – Classic Black
- Chalk paint brush
- FloralCraft Dry Foam Mug Plugs
- Wire cutters
- Black Aluminum Floral Wire
- Hot glue gun – I LOVE my cordless Ryobi Glue Gun
- 220 grit Sand paper
- Round pencil or pen
- Bats
- lint free cloth to protect your surface
I actually purchased most of my supplies here from Michaels or Target. I’ve found Target has the best selection for the Ball jars at a good price. The bats are a chipboard bat from the Martha Stewart Crafts line at Michaels but, you can totally make your own bats out of black paper as well. If you have a Cricut machine it would be a snap!
Instructions for the Halloween Bat Jars
Place a lint free cloth or paper down on your surface to protect it from the paint.
You will begin by painting your first coat of paint with the Classic Black Americana Decor Satin Enamel. Now, I want these jars to look rough and not polished at all. I don’t mind brush strokes or a rough edge at the top. I actually purposefully created a feathered look at the top with my brush.
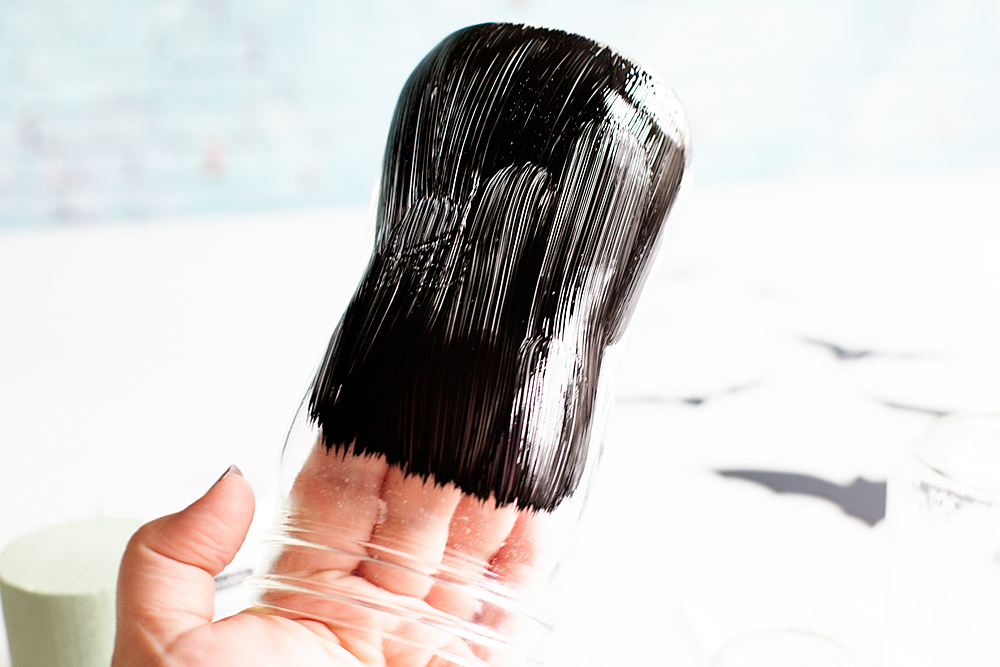
I turned them upside down and let them dry for an hour or two. You don’t want the paint to be tacky at all when you move onto the next coat.
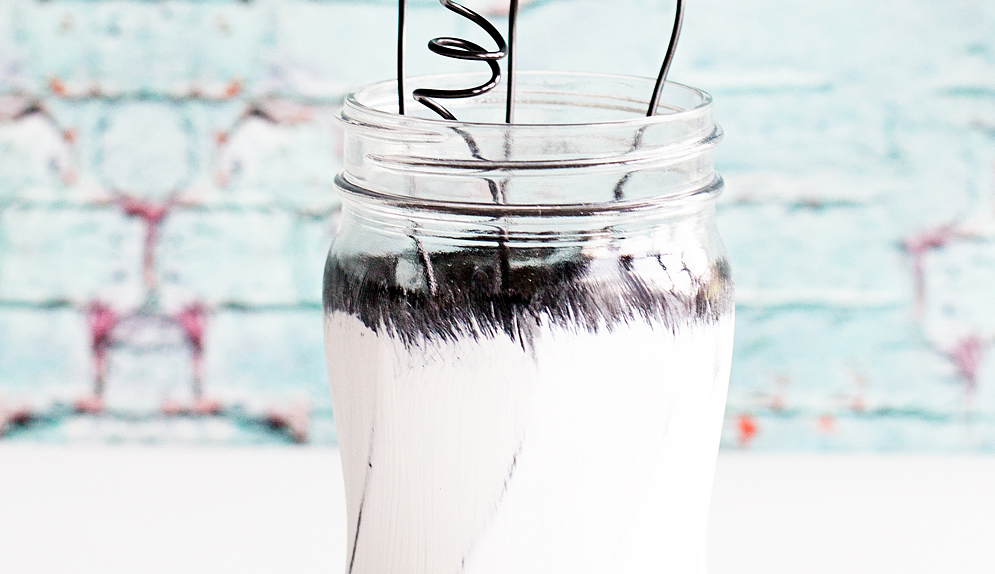
Once your black layer is dry after an hour or two, you’ll paint on your white layer with the Americana Decor Chalky Finish in Everlasting (white.) I left about a 1/2 to a 1/4 inch section at the top of the black. That way a little more of the black paint is showing through. Again, I kind of feathered the top with my brush.
PRO TIP: For the white layer, I found a thicker application of the paint is best. I wouldn’t go so far as to do two coats. Just paint it on a little heavy.
Then I set them aside to dry again. This time I didn’t have to wait too long. The Chalky Finish paint dries super quick even if it is layered on rather thick.
Then I took the 220 grit sand paper and LIGHLY swipe the paint on the jar with a flat hand. You don’t want to attack it like a jack hammer. You want to lightly distress the high points of the jar so that it look natural.
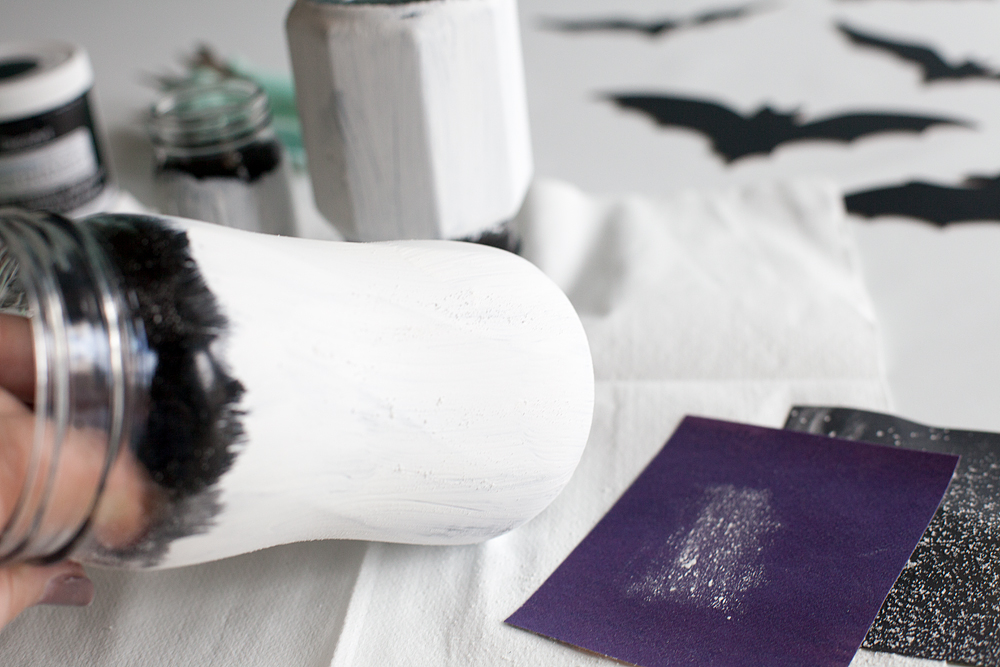
If you don’t want to worry about paint dust from the sandpaper, you can distress your jar with a wet cloth. Just make sure not to get the paint too wet. It will pull large areas of paint off the jar if it is not done carefully.
Now, put the floral foam into the jars. You may need to cut down the foam in order for it to fit into the jar.
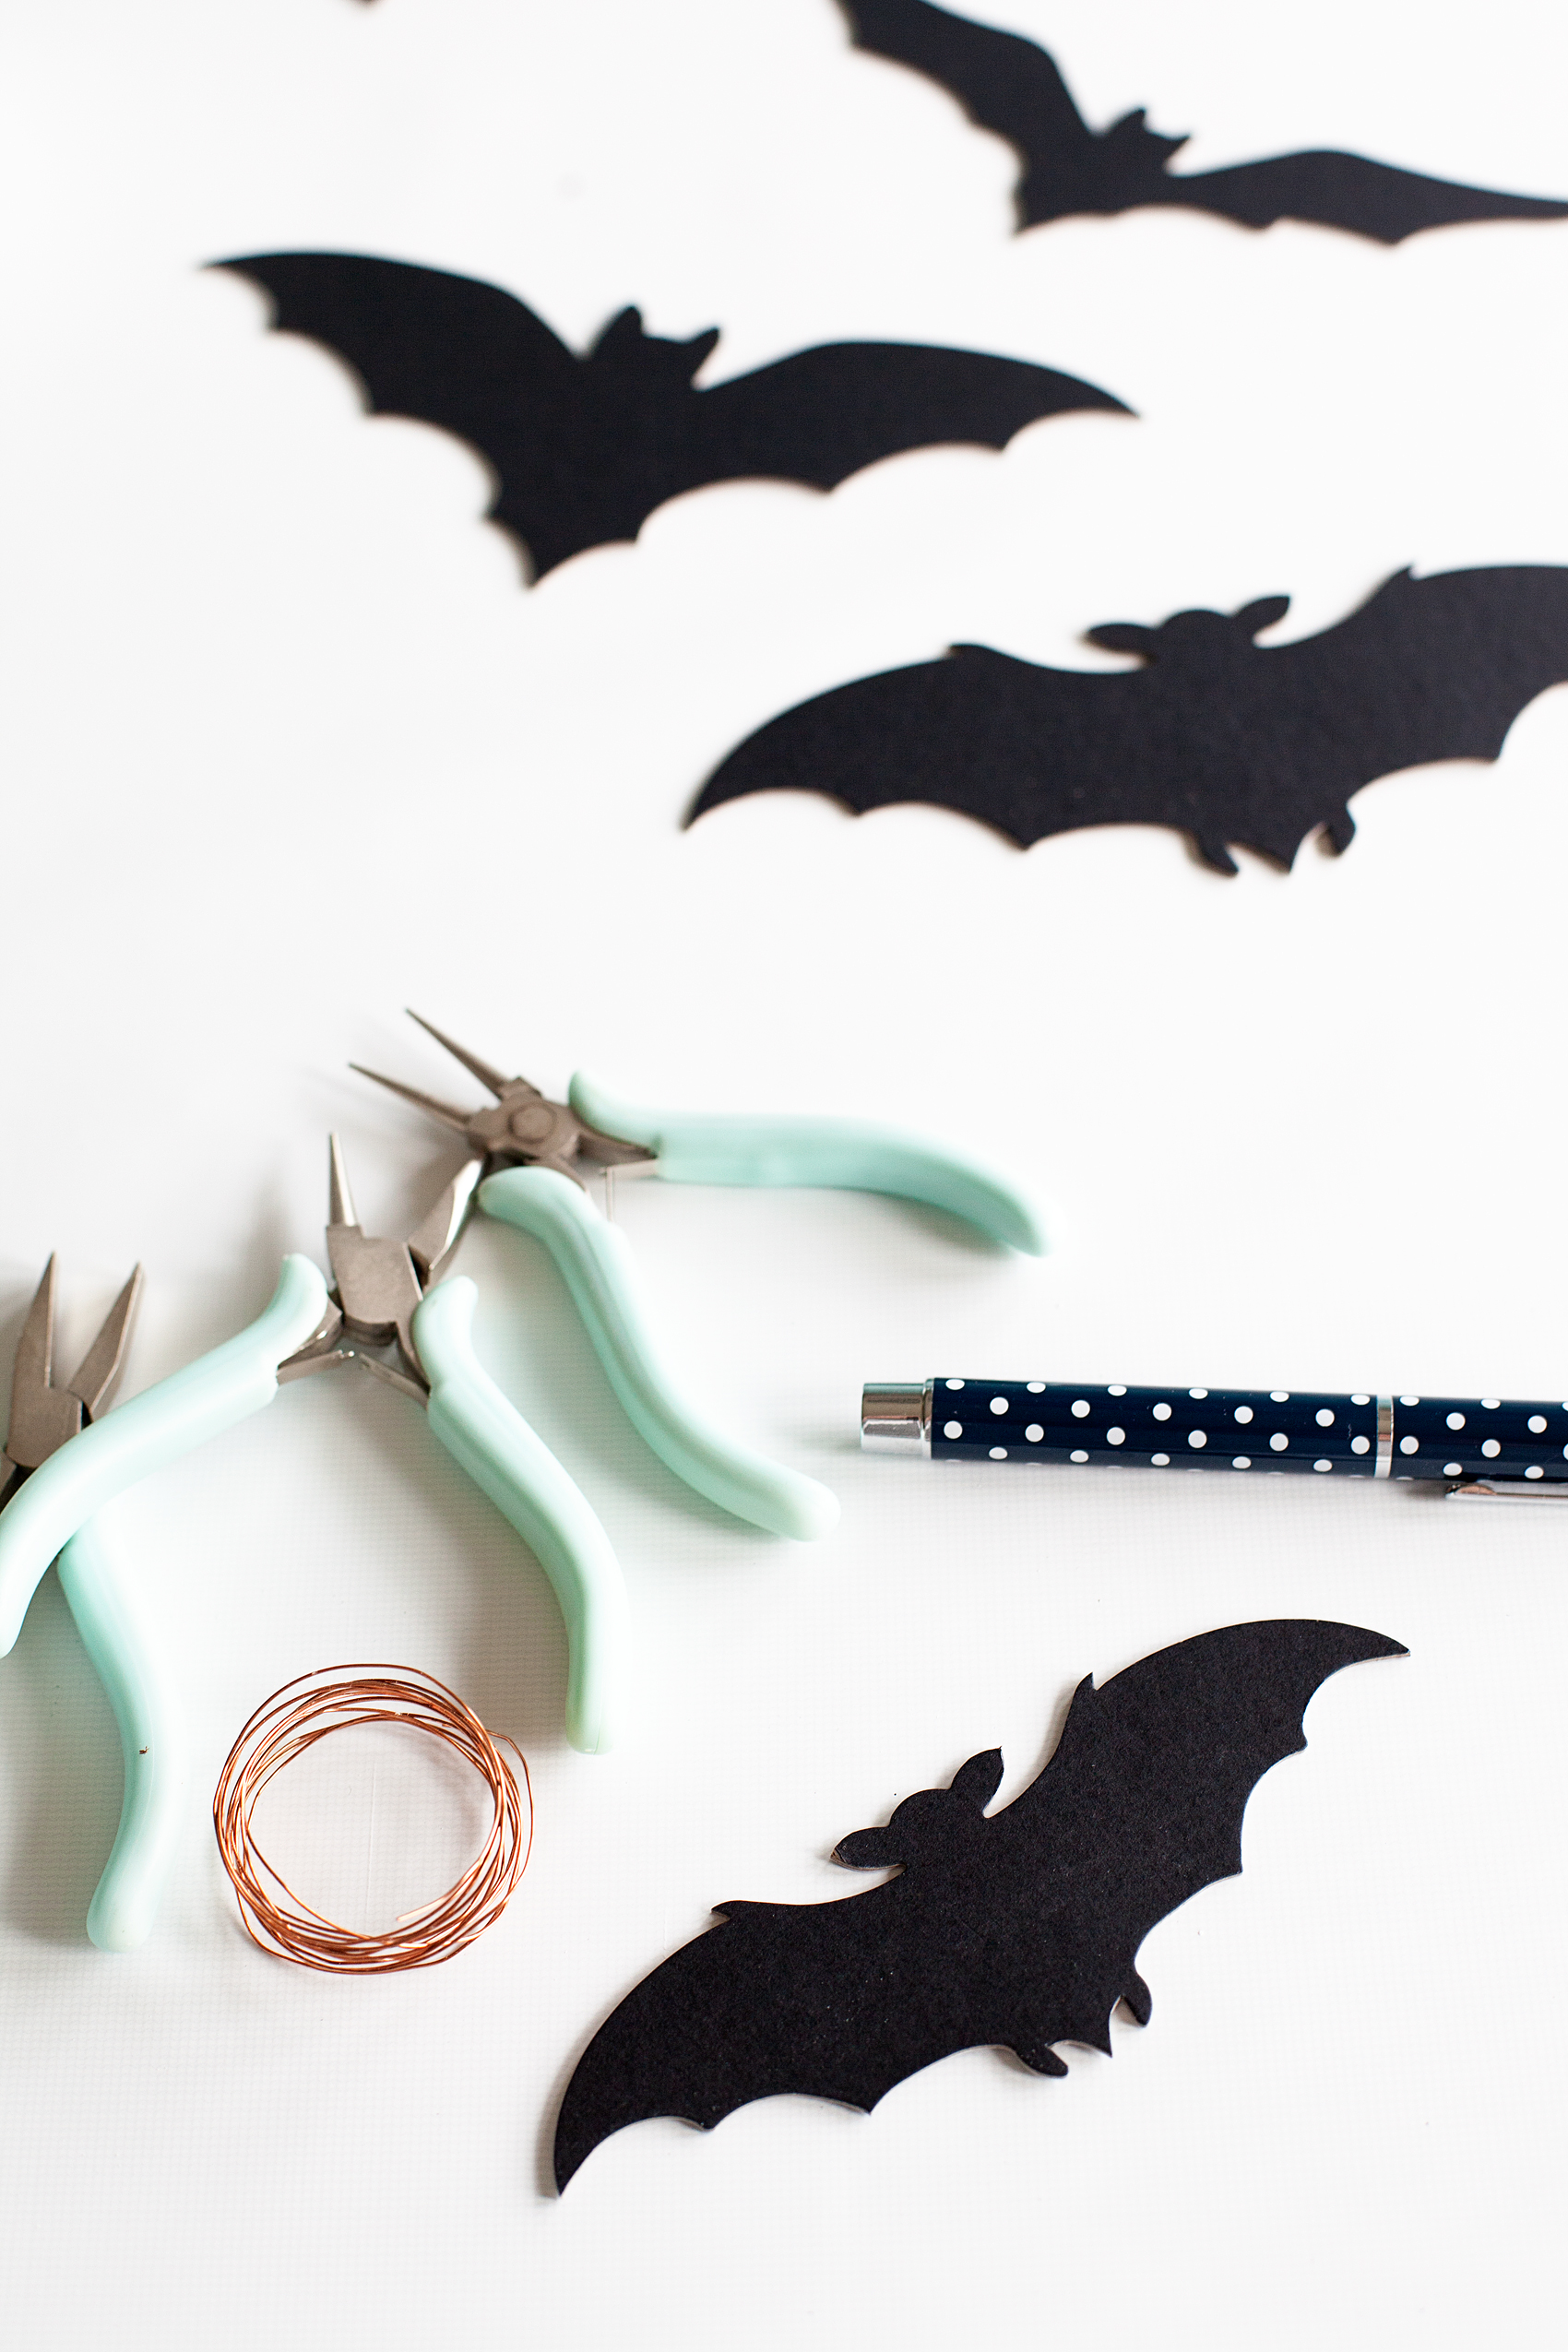
It’s time to add your bats! You have several different choices for wire. If you are using a lighter, cardstock type paper for your bats, you’ll be able to use a 24 gage wire like the one pictured above. If you are using chipboard bats, you might opt for a heavier wire like the black aluminum decorative wire that I used.
Have fun twisting and curling the wire to create fun lines and swirls just like the swirls on the jar! I used some jewelry making tools along with a circular pen to create the twists and turns in my wire.
I hot glue the wire to the back of the bats and then arrange them in the jars sticking the wire into the floral foam to keep them in place.
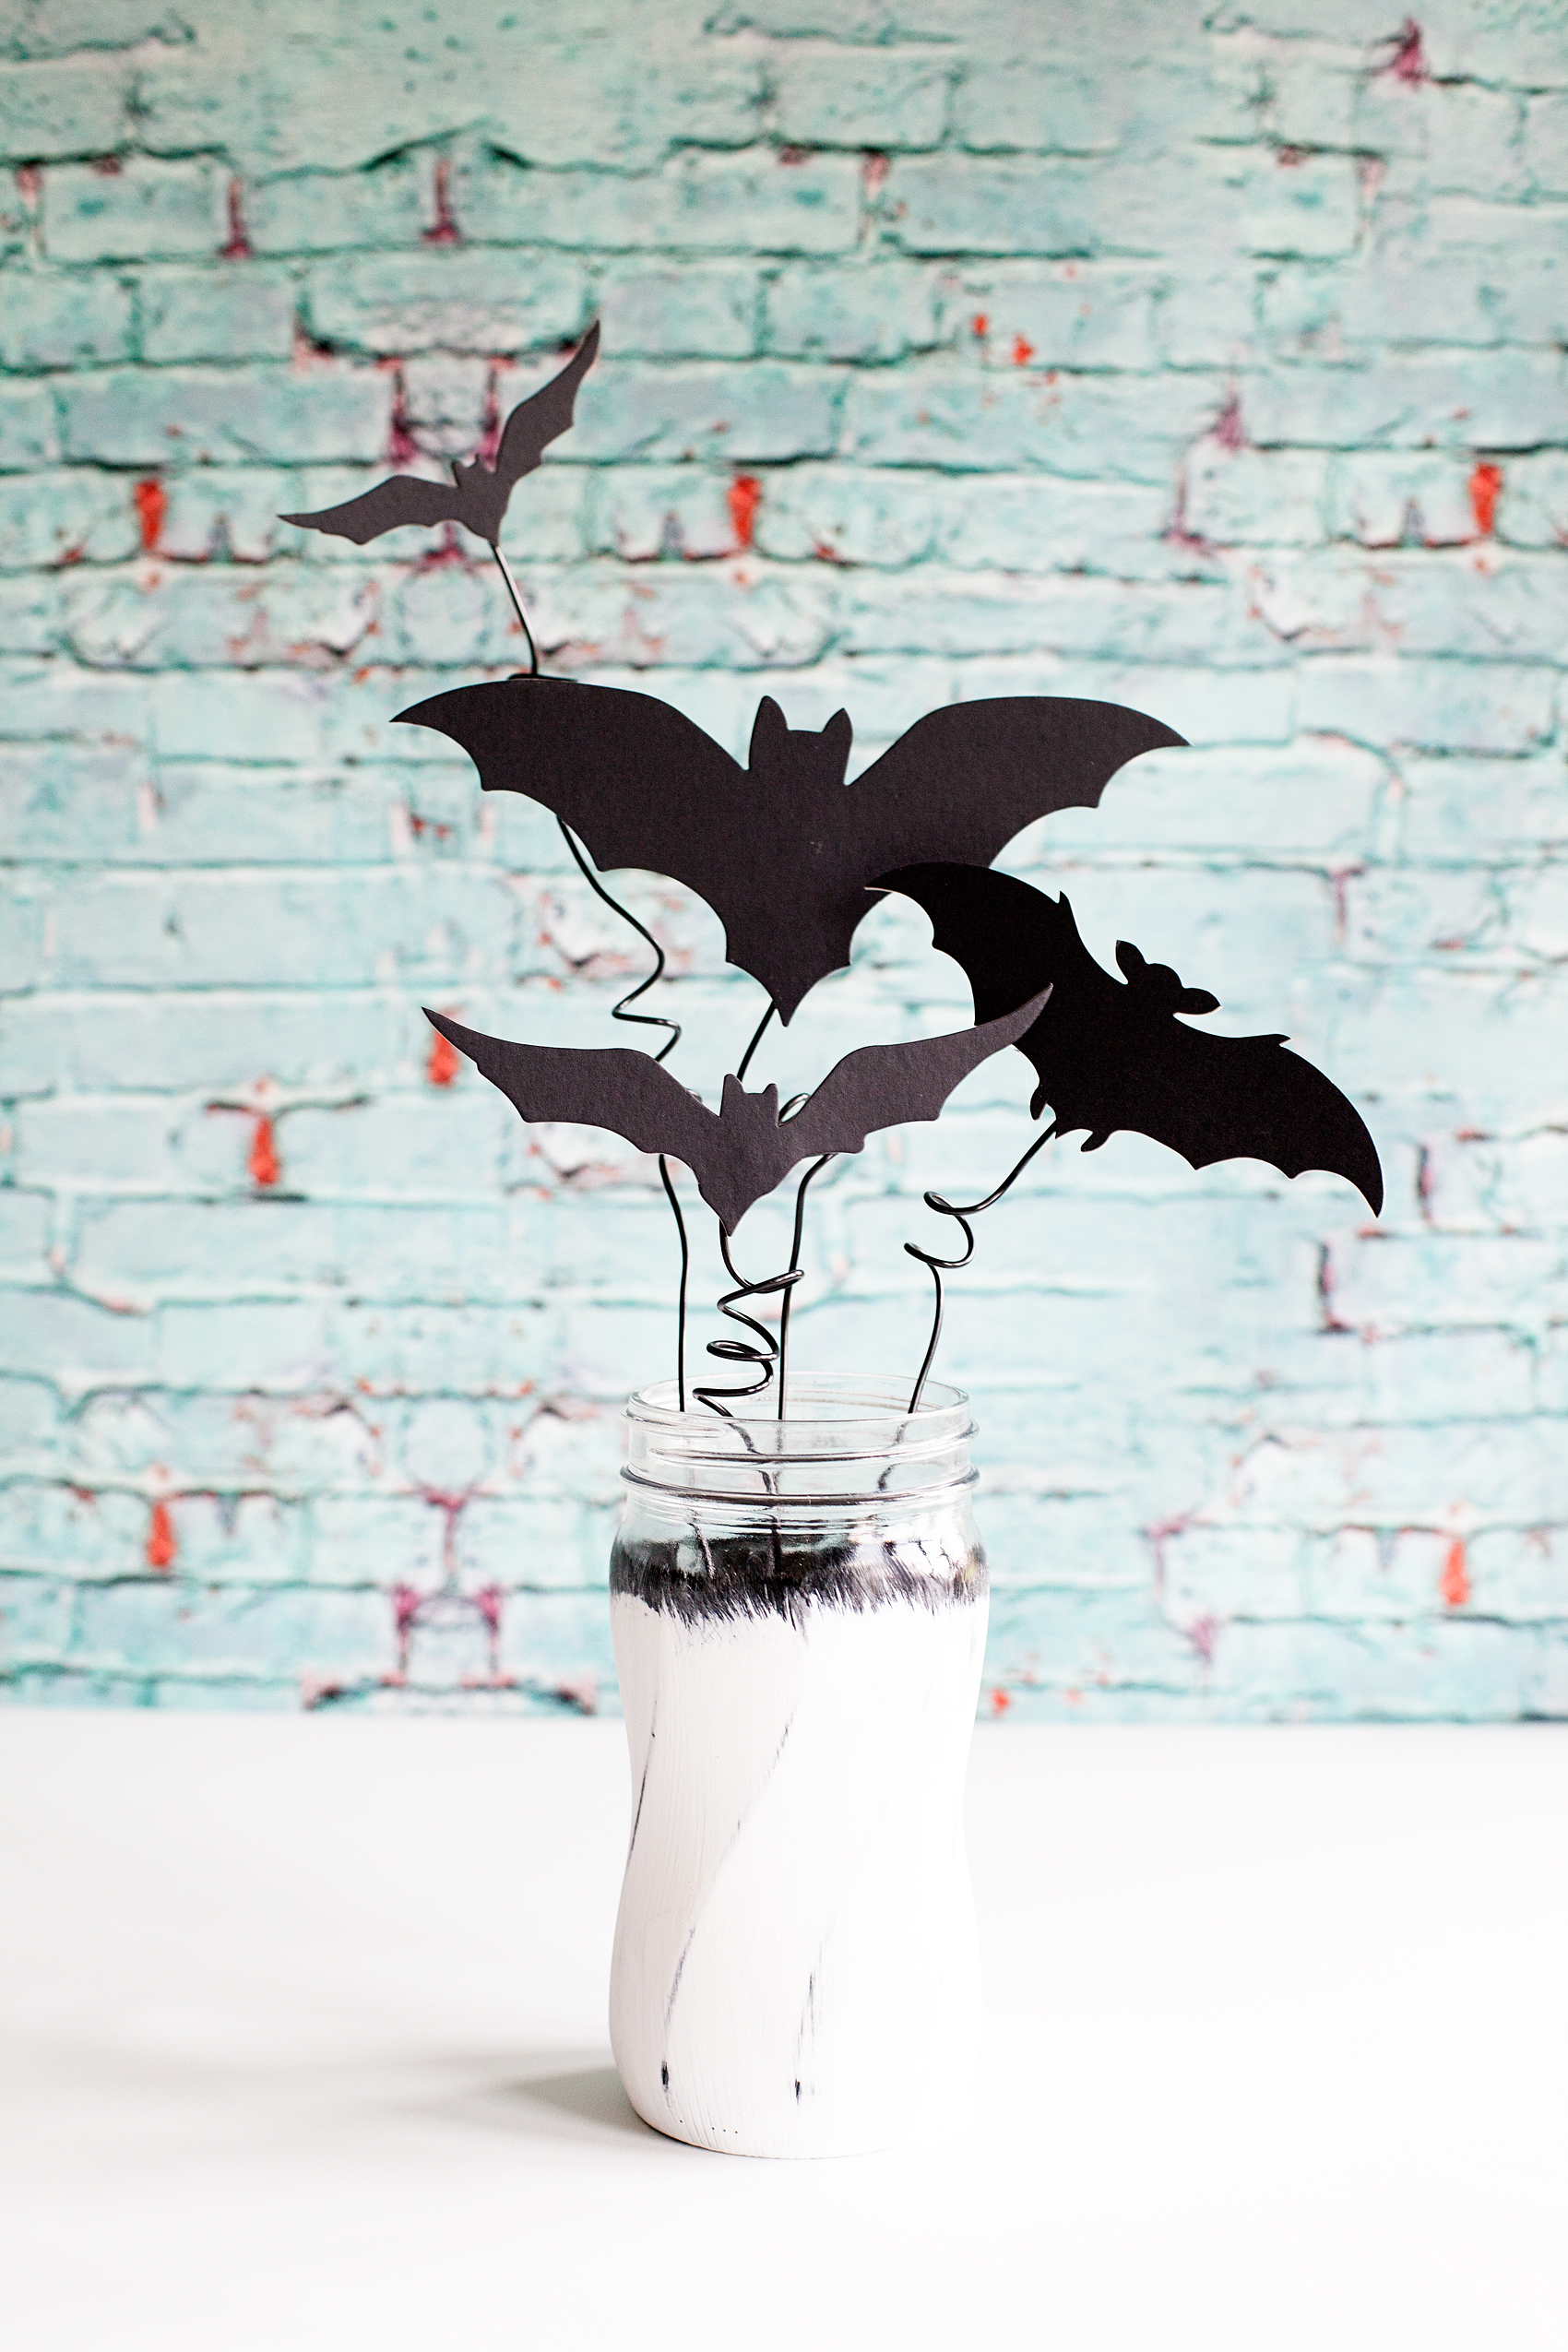
Doesn’t the jar look fun with the distressed swirls?!
I love how these turned out and can’t wait to make a few more to dress up our home for Halloween. It would be fun to make some jars with ghosts and such… Ahhh, fun!