• Skip to primary navigation
  • Skip to main content
  • Skip to primary sidebar
  • Skip to footer

Whipperberry

WhipperBerry • Your Home For Creative Inspiration

  • Home
  • Recipes
    • Starters
    • Easy Weeknight Dinners
    • Main Dish
    • Salads
    • Side Dish
    • Soups & Stews
    • Desserts
    • Breakfast
    • Miscellaneous
  • Tutorials
    • Creative Crafts
    • DIY Decor
    • Fabric Crafts
    • Food How-To
    • Jewlery
    • Paint Projects
    • Paper Art
    • Party Styling
    • Photography and Graphic Design
    • Silhouette
  • Holidays
    • Easter
    • Mother’s Day
    • Father’s Day
    • 4th of July
    • Halloween
    • Thanksgiving
    • Christmas
    • Valentine’s Day
  • Gift Ideas
    • Gifts For Everyone
    • Gifts for Dad
    • Mother’s day
    • For The Girls
    • For The Kids
    • Teacher Gift Ideas
    • Christmas
  • Printables
    • Holiday
    • Gift Idea
    • LDS Primary
  • Travel
  • About
    • Terms
  • Contact
  • Nav Social Menu

    • Facebook
    • Instagram
    • Pinterest
    • RSS
    • Twitter

dessert

Modern Buttercream with Craftsy

2 · Oct 31, 2013 · 1 Comment

This post brought to you by Craftsty // I LOVE learning new skills and one of my go to places for that is… Craftsy. Have you discovered Craftsy yet? Craftsy is your premiere online learning resource for anything creative. They have sewing, knitting, jewelry making, cooking and cake decorating to name just a few. They have gathered top experts in their field to create high quality classes for you to enjoy and learn from right in your home and on your own time schedule. The other day I took one of their free classes that they have available, Modern Buttercream…

Now, I'm no stranger to cake making, but… I am no expert. I am self taught, I have been dying to learn how to make my cakes look a little more professional. I knew it was time to take a class, but who has time to take a class? I sure don't. That's why Craftsy is perfect! I logged onto my class while sitting on my couch in my PJ's with Gage (my three year old tag along) hanging out with me. It was perfect, I didn't have to find a babysitter or even get dressed. I was able to learn the finer points of creating a buttercream cake from Joshua John Russell. He is an amazing cake artist who I've been watching for several years on the Food Network. He is super talented and a fabulous teacher…

I am blown away every time a take a class through Craftsy. They are indepth and create a class that you can really learn from. I learned a ton from Joshua. Like how to carve a cake so that it not only looks good, but tastes even better too.

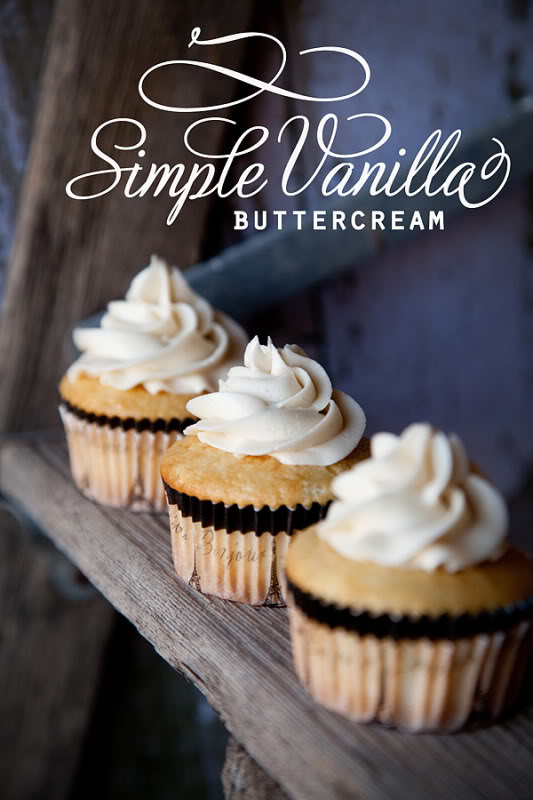
I have always used a "buttercream" that is simple to make, but it's not a real buttercream. In this class Joshua teaches how to make a traditional Swiss Buttercream and then how to frost your cake so that it looks like a professional decorated it. Another tip I learned, drizzle a simple syrup on your cake before you assemble. this way your cake stays nice and moist…

I was able to watch right along with Joshua on my iPad while I worked right along with him…

Craftsy even has their very own app so it's even easier to watch your classes on your mobile device. 

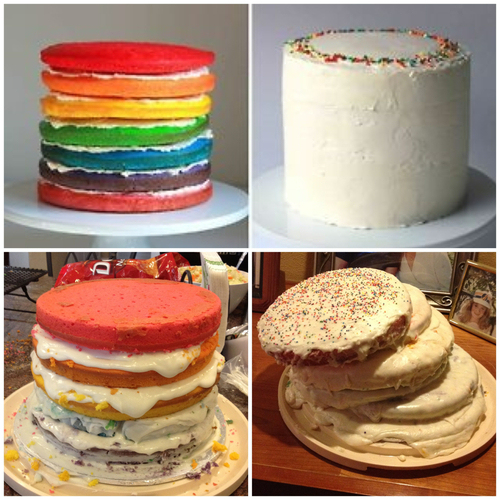
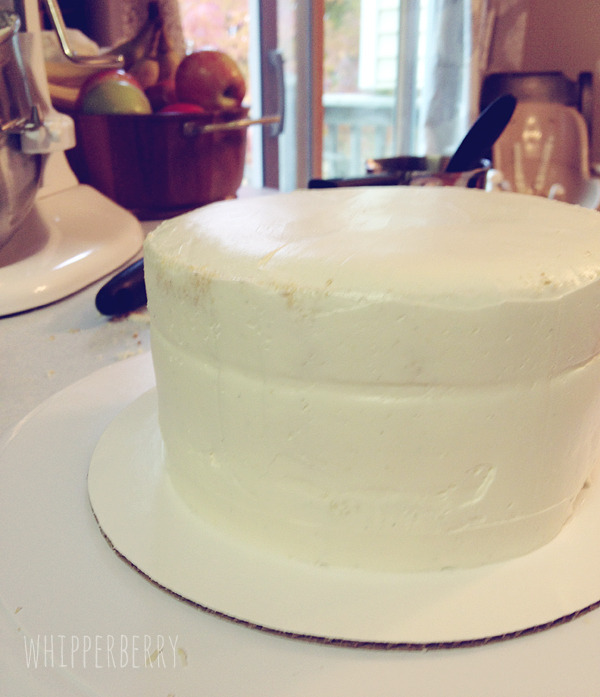
I was able to practice my carving skills (which I still need more practice.) 

Then I practiced my crumb coating skills. Do you know why you use a crumb coat? You'll have to come take the class to find out.

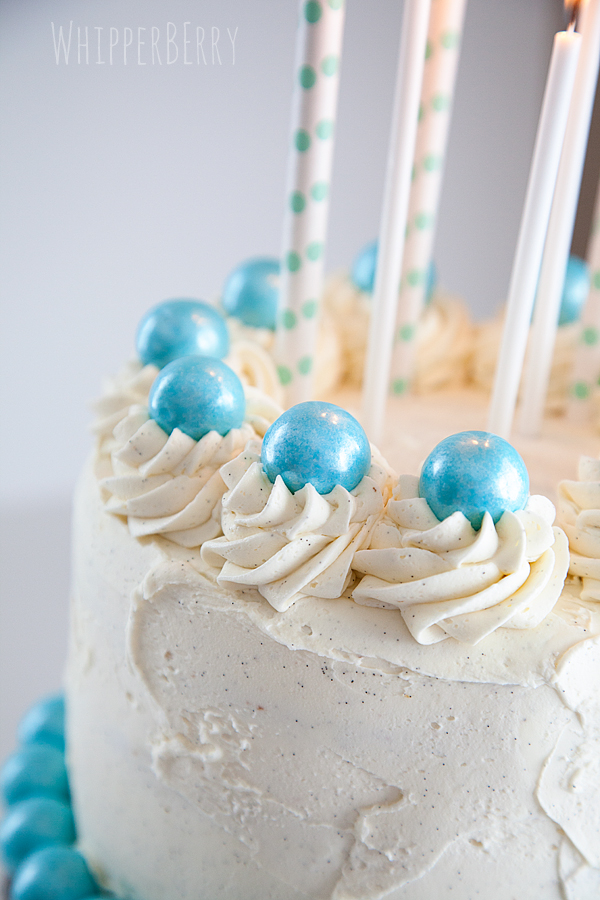
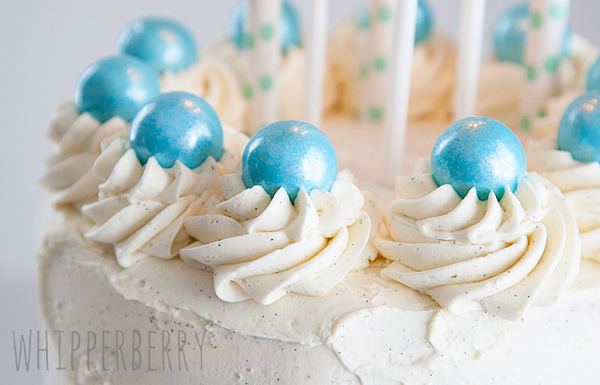
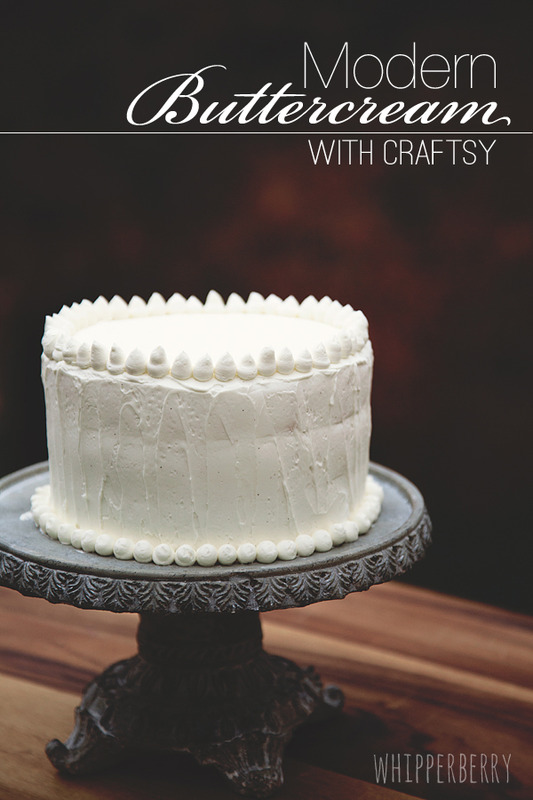
Then I did my final coat and a simple decoration and a rustic finish for my first  buttercream cake…

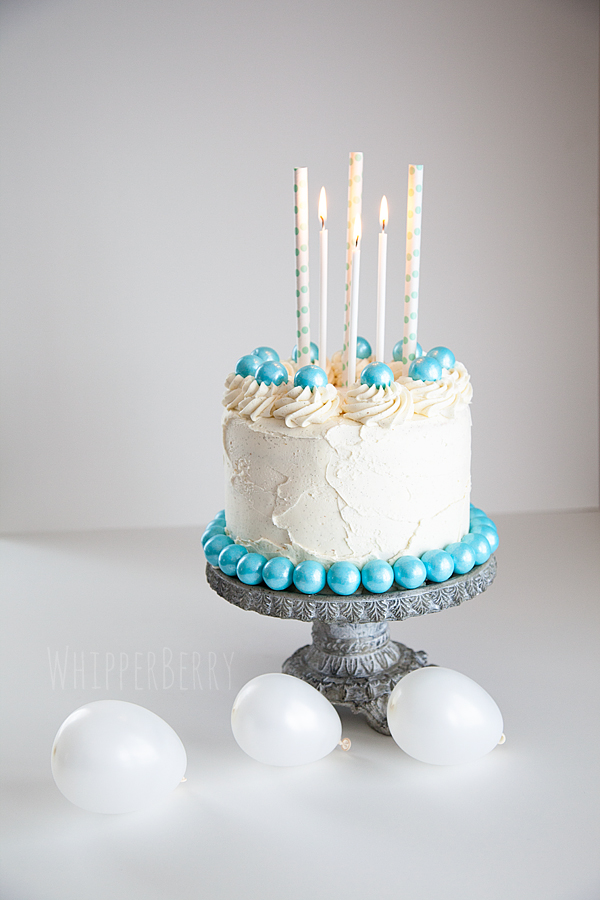
It turned out pretty good, but I'm ready for some more practice so I can make a cake just like Joshua. The nice thing… it tasted amazing! I did add a little more sugar to his buttercream recipe because I like my buttercream a little sweeter, but overall this class was excellent. I am going to work on another autumn themed cake this weekend to practice my skills. I'll let you know how it turns out next week. In the mean time… You should head over to Craftsy and take one of their free classes to see how amazing the platform is. They have this Modern Buttercream class and Fondant and Hand Painted Cake classes… You'll be amazed!! 

Come back next week for my second cake, I have a few more secret tips that I will be sharing!

This is a sponsored conversation written by me on behalf of Craftsy. The opinions and text are all mine.


Cake Decorating Made Easy

14 · Mar 21, 2013 · 25 Comments

Cake Decorating // Let's face it, we all see those amazing cakes on Pinterest and it deflates us a bit. How on earth can we create a cake so stunning. Are you less of a woman if you can't? NOT AT ALL!! I'm not a professional baker but I have found a few tricks that help to create some fun cakes for my family and friends on their special days.

WhipperBerry's Cake Decorating Secrets

This is a cake that I made for my little guy's 3rd birthday. It looks pretty and… It was pretty easy to make. Over the years I've learned a few tips to make things a little easier for those of us who aren't professional bakers / decorators. Here are a few of my secrets…

The Cake

I have made many different types of cake in my life; homemade, box mix cakes, doctored box mix cakes and I've even… bought naked cake!!

From Scratch // Homemade can be challenging if you don't have a lot of baking experience. In my early years when I was aspiring to be just like Martha, I made my first from scratch cake for a friend's party, and it was a disaster. The cake was dense and awful!! I had to go back to the drawing board on that one. After a little more practice, I can now make a much better from scratch cake, but I don't have a fabulous go to recipe just yet.

Box mixes // I have been a cooking show junky for years and many different chefs / bakers on various different shows have said that todays box mixes are as close to perfect as you can get. They say there is no need to try any other method.  I have to agree with this as well. Don't feel any shame at all when you use a box mix. You can even take a box mix to a whole new level by doctoring the mix a bit. One of my most popular posts is a post that my friend Janeen helped me create. She has an amazing recipe for a doctored chocolate cake that is DIVINE!!

WhipperBerry's Most Amazing Chocoalte Cake

Naked Cake // Here is my favorite cake secret… When in a pinch, buy naked cake from your favorite bakery. Yep, you can do that!! The week of Gage's birthday was super crazy, and I really wanted to make a fun cake for him. I just didn't have time to bake and decorate a cake so I went to the bakery at my local market and asked to buy three cake rounds. They always have cakes in the freezer waiting to be decorated. However, if you have a specific flavor in mind, you may want to call a couple of days ahead. On the fly, you kind of have to take what you can get. My bakery charged me $5 per round, not bad considering the time that was going to save me. 

The Frosting

My sweet friend Lara from Less Cake… More Frosting would say, frosting is the most important part of the cake. Others may say, they can take it or leave it. For me, you need to make sure you have a fabulous frosting. That means… steer clear of the store bought brands and learn how to make a signature frosting that can act as a good base for many different flavors. My signature frosting is my Simple Vanilla Buttercream recipe…

vanillabuttercream017

It is a perfect, easy to make frosting that even a beginner baker can't mess up. For Gage's cake I went a step further and added the paste from a vanilla bean to the frosting to make it a little extra special. I just love the little flecks of vanilla in the frosting. I order my vanilla beans from Beanilla. They have some of the best product around. Steer clear of the dried-up, stale vanilla beans you find for a premium price at the super market. 

WhipperBerry Vanilla Bean Frosting

Building the Cake

Here are the boring mechanics that many people like to skip.  Since the inception of Pinterest, there have been a ton of blogs out there who's main purpose is to see if you can recreate what you see on Pinterest. They LOVE to show-off if they have a fail and they want everyone to know that the feat is impossible. Case in point…

slide_265764_1805033_free

img source // I wish I could find the original source, I would love to show them how easy it is!

Here is how you can avoid this mess.

  1. Make sure you have a good frosting that will hold up to a layered cake. That frosting looks more like a glaze, not the type of frosting that will hold a layered cake together.
  2. Freeze your cake. A frozen cake is much easier to work with. 
  3. Trim off the dome of the cake if it has one, creating a nice flat cake. Then flip the cake over and have the bottom be the top of the cake. That way you have a nice flat surface to work with.
  4. Place a small amount of frosting on the cake plate to provide a stable base for the bottom layer.
  5. Skewer your cake. Add a few bamboo skewers to the cake to keep it stable. 
  6. Create a crumb layer. What is this you ask? You will frost the cake with a thin layer of frosting and then place in the fridge for a bit to create a clean work surface.
  7. Take your time, work clean and your cake will look like the top cake. Rushing before you've mastered a skill is the bakers worst enemy. 

IMG_5938

Decorating the Cake

Here is where the fun begins! For Gage's cake I worked in stages. First I frosted a crumb layer and then put the cake in the fridge for a bit to create a clean, solid, workable surface. Next, I frosted the smooth layer of the cake with a small off-set spatula and since the cake was cold, it made that process really easy. I then used one of my favorite tools a jumbo star decorator tip that I purchased at Sweet Baking Supply. Having the right tools makes all the difference. Those small decorator tips that you can find at your local craft store will not do the trick for this cake. You NEED to have the jumbo tips which I have only been able to find online. Then all you have to do is create a large rosette with a small circular motion. It's really easy, just practice a few times on a plate. When you have the technique down all you have to do is scrape the practice rosettes back into the frosting bowl so you don't have to waste the frosting. 

Large rosettes

Another tip… If you mess-up on a rosette, take your off-set spatula and carefully take it off the cake and start over. Frosting is very forgiving!

I found these lovely blue gum balls at Target and bought several containers because I knew I would find something to make with them. They are so pretty!  I thought they would be the perfect addition to the cake around the base and on top of the rosettes. I loved how they turned out. 

WhipperBerry Vanilla Cake

Now, hind sight being 20/20 I would've left off the polka-dot straws. I was wanting something vertical and something that showed that Gage was turning three. If I had to do it over again, I would've just stuck with the extra tall candles, but that's just me. Just keeping it real.

Now, keep in mind… I'm not a professional, far from it. These are just some of the tips and tricks that I've learned over the years that have made my cake decorating what it is. I hope they can inspire you to try something fun and different the next time your loved ones have something to celebrate!

What are some tips, tricks or secrets that you've learned when it comes to cake decorating? Let's all take a minute to share, so we can all become EXPERT cake decorators.

The Most Amazing Ombre Whopper Cake /// Autumn Inspiration

15 · Oct 22, 2012 · 17 Comments

Today was my sweet Husband’s birthday and of course in true WhipperBerry fashion I had to make him a fabulous cake for his special day. I asked him what he would like and his one request was for, “one of those Whopper cakes with your Amazing Chocolate Cake recipe.”  What can I say, the man has good taste! Here we have it… as my spunky daughter decided to name it, The Whipper Whopper Cake!

Ombre Whopper Cake from WhipperBerry #cake #baking #ombre #dessert

This is not a new cake or a new concept at all. As a matter of fact my sweet friend Michael from Inspired by Charm made the most stunning Strawberry Malt Ball Cake that I just LOVE!  I needed to put my own spin on it.  With our move to Nebraska from the desert of Las Vegas, our family is falling in LOVE with Autumn all over again.  The colors, the crisp feel to the air, hazy days and foggy mornings are something we missed for the last several years.  I thought, since Mike’s birthday is in October, why not make a Whopper Cake with a little bit of Autumn flair.  Using Duff Goldman’s Gold Cake Graffiti, I gave the cake a bit of an ombre look, by spraying the top half of the cake gold.

Whopper Cake

I also found some fall leaves out in our yard to decorate the table with.  I lightly sprayed them with the Gold Cake Graffiti as well to class up the rustic look.


Autumn Whopper Cake

Recipe

I used the same cake and frosting recipe from my Most Amazing Chocolate Cake post from a few years ago.  It’s a classic cake and chocolate buttercream that can be reinvented in soooo many ways. Luckily we have some new friends here in Lincoln that we can share this cake with because it is a rich one that is meant to be shared.

Tips for Cake Assembly


  • Freeze your cake after it cools to create a firm surface to work with when putting the cake together.
  • Make sure the frosting is a good stiff frosting that will hold those lovely Whoppers in place.
  • Place some bamboo skewers into the cake before you frost it to give it a little help in the stability department.
  • Once the cake is assembled, place in the refrigerator for an hour or so to firm up the frosting and hold tight to the Whoppers.
    Ready for a little bit of autumn love from my backyard.  These are the things that a girl who just moved from the desert just relishes…

Gold Leaves

I just can’t get enough of the fall colors, they are just making my world so happy right now.  I was photographing the cake outside and just looked up and to a picture.  Here it is in all it’s simple glory.

I love watching my children fall in love with a new season that most of them haven’t ever really experienced.  While I was engrossed with taking pictures of the cake, my spunky Emily was out playing in the yard and came running over to me to share her most amazing discovery. Of course I had to stop what I was doing so that I could come over and photograph it for her…

Fall Mist

Today had been a bit of a gray misty day and she was just aaaamazed to find spider webs in the grass with little rain drops dotting their surface. Ahhhhh, I love when my kiddos can find the little beauties in nature that we as grown-ups sometimes pass on by. Of course I had to take a picture and Em insisted that I share it with all of you. What’s your favorite hidden gem? What makes fall magical for you? On a sweeter note, what’s your favorite go to cake recipe? What makes your special days, even more special?

Heather copy

Biscoff & Raspberry Crepe Cake /// Recipe

18 · Aug 8, 2012 · 50 Comments

Raspberry Biscoff Crepe Cake // This my friends is the cake of my dreams… A Biscoff & Raspberry Crepe Cake.

Raspberry and Biscoff Crepe Cake copy

I have been a crepe lover for as long as I can remember.  My Mom would always make crepes on special occasions at our house growing up for breakfast.  Sleepovers, birthdays, holidays or even Saturday was a great occasion for crepes. As I grew-up I became the crepe expert in the house.  Give me two good crepe pans, a pitcher full of crepe batter and I could please a crowd!! My love affair has grown even stronger after a trip to Paris a few years ago.  One of my favorite memories was sharing our first Nutella crepe bought from a street vender in Paris on our way to the Louvre. Ahhhh now that’s heaven! Here’s a picture of Hales or Lil’Whip as I’ve come to call her enjoying said crepe.

LilWhip in Paris

Needless to say, I’ve had a crepe obsession for many years. This last weekend we had family in town for Em’s baptism and I thought it would be a great time to see if I could make a crepe cake.  I’ve seen many variations a few different places, I even featured one last week as the inspiration photo for Friday Flair. It was a Chocolate Amaretto Crepe Cake from Sprinkles Bakes and it looked divine! I decided my flavor profile for my first crepe cake should be…

Biscoff and Raspberries

What is Biscoff

Yep, you got it… Biscoff and raspberry. If you haven’t tried Biscoff Spread you need to find some.  It’s a fabulous spread that is basically ground up Biscoff cookies mixed with some oil to give it a nice and creamy consistency.  A Biscoff cookie is similar to a ginger snap but a little more delicate. They are from Sweden and they are delish.  I found my Biscoff Spread at Cost Plus World Market. It’s not widely available quite yet so you may need to do a little searching or get it online. The lovely thing is that is goes very well with raspberries or even lemon. Basically anything that would go well with a gingersnap type cookie.

Raspberry and Biscoff Cake

Now for the cake… You will need three basic elements. The crepes, a light and lovely Biscoff buttercream and a strong raspberry sauce that can hold up to the cake layers. Once you have those three elements you are good to go, you just need to start layering.

Biscoff & Raspberry Crepe Cake:

Crepe Recipe:

6 eggs

1/2 tsp. salt

2 tbsp. sugar

2 tsp. vanilla extract

pinch of fresh nutmeg

1 1/2 cups of milk

1 1/2 cups of AP flour

Biscoff Buttercream:

2 sticks of unsalted butter at room temperature

1 cup Biscoff

1 tsp. vanilla extract

pinch of salt

3-4 cups of powder sugar

1-2 tbsp. whole milk

Raspberry Sauce:

2 pints raspberries

1/4 – 1/2 cup sugar depending on the sweetness of the raspberries

1 tbsp. lemon juice

2 tsp. vanilla extract

pinch of fresh nutmeg

1 tbsp. cornstarch

This is my tried and true recipe that was passed down from my Great Uncle that I have used all my life. I have added a couple of ingredients that I just love to boost the flavor a bit, but for the most part it is a GREAT basic crepe recipe that makes about 20 crepes. For this cake I actually doubled this recipe and used all 40 of the crepes. However, make it in batches because a double recipe won’t fit into a blender. At least it won’t fit into mine.

Crack your eggs into a blender and add the salt, sugar, vanilla extract and nutmeg.  Cover the blender and start in the lowest setting. While the blender is on, alternately add small amounts of flour and milk, starting with flour and ending with milk. Make sure it is blended well.  Let batter sit for a 1/2 an hour or so before you start to cook your crepes to let it rest.

In a small non-stick crepe pan add a small amount of canola oil and place the pan over medium high heat. Add about a 1/4 a cup of crepe batter and gently swirl the pan around so that the batter covers the pan. Let the crepe cook for a minute to a minute and a half or until the crepe is fully set. Then carefully turn the crepe over let cook in pan for another 20-30 seconds and then remove from the pan. 

For this cake you need the crepes to be cooled completely so place the crepes on a bakers rack to cool and then stack with wax paper in between each crepe and place in a large Ziploc bag and store in the refrigerator for 1-2 days or up to two months in the freezer.

For the buttercream I just modified my Simple Vanilla Buttercream recipe a bit by adding the Biscoff and lowering the amount of vanilla extract.  It’s a good classic and easy buttercream recipe.

In a bowl of an electric mixer with the paddle attachment,  place softened butter and Biscoff.  Cream the two together and add vanilla extract.  Turn mixer off and add half of the powder sugar, carefully turn the mixer on low and mix the sugar in completely. Add the remaining sugar slowly until it creates a dough like consistency. Add 1 tbsp. of milk and mix on high. Check the consistency of the buttercream. If it’s too tight add more milk. Mix on high for 5-7 minutes until light and fluffy.

If needed store in a air tight container in the refrigerator for up to a week.  Take out of the fridge an hour or two before you want to use it to make sure that it is a room temperature when you need it.

Again, I took one of my favorite recipes, my Velvet Cherry Sauce and modified it for this cake by using raspberries instead of cherries.In a small sauce pan place all of the ingredients over medium heat and bring to a boil stirring occasionally. Simmer on low heat for 8-10 minutes. Remove from heat and strain with a fine mesh strainer. Use the back of the spoon to get as much juice out of the berries as possible.  Place the strained juice back into the small sauce pan and place over low heat.  Remove a 1/4 a cup of the raspberry juice and place in a small container with a lid.  Add the cornstarch, place the lid on the container and shake vigorously. Slowly whisk in the cornstarch mixture into the raspberry juice and cool over low heat until the sauce thickens.  Remove from heat and let cool completely.

Place in an air tight container in the refrigerator for up to a week.

How to Assemble the Crepe Cake

Now is when the fun begins… Place a small dab of buttercream onto your cake plate to hold your first crepe steady.  Next, add a thin layer of buttercream onto the crepe. Add another crepe and add another thin layer of buttercream. Add one more crepe and this time add a thin layer of the raspberry sauce. Repeat that whole process until you have used all of your crepes. For the top of the cake I used a large closed star tip with a pastry bag and piped pretty little rosettes to decorate the top. I then placed fresh raspberries in the center of the rosette and dusted the whole cake with powder sugar.

Biscoff and Raspberry Crepe Cake

Place the cake in the refrigerator for an hour or two until it sets up and then slice into it while all your friends are watching and soak in all the ooooohs and aaaaaahs.

Heather copy

  • « Go to Previous Page
  • Page 1
  • Interim pages omitted …
  • Page 3
  • Page 4
  • Page 5
  • Page 6
  • Go to Next Page »

Primary Sidebar

Heather from Whipperberry
Hello... my name is Heather and I'm the creator of WhipperBerry a creative lifestyle blog packed full of great recipes and creative ideas for your home and family. I find I am happiest when I'm living a creative life and I love to share what I've been up to along the way... Come explore, my hope is that you'll leave inspired!

Footer

  • Privacy Policy
  • Crafts
  • Food
  • Gifts
  • Holidays
  • Home
  • Mom Life
  • Recipes
  • Travel

Copyright © 2026 · Seasoned Pro