• Skip to primary navigation
  • Skip to main content
  • Skip to primary sidebar
  • Skip to footer

Whipperberry

WhipperBerry • Your Home For Creative Inspiration

  • Home
  • Recipes
    • Starters
    • Easy Weeknight Dinners
    • Main Dish
    • Salads
    • Side Dish
    • Soups & Stews
    • Desserts
    • Breakfast
    • Miscellaneous
  • Tutorials
    • Creative Crafts
    • DIY Decor
    • Fabric Crafts
    • Food How-To
    • Jewlery
    • Paint Projects
    • Paper Art
    • Party Styling
    • Photography and Graphic Design
    • Silhouette
  • Holidays
    • Easter
    • Mother’s Day
    • Father’s Day
    • 4th of July
    • Halloween
    • Thanksgiving
    • Christmas
    • Valentine’s Day
  • Gift Ideas
    • Gifts For Everyone
    • Gifts for Dad
    • Mother’s day
    • For The Girls
    • For The Kids
    • Teacher Gift Ideas
    • Christmas
  • Printables
    • Holiday
    • Gift Idea
    • LDS Primary
  • Travel
  • About
    • Terms
  • Contact
  • Nav Social Menu

    • Facebook
    • Instagram
    • Pinterest
    • RSS
    • Twitter

Crafts

DIY Barbecue Tool Storage for Father’s Day + $50 Home Depot GIVEAWAY

0 · Jun 11, 2014 · 3 Comments

Barbecue Tool Storage post brought to you by ScotchBlue™ Painter’s Tape // Father’s Day is right around the corner, and this year I decided I wanted to go the DIY route and make a place for our sweet Dad to hang his barbecue tools. I knew I wanted to make something that was stylish, yet masculine so I decided to create a funky storage board using ScotchBlue™ Painter’s Tape for Multi-Surface with Edge-Lock™ Paint Line Protector, Minwax® Wood Finish and some funky hooks found in the plumbing section of Home Depot.
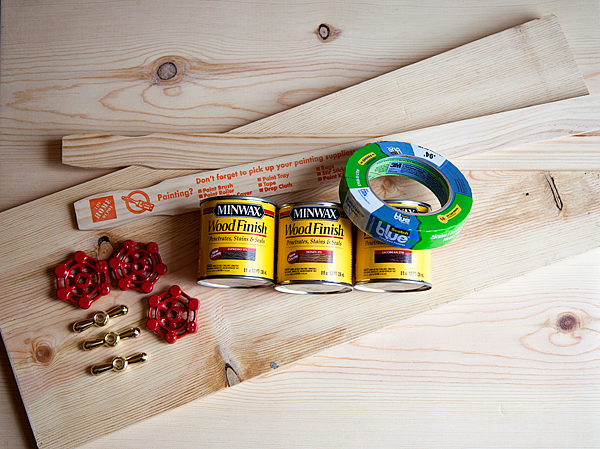
photo 1

I thought this would go perfect for the Get it, Got it Blog Hop hosted by ScotchBlue™ Painter’s Tape ™ Painter’s Tape and Link to The Home Depot .

First things first, we needed to build the board… It turned into a fun family project with my son Gage getting in on the action…

photo 17

I bought two 1×10 boards and had the cool guys at Home Depot cut them in half for me right at the store.
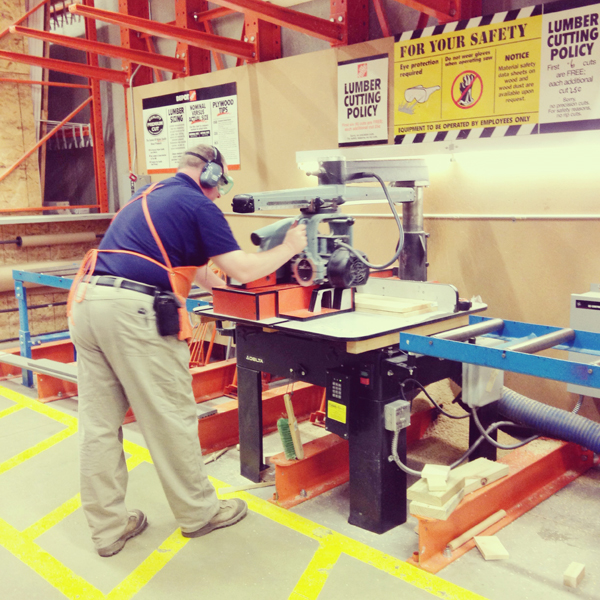
photo 3

We secured three of the boards together with large painters sticks that you can get for free at Home Depot. We just screwed them to the back of the boards making sure to use screws that wouldn’t go through the front of the board.
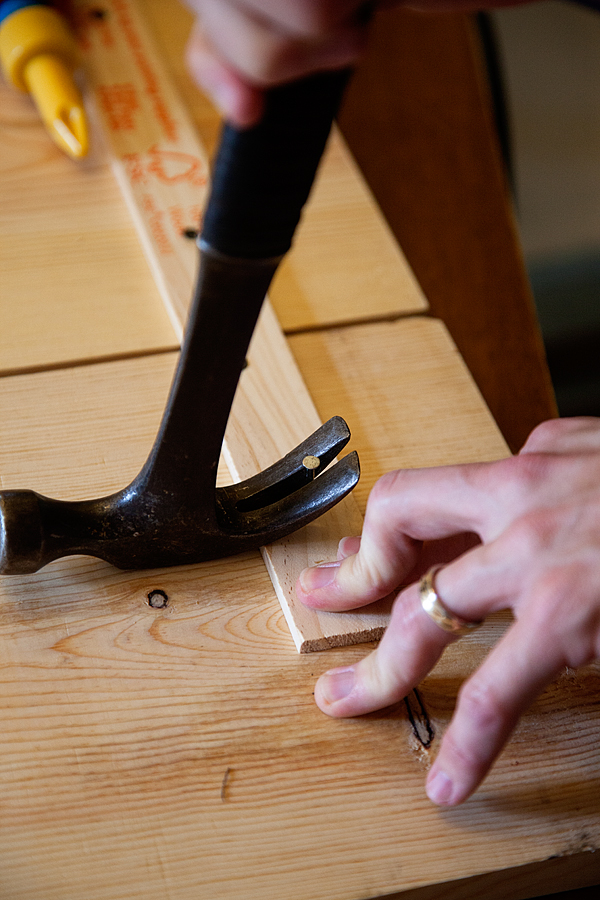
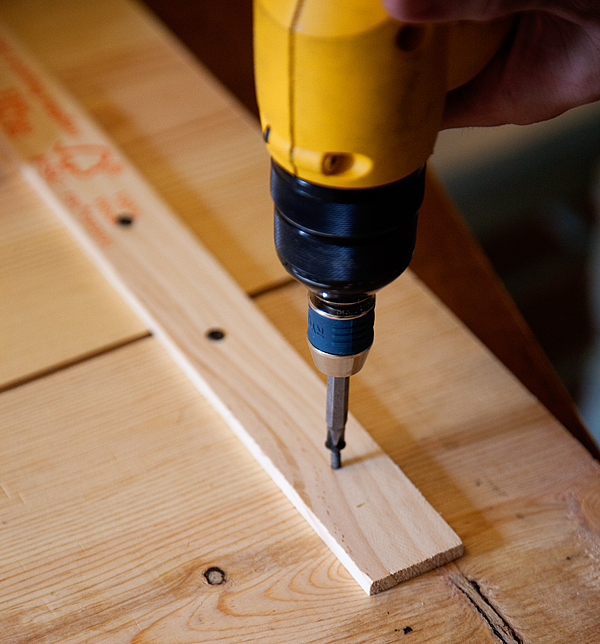
photo 4

photo 5

Quick Tip // Use a nail to create a guide hole for your screw. Just nail it in part way, and then remove it from the board. This way you don’t have to drill a hole!
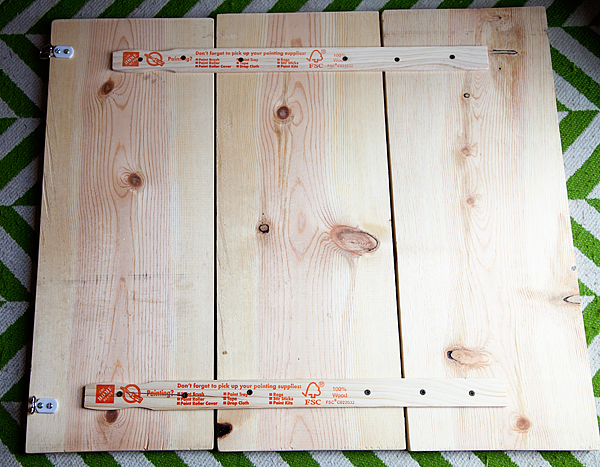
photo 6

we also added some “D” ring hangers on the back so that we could attach our rope when we were finished.

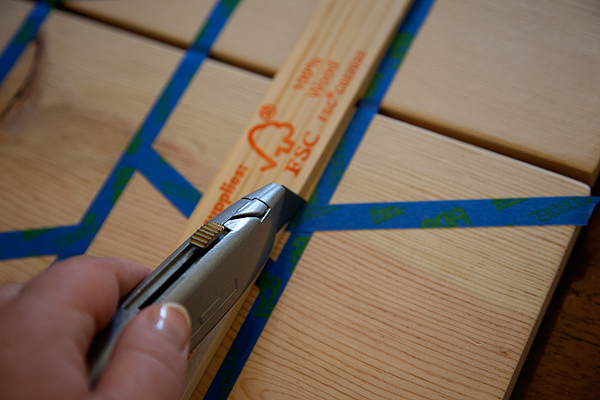
Here’s where the fun part starts… I used the ScotchBlue™ Painter’s Tape to create a fun geometric design on the board. Now the thinnest ScotchBlue™ Painter’s Tape I could find is .94 inch wide and I wanted my lines to be a little thinner, so once I laid down my tape, I then went back with a box cutter and a straight edge and cut the tape in half.
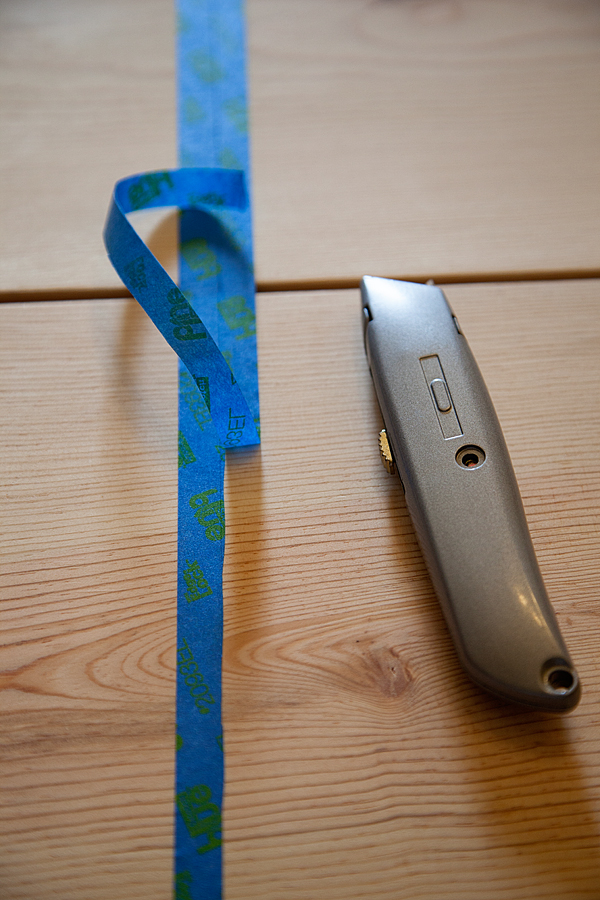
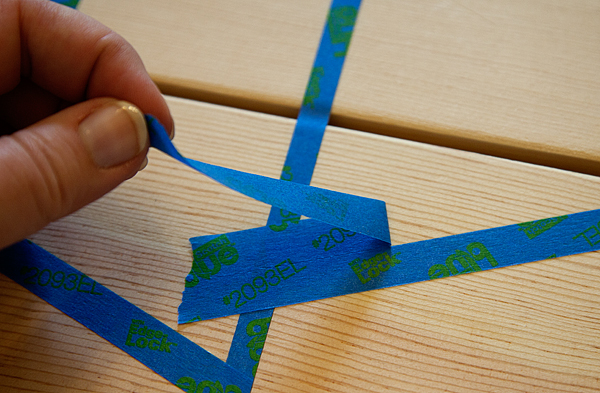
photo 7

photo 8

photo 9

It worked like a charm! I laid down 6 vertical stripes equally spaced apart and then random stripes in-between the vertical stripes with the ScotchBlue™ Painter’s Tape.
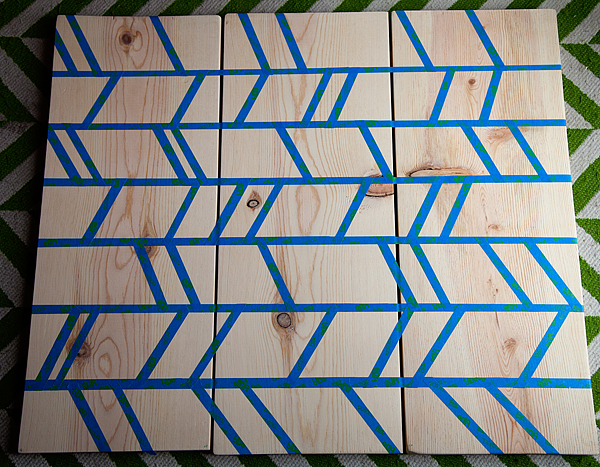
photo 10

It was all really rather random and I eye-balled the whole thing, so don’t get caught up in exact measurements. Trust your eye.

Then I used 4 different colors of Minwax® Wood Finish™; Jacobean, Honey, Expresso & Maple (Wood Finishing Cloth in Maple.)
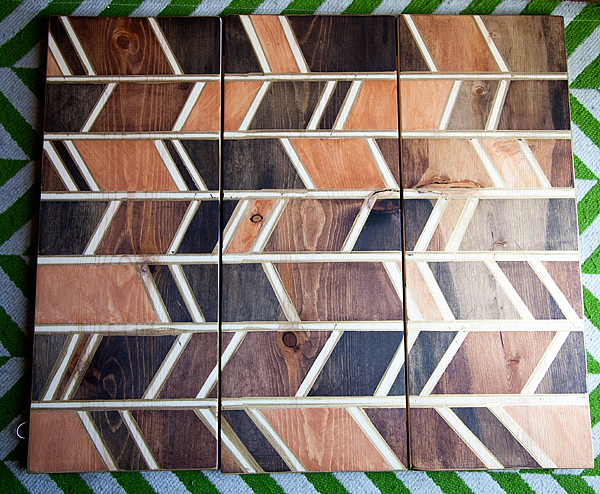
photo 11

It was just a simple process of wiping on the different stain colors in a random pattern and then wiping it off with a clean cloth.

Then I used a gold paint marker from Elmer’s and a straight edge to define all of the lines. It turned out amazing!! I fall in love with stain over and over every time I use it. I sealed it with Minwax® Express Clear™ to protect the wood.

Next, we affixed the hardware for the hooks…
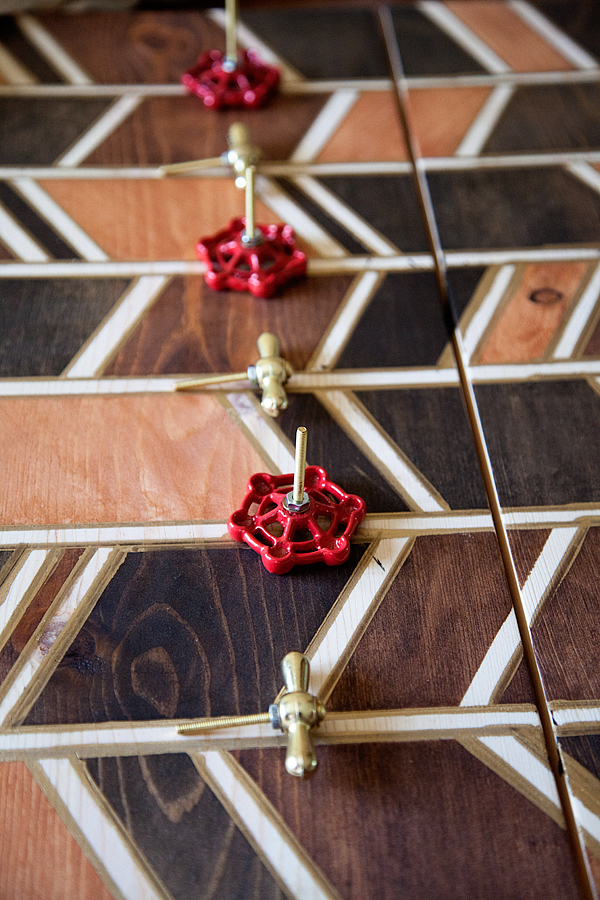
photo 12

I used faucet handles that you can find in the plumbing section for a dollar or two. They worked perfect with some brass machine screws (#8 32×1) and matching washers and machine screw nuts. I fed the screw through a washer and the top of the handle and then secured it with a nut on the other side. Then we drilled holes in the board just a tad smaller than the size of the screw.
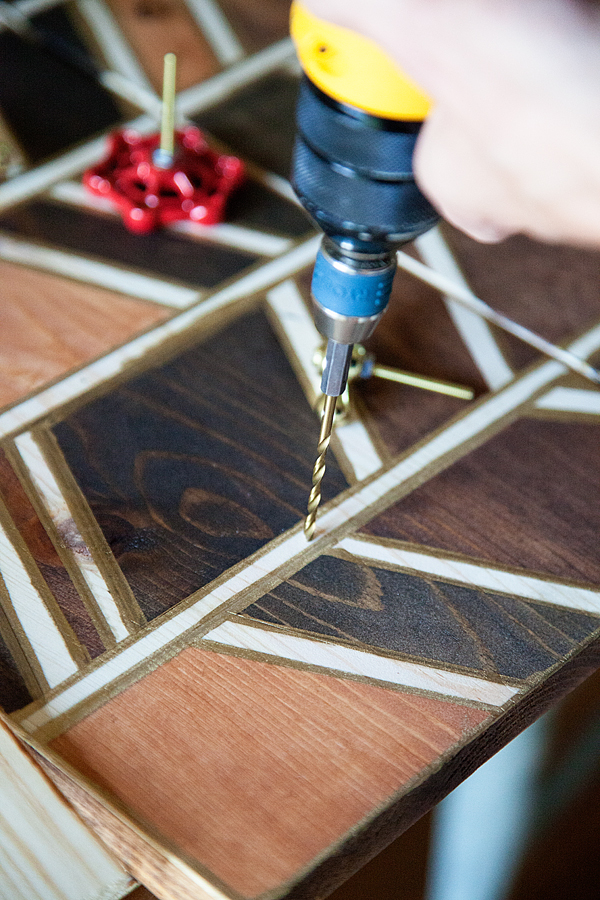
photo 13

Then we just screwed in the hooks into the board.
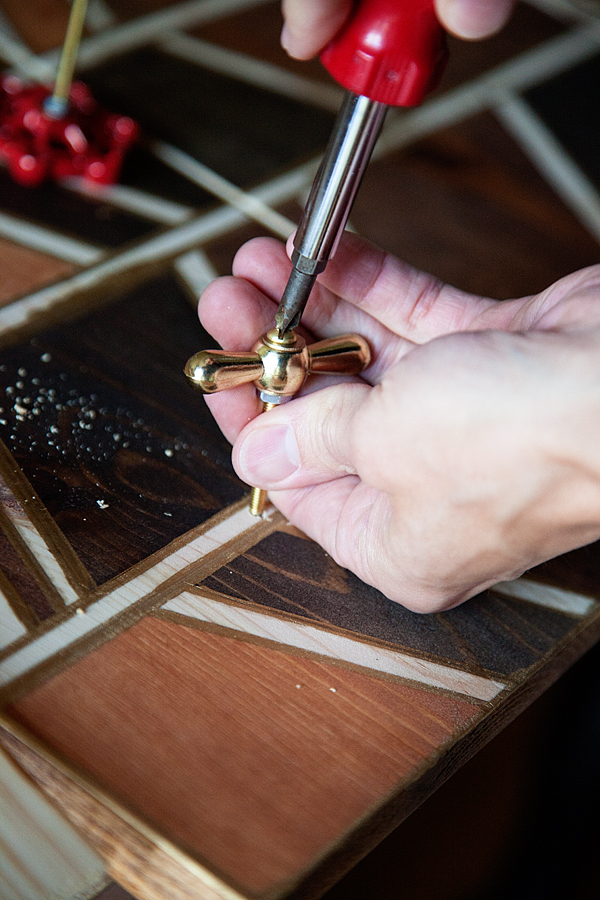
photo 14

Then all we did was take a bit of rope and fed it through the “D” hangers and secured it with rope clamps… It turned out perfect!


I attached some hemp twine to my husband’s BBQ tools and hung them on their new board.
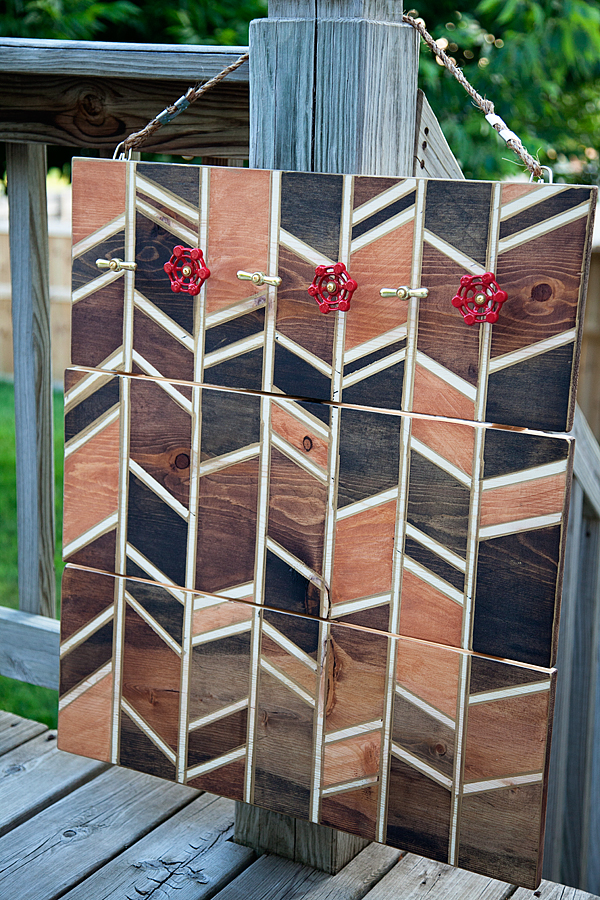
photo 15

Now this board can hand on a deck right next to your barbecue or on a wall close by. Then, in the off season you can hand it in the garage for safe keeping it’s perfect.
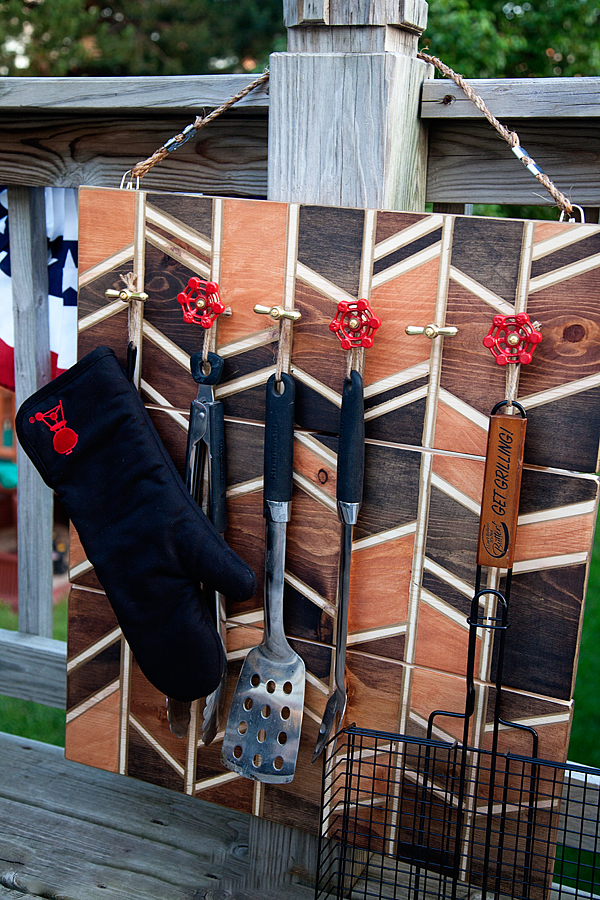
photo 16

Now per some discussion on Instagram while I was posting about my project, some folks thought it could be a tie rack… Either way, I’m sure any Dad would love it and all the work you put into making it for them!

Are you a fan of Home Depot or now someone who is? You can check out the Link to The Home Depot Consumer Program and then enter to win a $50 Home Depot gift card right here on WhipperBerry! You can follow Home Depot on Link to The Home Depot Facebook page , Link to The Home Depot Twitter and Link to The Home Depot Pinterest page

You can also follow ScotchBlue™ Painter’s Tape on Link to ScotchBlue Pinterest , Link to ScotchBlue Twitter , Link to ScotchBlue Facebook page . You can find all kinds of inspiration at any of these social channels or you can find even more at the other blogs that are participating in this summer’s Blog Hop Link to Centsational Girl Landing Page …

Link to Domestically Speaking blog post
Link to Dukes and Duchesses
Link to Centsational Girls Blog Post
Link to 320 Sycamore post

a Rafflecopter giveaway

I am proud to be a 3M- sponsored blogger, and, as part of my responsibilities, I get the opportunity to evaluate new products from ScotchBlue™ Painter’s Tape. Opinions are my own and additional product used in the project were selected by me.
DIY Painted Tray Set

1 · May 19, 2014 · 4 Comments

+ This DIY Painted Tray Set post brought to you by the lovely folks at Elmer’s +

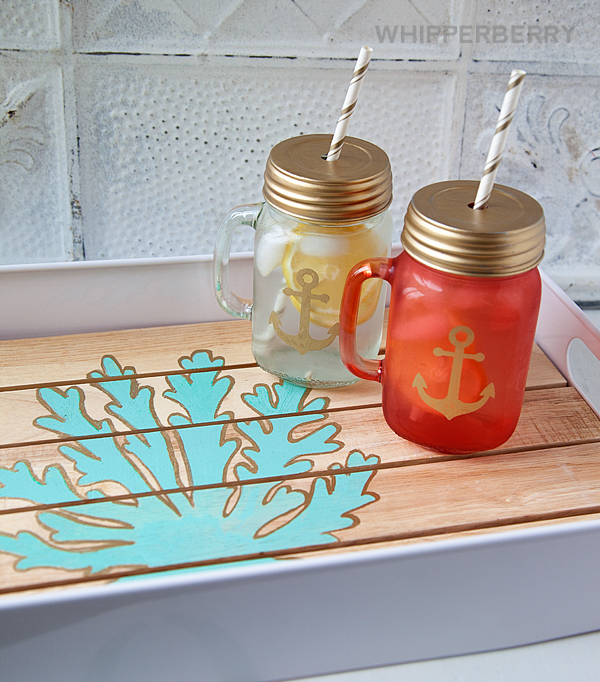
Coral-Tray-with-Elmers-Painters-Markers-from-#whipperberry-2

With the spring in full swing and summer fast approaching, my creative spirit has started longing for all things beach. The nautical trend is one that I whole heartedly adopt. I love the colors, the simplicity, the way that it takes me back to slow days on the beach with my family and especially my sweetheart.  Yea, I’m loving it!

Last month I had the chance to meet a couple of the lovely ladies that work at Elmer’s while I was attending SNAP. Now, I’ve worked with Elmer’s products for years and I’m on the Elmer’s Craft It Crew this year and while hanging out in their booth at SNAP, I started to realize the potential of a product that has kind of hung out in the background of the Elmer’s family of products… Their line of Painters Markers!

Coral-Tray-with-Elmers-Painters-Markers-from-#whipperberry-7

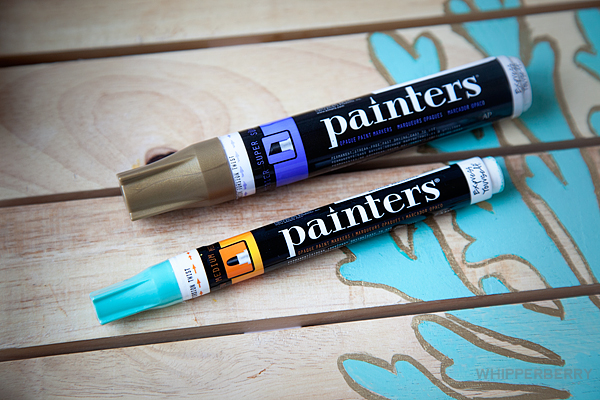
Painters Markers are acrylic paint markers that come in fine, medium or chisel tips. They are easy to use and virtually mess-free. The are permanent on most surfaces and can be used on pretty much any type of surface. Wood, glass, ceramic, tera cotta, plastic, metal, foam board & even fabric. They are streak-free, non-toxic & acid-free.  Yea, they ROCK!!

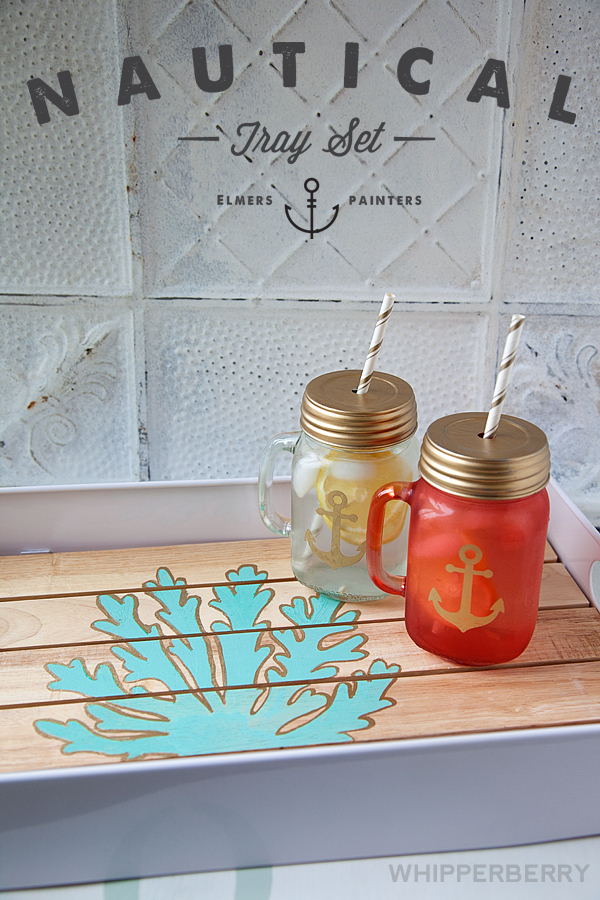
Recently, I found a fun wood and metal serving tray at Target and thought it would look great with the addition of some coral to give it a bit of a nautical theme. I decided to take these Elmer’s Painters Markers for a spin to see how well they worked!

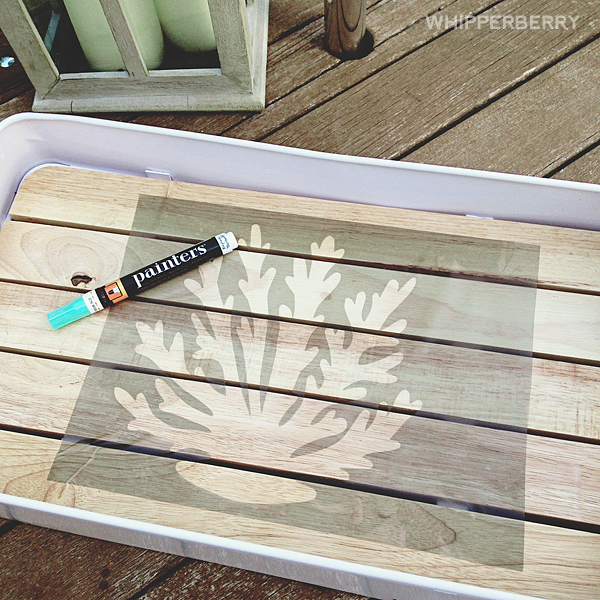
First, I found a coral image that I like and cut the image out on Stencil Vinyl from Silhouette on my CAMEO.

Coral-Tray-with-Elmers-Painters-Markers

Then I colored in the image with the Elmer’s Painters Marker in Sea Mist Brume.

Tip… I did learn that you need to shake it up really well and draw on another piece a paper for a little bit in order to get the color to regulate.

Once I was finished coloring it in, I removed the stencil and then outlined it with the with Gold Ore Painter’s Marker which is a FABULOUS metallic marker. I LOVE IT!!

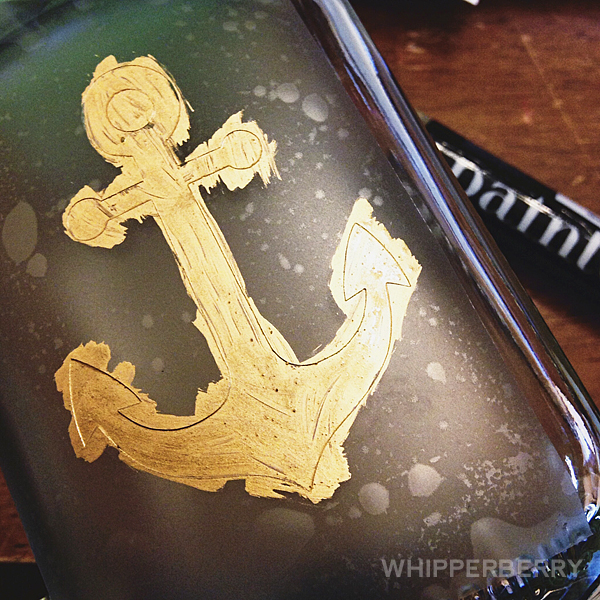
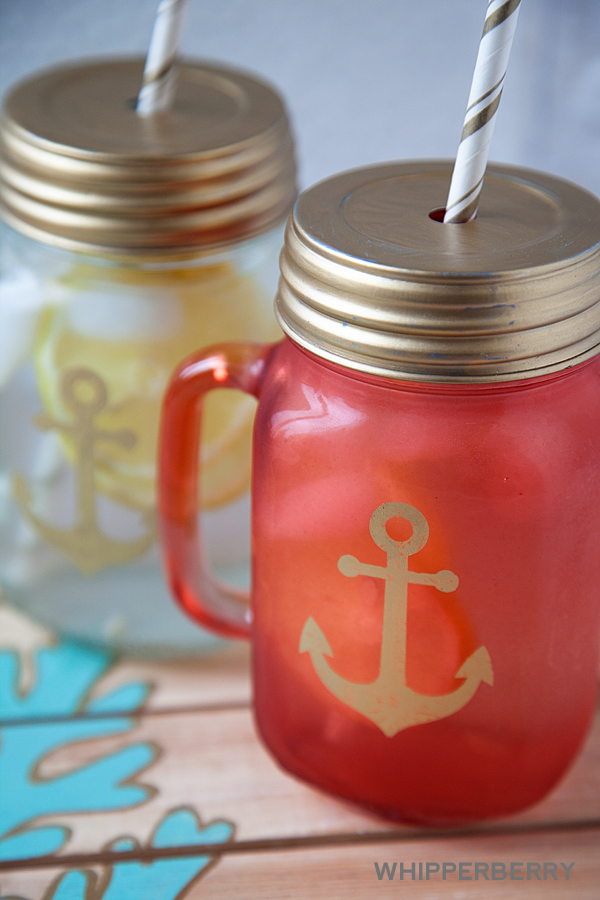
The acrylic paint from the markers dries so fast and the ease of being able to “paint” with acrylic paint in marker form just makes my day. No more brushes, and all the mess that comes along with painting. I decided my tray needed some matching glasses to complete the look so I took some jar glasses that I also found at Target, and using the same stencil process, stenciled a gold anchor onto the glass.

Anchor-Glass-with-Elmers-Painter's-Markers-by-#whipperberry

The gold paint goes onto the glass so smooth and looks fabulous.

Tip… I did learn that you need to remove the stencil while the paint is still wet, or you may pull some of the dried paint off when removing the stencil.

Coral-Tray-with-Elmers-Painters-Markers-from-#whipperberry-4

I even painted the silver metal lids that I have for my jar glasses gold with the Painter’s Markers. It was super slick!!

Coral-Tray-with-Elmers-Painters-Markers-from-#whipperberry-3

Now, I have a stylish nautical display piece for my house or I can make a few more glasses and I have a fun serving set for a party! I LOVE it!!

The cool thing is that it really only took a few minutes to make all of these creations, less than an hour for sure and the paint was dry within minutes.

As for the anchor glasses… I’m not sure how this paint will react to a trip though the dishwasher and I do think that it could scratch off easily so I would hand wash for sure. I plan on using them mostly for display and not really for everyday use. If you would like to use them everyday I would try to find some type of sealant to make the gold image a little more permanent.

Now, that I’ve hopefully inspired you… What would you like to paint with Elmer’s Painters Markers?

Disclaimer // I am a member of the 2014 Elmer’s Craft It Crew and was compensation for my time while preparing this post. However, all thoughts, idea and opinions are my very own!

DIY Black and White Wall Art

0 · May 8, 2014 · 8 Comments

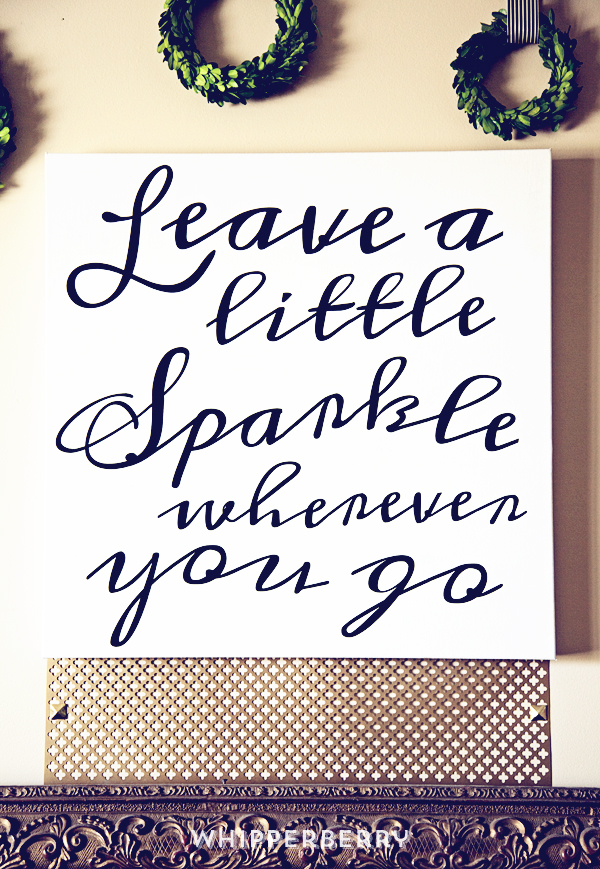
DIY Black and White Wall Art // I have always been a huge fan of black & white. I love the stunning contrast and knew that when I was ready to dress up our front room in our new house I wanted a strong black & white theme. I also LOVE typography wall art and adore the hand painted typography displays that I’ve seen all over the place.

I however, CAN NOT hand paint a stick figure, let alone a beautiful hand lettered canvas… So, I did the next best thing! I busted out my Silhouette CAMEO, some black paper and a lovely large 24 x 24 canvas and went to work…

WhipperBerry-Sprint-Room-Makeover-12

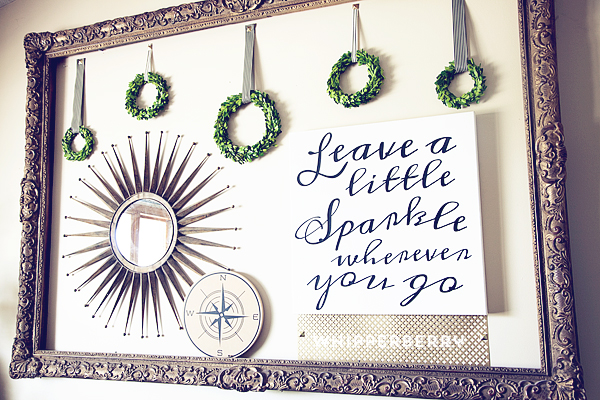
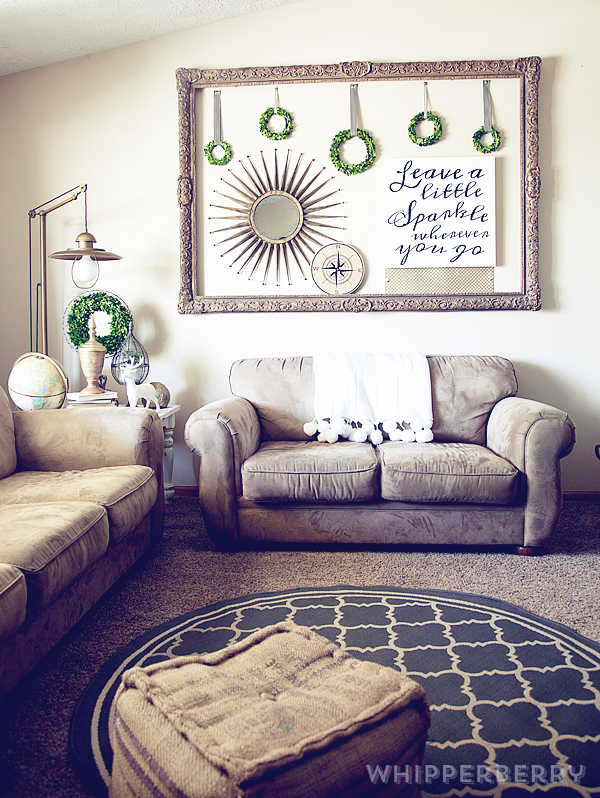
I LOVE how it turned out! It’s an element in my HUGE gold frame that is in my front room that I have redesigned for the spring/summer…

WhipperBerry-Sprint-Room-Makeover-16

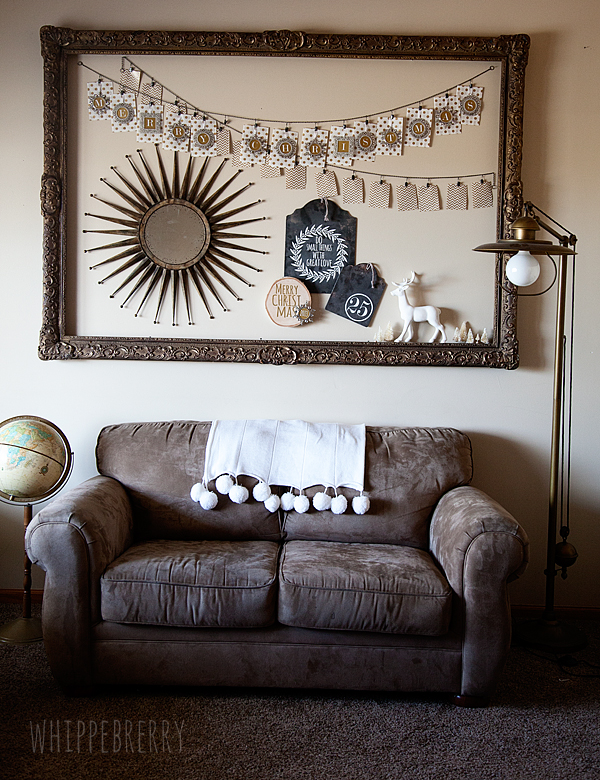
This is how it looked for Christmas this last year…

Michaels-Mini-Frames-justaddmichaels-5

The frame is HUGE and I love it, but it can be a challenge trying to find stuff to fill the space, a large canvas is perfect!

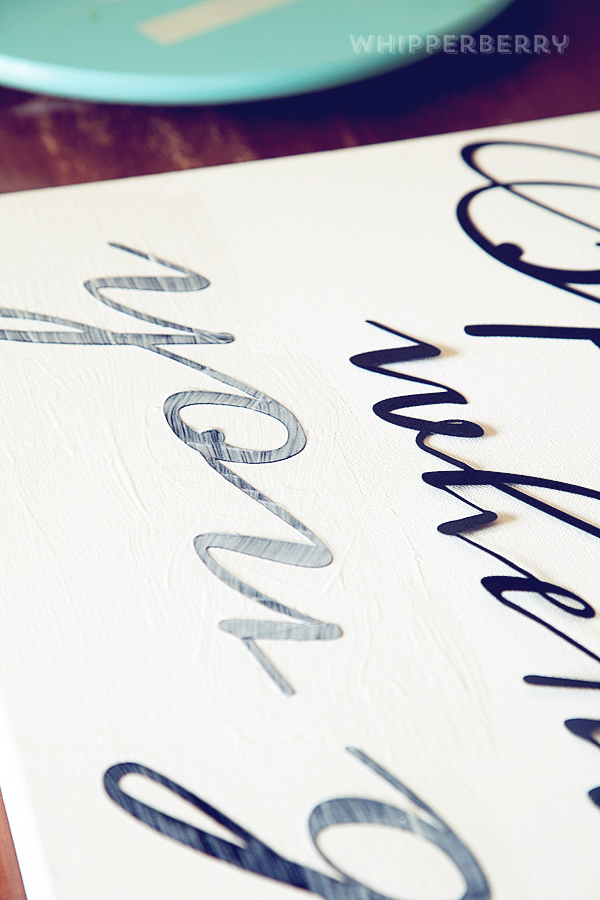
This project is really quite simple. I used the Meddon font which has an imperfect hand lettered look to design my typography art. Then I cut my saying, “Leave a little sparkle wherever you go” out of black textured card stock paper with my Silhouette CAMEO and then used Decoupage from DecoArt to affix the letters onto the canvas.

WhipperBerry-Sprint-Room-Makeover-1

Want to know a little secret to successful decoupaging? Wet your paper that you are wanting to affix to your surface FIRST before you place it onto your surface. I had a plate with a wet paper towel sitting next to me and placed the paper words on the towel for a few seconds to get them a little damp before I placed it on the canvas. This will help with any bubbling problem you may have once you add the Decoupage.

How to make typography wall art with Silhouette CAMEO and Decoupage

  1. Cut your words out on the Silhouette CAMEO. For this size of canvas I needed a machine that could cut large elements and the CAMEO is perfect for that. I used my 12×24 mat and it was perfect. I unfortunately didn’t have 12×24 black paper so I had to piece some of the words together, but that wasn’t a big deal.
  2. Figure out the placement of your words on the canvas.
  3. Starting in small areas, one word or part of a word at a time, remove the paper word and place on a wet paper towel. Then using a foam brush, place a thin layer of Decoupage onto your canvas. Replace the paper word onto your desired spot and gently press into the Decoupage. Then carefully with a light hand, brush another layer of Decoupage onto of the paper word. Be careful not to over work the paper. Especially when using black paper on a white canvas, the Decoupage will breakdown the paper and then you will have a muddy mess instead of a clean black and white canvas.  WhipperBerry-Sprint-Room-Makeover-2
  4.  Move onto the next word until you have the entire saying affixed with the Decoupage.
  5. Make sure you cover the entire canvas with Decoupage so that the canvas will have a uniformed appearance.
  6. Let the canvas dry and then hang!

WhipperBerry-Sprint-Room-Makeover-6

 I added a sheet of decorative metal that I found at Home Depot for a little added pop under the canvas and I LOVE how it looks!

WhipperBerry-Sprint-Room-Makeover-16


So… Do you love typography art? What saying would you like to create with this simple project? Leave a comment with your saying!!

Disclaimer // This is NOT a paid post, I am however a member of the Silhouette Circle which is an affiliate program.

Anchor Bag with Silhouette PRINTABLE Heat Transfer Material

0 · Apr 21, 2014 · 154 Comments

This Anchor Bag project brought to you by Silhouette // Silhouette Portrait GIVEAWAY along with the April PromotionSilhouette-Portrait-Giveaway

Anchor Bag with Silhouette Printable Heat Transfer Material

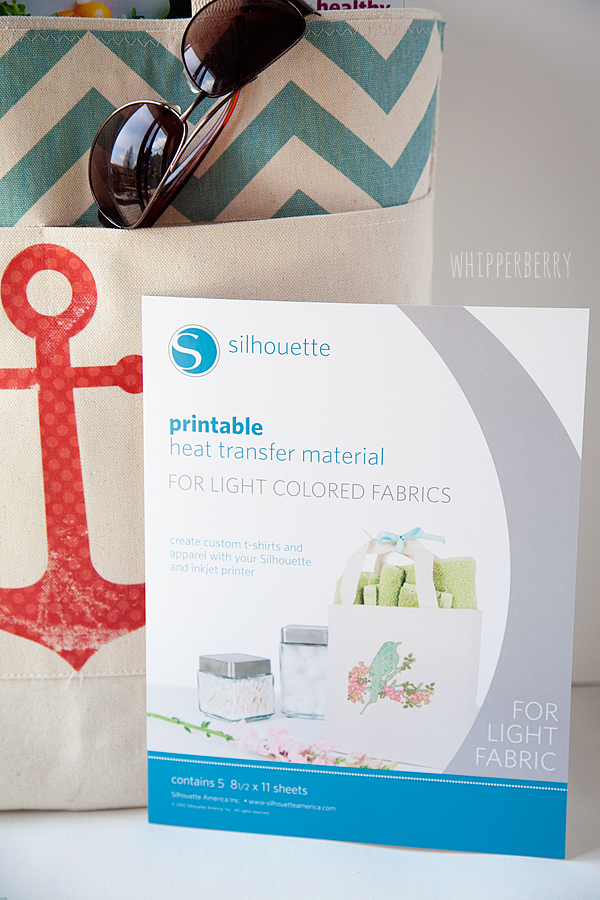
But, before we get to that… I have a super cool new product from Silhouette to share with you! PRINTABLE Heat Transfer Material!

anchor-bag-with-Silhouette-printable-heat-transfer-material-#whipperberry-7

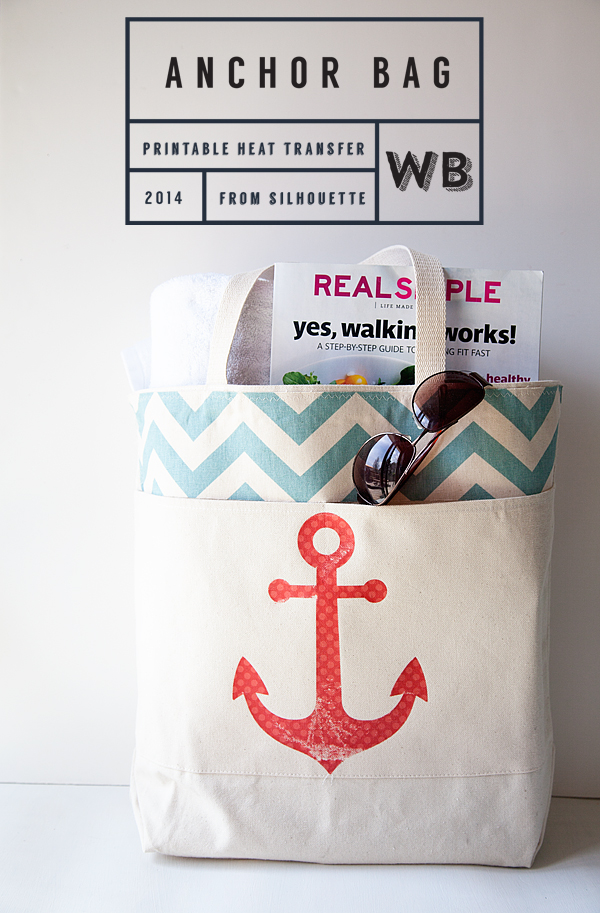
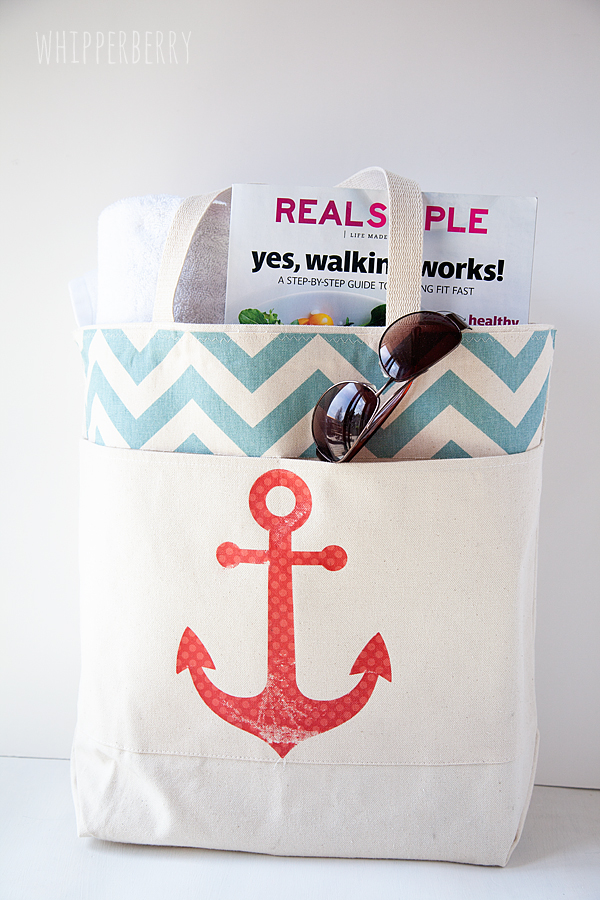
This is the coolest stuff… You can print directly on it, cut it out with your Silhouette and then iron it on to most types of fabric. I added a little flair to a canvas bag that I had sitting around and I LOVE it now.

anchor-bag-with-Silhouette-printable-heat-transfer-material-#whipperberry-5

What makes the anchor so fun is that I was able to take a fun polka-dot pattern from the Silhouette Shop and add it to a basic anchor shape to transform it into something a little extra special.

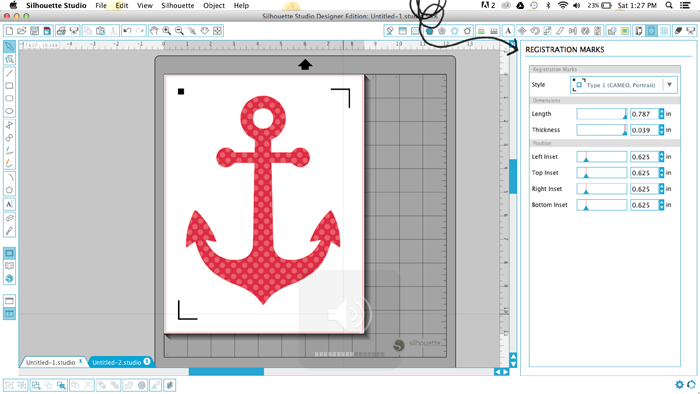
I created the anchor and then in the NEW and improved Silhouette Studio,  I used the print and cut option and then added Registration Marks to my design.

Screen-Shot-2014-04-19-at-1.27.47-PM

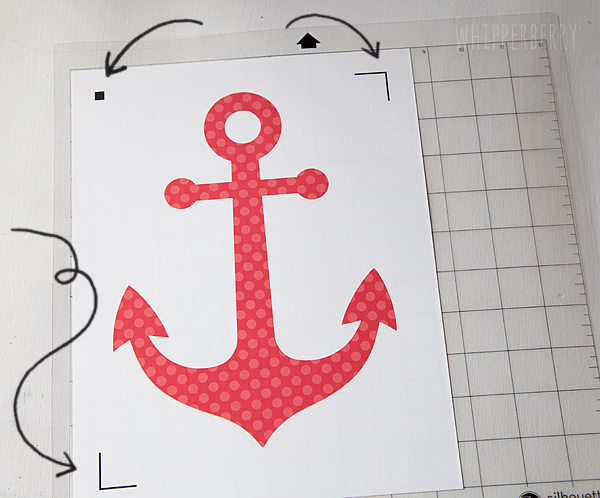
When I printed my out my design the registration marks are also printed and that is how the Silhouette machine can then cut out your printed design.

anchor-bag-with-Silhouette-printable-heat-transfer-material-#whipperberry-1

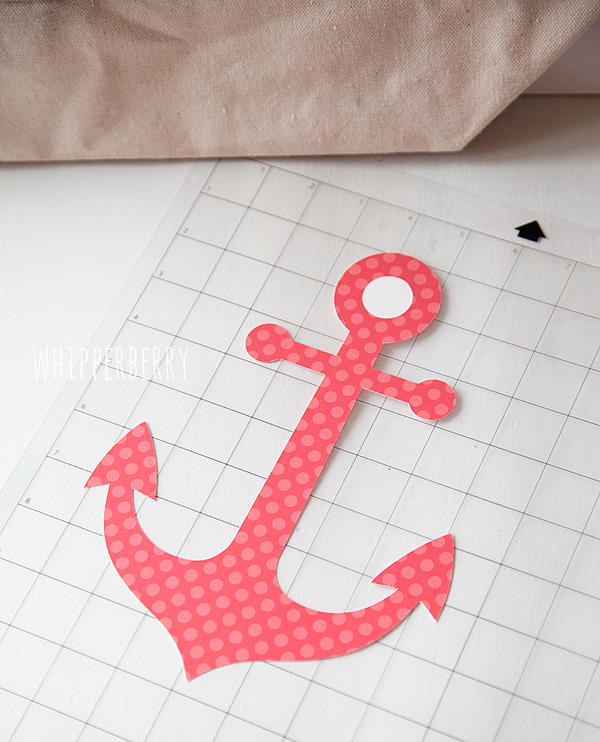
I cut out the anchor on my Silhouette CAMEO…

anchor-bag-with-Silhouette-printable-heat-transfer-material-#whipperberry-3

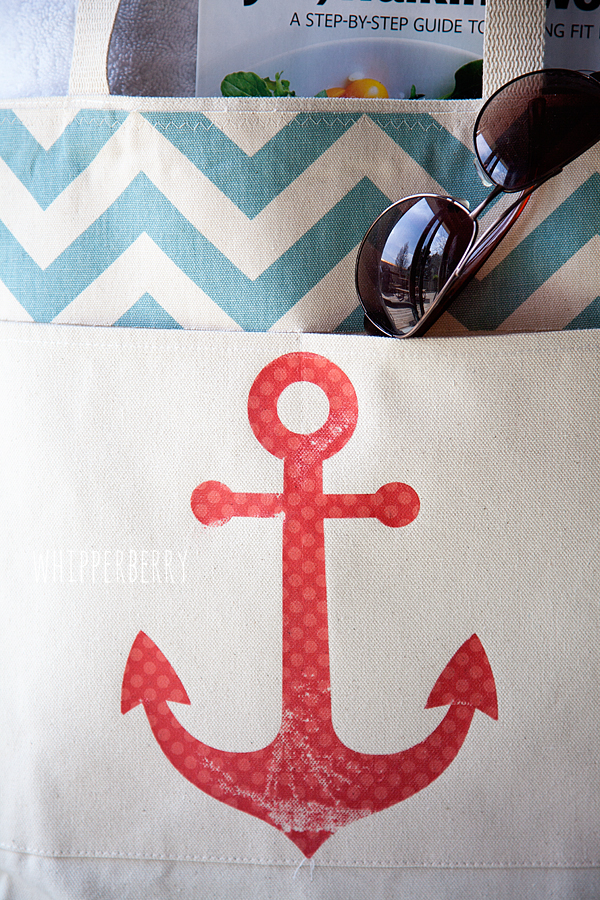
Then ironed it on to my bag following the package directions. I then used my finger nail to rough up the anchor a bit so that it looked a little worn.

anchor-bag-with-Silhouette-printable-heat-transfer-material-#whipperberry-4

It was as simple as that. It took more time trying to decide what image I wanted on the bag than actually making the project!

How fun is that?!

anchor-bag-with-Silhouette-printable-heat-transfer-material-#whipperberry-6

I love how the bag looks now and I have all kinds of fun ideas now floating around in my head for other projects.

April Silhouette Special Promotion

 This month’s special is wonderful… Here are all the details!

 April Promo, running April 21-301
Silhouette CAMEO
1 Heat Transfer Starter Kit
1 Printable Heat Transfer Material for Dark Fabrics
1 Printable Heat Transfer Material for Light Fabrics
$269.99
 Silhouette Portrait
1 Heat Transfer Starter Kit
1 Printable Heat Transfer Material for Dark Fabrics
1 Printable Heat Transfer Material for Light Fabrics
$139.99
All Heat Transfer materials will be 30% off as well!
And FREE Shipping!!!
button_aprilpromo
CLICK HERE to visit the April Promo shop, make sure you use the promo code WHIPPER when you check out to receive the special deal!

Silhouette Portrait + 12 month Deluxe Subscription GIVEAWAY // A $360 Value

For those of you feeling LUCKY… The lovely folks at Silhouette are giving away a Silhouette Portrait along with a 12 month Deluxe Subscription to the Silhouette Online Store where you have access to THOUSANDS of fabulous images and design ideas to help you create all kinds of masterpieces… This is a $360 VALUE!!

All you have to do if follow the directions in the Rafflecopter Box below to enter…

a Rafflecopter giveaway

Disclaimer // I was not paid for this post however, I am a member of the Sillhouette Circle which means I am an affiliate with Silhouette.

  • « Go to Previous Page
  • Page 1
  • Interim pages omitted …
  • Page 58
  • Page 59
  • Page 60
  • Page 61
  • Page 62
  • Interim pages omitted …
  • Page 92
  • Go to Next Page »

Primary Sidebar

Heather from Whipperberry
Hello... my name is Heather and I'm the creator of WhipperBerry a creative lifestyle blog packed full of great recipes and creative ideas for your home and family. I find I am happiest when I'm living a creative life and I love to share what I've been up to along the way... Come explore, my hope is that you'll leave inspired!

Footer

  • Privacy Policy
  • Crafts
  • Food
  • Gifts
  • Holidays
  • Home
  • Mom Life
  • Recipes
  • Travel

Copyright © 2026 · Seasoned Pro