I LOVE Panna Cotta! Have you ever tried this simple yet scrumptious dessert? When it comes to dessert I LOVE smooth and creamy desserts that just melt on your tongue and panna cotta is one of those desserts that I just crave. It’s origins are from Italy and it translates to cooked cream.
That’s basically what it is, cream or milk simmered with sugar and vanilla, you then add gelatin and let it cool to create this decadent dessert. The nice thing about this dessert is that it’s kind of a blank slate, you can make it with what ever kind of milk you like and then top it with what ever you want. A few years ago I made a lovely Peaches and Cream Panna Cotta that was divine and today I have a fun new twist… I used Silk Almond Milk for part of the cream base!!
It turned out soooo good!! For this recipe, I used half Silk Almond Milk and half cream so it isn’t dairy-free but I’m sure you could play around with the recipe and create a dairy-free panna cotta with Silk.
Why did I add silk? Well… Adding the Silk Almond Milk added to the flavor of the panna cotta with a subtle almond flavor, plus It helps to cut the fat and calories of a normally high in saturated fat dessert. It also lowered the cholesterol in the dessert because Silk Almond Milk doesn’t have cholesterol! Now, keep in mind… I still use cream because I want that nice creamy texture, but by using Silk Almond Milk I cut some of the bad stuff in half!!
Did you know that Silk products are GMO free? What is a GMO? GMO stands for Genetically Modified Organisms and it’s a huge issue in the food industry today. Silk is leading the charge to eradicate GMO’s from our foods. You can learn more about there mission here. You can also visit the Silk Facebook page for even more facts about this fabulous product, plus you’ll be the first to hear about special deals on Silk products!!
That’s why I decided to use Silk Almond Milk in my favorite Panna Cotta! Here is how you make it…
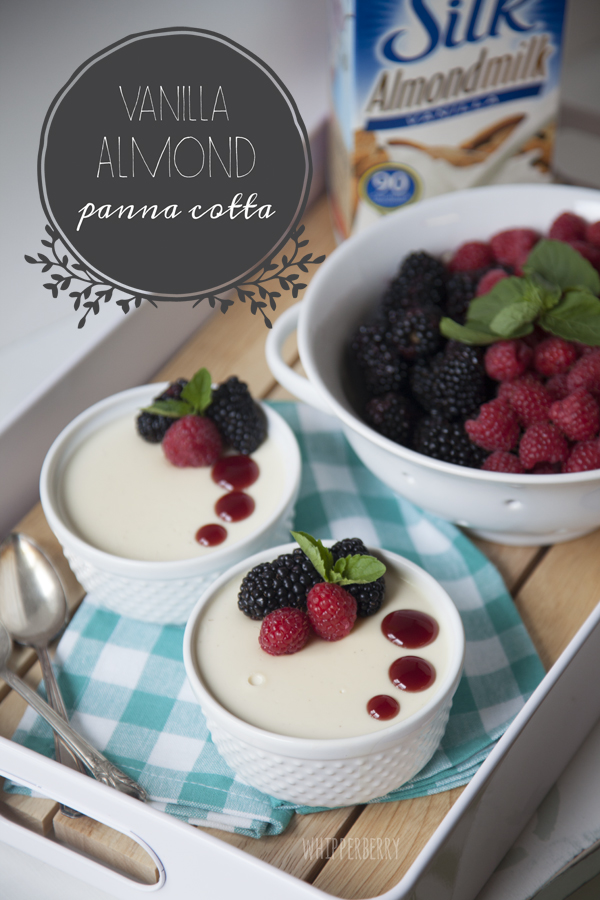
Vanilla Almond Panna Cotta Recipe
3 cups Silk Almond Milk vanilla flavored
3 cups of heavy cream
1 cup sugar
1 teaspoon vanilla extract
2 cups crème fraîche
3 packets of gelatin
In a large sauce pan, add the Silk Almond Milk, cream, and sugar. Stir occasionally and bring to a simmer. Once it has started to simmer, remove from the heat and add the vanilla extract and crème fraîche and combine well. Once the mixture is nice and smooth, slowly whisk in the powdered gelatin.
Pour mixture into serving dishes and place in the refrigerator for three hours or until set. You can serve with berries and a berry sauce of some kind. I used Smucker’s PlateScapers for the berry sauce adding small circles to the top of the panna cotta for a stylish presentation.
Do you have a recipe that you want to try with a Silk Product? Head on over to Silk for some special deals that you don’t want to pass up! Then come on back and tell me what you are going to make!!
This is a sponsored conversation written by me on behalf of Silk. The opinions and text are all mine.